I am vacationing in India right now and enjoying some fabulous home cooked food. Every time I visit India, I ask my mother’s friend Veena aunty to teach me her amazing recipes. Veena aunty has such a love for cooking, you can taste the passion in her food. This time she showed me how to make her paneer paratha recipe. Paneer parathas are Indian flat bread stuffed with cottage cheese. You wont be disappointed with this paneer paratha recipe!
Paneer Paratha Recipe (Cottage Cheese Stuffed Flat bread)
makes 6-8 parathas
for the paratha dough
Ingredients
1 cup whole wheat flour (atta)
1/3 cup all purpose flour (maida)
1/2 teaspoon salt or to taste
1 teaspoon vegetable oil
1 cup water (you may not need all of it)
Method
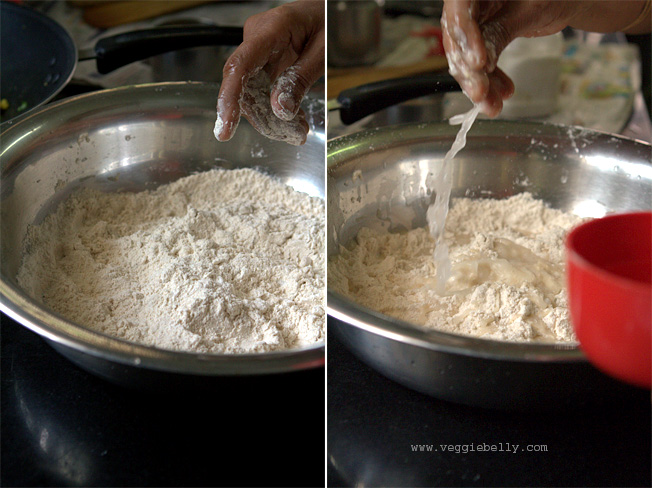 1. Combine the wheat flour, all purpose flour, salt and oil in a large bowl
2. Sprinkle a little water at a time till the dough binds together
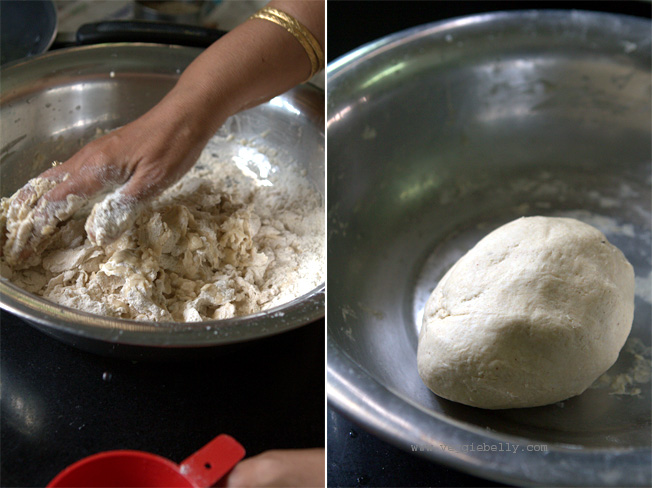 3. Knead the dough, sprinkling water, until it forms a soft, elastic ball
4. Make sure the dough isn’t too wet. If it gets too wet or sticky, add more flour
5. Knead the dough till it is smooth and elastic (think pizza dough)
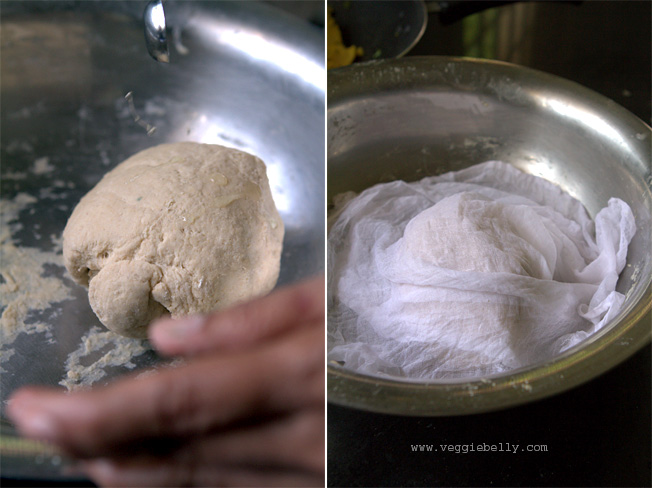 6. Drizzle a few drops of oil over the dough ball, and spread it all over the surface
7. Cover the dough with a damp towel
8. Let it rest for 15 minutes. In the meanwhile, make the paneer filling
for the paneer filling
Ingredients
7 oz paneer, finely grated (about 1 1/2 cups when grated)
1 small onion, minced
3 tablespoons finely chopped cilantro
1/2 teaspoon garam masala
1/4 teaspoon turmeric powder, optional
1 green chili finely chopped or according to taste
salt
Method
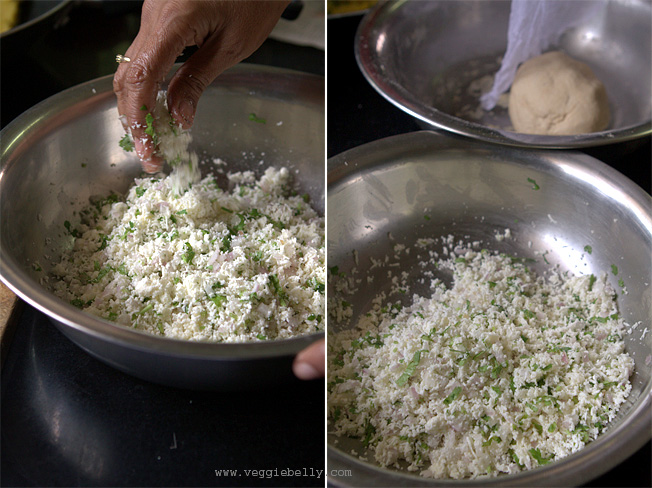 1. Combine all paneer filling ingredients in a bowl
2. Taste the filling and adjust salt and seasonings if needed. If you like it spicier, you can add more minced chilis or garam masala at this point
Make the paneer parathas
1. Keep a small bowl of wheat flour near you
2. Remove the dough from the bowl, and knead it a few times
3. Divide the dough into 6 equal parts. If you don’t have much experience making parathas, divide the dough into 8 parts, so each paratha is smaller, and therefore easier to make.
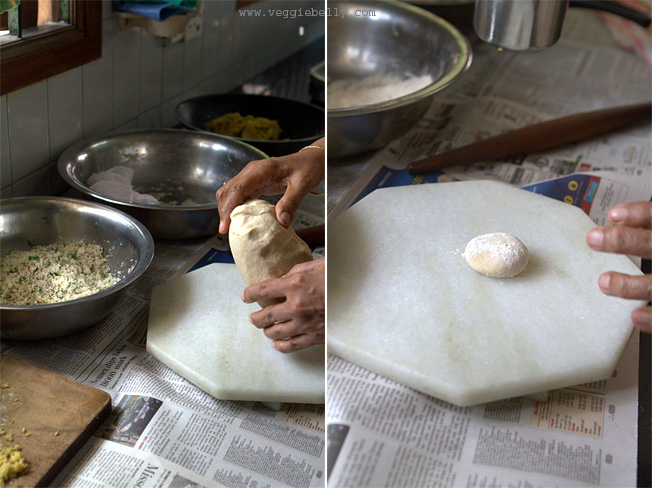
4. Take one piece of the divided dough and form it into a ball
5. Dip the dough ball in wheat flour
6. Place it on a clean, flat surface for rolling
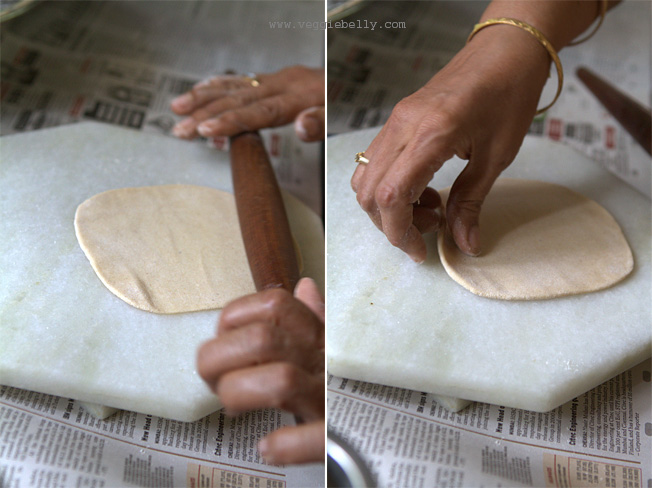
7. Using a rolling pin, roll out the dough into a round using a light touch
8. Turn the paratha 1/4ths of a turn each time you roll it. This will keep it round.
9. Sprinkle a little flour as and when needed.
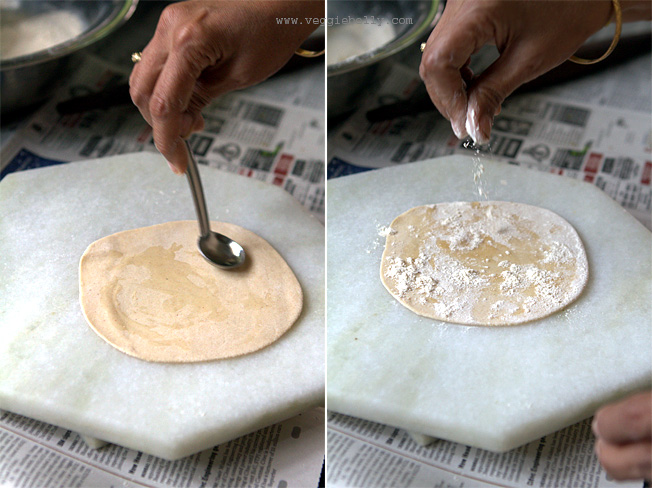
10. When the paratha is thin and even (see picture above), stop rolling, and spread 6 drops of oil
11. Sprinkle a little flour on the oiled side, dust off the excess flour
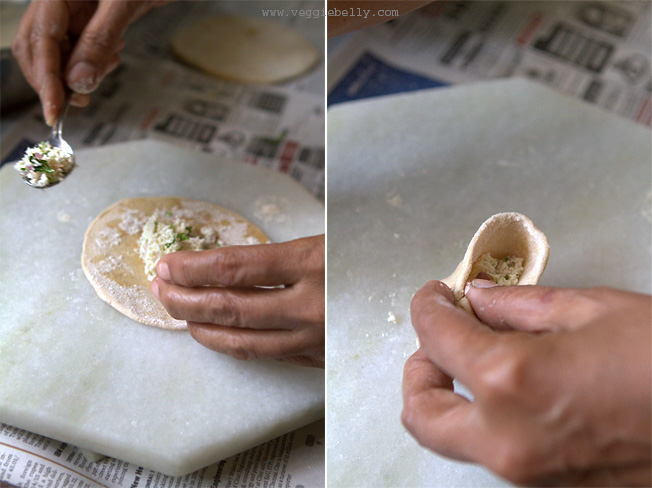
12. Place 2 tablespoons of the paneer filling in the center
13. Gather the edges of the paratha and bring them up, and pleat them over the filling, to form a parcel. If you feel the parcel can hold more paneer filling, add a little more now
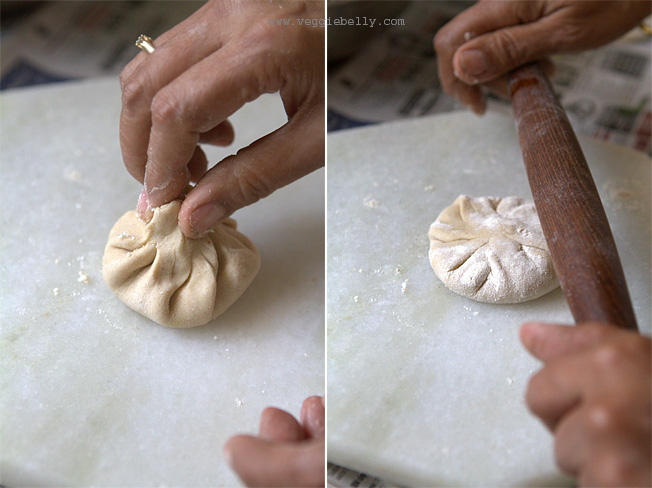
14. Pinch the top to seal the paratha
15. Dip it in flour, flatten it a little, and gently roll it using a rolling pin
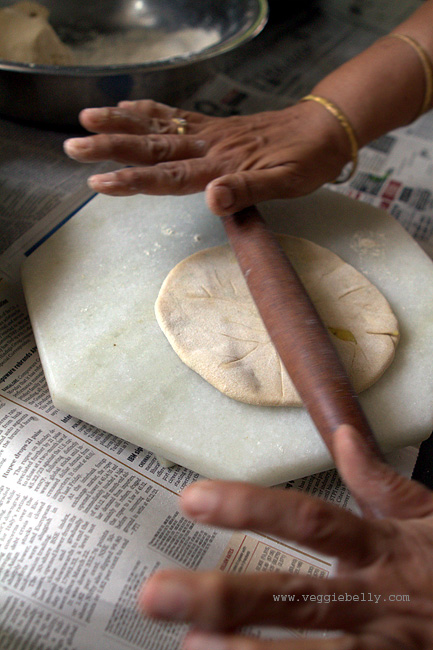 16. Roll gently till the paratha is about 1/4 inch thick
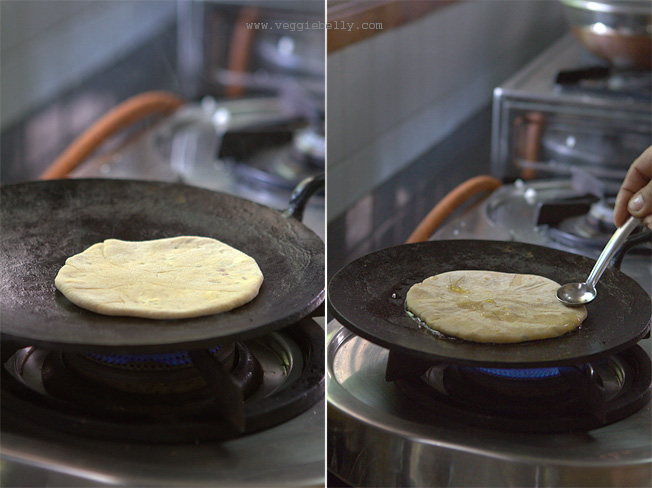 17. Heat a tava, or cast iron skillet on medium heat
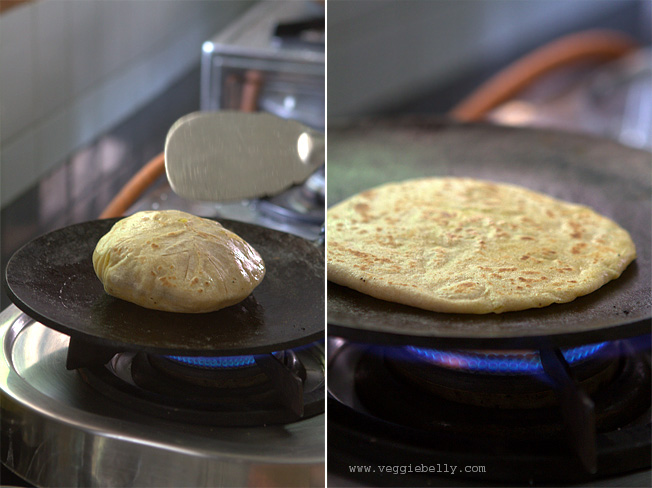
18. Place the paratha on the skillet. Cook on medium heat till pale brown spots appear on the under side
19. Then flip the paratha and let pale brown spots appear on the other side
20. Then increase heat to medium-high and drizzle about 1/4th teaspoon of vegetable oil (you can use less oil or oil spray)
21. Cook paratha on both sides till the dough is cooked and lightly browned (but not too dark)
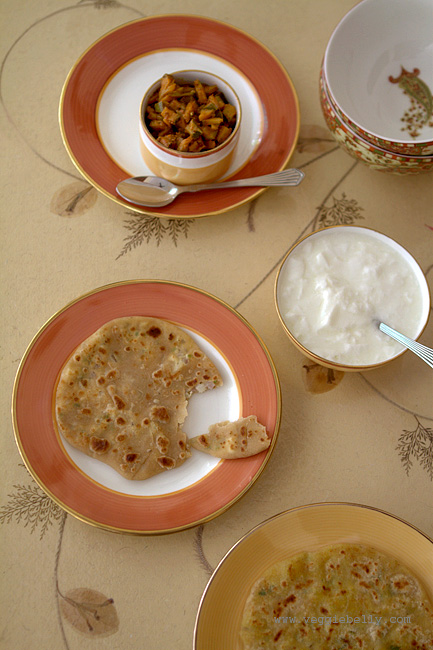
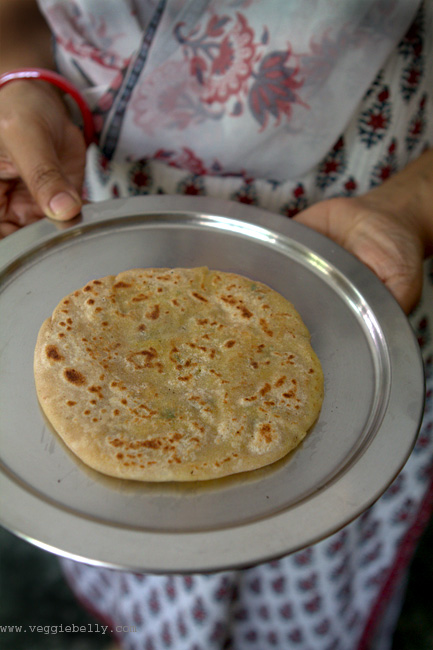
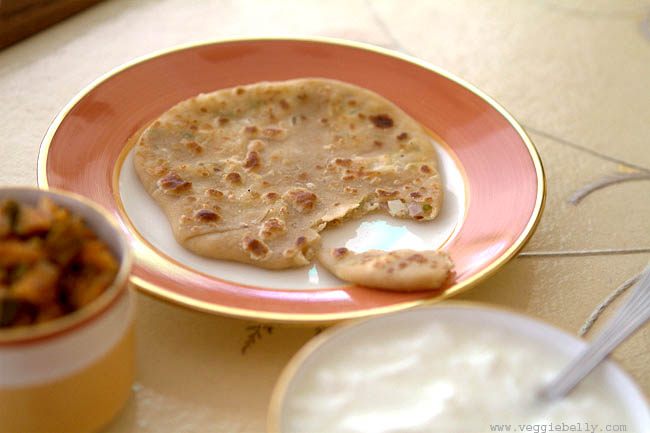
Serve paneer parathas with yogurt or my grandmother’s multi colored raita and my apple pickle.
Paratha making tips
- add enough water to the dough so that it is soft (but not sticky)
- sprinkle wateron the flour a little at a time, this way you are more in control of the final result
- a hard dough will make your parathas stiff
- when kneading, aim for a soft, smooth, elastic dough that is not sticky
- it important to cover and rest the paratha dough for atleast 15 minutes before rolling
- when rolling parathas use a gentle touch
- make sure you chop the filling ingredients very fine. For paneer parathas, the paneer must be grated finely, and the onions and cilantro must be minced. For aloo parathas, the potato must be mashed with no lumps. If you leave large pieces in your filling, it will tear the dough when you are rolling out the parathas.
- when stuffing parathas, you need to use about equal amounts of dough and filling. So if you are using a lime size ball of dough, use about a lime sized mound of filling. However, if you are new to paratha making, lesser amounts of filling may be easier to deal with it, but you will compromise on taste.
- the more you practice making parathas, the better you will get!

That is a speciality I really love. Your paneer parathas look wonderful! A great tutorial.
Cheers,
Rosa
[Reply]
i agree… u need to knead it often for the perfect soft paratha my rolling platform goes all over whenever making parathas.. the stuffing displaces like a jerk reaction to my rolling pin . lol. not giving up, trying still
  the dough and stuffing quantity that u mention, may help !
[Reply]
Lovely! i am on a paneer making spree at home that is, and usually mix potato and paneer in a paratha so my son can eat it easily, but i love the clean flavor of only paneer and will make mine this way!
Sala, I just wanted to know, is there a reason why u used oil and sprinkled flour on the rolled dough before stuffing?
[Reply]
Sala @ Veggie Belly Reply:
July 21st, 2011 at 4:58 am
it helps it puff up and makes distinct layers between the dough and the filling. you can skip this step if you like.
[Reply]
That is such a good illustration. Anybody, absolutely anybody, should be able to make it now!
[Reply]
Like the image of the paratha puffing up. It is so satisfying when that happens
[Reply]
Reminds me of my mom platter looks delicious
[Reply]
Awesome tutorial. I can eat parathas all day long. Simple homestyle pictures.
[Reply]
These parathas are my favourite Sala. I loved the warm feel in the photographs
[Reply]
There’s just something so nostalgic about those hands making paratha on a traditional tava in an Indian kitchen! Reminds of home.
Lovely post Sala! LOVE paneer paratha.
[Reply]
this post made me all sorts of nostalgic. i was reminded of my home and my mom and everything in between. thanks for this, Sala
[Reply]
Sono molto felice che tu mi abbia spiegato così bene questa ricetta, grazie
ciao
[Reply]
Thank you, Sala. I’m fairly new to making paneer, but I’m ready to try this!
[Reply]
Lovely!
[Reply]
I love this post! I’ve wanted to try making parathas for such a long time but I’m always nervous to try so I love the step by step pictures. The pictures are so nice, it’s great to see someone else’s hands in there actually making them. Thank you for the tutorial
[Reply]
What a wonderful post! Thanks for the exper tips on paratha making. And I like how the counter is lined with newspapers. That is the best defensive tactic to making cleanup more efficient.
[Reply]
This looks easy to make. I usually buy frozen paratha from the supermarket. They don’t taste like freshly made paratha. Thanks for sharing.
[Reply]
Thank you!
I have some chapati flour, would that work for this? (Or maybe I’m way off)
[Reply]
Sala @ Veggie Belly Reply:
July 21st, 2011 at 11:28 pm
yes
[Reply]
Till now I have never made them, i mean filled parathas, have ate them but then made by pther ppl. I never knew they puffed up like that when you cook them.
I am sure gonna try this recipe,
[Reply]
This is one paratha that is a favourite with us too!!
[Reply]
That looks so delicious!!!
[Reply]
I have a similar rolling stone with white marble, got it from Udaipur. Love paneer parathas..and these look so delicate and yum.
[Reply]
I love you recipe, especially the photos step by step! It reminds me a lot of Mauritius!
[Reply]
Where can I get paneer or what other kind of cheese could I use? These look wonderful!
[Reply]
Sala @ Veggie Belly Reply:
July 22nd, 2011 at 12:34 pm
paneer is easily available at indian stores.
[Reply]
jasleen kaur Reply:
July 29th, 2011 at 1:14 pm
Jane, you can make paneer really easily at home, all you need is milk, vinegar (or lemon juice) and cloth to strain it.
http://www.wikihow.com/Make-Paneer-%28Indian-Cheese%29
the leftover whey can be used in place of water when you make the parotha dough, it makes it extra soft.
[Reply]
The curse of being gujarati – no one could ever teach me how to do a stuffed paratha. Thanks so much – I am indebted to you for this post! I LOVE a stuffed paratha. I love the step by step with Veena auntie. I like to see the newspapers under that paatlo (rolling platform)…takes me back home. Your paneer looks like fresh snow – which sounds good right now! It’s 106 here in dallas!
[Reply]
Lovely pics & delicious paratha Sala, Can tofu be used instead of panner?
[Reply]
Sala @ Veggie Belly Reply:
July 22nd, 2011 at 11:18 pm
ive never tried tofu in parthas, but i think it will work. just make sure you press the tofu, and the tofu is dry and firm. tofu may also require a little extra seasonings.
how to press tofu:http://www.veggiebelly.com/2011/04/how-to-press-tofu.html
[Reply]
The most fool-proof recipe I ever came across. Just made and my tummy says thanks
And, those hands with bangles was what made me try this ASAP.
[Reply]
I love the step-by-step instructions, the pictorials and the tips! I made aloo parathas for the first time today and wish I had seen this before, as I was wondering about tips to get perfectly round parathas as well as how to make them nice and soft. Now I know and am totally motivated to try again…with paneer this time! Thanks, Veena Aunty!
[Reply]
the photos are calling out to me sala…..gosh that puffed up paratha looks so delicious ! now if only magic existed for real and i chant a spell…n food pops out of my screen ! *sigh*
[Reply]
Sala @ Veggie Belly Reply:
July 28th, 2011 at 7:03 am
lol!
[Reply]
My mom makes thus at home at normally serves it with saunf ka achaar.. you could try that too..
[Reply]
I tried this recipe last week for dinner, it turned out great !, I added some fresh mint in addition to the the cilantro, it was delicious. Thanks for sharing.
[Reply]
made these for breakfast this morning, but added a bit of chopped tomato as well. very yummy, my husband said they’re as good as his mom’s. that’s the best complement you can get from a punjabi!
[Reply]
Sala @ Veggie Belly Reply:
July 30th, 2011 at 12:18 am
aaaw, thanks. glad you and your husband liked it.
[Reply]
Bread-magic! <3 It!
[Reply]
I love the care that you took by providing step-by-step photographs of your Paneer Paratha recipe. I’ve rarely seen such a detailed recipe photographed so beautifully on a food blog. Your blog is art, including its whimsical name. I’m adding a link to your blog under my blog’s “Recommended Links” column. Keep writing, photographing and, of course, cooking.
Alaiyo Kiasi
[Reply]
Wow, great Job!!! This looks like a lot of love and hard work went into making these. Well I guess its not work if its fun, but wow! Great job! I really enjoyed this post!! and i love anything in a little food purse or pouch! So fun to eat!
[Reply]
Lovely photographs. I have to make these parathas for breakfast tomorrow.
[Reply]
your recipes look amazing I can wait to start making them Thank you for having this website.
[Reply]
HI,
i have never seen the full proof reciepe.great going
[Reply]
wow.awesome pics n yummy parathas….
[Reply]
Parfait! Very clear instructions and useful tips! The pictures are so natural!:-) thanks for that!
[Reply]
awesome….
Sala, I am just so craving this badly…
You know my aunt add some potatoes with paneer, i just showed this to my hubby and he is asking me to make it asap..
yumm..
[Reply]
nice…………
i love paneer paratha it’s make very easy
[Reply]
thank you so much for your recipe,
I just visit india. I like paratha very much.
This is my first time to cook India food. You are a great teacher.
Thank you
[Reply]
Hi, thanks for the recipe. I have come acroos another recipe which stated that you need to make two small round chapati, add the paneer on one, cover with another, roll it and then cook it on tawa. please advise which is better.
[Reply]
This atta recipe is just genius. I’ve gone beyond just the paneer stuffing and made every paratha imaginable. I stuffed the parathas with cauliflower today and it was just spectacular…especially on a night that we managed to finish 2 bottles of wine Many many thanks from my husband and me!
[Reply]
it was good &tasty
[Reply]
this looks so good! it seems similar to something we used to have as kids but they were filled with spiced vegetables
[Reply]
Great Recipe! Loved it check my recipe out
[Reply]