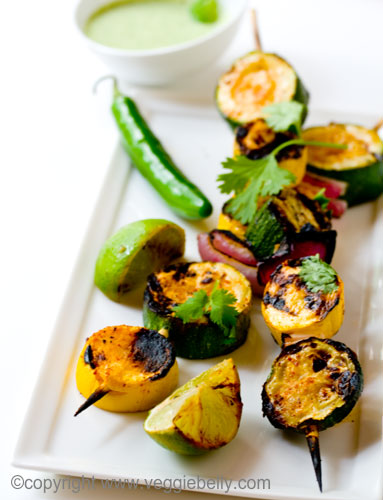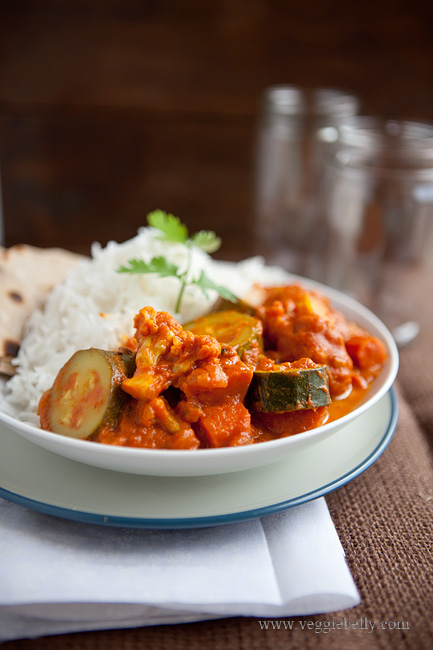
Easy Zucchini and Cauliflower Curry Recipe. Only 8 ingredients!

My husband loves this easy zucchini and cauliflower curry and requests it at least once a week. I will vary the vegetables depending on what’s available and what we are in the mood for. I’ve made this curry with eggplant, green beans and potatoes. I’ve made it with pumpkin and kale. I’ve also made it with cubed paneer,  green peppers and baby corn. This recipe is versatile!
A make ahead tip: Because I make this curry so often (did I mention we love it?!), I’ve started making the curry sauce in bulk and freezing it. It’s easy. Once you are done with step 5 in the recipe below, just spoon the curry sauce into ice cube trays and freeze it. When solid, put the frozen curry cubes in freezer bags and return to the freezer.

You now have a delicious vegetarian, vegan curry base sitting in your freezer to pull out anytime and heat up along with vegetables of your choice!
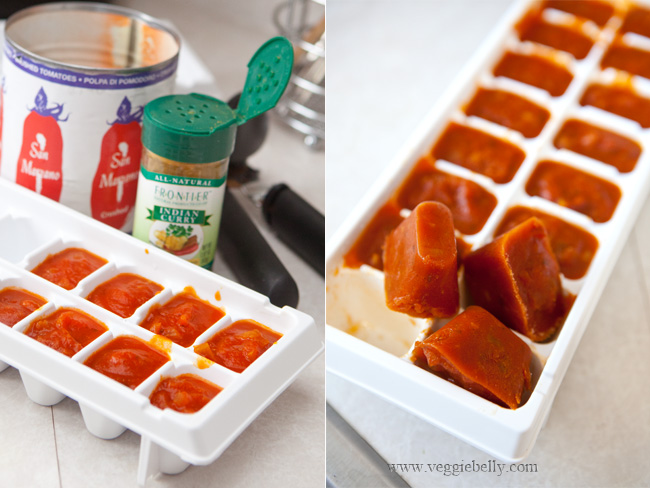
I prefer the taste and convenience of canned tomatoes for this recipe. If you want to use fresh tomatoes, core them, and puree them in a blender. You will need 3 cups freshly pureed tomatoes + about 1 cup water. If the fresh tomatoes make a tart curry, you will want to add a little sugar at the end of cooking.

My favorite tomatoes to use for this curry:
-          Muir Glen fire roasted diced tomatoes
-          San Marzano crushed tomatoes
-          Del Monte diced tomates with basil, garlic and oregano
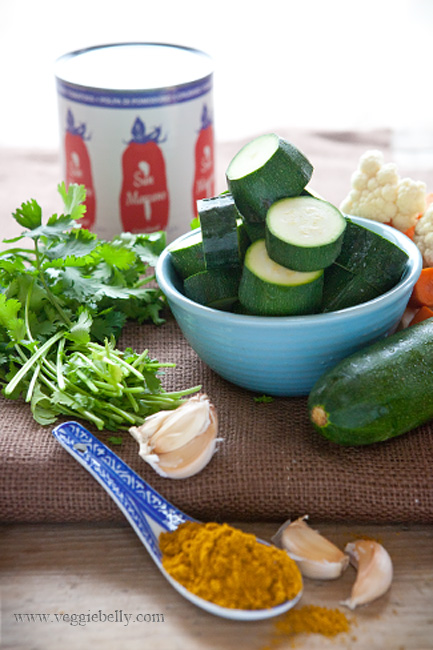
And the curry powder I used is Frontier Indian curry powder from Whole Foods, which is mild, very fragrant, tasty and has a hint of lemon peel. If you use a stronger curry powder, you may want to use less.
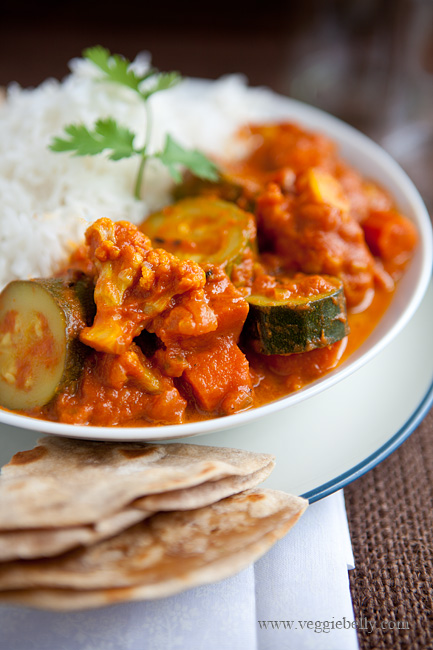
Easy Zucchini and Cauliflower Curry Recipe

serves 3-4

Ingredients
1 ½ tablespoons Oil
½ teaspoon Cumin seeds, optional
A pinch of asafetida, optional
½ large red onion, diced
2 garlic cloves, minced
2 teaspoons curry powder
One 14 oz can of diced or crushed tomatoes. I like San Marzano or Muir Glen.
2 zucchinis, about 12 oz
6 cauliflower florets (about 1 heaping cup of florets)
1 carrot
¼ cup coconut milk
Chopped cilantro or mint for garnish

Method
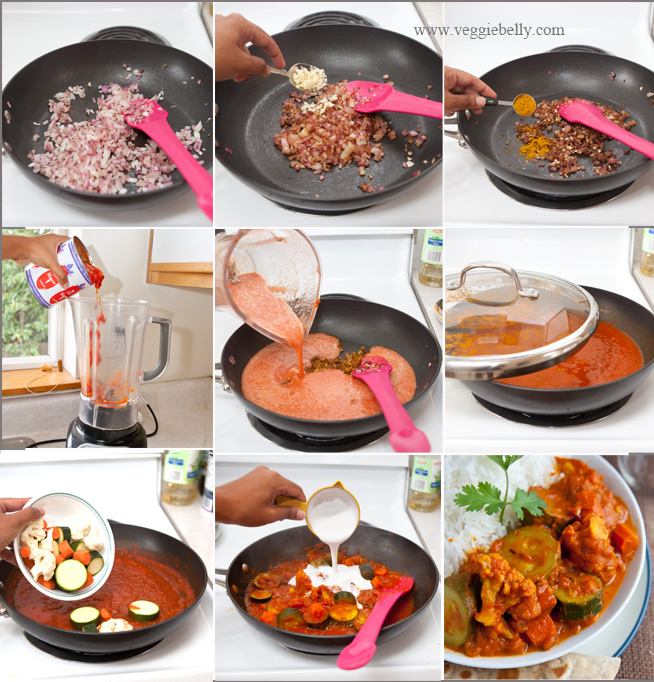
1.Heat oil in large sauté pan. Add cumin seeds if using. When they sizzle, add the asafetida if using.

2. Immediately add chopped onions. Cook on medium heat till the onions are lightly browned.

3. While the onions are cooking, puree the tomatoes. Place the canned tomatoes in a blender. Fill the empty tomato can with water, pour this into the blender as well. Puree well. You should have about 30 oz of puree now. Set aside.

4. When the onions are browned, add minced garlic and stir for 30 seconds.

5. Add curry powder and stir another 10 seconds. Then pour in pureed tomatoes and salt and bring to a boil. Reduce heat to medium-high, partially cover the pan with a lid and let the sauce simmer for about 15 minutes or till the sauce thickens a little. Careful, the sauce will bubble and splatter.

6. While the sauce is cooking, prepare the vegetables. Cut the zucchini into 3/4th inch rounds. Peel and cut the carrot into ½ inch pieces. Break up the cauliflower into florets.

7. Toss the vegetables in the curry sauce, cover and cook till the zucchini is soft, about 10 minutes.

Turn off heat and stir in the coconut milk. For an extra creamy curry, add 1/2 cup coconut milk instead of the 1/4 stated in this recipe.

Garnish with chopped cilantro or mint. Serve hot with brown rice or roti or pita bread. My grandmothers multi colored raita goes well with this dish.

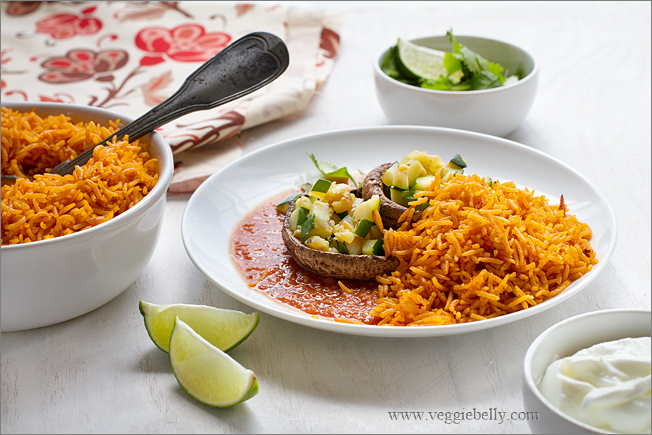
Portobello Mushroom and Zucchini Rellenos with Ranchero Sauce and Mexican Yellow Rice

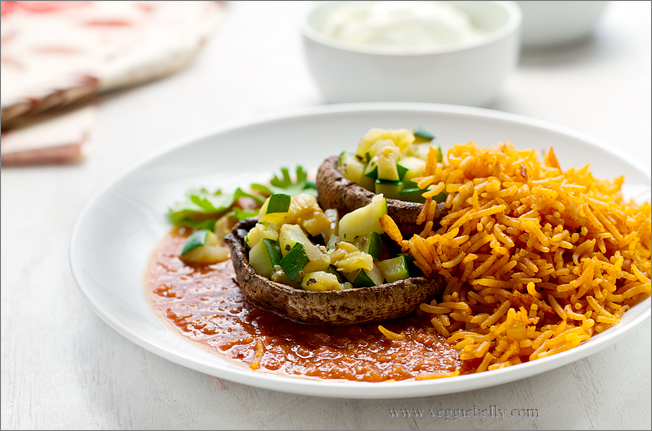
A traditional Mexican chile relleno (stuffed chile) is usually a poblano chile stuffed with meat and cheese, dipped in batter and deep fried. My Portobello mushroom and zucchini relleno recipe is a little different. It is a lighter, simpler, vegetarian, vegan relleno, and it requires no frying. This recipe can get even simpler if you use store bought ranchero or enchilada sauce.

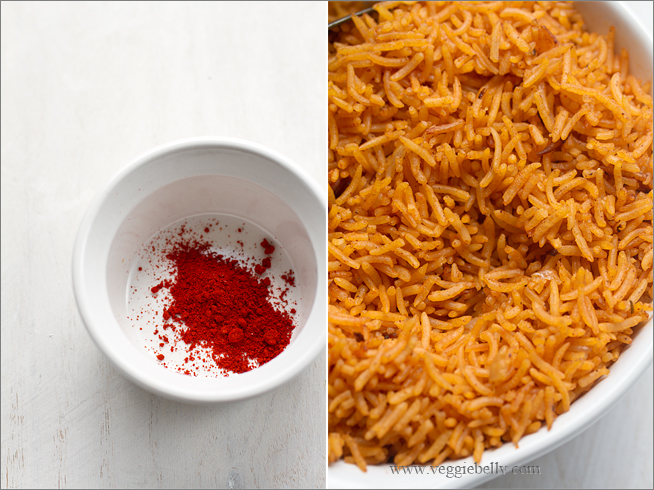
Ground annatto gives the rice its brilliant orange-yellow color. Annattos are the red seeds of the Achiote tree, often called ‘lipstick tree’ because of Annattos coloring properties.

This is a good make ahead recipe. You can make the ranchero sauce and the Mexican yellow rice ahead of time. Simply cook the vegetables the day of, heat up the sauce and rice and assemble everything!

Watch this video to see how to make Portobello rellenos stuffed with peppers and rice. It’s in Spanish, but the method is simple to watch and follow :)

Happy Cinco de Mayo!

Portobello and Zucchini Rellenos in Ranchero Sauce with Mexican Yellow Rice

Serves about 4

For the ranchero sauce
1 teaspoon olive oil
1/2 medium onion, diced
2 cloves over garlic, minced
½ jalapeno, or according to taste
½ teaspoon scant, ground cumin
½ teaspoon dry oregano
One 14 can crushed tomatoes OR 2 cups fresh chopped tomatoes
Salt

Heat oil in a medium saucepan and add the onions. Cook on medium heat till they are soft. Add the garlic, and jalapeno and stir 2 minutes. Then add cumin, oregano, tomatoes, and salt. Cook the same on medium heat for about 3 minutes. If you are using fresh tomatoes, they will take longer to cook.

Serve the sauce chunky or puree it in a blender. I pureed it.

You can make this sauce up to 3 days ahead.

For the vegetables
6 small portabello mushrooms (weighing about 8oz total)
1 teaspoon + 1 teaspoon olive oil
1/2 teaspoon dry oregano
1 large zucchini, cut into small cubes
½ cup cotija cheese (feta, grated pepper jack or cheddar will also work)*
Salt

* I didn’t use the cheese

Wipe the portabellos with a paper towel. Then using a small spoon, gently scrape out the dark gills. Using a small, sharp knife, remove the stem.

Brush a little oil all over the mushrooms.

Heat a skillet on medium high, and cook the mushrooms, gill side down, in a single layer for 2 minutes. Then flip the mushrooms and cook the other side another minute or till cooked through. While the second side is cooking, sprinkle salt and half the oregano over the mushrooms cavities.

In a same skillet, heat a little more oil, add the zucchini and remaining oregano. Saute on high heat for about 2 minutes or till the zucchini is tender but still a little crunchy, and not mushy. Sprinkle salt, and the cheese.

For the yellow rice
1 large or 2 small vegetable bouillon cubes*
2 cups warm water
1 tablespoon butter or olive oil
1 small onion, diced
1/2 teaspoon achiote powder, also called ground annatto (substitute with ¾ teaspoon turmeric or saffron)
1 cup long grain rice
Chopped cilantro for garnish

*I used 2 small Herb Ox brand vegetable bouillon cubes; they are tasty and have no MSG. Maggie or Knorr stock cubes will also work.

Dissolve the bouillon cubes in warm water and set aside.

Sauté the onions in butter or olive oil in a medium saucepan. When the onions are soft, add the Achiote powder and rice. Stir on low heat for a minute.

Pour in the bullion water, and bring to a boil. Reduce heat to a low, cover the pan, and let the rice simmer for 10 minutes or till the rice is cooked, but the grains are still separate, and not mushy. Cooking time may vary depending on the rice.

Fluff rice with a fork. Garnish with cilantro.

To assemble and serve
Spread ranchero sauce on a platter. Arrange the mushrooms, gill and stem side up, over the sauce. Spoon a little zucchini and cheese into the mushroom cavities.

Serve the yellow rice on the side, along with sour cream (optional), extra cheese and extra chopped cilantro.

Balsamic Grilled Summer Vegetables with Basil Quinoa Salad


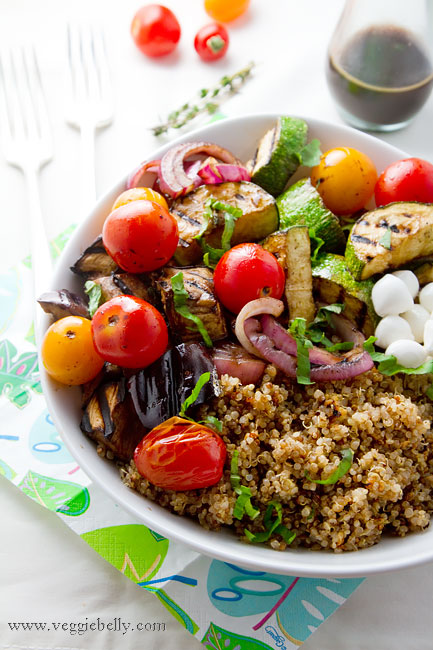
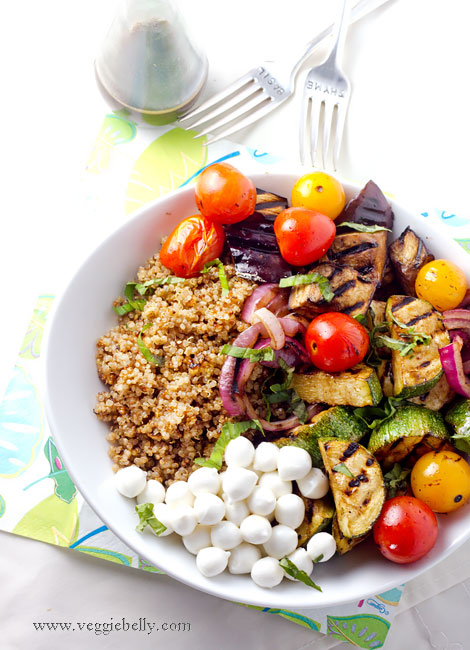
Repeat after me – balsamic makes everything better! Especially grilled summer vegetables and quinoa. I love to grill vegetables tossed in a simple dressing or marinade of balsamic vinegar, olive oil and garlic. I then serve the same dressing as a dipping sauce for the vegetables.

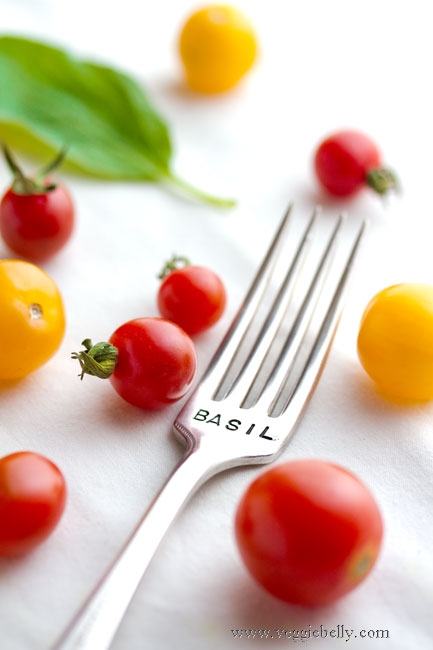
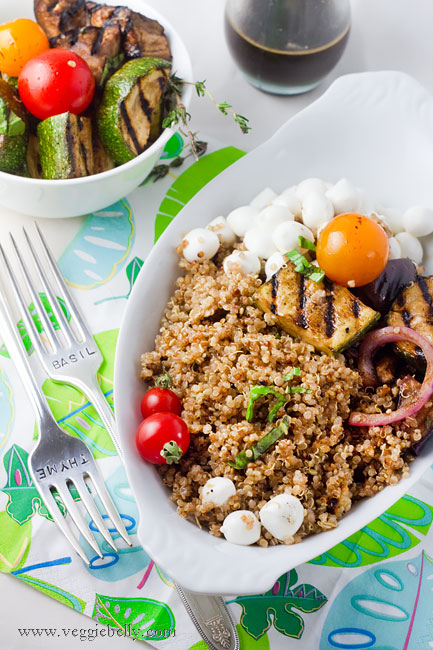
Herb name engraved vintage silver forks are the latest addition to my prop collection. I got them from Beach House Living shop on Etsy.com. Rita will customize the forks for you; her work is beautiful and service is super quick. Rita also flattens out engraved forks, spoons, and knives to be used as garden markers.

To salt or not to salt eggplant before cooking?

Eggplant is full of little air pockets (which is what makes it spongy). When cooking, these air pockets will absorb oil, and make your dish oily. Salting will collapse these air sacs.

Salt eggplants before cooking:
- to reduce oil absorption
- for firmer texture when cooked
- to remove bitterness from an old eggplant

Dont salt eggplant before cooking:
- for dishes that require mashing or pureeing the eggplant
- for silky, soft texture
- if you are quick cooking the eggplant or using high heat (like in this recipe)

How to salt eggplant:

Cut the eggplant as called for in the recipe. Place it in a colander. Sprinkle some salt over the eggplant (as much salt as you would when you cook it). Toss well. Place a heavy saucer or plate over the eggplants in the colander, to weigh them down. Let the eggplant sit like this in the colander for about and hour. All the moisture (brown liquid) will drain out. Rinse well, and pat dry with a cloth. Make sure eggplant pieces have been dried well. Then cook according to the recipe.

You dont have to salt the eggplant for this recipe, because you arent grilling it for long, so you dont risk it getting soft or mushy.

Use whatever vegetables you like. Red bell peppers, mushrooms, any winter squash, asparagus will also taste great grilled and served with quinoa; check out Dishing up Delight’s roasted vegetable quinoa recipe. 101 cookbooks has a quinoa recipe with roasted cherry tomato and tofu.  

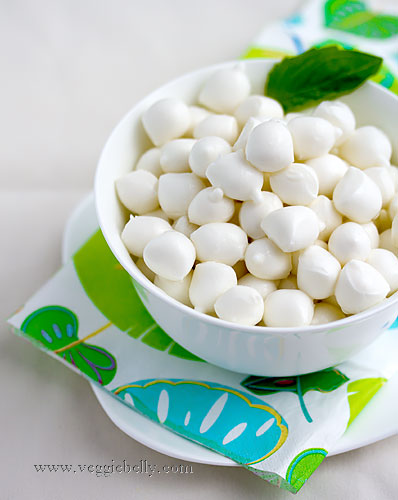
How cute are these little pearlini mozzarella balls? If you cant find them use bocconcini (slightly larger mozzarella balls). Vegans can use pan fried tofu or some toasted pine nuts or walnuts instead.

Balsamic Grilled Summer Vegetables (Eggplant, Zucchini, Tomato, Red Onion), Pearlini Mozzarella and Basil Quinoa Salad Recipe

serves about 3. (you will have as much grilled vegetables as quinoa).

for balsamic dressing
1/4 cup balsamic vinegar
3 tablespoons olive oil
2-3 cloves garlic minced
salt and pepper

for grilled summer vegetables
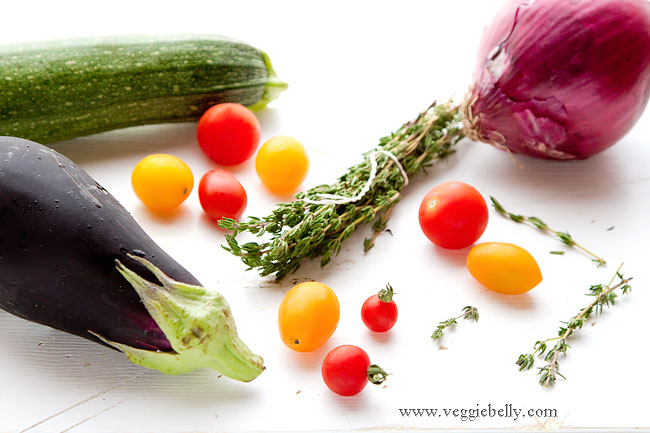
1 small italian eggplant (about 2 cups when cut into big cubes)
1 small zucchini (about 2 cups when cut into big cubes)
1/2 small red onion (1/4 of a large red onion)
3/4 cup cherry tomatoes
4 sprigs fresh thyme, leaves stripped

for basil quinoa salad
2 cups water
1 cup quinoa
1/4 cup basil leaves loosely packed, chopped

other ingredients
1/2 cup pearlini mozzarella balls, or bocconcini mozzarella balls, tossed in a little salt and pepper
(substitute with pan fried tofu or toasted pine nuts or walnuts for a vegan dish)

Whisk together all the balsamic dressing ingredients and set aside.

In a medium saucepan, boil water for the quinoa salad. Add quinoa and bring back to a boil. Reduce heat, and simmer covered, till all the water has been completely absorbed, about 20 minutes.

While quinoa is cooking, cut the eggplant and zucchini into 1 1/2 inch cubes. Cut the red onion into rings. Place cubed eggplant, zucchini, red onion, tomatoes and thyme leaves in a bowl. Pour half the balsamic dressing over the vegetables and toss well.

Brush grill grates with olive oil or non-stick spray (I used a stove top cast iron grill). Heat grill to medium-high. Grill the vegetables about 3 minutes on one side or till grill marks appear, about 3 minutes. Flip them over and grill other side till vegetables are tender but still a bit firm. Tomatoes will cook quicker, remove them from the grill as soon as they start to blister.

Reserve the balsamic dressing that remains in the bowl, to serve with the meal.

If you dont have a grill, broil the vegetables in the top rack of an oven, till one side is golden. Flip and broil other side.

When the quinoa finishes cooking, toss it with the second half of the balsamic dressing. Stir in chopped basil, salt and pepper. 

Spread quinoa on a platter or bowl. Arrange the grilled summer vegetables and mozzarella around the quinoa. Serve warm with the reserved balsamic dressing on the side.

Thai-Burmese Curry Noodles (Khao Soi). Thailand part 3.

Before I tell you about this amazing noodle dish I learned to make in northern Thailand, here are more pictures from my recent trip. (And in case you missed my previous Thailand posts, they are here and here).

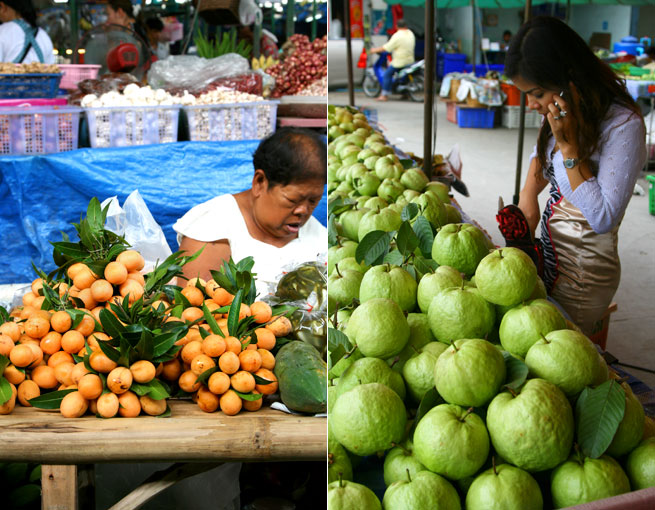
A Thai Market Outside Bangkok

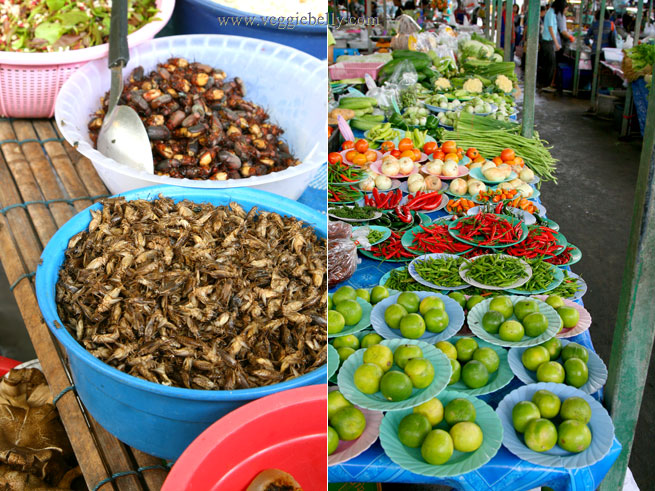
I visited several markets in Bangkok and Chiang Mai. The format seems to be pretty much the same everywhere – vegetable section, fruit section, then there are some bug vendors (yes, insects), rice vendors, fresh noodle vendors, dessert section and prepared foods section. Every single market I went to was extremely clean and organized.

This one was outside Bangkok, in the suburbs where I was staying with my uncle. So this market wasnt touristy, which is always a bonus.

Left: Sapodilla vendor. Right: My uncles wife Da, on her phone & buying guavas. Da showed me around here and so patiently explained everything and translated for me so I could communicate with the vendors 

Left: bugs and insects; I was feeling very Andrew Zimmern-ish.  Right: lime, red and green chillies


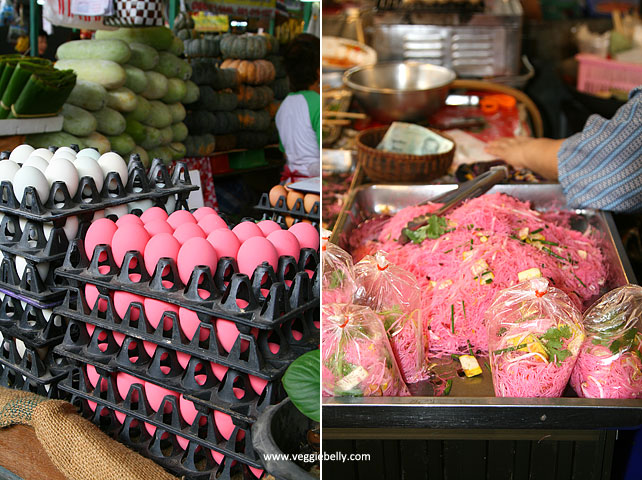
Pink preserved eggs (Chinese thousand year old eggs or century eggs) and pink noodles

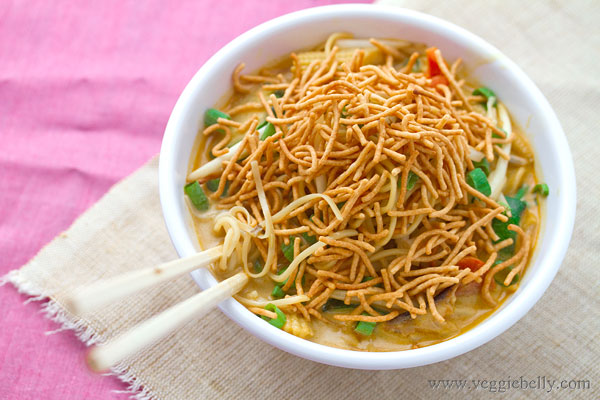
Khao Soi Curry Noodles from Chiang Mai (Kow Swear or Khauk Swear in Burma)

Now lets travel up north to the cool mountains of Chiang Mai, Thailand. Chinese Muslim traders have greatly influenced this region’s cuisine. Their delicious, spicy noodle dish, influenced by Burmese cuisine, called Khao Soi was everywhere in this city. My favorite vegetarian Khao Soi is from Aum Vegetarian Restaurant. in Chiang Mai.

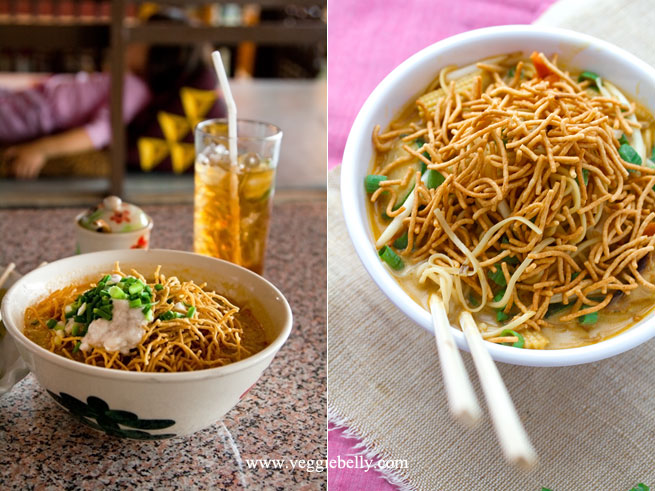
Left: Chiang Mai Aum restaurant’s Khao Soi topped with coconut cream. In the background, chilli paste, lemon iced tea, and British kid.    

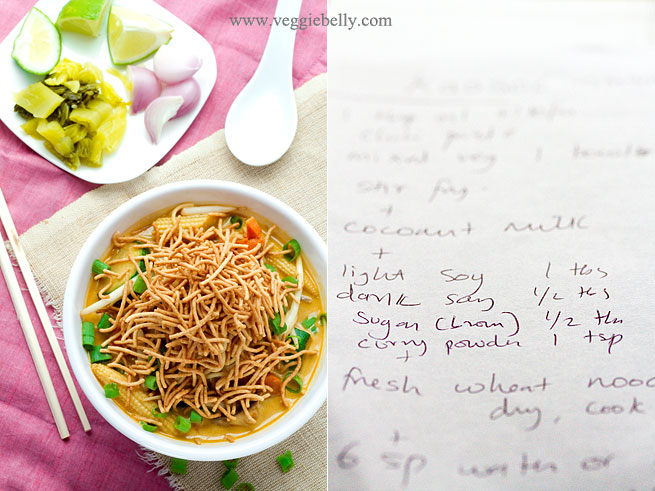
Right: My home made version

When I took a Thai Vegetarian cooking class at May Kaidee’s, Duan the owner and instructor was kind enough to show me how to make Khao Soi, even though it wasnt on the class schedule. See this post  for more on Duan and the cooking class.

Khao Soi, also spelled Khao Suey or Khao Soy, is also eaten in Myanmar or Burma and Laos. The Burmese version of Khao Soi is called Kow Swear or Khauk Swear. From what I understand, the Burmese curry noodles, are also in a coconut milk broth, but use more Indian influenced spices like coriander and do not have the crispy noodle topping. Since both the the Thai and Burmese versions are quite similar, I’m sending this post off to AWED Burma, hosted by Kitchen Swathi 

Other Khao Soi recipes:

Khao Soi by the amazing Chez Pim
A Khao Soi battle between an American guy in Bangkok and a Thai girl in Iowa
A Khao Soi recipe from Rosas Yummy Yums
And then there is this whole blog dedicated to the quest for the perfect Khao Soi in New York city!
A recipe for the Burmese version – Kow Swear on We Are Never Full blog

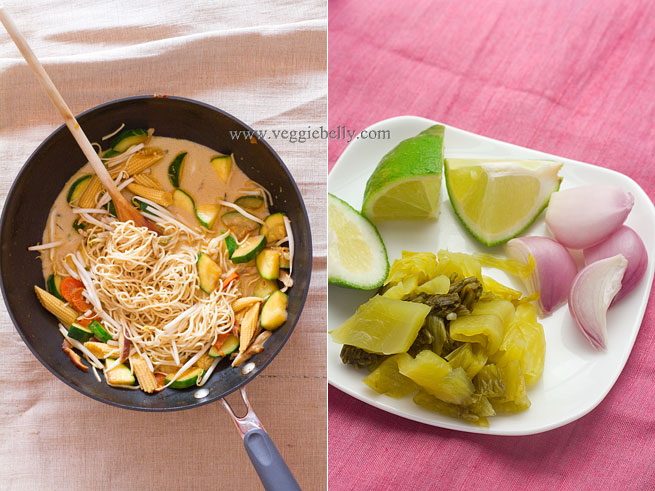
The version I learned to make at the cooking class had shredded chinese cabbage, cauliflower, and tofu. Ive used shiitake mushrooms, baby corn, carrot, zucchini and beansprouts. But I highly recommend adding some pan fried or deep fried firm tofu to this.

If there is an Asian store where you live, that is best place to buy the specialty ingredients for this recipe. But you may be able to find fresh chinese noodles (not the dry stuff) at the regular grocery store. For the pickled mustard greens, you may have to make a trip to the Asian store (if you want to make your own, here is a good recipe).

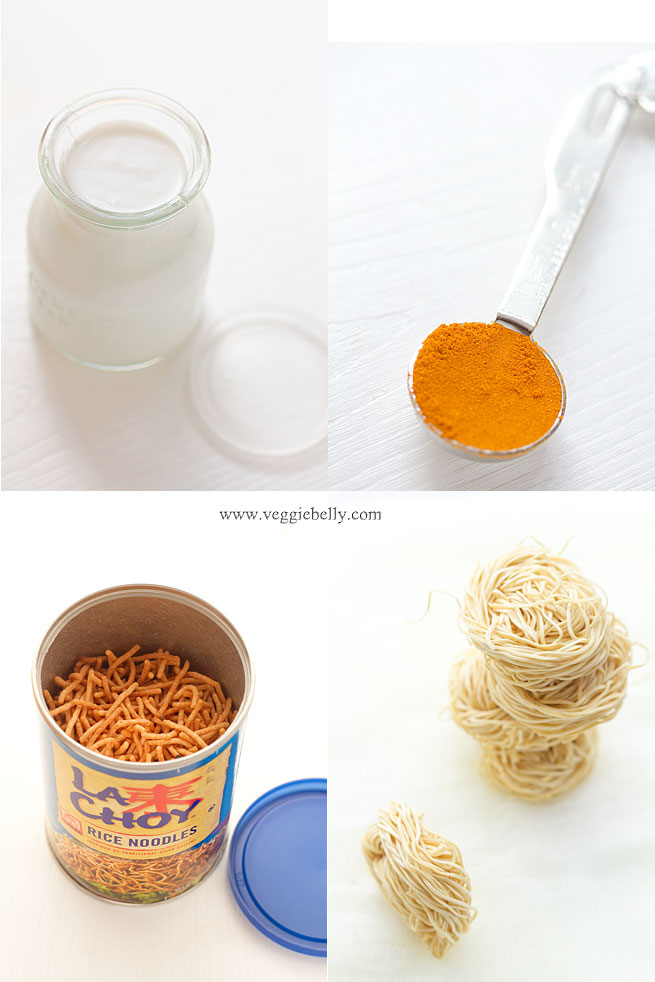
All the amazing Khao Sois I had in Chiangmai were topped with crispy fried noodles – the best part! I didnt feel like deep frying, so I used store bought La Choy brand crispy Asian noodles.

Curry Noodles in Coconut Milk Broth or Khao Soi or Khao Soy Recipe

serves 2-3

1 tablespoon oil
1 cup chopped shiitake mushroom
1 medium zucchini, chopped
1 small carrot, chopped
1/2 cup chopped baby corn
1 tablespoon red curry paste
1 teaspoon curry powder or according to taste
1 tablespoon light soy sauce
1 teaspoon dark soy sauce
1 teaspoon brown sugar
1 cup coconut milk
1 cup water
2 cups fresh Chinese wheat based noodles or about 3 oz dried thin wheat based noodles
1 cup bean sprouts

Toppings and garnishes
1 cup store bought crispy noodles (I used La Choy brand)
2 shallots, chopped
1/4 cup chopped pickled mustard greens (available at Asian stores)
3-4 lime wedges
Chopped cilantro
Chopped green onion

Heat a large wok with oil. Add shitake mushroom, zucchini, baby corn and carrot and cook on high for about 2 minutes. Then add curry paste and curry powder. Toss to coat the vegetables. Add light soy sauce and cook about 30 seconds so the vegetables absorb the liquid. Then add dark soy sauce, brown sugar, and coconut milk. Let the curry simmer for about 2 minutes.

Then pour in water and bring back to a simmer. Taste curry and adjust soy sauce, and sugar to taste. 

Bring a large pot full of water to boil noodles. If using dried noodles, cook in boiling water till noodles are very al dente. If using fresh noodles, boil for about 1 minute. No matter what noodles you use, make sure not to over cook them. Drain well.

Add cooked noodles and bean sprouts to the curry broth. 

Serve Khao Soi in individual bowls, topped with crispy noodles. If you dont have store bought crispy noodles, increase the fresh or dry wheat noodles quantity in this recipe by 1/2 cup. If using dried noodles — deep fry this extra half cup of boiled, drained noodles in oil, till golden. If using fresh noodles, deep fry them as is. Then top Khao Soi with the fried noodles.

Serve with chopped shallots, pickled mustard greens, lime wedges and cilantro on the side.

Spaghetti and Spinach Balls

I first had this amazing pasta dish at Italia restaurant in Park Pod hotel, Chennai, India. Wanting to recreate the dish at home, I googled around to see if there were similar recipes. To my surprise I found a very similar recipe that is served at the famous Carluccios restaurant in UK! My recipe is inspired by Antonio Carluccios recipe for pasta with courgette sauce and spinach balls on BBC Food


Not only is Antonio Carluccios recipe delicious, it also has a special story behind it..

Everytime someone orders this dish at Carluccios restaurant, 50p (about 75 cents) is donated on the diner’s behalf to the charity, Action Against Hunger. In just 3 years Carluccios has raised 430,000 pounds for the charity this way!  Take a look at their menu for details. (The restaurant sells this dish as penne giardiniera).

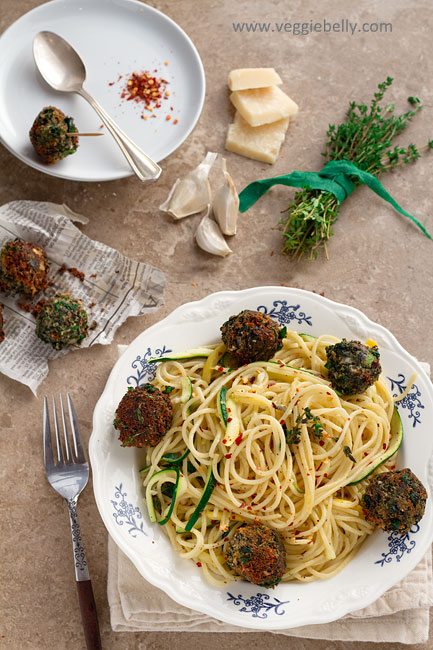
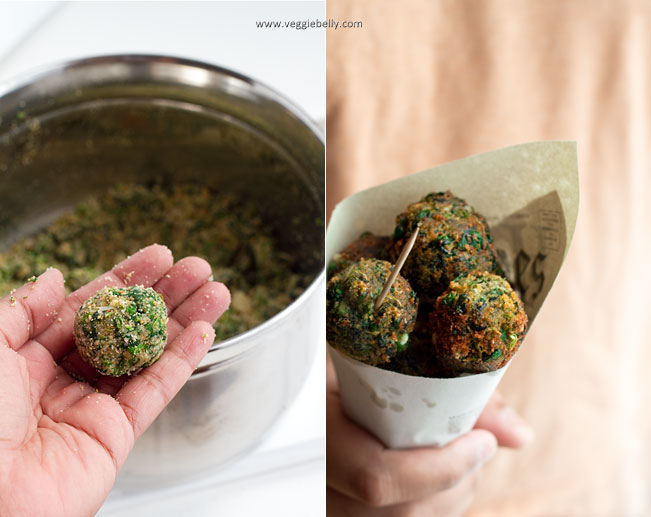
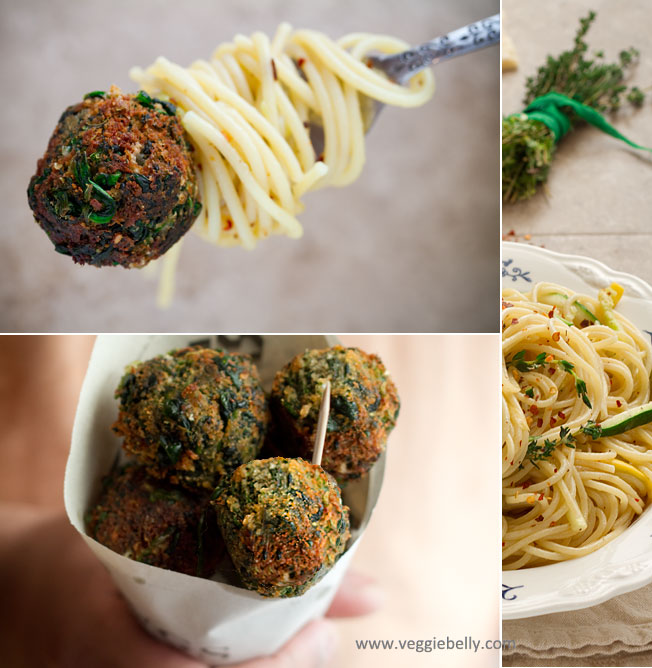
I made several changes to Carluccios recipe. Their spinach balls use eggs, I cut that out. Their recipe required fresh spinach leaves, but I used frozen, thawed spinach because i like the texture of frozen spinach better. I also added fresh thyme and extra garlic to the pasta for extra flavor. The fried spinach and parmesan balls are super tasty! You could even serve them as a snack or appetizer. But I love them in the pasta. These are a great vegetarian substitute  for spaghetti and meat balls.

Some tips:

- Timing is important in this recipe because there are 3 elements to it – the pasta, pasta sauce, and spinach balls. Make the pasta sauce first (using olive oil, thyme, garlic, zucchini and cheese) and keep aside. Then work on the spinach balls. Roll the balls and keep them ready to fry.  Then put the pasta to boil. While the pasta is boiling, fry the spinach balls. This way, the pasta and the spinach balls will be done at the same time and you will have al dente pasta and crispy spinach balls just before serving.

- If you want to use fresh spinach, blanch it in boiling water and squeeze dry before using. Refer to Carluccio’s original recipe which uses fresh spinach.

- If your spinach mixture is too dry and wont form a ball, sprinkle a little water. If the mixture is too moist (you probably didnt squeeze the spinach dry enough), try adding more bread crumbs. Keep in mind that if the mixture is too wet, then end result will be oily.

- You can bake the spinach balls if you wish. But it will work better if you formed the spinach mixture into patties for baking, instead of balls. This way, you will get a crunchier exterior in the oven. Ive never baked these before, but I think a temperature of 400-450f should work.

Spaghetti and Crispy Fried Spinach Parmesan Balls Recipe

adapted from this recipe by Antonio Carluccio
serves about 6

For pasta

450g or 1 lb spaghetti pasta
8 tablespoons olive oil
3 sprigs fresh thyme
4 garlic cloves, minced
Crushed red pepper, according to taste
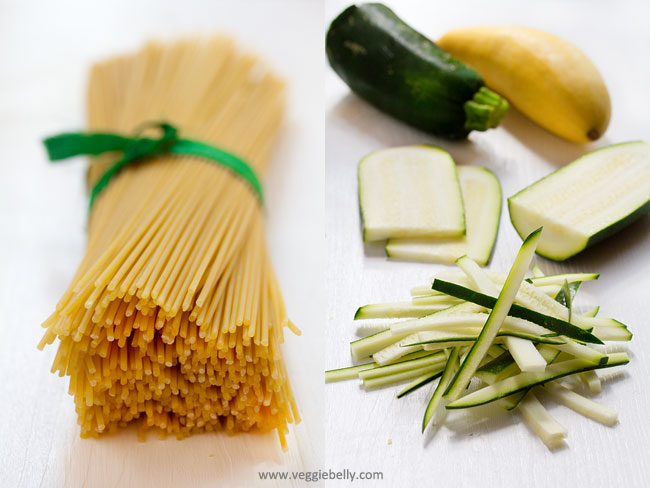
2 zucchini or summer squash cut into thin strips (see picture in post)
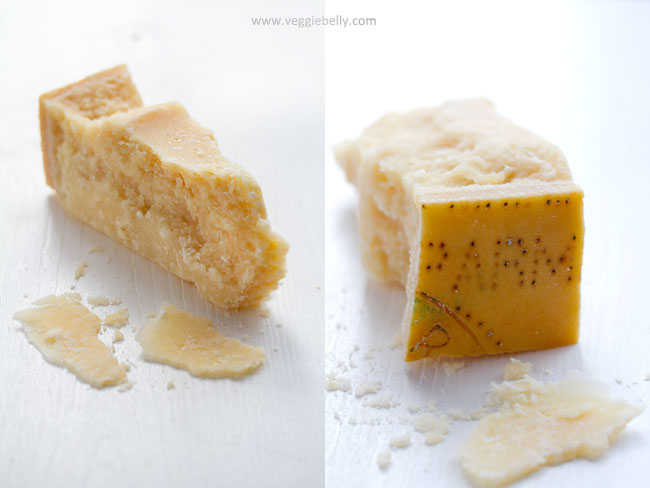
1/2 cup grated parmesan cheese
Salt
Pepper

Bring a large pot of water to boil. Generously salt the water. When water boils, add pasta and cook till al dente.

While pasta is cooking, heat oil in a pan. Add thyme sprigs, garlic and crushed pepper and cook for about 30 seconds. Then add the chopped zucchini. Saute for about 2 minutes or till the zucchini is cooked, but still a little crunchy. Turn off heat and stir in grated parmesan, salt and pepper. This is your pasta ‘sauce’. When the pasta is done, drain the pasta and toss with the zucchini mixture.

For Spinach Balls (makes about 24 balls)

1 lb frozen spinach
1/2 cup grated parmesan
1 cup breadcrumbs
a pinch of nutmeg
1 garlic clove, minced
Salt
Pepper
Vegetable oil for frying

Thaw frozen spinach. Squeeze out as much water as possible. Place thawed, dry spinach in a bowl. Add all other ingredients to the bowl, except the oil. Mix well.

Now test the spinach balls. Make one ball from the mixture, heat the oil, and shallow fry it on medium-high heat. If the balls fall apart, you need to add a little more bread crumbs to bind the mixture. If the extra breadcrumb trick didnt work, and the balls still fall apart, add one beaten egg to the mixture.

Form the spinach mixture into balls (see pictures in post). Heat a thin layer of oil in a wide, shallow pan.

Place spinach balls a few at a time and shallow fry them on medium-high heat, turning the balls around till all sides are golden and crisp. Remove spinach balls with a slotted spoon and place them on paper towels.

Serve spinach parmesan balls with the spaghetti.

Chipotle-Lime Grilled Squash with Kalyn’s Creamy Tomatillo Sauce

grilled-zucchini-squash-and-creamy-tomatillo-sauce

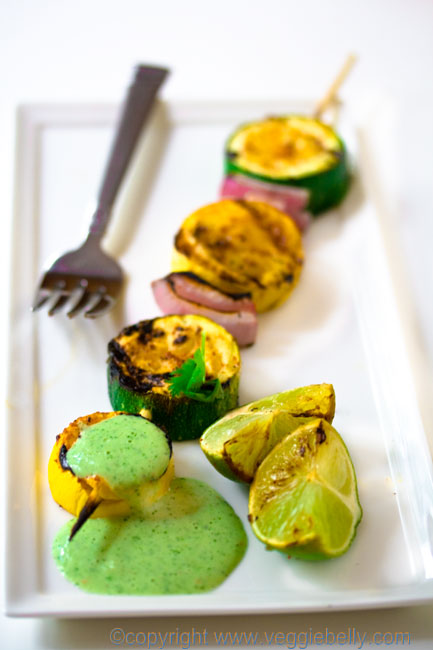
Call me crazy..but I grilled outdoors on a blazing hot, 98 degree day. I could have made my no-cook double layer summer vegetable sandwich instead, stayed indoors and stayed nice and cool. But I was really, really in the mood for some grilled summer squash/zucchini skewers with chipotle and lime.

When the wonderful Kalyn of Kalyn’s Kitchen posted a recipe for creamy tomatillo dressing, I simply had to make it and serve it with grilled zucchini. Kalyn’s Café Rio inspired tomatillo dressing is tart, creamy and refreshing. But let me tell you about the chipotle lime grilled squash first.

thread-squash-on-skewer

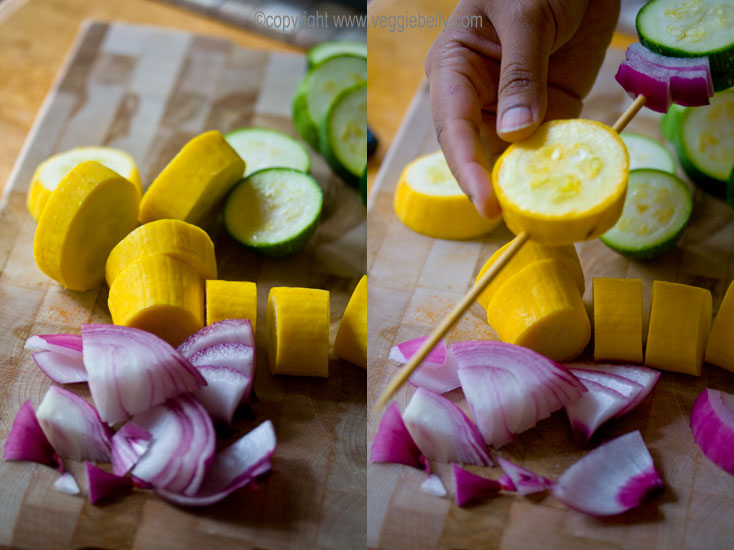
Use both yellow squash and green zucchini for colorful skewers. Red onion goes well with the squash and is always wonderful on the grill. Red onion is one of my favorite things to grill – it gets sweet and roasted and incredibly flavorful. Cut the squash and onion and thread them alternatingly on soaked bamboo skewers.

Then grill the skewers on an outdoor grill. Towards the end, baste the skewers with a mixture of olive oil, lime juice, chipotle powder, cumin and salt. Chipotle powder burns easily, so only baste in the last minute or so of grilling.

grill-and-grilled-lime

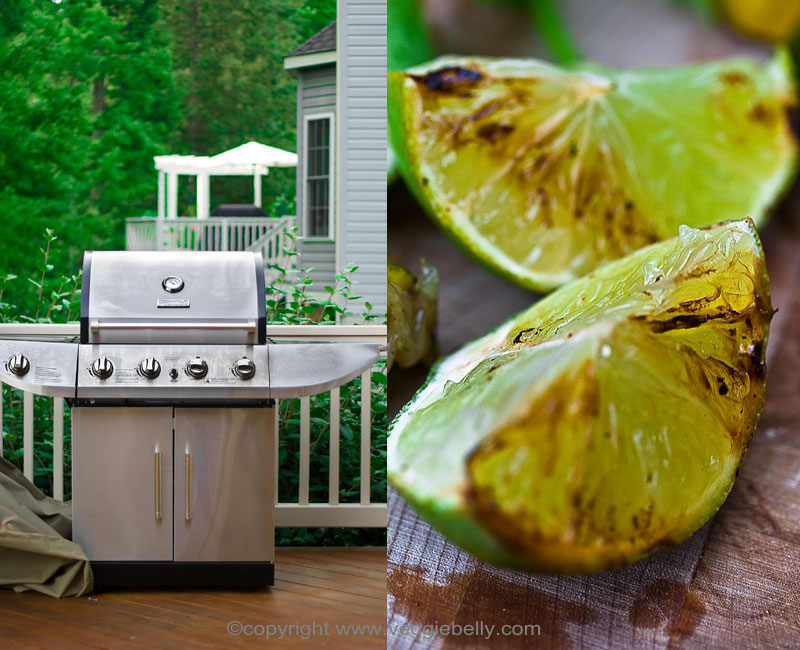
Meet my grill. We got an incredible deal on it a few years ago in Sears. Among the many things we’ve grilled, we really like grilled limes and they go great with this dish.
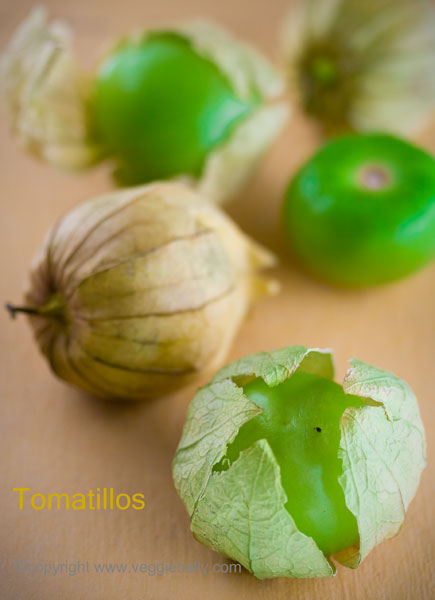
tomatillos

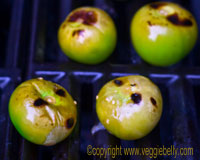
grilled-tomatillosNow, onto Kalyns creamy tomatillo dressing. This is really easy to make. You’ll need a couple of tomatillos. Remove their husk and wash away the sticky coating on the tomatillos. Pat them dry. Then throw the tomatillos on the grill. When they are soft and blistered, put them in a blender.

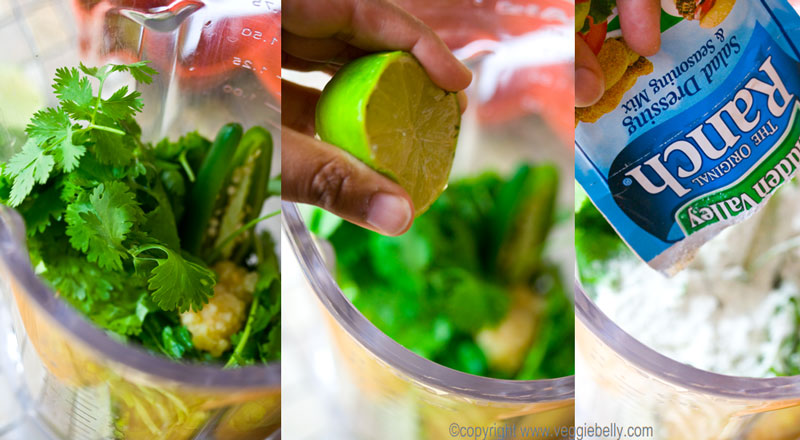
add-lime-and-ranch-powder

 Add some cilantro, garlic, a Serrano chili (Kalyn uses jalapeno or Tabasco sauce), lime juice, a packet of ranch dressing mix and a cup each of milk and mayonnaise.

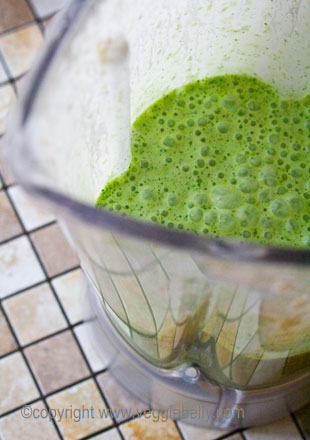
creamy-tomatillo-sauce

Blend everything together and your sauce is done.

grilled-squash-with-tomatillo-dressing

Served chipotle grilled squash with creamy tomatillo sauce and grilled limes.

Chipotle Lime Grilled Squash recipe with Creamy Tomatillo Sauce
makes 4 skewers
2 squash (preferably 1 yellow squash and 1 green zucchini)
½ medium red onion
¼ tsp ground chipotle
¼ tsp ground cumin
1/2 tbsp lime juice
1 tbsp olive oil
Salt
four 12 inch bamboo skewers

Soak the skewers for 15 minutes in warm water. This will prevent them from burning on the grill.

Heat an outdoor grill to about 350f.

Cut the squash into rounds (about 8 rounds per squash). Cut the onion into chunks. Thread the squash and onions onto the skewers alternatingly – about 4 pieces of squash and 3 pieces of onion per 12 inch skewer.

Mix chipotle powder, cumin, lime juice, olive oil and salt together. Place squash skewers on the grill and grill each side till browned. Brush the chipotle-olive oil mixture on the grilled squash in the last 1 minute of grilling.

Serve with creamy tomatillo sauce.

Kalyn’s Creamy Tomatillo Sauce recipe inspired by Café Rio
about 2 ½ cups (you’ll have left over sauce)

2 large or 4 small tomatillos
½ cup chopped cilantro
2 tsp lime juice
1 tsp minced garlic
1 serrano chili (Kalyn uses jalapeno or Tabasco sauce)
1 packet Hidden Valley ranch dressing mix
1 cup milk
1 cup mayonnaise

Toss the tomatillos in 1 tso of oil and grill on an outdoor grill or in the oven till soft and blistered. Place the tomatillos along with all other ingredients in a blender. Blend into a sauce. Refrigerate till you are ready to serve.

If you want to use prepared/bottled ranch dressing, use 2 cups of the prepared dressing instead of the ranch dressing mix, milk and mayo. If you don’t have tomatillos, Kalyn recommends using store bought salsa verde.

Grilled Zucchini Tagine

Ive finally made use of that tagine I bought in Morocco last year. My long time friend V, and I took a trip to Marrakech and the Sahara desert. The souks in Marrakech were an exotic labyrinth of shops and stalls. Thats where I bought this tagine. And thats where I found out V is an expert bargainer!

We walked into a tagine shop and V made the shopkeeper, a lanky teenager, pull out almost every tagine on his shelves. Exhausted, the kid sat down, anticipating a large sale. V bargained and bargained for her lovely green tagine. Then she bargained and bargained for my yellow one you see in the picture. After about half an hour of this, V simply walked out of the shop saying she didnt like any of the tagines!

The almost weeping shopkeeper/kid came running behind us. He gave us the tagines for less than a fourth of the original price!

My tagine recipe today is for V, the bargain queen :)

There is a little twist in this recipe; the zucchini is grilled. I saw Bobby Flay on Iron Chef America – battle zucchini – where he grilled up some zucchini and made a tagine out of it. Thats my inspiration for this dish. The grill marks make the zucchini look great.
Zucchini – 4
Onion – 1 large, diced
Garlic – 4 cloves
Cauliflower – 5-6 florets
Chick peas – 1 can
Saffron – pinch
Cumin – 1 1/2 tsp
Paprika – 1 tsp
Turmeric – 1/2 tsp
Parsley – 2 tbsp chopped
Lemon Juice – 1 tbsp
Water or stock – 1 cup
Oil – 1 tbsp
Salt

Wash and dry the zucchini. Trim the end. Slice it in two lengthwise. Brush some oil on the cut sides and grill on a very hot grill, just till you get the grill marks.

In the meanwhile, heat a large, heavy bottom pan. Add the oil and saute the onion till light brown. Then add the garlic, cumin, turmeric and paprika and saute one minute.

Arrange the grilled zucchini and cauliflower in the pan, sprinkle with salt. Pour in the water or stock and bring to a simmer. Simmer covered till the vegetables are tender, about 10 minutes.

Stir in the chick peas and saffron and simmer another minute. Turn off heat. Mix in lemon juice and parsley.

Serve with couscous or as our camel man served it in the Sahara desert – with crusty bread.

Related Posts with Thumbnails