Easy Carrot Mint Soup and a Great Tip for Flavoring Milk Based Soups

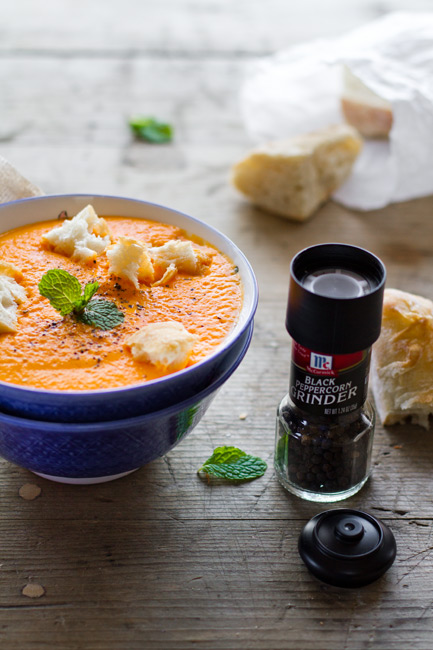
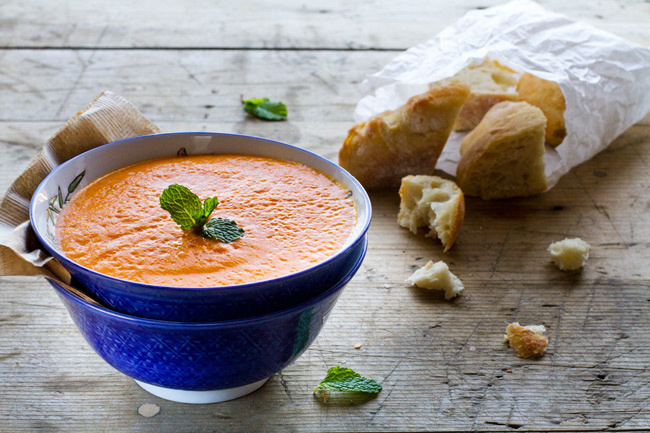
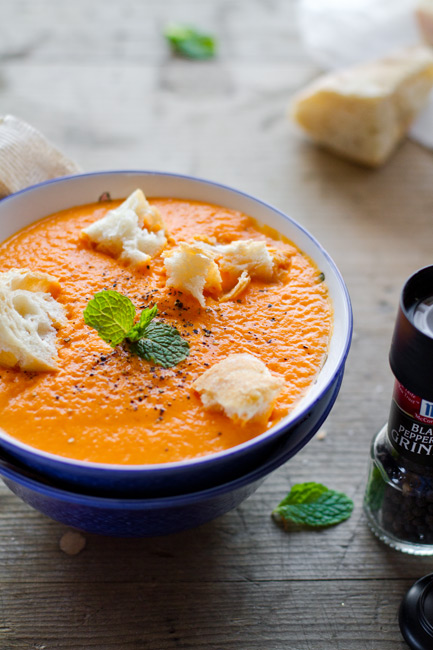
Let’s start the New Year with a simple, yet delicious carrot mint soup recipe, shall we?! This is my go to recipe when I’m feeling like a soup laden with the freshness of herbs and vegetables. This soup is very easy to make and pantry friendly since it uses only carrots, fresh mint, and milk.
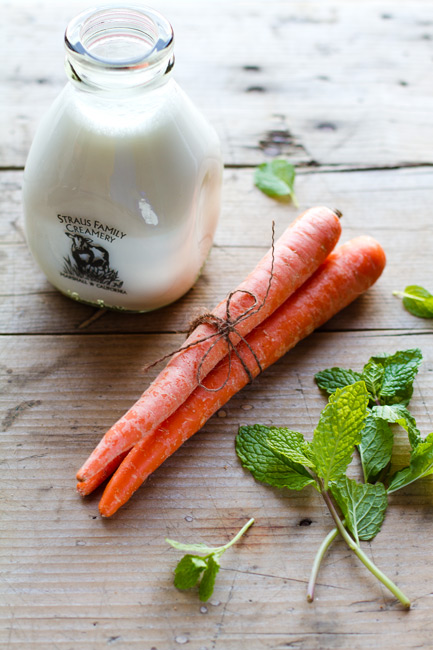
I’ve tried this soup before by pureeing the mint leaves along with the carrots, just like my pea and mint soup. The pureeing method works beautifully for the pea and mint soup, but not so well for the carrot soup. When you puree the mint with the carrots, the soup loses it brilliant carotene tinged orange color. So heres how I infuse the mint flavor into the soup. Read on..

How to flavor milk based soups

If you are making a milk based soup with a herb, this is the best way to infuse the herb flavor into the soup. Mint and basil work particularly well with this method, but you can also use cilantro, parsley, rosemary or chives.

Bring the milk to a gentle simmer, and add the herb (mint in this recipe) to it. Turn off the heat, cover the milk and let the herb infuse for about 15 minutes. Then pull out the herb leaves from the milk, squeeze any milk out, then discard the leaves. That’s it! You have herb infused milk! Puree this milk along with cooked vegetables (carrots in this recipe) and you have a beautiful herb infused soup.

This is a great make ahead recipe. You can make this soup a few days ahead and simple re-heat it in the microwave. I love this carrot mint soup for a work day lunch, packed in a thermos with a paper bag of french baguette. Yum!

Easy Carrot Mint Soup Recipe

Serves 2
Ingredients
6 medium carrots, peeled and cut into chunks (about 1 ½ cups)
1 1/2 cups water
1 cup milk (Whole milk will taste best, but you can use 2% milk too)
4 sprigs mint (about 20 mint leaves)
Salt
Freshly cracked black pepper
¼ teaspoon sugar, optional

Method
Place the chopped carrots and 1 1/2 cups water in a pan. Bring to a boil. Reduce the heat to medium-low. Cover with a lid and simmer the carrots till they are very very soft, about 40 minutes. When you mash a carrot chunk with the back of a spoon, it must mash very easily. This means the carrots are ready. Alternatively, you can pressure cook the carrots.

While the carrots are cooking, gently heat the milk in a medium saucepan. Just as small bubbles start to appear on the sides, and the milk is about to boil, turn off the heat. Immediately add mint sprigs to the milk and stir. Cover and let it infuse for 15 minutes.

Then fish out all the mint leaves, squeeze the milk out of them, and discard the mint leaves.

When the carrots are cooked, place them in a blender along with their cooking water, the mint infused milk and salt.

Blend to a smooth puree. Add more milk to the blender if needed, to thin out the soup. Be careful when blending hot liquids in a blender, always vent the lid a little.

Taste the soup; if you would like it a little sweeter, stir in the sugar. Some carrots are sweeter than others, so you may or may not need the sugar.

To serve, pour hot soup into bowls, top with cracked pepper and serve with crusty bread.

Cucumber Cream Cheese and Cilantro-Mint Chutney Sandwich Recipe

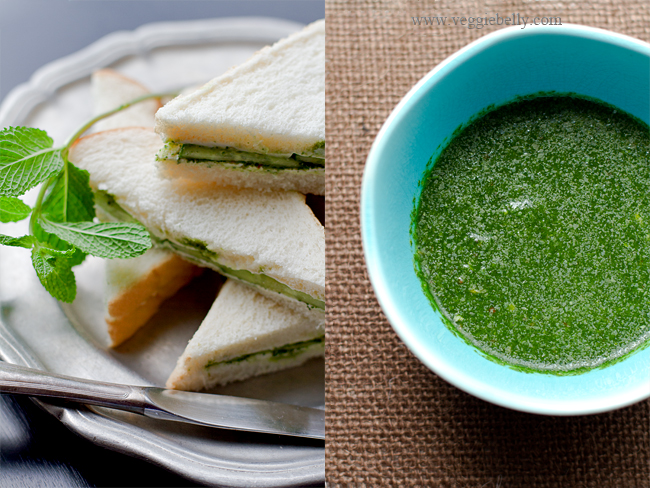
When the weather is nice, we will pack ourselves some sandwiches and lemonade and have a little picnic in our back yard. These cucumber, cream cheese, cilantro-mint chutney sandwiches are our favorite. I’ve made these for several picnics and I really dont know anyone who doesnt like them.

We used to get these sandwiches in India – white bread spread with a little butter, cilantro mint green chutney, and cucumber slices. It is India’s version of English tea sandwiches. I like to use cream cheese in this sandwich recipe; it goes great with the cucumbers and chutney.

Cucumber Cream Cheese and Cilantro-Mint Chutney

Sandwich Recipe

Makes 4 whole or 8 half sandwiches

½ an English seedless cucumber (the one with the plastic wrap)
8 slices of white or soft wheat bread
8 tablespoons cream cheese at room temperature, I used the low fat kind.
½ cup cilantro mint chutney. Recipe below.
Salt

Cut the cucumber into thin rounds.

Take 2 slices of bread. Spread 1 tablespoon cream cheese on one slice. Spread 1 teaspoon (or more if you like) chutney over the cream cheese. Arrange 4-5 slices of cucumber on top. Sprinkle a tiny pinch of salt over the cucumbers.

Spread one tablespoon cream cheese and then one teaspoon cilantro mint chutney on the other slice of bread. Place this on top of the cucumbers, to make a sandwich. Repeat for all bread slices.

Spreading the cream cheese first, and then the chutney will prevent the chutney from soaking through the bread. Serve immediately.

Cilantro Mint Chutney Recipe
Makes about 1/2 cup, enough for 4-6 sandwiches

1 cup cilantro leaves, tightly packed
1/2 cup mint leaves, tightly packed
1/2 fresh green chili or Thai hot pepper, chopped*
1/8 teaspoon cumin seeds
1 garlic cloves, peeled
1/2 tablespoon lemon juice
Salt
2 tablespoons water

*This makes a spicy hot chutney. Use less chili or leave it out if you don’t want it spicy.

Place all ingredients in a food processor and process into a smooth sauce, scraping down the sides of the food processor now and then.

If you are using a blender, you may need to use a little more water. Store the chutney in an air tight container in the fridge.

Vietnamese Summer Rolls with Mango and Sweet Chili Dipping Sauce

Another no-cook recipe – these Vietnamese summer rolls or Goi Cuan are bursting with fresh herbs and vegetables. And they will be perfect to take along for a vegetarian picnic.

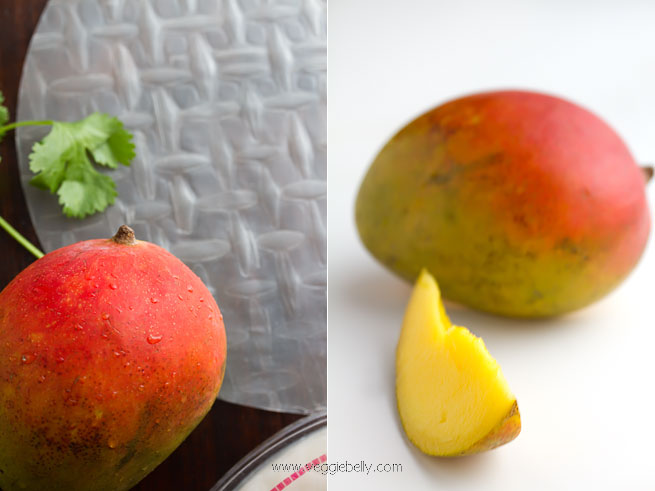
I used mangoes here for some summery, fruity, sweetness. But you can use pretty much any combination of vegetables in this summer roll. I’m not a fan of mangoes, so I made this recipe for our guests (they loved it) and I made myself a roll with carrots and purple cabbage.

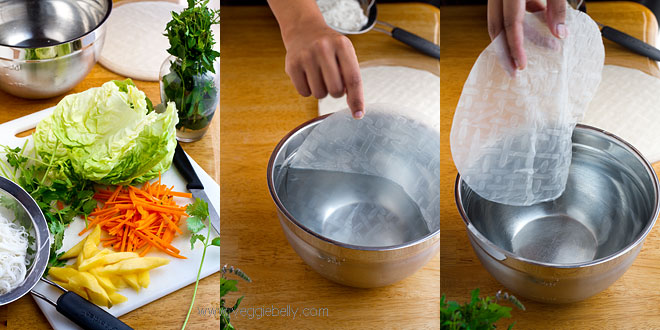
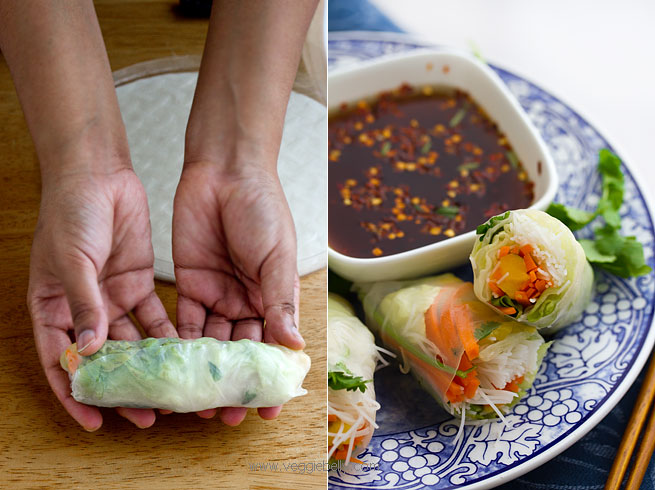
Set up all the ingredients on a clean surface. Dip a rice paper wrapper into a large bowl of water. Make sure all sides get wet. Then remove the rice paper and gently shake it dry. The rice paper will now be pliable. If it isnt, let it stil on the table (not in the water) for a few more seconds.

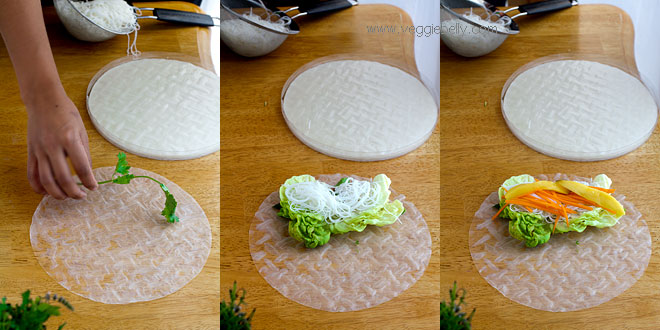
Place the softened rice paper wrapper on a clean surface. Place filling ingredients on the front (closest to you) 1/3rd of the rice paper wrapper in this order – cilantro, mint, lettuce, noodles, carrot, mango.

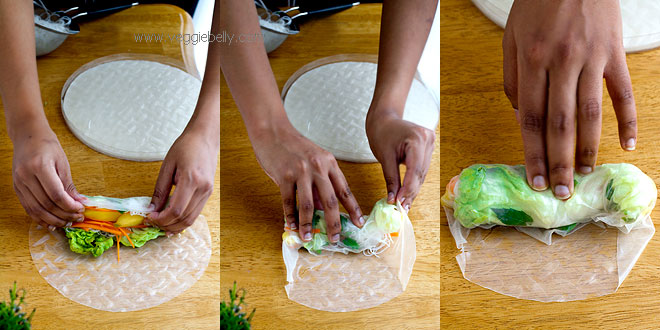
Now fold the front part over the filling and roll. Then fold both the sides in. Roll gently but firmly.

Its that simple! With practice, you will get better and better at rolling. Serve these Vietnamese summer rolls with sweet chili dipping sauce. Regular Vietnamese dipping sauce or Nuoc Cham has fish sauce. See below for my vegetarian Nuoc Cham recipe.

Vietnamese Summer Rolls or Goi Cuan with Mango Recipe

makes 6 rolls

2 oz dried rice sticks or rice vermicelli (available in Asian section of most grocery stores)
6 rice paper wrapper sheets (called ‘bahn trang’ - available in Asian section of grocery store)
a large bowl of water to dip rice paper sheets
6 sprigs cilantro
6 sprigs mint
6 leaves lettuce, rib/stem removed (I like boston lettuce)
1 small ripe mango, peeled and cut into strips (substitute with shredded purple cabbage, cucumbers, savoy cabbage, bean sprouts)
1 carrot, peeled and cut into match sticks

Soak rice sticks in boiling water for about 3 minutes or till soft. Drain well.

Dip the rice paper sheets in water, making sure all sides are wet. Shake off excess water. Place on a clean work surface. Place a sprig each of cilantro and mint in the front 1/3rds of the rice paper sheet. Then place lettuce leaf, a little rice noodles, carrot, and mango slices. Fold and roll the summer roll – see photos above for details on how to roll vietnamese summer roll.

Serve immediately with vegetarian vietnamese dipping sauce (recipe below). To store, put rolls on a plate, cover with a damp paper towel. Then cover plate completely with foil or plastic wrap and refrigerate.

Sweet Chili Dipping Sauce or Vegetarian Nuoc Cham (Vietnamese dipping sauce) Recipe 

makes little less than 1 cup

4 tablespoons light soy sauce
4 tablespoons rice vinegar
2 tablespoons sugar
2 tablespoons warm water
1 garlic clove peeled and crushed
Red pepper flakes or chopped fresh chili to taste

Whisk everything together till the sugar dissolves.

Wheat Berry Confetti Salad with Artichokes, Peppers, Dill and Mint

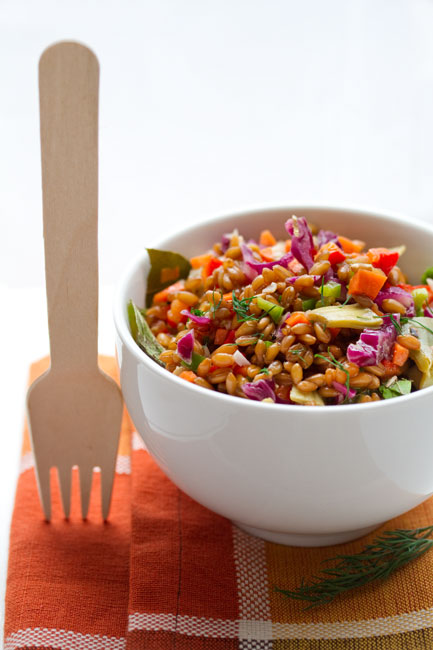
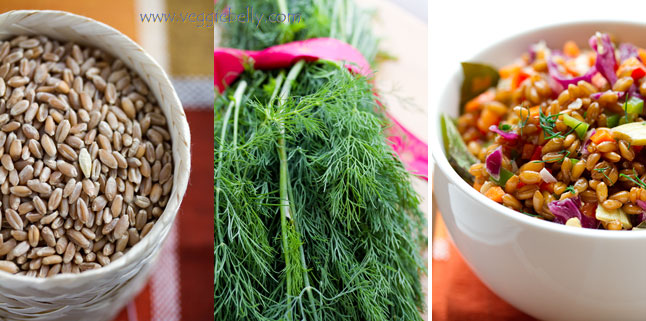
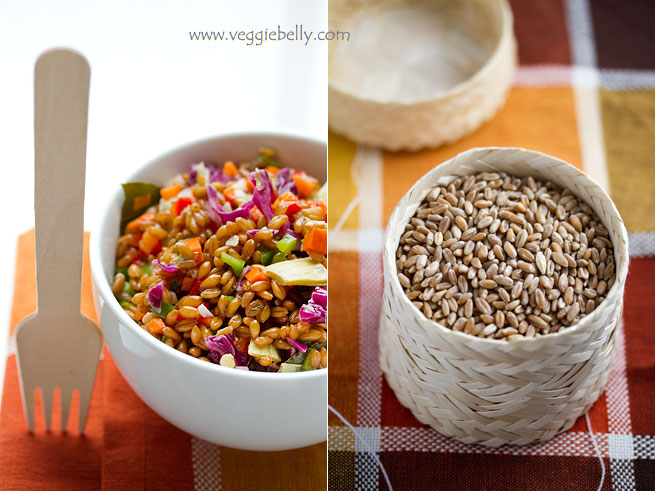
Wheat berry is the whole wheat kernel containing the wheat germ and wheat bran.  Wheat berries have heaps of fiber and protein. They have a sweet, nutty flavor and a chewy texture. They are tasty, easy to make and good for you. I buy wheat berries at Whole Foods. This recipe has a great confetti of color from all the different vegetables. Not only is this a colorful, healthy salad, its also vegan!

How to cook wheat berries

- Boil wheat berries in salted water and drain when done

- They will take anywhere between 1 to 2 hours to cook. I usually cook mine for about 1 1/2 hours.

- After one hour, start tasting the wheat berries. Turn off heat and drain when they are done to your satisfaction.

Wheat Berry Confetti Salad with Artichoke Hearts, Roasted Red Pepper, Green Pepper, Purple Cabbage, Yellow Sweet Corn, Dill and Mint Recipe

serves about 4

1 cup hard wheat berries
1-2 dried bay leaves
10 cups water
4 tablespoons olive oil
1-2 cloves garlic, finely minced
2 tablespoons white wine vinegar
1 teaspoon brown sugar
salt and pepper
1 large artichoke heart (bottled or frozen), chopped
1/2 cup chopped roasted red peppers
1/2 cup chopped green peppers
1/4 cup shredded purple cabbage
1/4 cup canned sweet corn, drained
1/2 tablespoon chopped fresh mint
1/2 tablespoon chopped fresh dill

Place the wheat berries, bay leaf, and water in a large pot. Salt the water generously. Bring to a boil. Then reduce heat to medium. Place a lid on the pot and crack the lid open to let steam escape. Let the wheat berries boil for about 1 1/2 hours or till done. After an hour of cooking, start checking the wheat berries for doneness. Remove from heat when wheat berries are done to your liking. Drain and set aside.

In the same pot, heat olive oil. Add the minced garlic and let it sizzle for about 20 seconds. Turn off heat and let the oil cool a little. Then stir in white wine vinegar, brown sugar, salt and pepper. Add cooked wheat berries to pot and mix well. Then add all other ingredients and mix well. Serve at room temperature. This salad will taste better if left in the fridge overnight.

Sev Puri (Chaat) – Memories of an Indian Summer. My Guest Post for The Kitchn

This is my recent guest article on The Kitchn..

Chaat always brings back memories of carefree childhood weekends spent at my parents’ beach house in India. I’d walk over to the beach in the afternoon when the tide is low enough to pick sea shells. I’d return home with my pail full and stomach empty. A gorgeous bowl of chaat would be waiting for me  – crunchy, sweet, tangy, spicy, filling all at the same time. I’d sit on the verandah eating chaat, listening to the waves crashing near by and watching the kites sail over me.

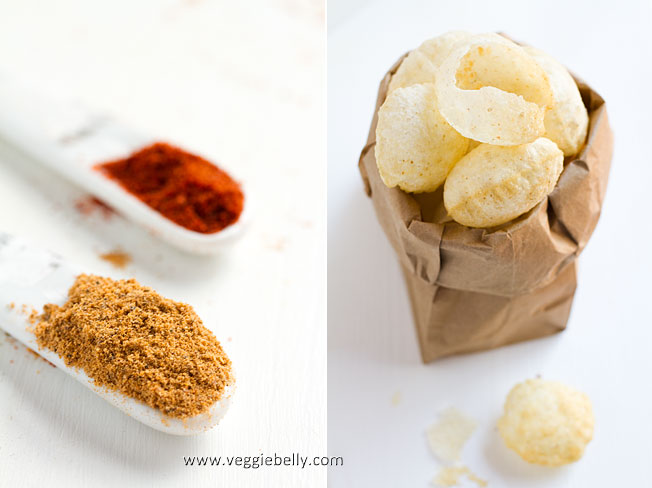
Chaat on weekends still transports me back to those balmy evenings in India. Sev puri is my favorite kind of chaat (‘chaat’ is a general name for this Indian street food; there are several variations). Sev puri are little puffed, fried rounds of dough (puri) stuffed with  crispy noodles (sev), potatoes, onion, yogurt, tamarind chutney and mint chutney. The whole thing is then finished with a sprinkling of amazingly zestful chaat masala – a blend of salt, red chilli, coriander, cinnamon, ginger, anise, pepper, cumin, cardamom, clove, mace, carom and dried mango.

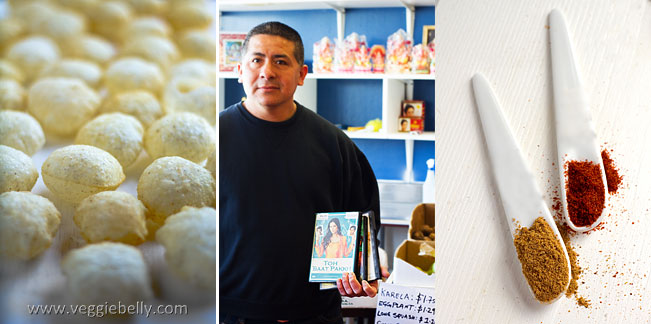
Above: Armando, the man who works at the local Indian store. He is El Salvadorian and his kowledge of Indian ingredients is encyclopedic. He watches all the bollywood movies and gets offended if they dont offer spanish subititles! Gotta love DC/VA!

You will need to make a trip to the Indian store for this recipe. You could attempt to make all the ingredients at home, but that would be time consuming. Why bother when you can buy the same thing at a store!

This is a basic recipe for sev puri; I encourage you to  be creative with it..you are limited only by your imagination. When pomegranates are in season, I like to sprinkle some on top for a colorful, refreshing sweetness. A little chunk of pineapple tucked into the sev puri is divine (toss the pineapple chunks in chaat masala for a delightful sweet-savory flavor).  To make these sev puris vegan, simply leave out the yogurt and use hummus, tahini or cashew butter instead. If you don’t have pani puris, try making this with tortilla chips instead; Scoops! will be perfect for this.

Finally, there is only one way to eat a sev puri – put the whole thing in your mouth! Don’t try to bite into it, just pop the whole thing in your mouth!

Sev Puri (Chaat) Recipe
Serves about 6

1 medium potato, boiled, peeled and diced
½ cup canned chickpeas, drained
3-4 tablespoons finely chopped red onion
40 pani puris* (fried rounds of dough)
½ cup yogurt
½ cup sev* (crispy noodles)
¼ cup date-tamarind chutney*
¼ cup mint chutney*
1 tablespoon Chaat Masala*
1/4 tablespoon red chilli powder or cayenne or paprika
A few sprigs of cilantro

*easily available at any Indian store

Mix together the boiled diced potato, chickpeas, red onion, ¼ teaspoon chaat masala and salt. Set aside. Gently poke a hole on one side of a pani puri. Make it large enough so you can stuff it with the potato mixture. Place some potato mixture inside the pani puri cavity. Top with about ½ tablespoon of yogurt. Sprinkle some sev on top of the yogurt. Then add date-tamarind and mint chutneys. Finish by sprinkling a little chaat masala and chili powder over the top.  Repeat with all pani puris. Serve immediately.

Fresh Pea and Mint Soup


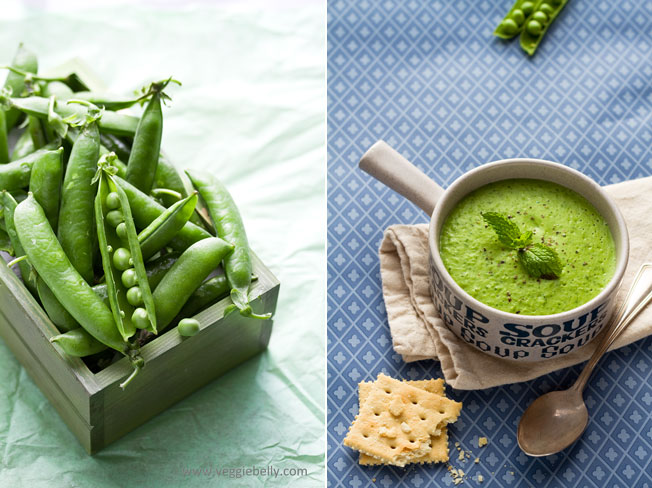
Whenever I buy fresh spring peas in their pods, I always think of what peas and pods signify. Peas in their pods are beautiful things - six or seven tender little peas, all snuggled up safely inside the comfort of their pod. An expectant mother carrying a child, close friends, a couple living together – all peas in a pod, enjoying their togetherness.

My husband, when he is in a romantic mood will calls us  ‘two peas in a pod’. How appropriate. Two of us, living together and going through the journey of life together. Just like peas in a pod.

If you have never tried fresh peas, now is the time. Fresh green peas are in season during the spring. They are really easy to shell and cook. Fresh shelled peas are so tender, you don’t need to cook them more than 4 minutes max. In a pinch, frozen peas will be good substitute.

Fresh Pea and Mint Soup Recipe

serves about 2

1 tablespoon olive oil
1 small onion, chopped
2 cloves garlic, peeled
2 cups fresh, shelled peas (substitute with frozen peas)
1 1/2 cups whole milk (more for thinner soup)
salt
1 cup fresh mint leaves
freshly cracked black pepper

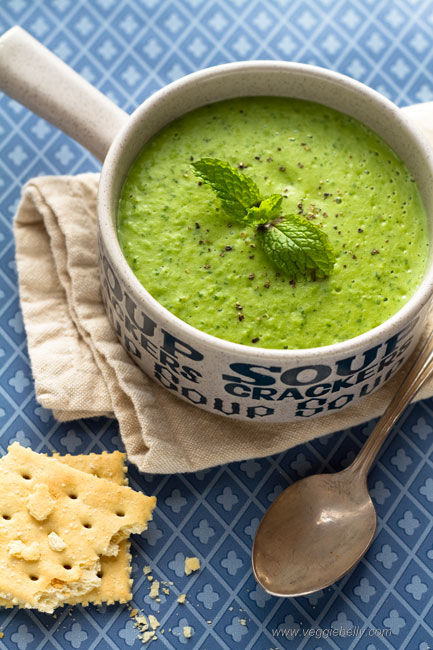
Heat oil in a pan and add onion. Cook on medium heat for about 2 minutes or till the onions are  transluscent. Add the garlic pods and cook 1 more minutes. Add peas and saute for about 2 minutes. Add milk and salt. Simmer for 3-4 minutes or till the peas are cooked. Pour the milk and peas mixture into a blender. Add mint leaves to the blender. Blend soup as chunky or smooth as you like. (Be careful when putting hot liquids in a blender – always vent the blender lid). Serve soup with freshly cracked black pepper.

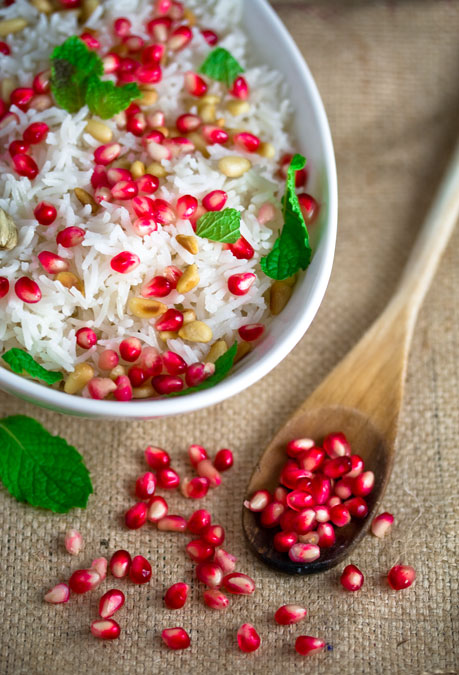
Monica Bhide’s Basmati with Pine Nuts, Pomegranate and Mint


basmati-with-pine-nuts-pomegranates-and-mint3

This picture goes to Jugalbandi’s Click. This month’s theme is heirloom.

How gorgeous does this rice dish look?! This recipe for basmati with pine nuts, pomegranate and mint is from Monica Bhide’s book ‘Modern Spice’.

Check out my guest post about this dish on Monica’s site.

You can buy Monica’s book, ‘Modern Spice’ here:

Please Herbs, Stay Alive for Me.

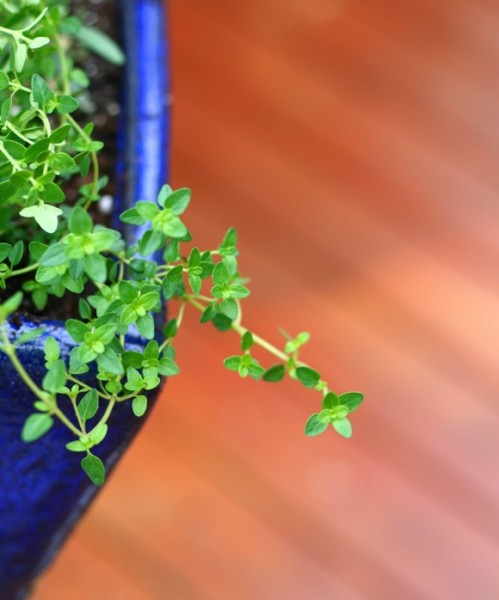
thyme plant in my deck

Is there such a thing as a black thumb? Like, opposite if green thumb? Thats what I am. I just cant keep any plant or green thing alive. I’ve even killed grass. Twice. (Over fertilized and under watered, in case you are wondering).

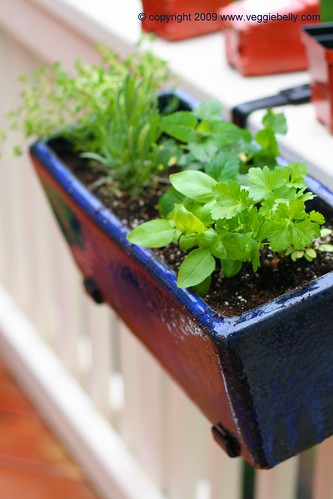
So this year, Ive challenged myself to planting something and nurturing it. So I planted some herbs on the deck. I figured herbs would be a great place to start. The prospect of cooking with freshly harvested herbs from my planter, hopefully, is motivation enough to take care of them.

I’m already dreaming of what I will cook when the herbs are ready to pluck! Iced tea with that incredibly lemony smelling lemon balm….green pea and mint soup….lavender infused frosting on cupcakes…sandwiches with fresh homemade basil pesto…

…please herbs, stay alive for me…puhllleeeeezzzzeeee..

Planting Herbs
This is the end result of the afternoons labor…

Continue reading

Related Posts with Thumbnails