Pumpkin Kootu Recipe

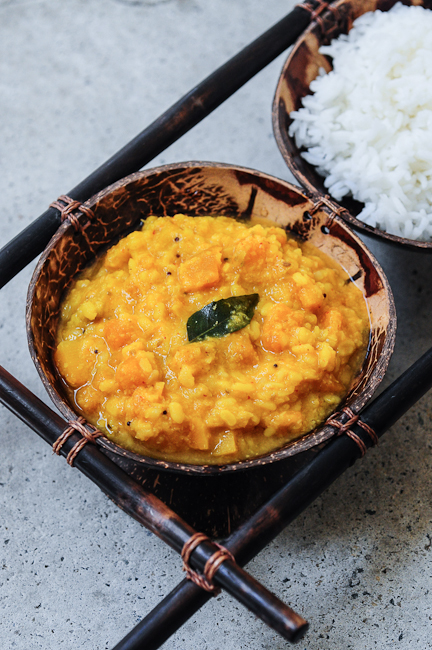
The very talented Nags of Edible Garden blog brings us this easy pumpkin kootu recipe today. A kootu is a side dish of vegetables cooked with lentils. And I cant think of anyone better than Nags to guest post about this traditional South Indian recipe. Her blog is full of everyday, fuss-free Indian recipes. Take it away Nags!

Hello everyone, I am Nags, the writer, cook, and photographer behind Edible Garden. I’ve been blogging for almost 6 years now but haven’t done very many guest posts (this is my 2nd, actually) so please raise a glass with me to Sala’s courage and trust!

It’s been over 7 years since I moved away from home and started cooking to feed myself, but I have only cooked with pumpkin about 2-3 times in this entire period. I can’t quite figure out why this is because pumpkin is a gorgeous vegetable by all means. It’s a lovely orange-yellow, cooks quickly, lends a mild sweetness to the dish, and is generally well-behaved and easy-going. Well, I can only hope I can make up for my rudeness by cooking with it more, so here’s a simple pumpkin kootu recipe to kickstart what I hope is a great relationship between me and the lovely pumpkin.

But before I go into the recipe, I must say what an honour it is to take up a small part of Veggie Belly. I’ve been in awe of Sala’s recipes and pictures since the day I set my eyes on this website. She has a lovely eye for details, props, colours and food photography. She’s also so very generous. I won a cookbook in a contest in Veggie Belly once but Sala sent me this entire package filled with goodies all the way from the US to Singapore.

Pumpkin Kootu Recipe

Serves 4

Ingredients
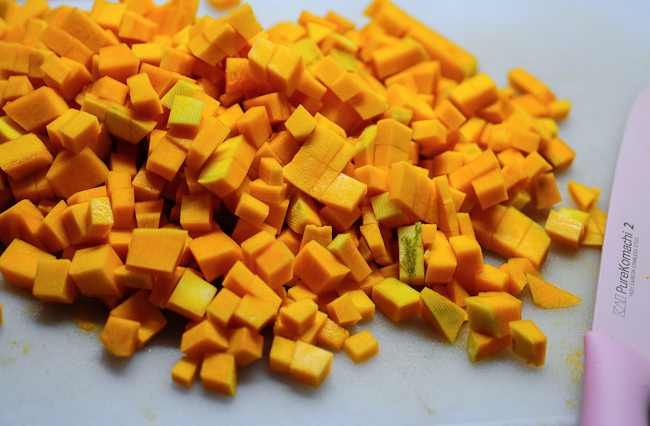
3 cups pumpkin (or kabocha or butternut squash), cut into small cubes.
1 cup yellow moong dal
¼ tsp turmeric powder
Salt
Curry leaves
Grind Together to a Paste
½ cup grated coconut
½ tsp red chilli powder
1 tsp cumin seeds
1 clove of garlic
2 shallots, optional
For Tempering
2 tsp oil
¼ tsp black mustard seeds
¼ tsp hing, optional

Method

  1. Add the pumpkin, dal, turmeric powder, salt and 4 cups water to a sauce pan and cook on low heat, covered, until the dal is soft and the pumpkin is very soft.
  2. Add the ground paste to the dal and stir well. If the mixture is too thick, add a bit more water but not too much. I usually wash the blender jar and add that water in which should be sufficient. Throw in the curry leaves. Cook the kootu for about 3 mins. Remove from heat.
  3. Heat oil for tempering in a skillet. Add the mustard seeds. When they pop, add the hing, if using. Add this to the prepared kootu. Adjust salt if required
  4. Serve with steamed white rice and any dry vegetable curry
  5. A variation of this kootu is to use channa dal instead of moong dal and green chillies instead of red chilli powder. Check out this Chow Chow Kootu, for instance.


Barley Khichdi Recipe

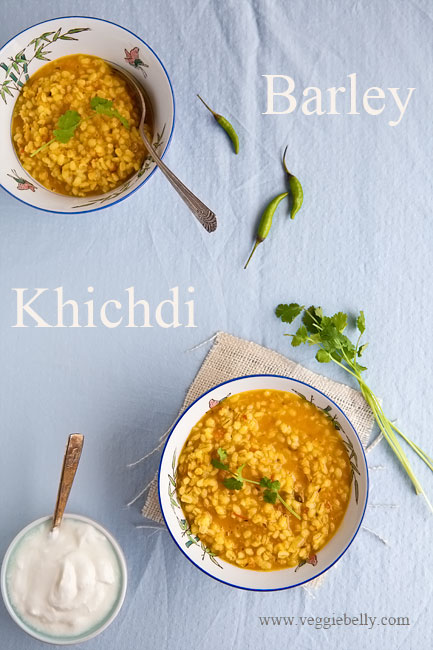
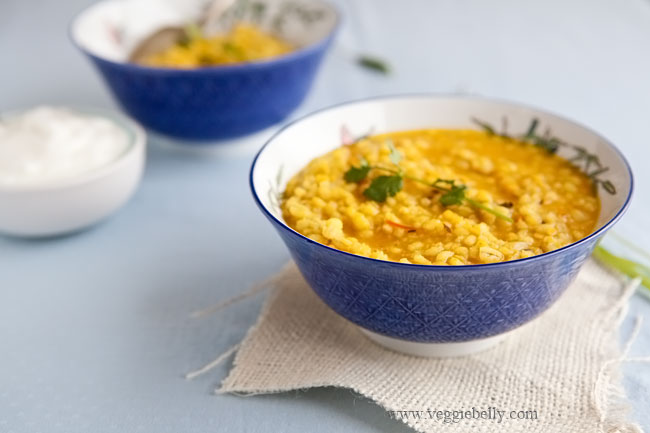
When I want a quick, comforting meal with no fuss, I turn to this barley khichdi. A traditional Indian khichdi is made with rice, moong dal (yellow mung beans) and turmeric and is cooked to a risotto like consistency. I use barley instead of the rice to create a curried Indian barley khichdi. This vegetarian barley khichdi is tasty, easy to make and will please the whole family! Plus, you can easily cut out the ghee and use oil instead to make this khichdi vegan.

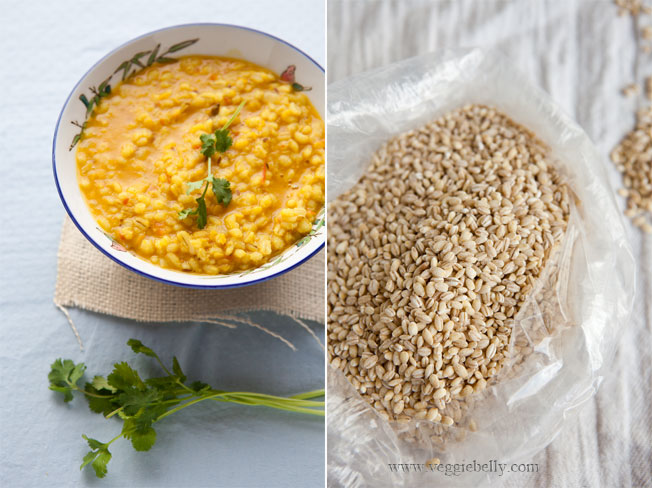
I recommend you use pearl barley in this recipe. Pearl barley cooks quicker than the non-pearled kind.  What’s the difference between pearl barley and hulled un-pearl barley? Hulled barley has its outer husk on, so it takes longer to cook. Pearl barley has its outer husk removed, therefore it cooks quicker. If you use hulled barley for this recipe keep in mind you will need to give it more time and water to cook.

Add a handful of frozen mixed vegetables or a little cubed carrot and some peas if you wish. Also use less dal, according to your preference.  This is a very forgiving recipe. If you have a pressure cooker, feel free to cook this in a pressure cooker.

Barley Khichdi Recipe

serves about 2

Ingredients
1 1/2 tablespoons butter or ghee
¼ teaspoon cumin seeds
1/8 teaspoon asafetida, optional
1 green chili, slit. Optional
½ onion, minced
1 small tomato, chopped finely
¼ teaspoon turmeric powder
½ cup pearled barley
¼ scant cup yellow moong dal. Substitute with masoor dal
A squeeze of lemon, optional
Chopped cilantro for garnish

Method
1. Heat ghee in a medium sauce pan. Add the cumin seeds. When they sizzle, add asafetida and green chili. Stir for 30 seconds.
2. Then add onions. Sautee on medium heat till the onions are soft (don’t let them brown).
3. Add the tomatoes, and cook till they are soft.
4. Add turmeric, barley and moon dal. Stir for a few seconds.
5. Add 3 cups of water and salt.
6. Bring the water to a boil. Then reduce heat to low, put a lid on the pan, and let it simmer till the barley is cooked. I like the barley to have a little bite to it, so I cook it for about 20 minutes.  If you want the barley to be softer, cook it longer. During cooking, if the khichdi dries up, add water as needed, 1/2 cup at a time.
7. Taste the khichdi and adjust salt if needed. Turn off heat, and add a squeeze of lemon, if using. (Taste the khichdi first before adding lemon juice. If the tomatoes are tart enough you may not need the lemon. This is by no means a lemony dish.)

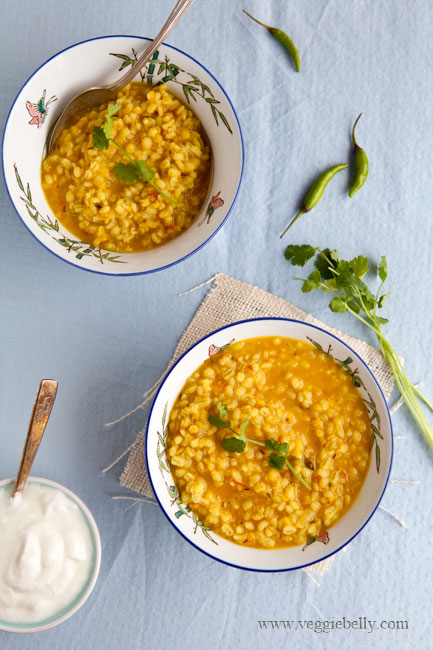
Serve hot with garnished with cilantro and yogurt on the side.

Laila’s Arabic Lentil Soup

Have you entered the Herbivoracious cookbook giveaway yet? You only have 2 days left to win Michael Natkin’s brand new vegetarian cookbook, Herbivoracious! Click here to enter the giveaway!

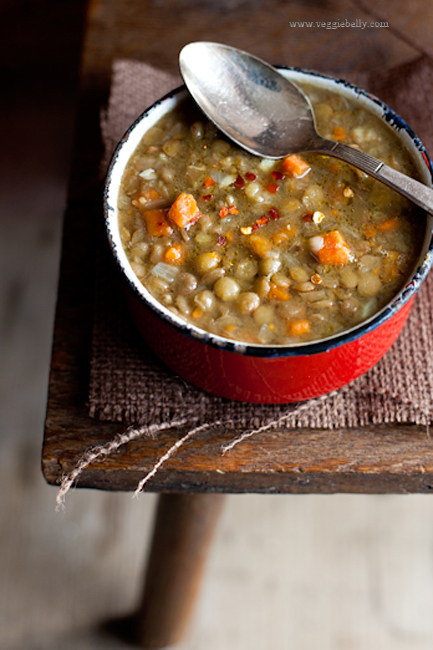
Now on to Laila’s delicious Arabic lentil soup recipe! I was in Bethlehem a few months ago, staying with a Palestinian family. (You can read all about my adventures here!) Laila, my wonderful host taught me how to make this simple, easy Arabic lentil soup. When I first tasted it, I had no idea how easy it is to make. And I was surprised that cumin is the only spice in this soup recipe! And guess what, cumin is all this soup needs. No need for any other funky, fancy flavors. The smokiness of cumin with the earthy lentils work very well together. Laila’s soup is a beautiful example of how simple is sometimes the best.

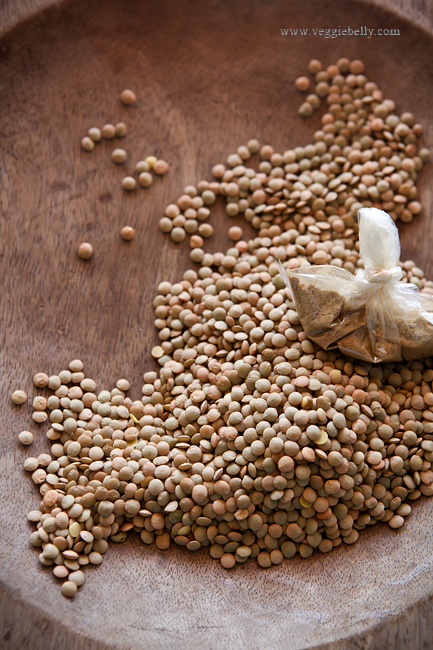
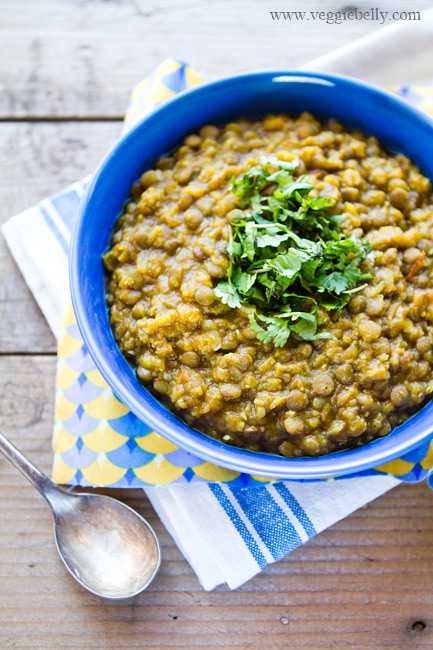
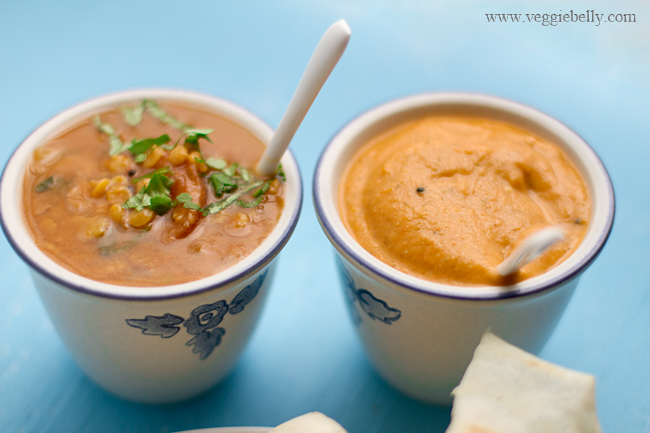
Laila used brown lentils. I used green lentils (pictured above) because I had some left over from making my dal fry mix in a jar for the holidays. You can use either brown or green, but keep in mind that cooking times may vary.

Laila served her soup simple and unadorned. And that’s what I’ve done here too. But if you like, you can garnish your soup with chopped parsley, cilantro, chili flakes or shredded cheese. To make a complete meal out of this soup, serve it with some crusty bread or pita.

Laila’s Arabic Lentil Soup Recipe

serves about 2

Ingredients
1 tablespoon olive oil
1 small onion, peeled and diced finely (1/2 cup when diced)
1 medium carrot, peeled and diced (1/2 cup when diced)
1-2 cloves of garlic, peeled and chopped
½ heaping cup dried green or brown lentils
½ teaspoon ground cumin
Salt to taste

Method
Heat olive oil in a medium heavy bottom sauce pan. Add the diced onions and cook on medium heat till soft and translucent.

Then add carrot and garlic and sauté till garlic is fragrant, about 30 seconds.

Now add the lentils and cumin and stir for 10 seconds.

Pour in 3 cups of water. Bring to a boil. Then reduce heat to simmer, cover the pan, and cook till the lentils are soft. This will take about 30 minutes.

If the soup needs more water while cooking, add more water one cup at a time, letting the soup come to a boil after each addition of water. (I used a total of 5 cups of water). How much water you need, will depend on how thick you like your soup, the lentils you are using and also the type of pot you are using. Just add the extra water one cup at a time till you get the desired consistency. And remember, the soup will thicken up when you mash the lentils.

When the lentils are done, they should be cooked and soft but should still be holding their shape.

At this point, turn off the heat. Using a potato masher, mash some of the lentils. I like to mash a third of the lentils, and leave the rest unmashed. If you want a smoother and thicker consistency, simply mash up more of the lentils.

Serve hot garnished with chopped cilantro or parsley or red chili flakes and some crusty bread or pita on the side.

Dal Fry Mix in a Jar. Homemade Holiday Gift Ideas for Vegetarians

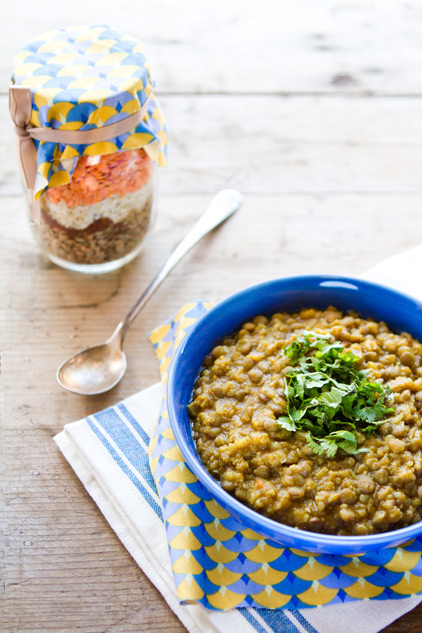
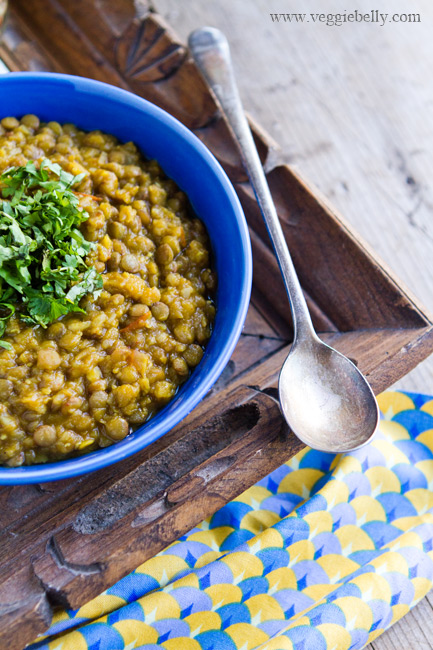
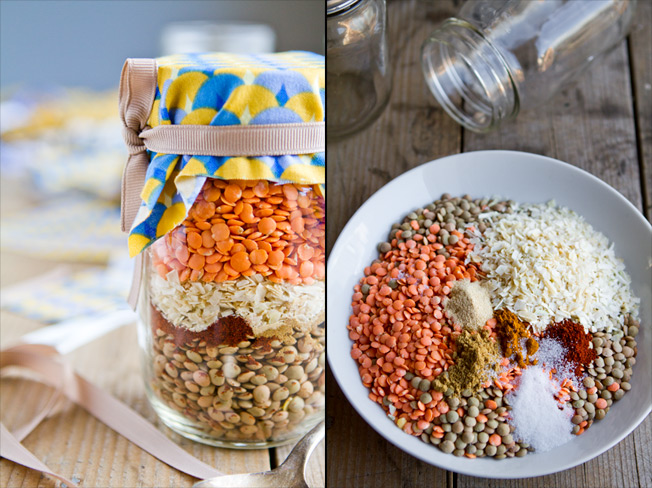
Dal fry is a typical Indian lentil dish (and popular on restaurant menus) made with cumin, turmeric, onion, tomato, garlic and lentils. I’ve simplified the recipe and turned it into a holiday gift mix in a jar. If you have friends and family who are vegetarian or Indian food lovers, they will be delighted to receive this as a Christmas gift! And you will love making this gift – its easy, fun, vegetarian, vegan AND cheap!

This dal fry mix in a jar was my Christmas present for a dear friend S, who is a new mother and is running her own business. You can imagine just how busy she must be! I figured a tasty dal mix in a jar, that she can make with almost no effort at all will be the perfect holiday gift for a busy mom like her.

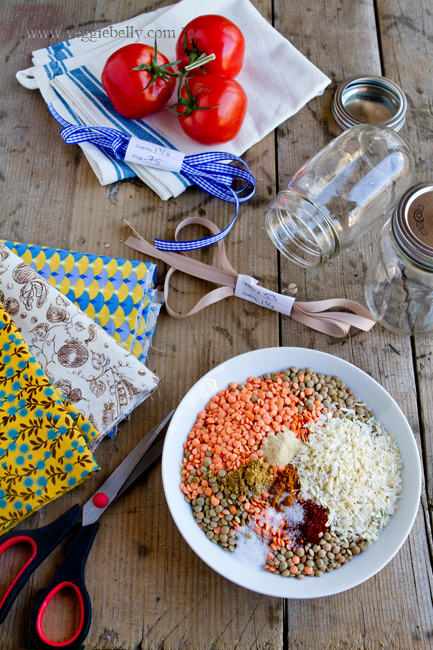
l’ve used a combination of red lentils (masoor dal) and green lentils. Make sure you use the flat round green lentils from the bulk section of the grocery store. Dont use whole Indian green lentils (green moong dal) because it takes longer to cook. You can substitute the green lentils with yellow letils (yellow moong dal).

Caramelized onions is a common flavor base for Indian curries. To emulate some of that flavor, I use dried onion flakes in this recipe. They give the lentils a great, deep, slow cooked taste. You can find dried onion flakes in the spice section of the grocery store or in the bulk section.

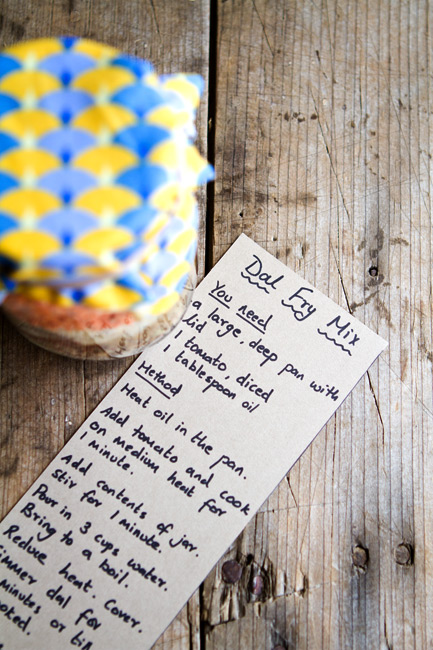
Writing (or printing) out the recipe/instruction card for this mix is your chance to really personalize the gift. I like to make my instruction cards humorous – like adding inside jokes, cartoons etc. The point is to get funny and creative with the instruction cards!

For another homemade holiday gift idea for vegetarians, take a look at my cajun dirty rice mix in a jar.

Dal Fry Mix in a Jar Recipe

makes 1 jar

For the gift jar
One 1 pint jar
a 5″x5″ piece of fabric
a thin rubber band
some ribbon
Cardstock or any thick paper for writing instructions

Ingredients
¾ cup green lentils (not green moong dal)
¾ cup red lentils
4 tablespoons dry onion flakes
1 ¼ teaspoon garlic powder
¼ teaspoon turmeric powder
1/2 teaspoon chili powder
½ teaspoon cumin powder
½ teaspoon salt

Pour the green lentils into the jar first. Then add onion flakes, garlic powder, turmeric, chili powder, cumin, and salt. Then pour in the red lentils.

If there is a gap between the top layer and the lid, crush a kitchen towel and stuff it into the gap. This will prevent the lentils and spices from moving around, and will preserve the pretty layers in the jar.

Seal jar tightly. Cover the lid with the fabric square. Place a rubber band over the fabric to secure it around the neck of the jar. Tie a ribbon in a bow around the neck of the jar, hiding the rubber band.

Write or print out these instructions on a thick piece of paper and attach to gift jar:

“You will need:
A large, deep skillet with a lid
1 medium tomato, chopped
1 tablespoon oil

Heat the oil in the skillet. Add tomatoes, and sauté on medium heat for about a minute. Add the contents of the jar, and stir for 2 minutes.

Pour in 3 cups of water. Bring to a boil. Reduce heat to low and cover the pan. Simmer the dal for about 20 minutes, or till cooked. Add more water while cooking, if needed.

Serve hot with steamed rice.

Serves 4″

Pierce a little hole in the upper corner of the instructions paper, and tie it to the ribbon. Or place the instructions against the jar, and tie it around the jar using ribbon or a rubber band.

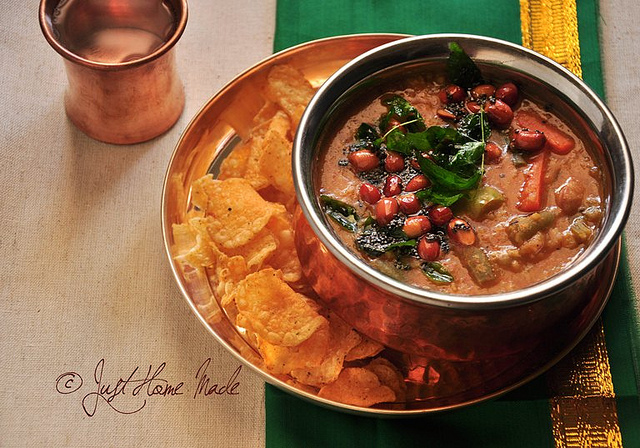
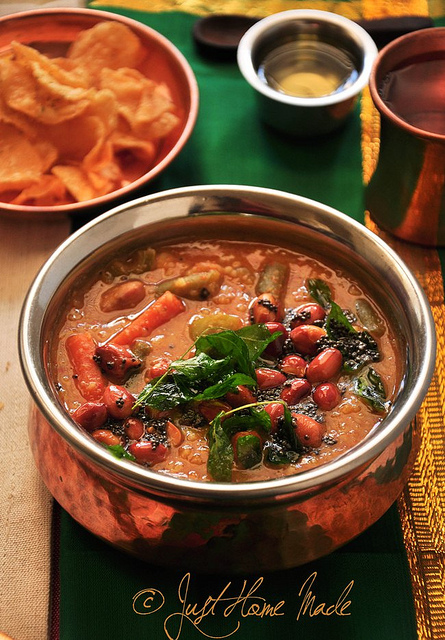
Bisi Bele Bath Recipe

..a guest post by Radhika of Just Home Made

I am driving cross country at the moment, and I’ve just seen Mt. Rushmore in South Dakota! As I trek across America, I am posting a series of essays about what I’m seeing, doing and eating. Read the first one here – A Vegetarian Road Trip Across America.

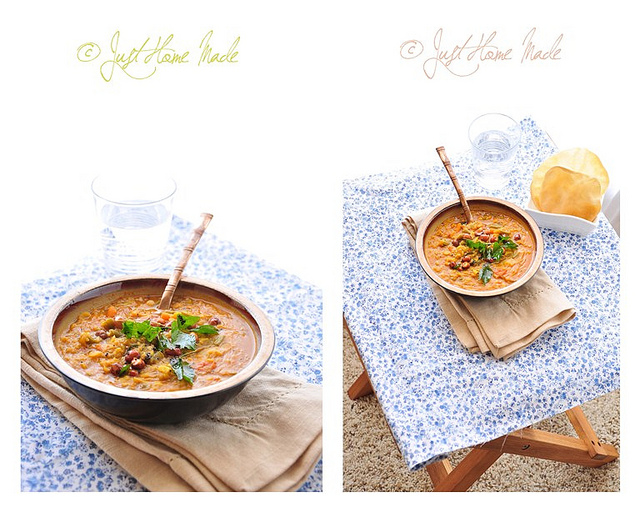
While I’m traveling, I’ve asked my friend Radhika to guest post today. I cant think of anyone more qualified than Radhika to share this Bisi Bele Bath recipe with you (one of my top 10 favorite Indian foods). Radhika is a brilliant cook, and her pictures are stunning. Make sure you check out her moutwatering creations on Just Home Made. Over to Radhika for her prized bisi bele bath recipe and a post full of tips, trick and clever shorcuts..

Guest posting for Sala has been on my mind for a while. When I learned of her cross country road trip and her need for guest posts, I jumped in to email my intentions. When she replied with a ‘Yes”, my joy knew no bounds…

Sala’s blog with perfectly lit beatiful photographs had me at the first look and I was hooked ever since. She has been a virtual guru to me right from my initial days of blogging even without her own knowledge. In fact, truth be told, the very first time I shot my DSLR camera in ‘Manual’ mode (for my Ghee post) was after I read her tutorial post on “How to take food photos with a bright, white, seamless background

I am ecstatic and honored more than that to be guest posting for you, Sala.. In the words of revered saint and composer Sri Purandara Dasa’s ”Kereya neeranu kerege chelli” (kannada) which translates to “Spilling the pond water to the pond”, I dedicate this post to you..

I couldn’t have suggested a better dish for this guest post than Bisi Bele Bath recipe. Until she responded with “I Love Bisi Bele Bath, I’d kill to get the recipe!”, I had no clue she likes it that much. What more do I say than Bisi Bele Bath it is?

Don’t ask me. But if you do, (we) Kannadigas take pride in our Bisi Bele Bath (also spelled bisi bele baath, bisi bele bhath, bisi bele bhaath) recipes which we undoubtedly consider as the queen of one pot meals. As with any authentic recipe, the perfect Bisi Bele Bath is quite elusive to many.

The recipe I am sharing with you here is the answer to my own quest for the perfect Bisi Bele Bath with an intoxicating aroma and a lip smacking taste after a lot of trials and nips and tucks to a number of recipes combined into one. Be prepared to lick your fingers!

Even though the ingredient list seems long, fear not – I promise you, a tiny bit of kitchen slavery will be well worth its value in gold when this trademark signature dish of Karnataka is done..

Did you know?

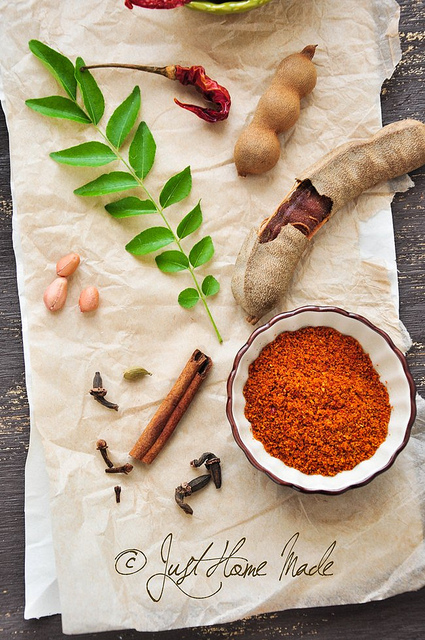
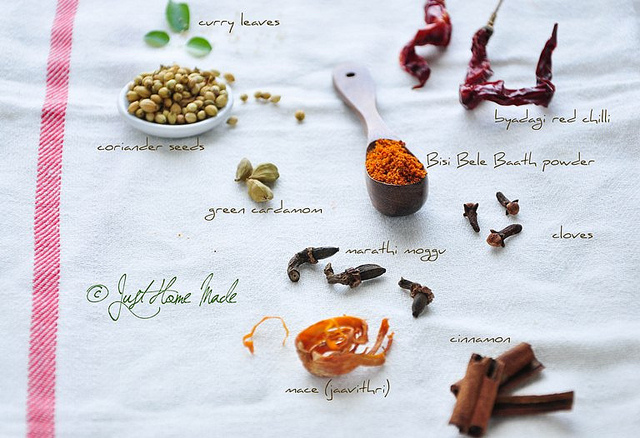
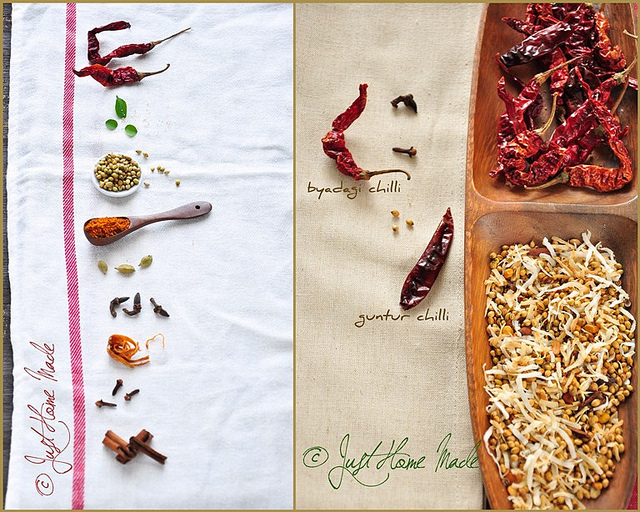
Byadagi Chilli is named after the town Byadagi in Haveri district of North Karnataka. Guntur is named after the city Guntur in Andhra Pradesh. Notice how both these red chillies come from places that have hot climates averaging at least 40° C ? (about 104°F)

Mace and Nutmeg come from the same tree; nutmeg is the seed of the tree whereas mace is the delicate lacey outer orange-red covering of the seed.

 Marathi Moggu (meaning bud in kannada) comes from the buds of silk cotton tree? Wonder why it is named after Marathi though?

What you won’t find in the authentic version

  •  Aromatic/Basmati rice - Like I have said for Pongal, stick to non-sticky short grain rice. Unlike Pulao or Biryani, we do not want rice to take center stage, but rather blend in with the lentils.
  • Veggies like brinjal, okra or radish – Feel free to add any veggie of your choice. If in the name of Bisi Bele Baath, you get to incorporate different veggies into your food I’d gladly say yes. But, when you make it for a guest or a friend, stick to the list to preserve authenticity. 
  • Cumin seeds in the seasoning
  • Cilantro
  • Onion
  • Ginger/garlic

Notes:

  • Byadagi red chillies aren’t available in all the Indian grocery stores. Substitute for Byadagi – any high on color and mild in heat variety will do. For Guntur- any high on heat (usually low on color) variety will do.
  • For larger quantities, remember lentil : rice - 1.5 : 1 and rice to water ratio of 1: 4 or 5
  • Mace (Javithri) much like cloves is best appreciated in small quantities. Use it more and it can overpower the aroma and taste of the spice mix
  • Some like to add potatoes. But, I’d rather not as potatoes tend to absorb all the spices, neutralize them and impart their raw earthy taste.
  • If you want to skip making the spice mix from scratch or don’t have the ingredients, store-bought MTR Bisi Bele Baath powder is good enough for instant gratification.
  • Marathi Moggu (Kapok Buds) are not available even in Indian grocery stores where I live, so I brought a small stash on my India visit. However, I recently found that they are sold online.
  • Before peeling Chayote squash, slice of the ends; rub the cut open end with the chopped slice until the white froth ceases. This takes away the bitterness, if any. 
  • Store leftover Bisi Bele Baath mix in an airtight container either in the refrigerator or in the freezer to keep the aroma fresh.

Bisi Bele Bath Recipe

served about 4

Printable Recipe

Ingredients
1/2 cup Rice (sona masoori or any short grain rice)
3/4 cup Pigeon Peas (Toor Dal)
1/4 tsp turmeric
1/2 large Chayote Squash or Kohlrabi (Knol kohl) peeled, small diced
1 large Carrot, peeled, cut into 2″ long, 1 cm thick pieces
handful Green Beans, ends removed and broken into 1″ pieces
1/2 cup Double beans or Butter beans or green peas or a mix
1/2 large Green Bell Pepper (Capsicum), seeds removed and small diced
1 small tomato, diced
lemon sized seedless tamarind (adjust as per taste)
1-2 tsp Rasam powder* home made or store-bought
3 tbsp Bisi Bele Bath powder (recipe follows)
2 tbsp grated dry coconut (copra) or desiccated coconut
4 tsp peanut oil
salt

Ingredients for seasoning
2 tbsp Ghee or peanut oil or a mix of both
1/2 tsp black mustard seeds
1/8 tsp asafoetida or hing
1/4 cup peanuts or cashews
4 curry leaf stalks

Ingredients for the Bisi Bele Bath Powder
12 Dried red chillies – Byadagi
4 Dried red chillies – Guntur
2 tbsp Coriander seeds (dhania)
1-1/2 tsp bengal gram (chana dal)
1 tsp black gram (urad dal)
3 kapok buds (marathi moggu)
2 cloves (lavang)
1″ piece cinnamon (chakke)
2 green cardamom (elakki)
1/2 ” piece – mace / javitri / jai patre
1/4 tsp fenugreek seeds
1/4 tsp white poppy seeds (gasa gase or khus khus)
2 tbsp grated dry coconut (copra) /desiccated coconut

*optional: If you dont want to use rasam powder as listed above, dry roast these as well:
1/2 tsp cumin seeds
1/4 tsp mustard seeds
1/4 tsp whole black pepper
3-4 curry leaves

Method
Wash and soak tamarind in warm water for 10-15 mins. Skip this if using tamarind concentrate.

Wash rice well until water runs clear, drain and let soak for 10-15 mins. Soaking ensures rice to be cooked soft. When soaked, wash lentils until water runs clear. Cook lentils with turmeric and double the amount of water and rice with 2.5 times water in the pressure cooker for 3 whistles. Put lentils in lowest container. Alternately, cook lentils and rice on stove top separately until well cooked.

Meanwhile cook cut vegetables covered in a medium pot with just enough water. Add salt mid way and switch off when the vegetables are almost cooked but hold their shape well.

Squish soaked tamarind (if using) to a pulp. Discard leftover seeds and fiber.

While veggies, rice and lentil cook, in a kadai / thick bottomed skillet over medium heat, dry roast all the ingredients listed for the Bisi Bele Baath spice mix except fenugreek, poppy seeds and dry coconut, until fragrant and lentils turn golden brown. Remove onto a plate. Reduce the heat to low and dry roast fenugreek seeds and poppy seeds until fenugreek seeds turn golden brown. This will happen fast, so pay attention. Pour onto the plate with the other roasted ingredients. Switch off and dry roast dry coconut in the retained heat of the skillet until golden brown. If you are not using Rasam powder as listed above, optionally dry roast mustard, cumin and black pepper until mustard and cumin crackle and curry leaves crisp up. Remove onto the same plate and let cool. When roasted ingredients are cooled, grind them to a powder in a coffee grinder or a mixer and set aside. Do not open the lid, to keep the fresh aroma of the ground spices intact.

When cooker has cooled, whisk through the cooked lentils to mash well.

Heat oil in a heavy bottom pot and sauté diced green bell pepper. Add salt, diced tomato, stir and cook covered until bell pepper is cooked. Add the cooked vegetables along with the water, mashed lentils, rasam powder, salt, tamarind pulp and bring to a boil. Add rice to this and keep stirring to make sure it doesn’t burn at the bottom. Add more warm water to adjust the consistency if required.

Now add the freshly ground Bisi Bele Bath mix, stir well to break any lumps and simmer for 5-10 minutes. Check for taste and adjust tamarind, salt and spice mix. Switch off, sprinkle dry coconut on top and keep aside. Store the remaining Bisi Bele Bath mix in an airtight container.

For the tempering (seasoning), heat ghee/oil in a small kadai or saucepan over high heat. When the oil is hot enough, add mustard seeds. When they splutter, reduce heat to medium, add peanuts and stir until they crackle and turn a light brown. Now add asafoetida (hing) and curry leaves and sauté until curry leaves are crumbly crisp. Pour the tempering over on the piping hot Bisi Bele Bath, cover immediately to preserve the aroma and keep aside.

Serve hot drizzled with ghee and potato chips or Khara boondi on the side. Bisi Bele Bath tastes even better after several hours of making, which makes it a good candidate for a make-ahead meal.

Bisi Bele Baath shortcut method

Heat oil/ghee in the pressure cooker over medium-high heat and follow seasoning steps. Strain the peanuts and curry leaves and keep aside. To the seasoning, add diced bell pepper and turmeric and sauté for a bit. Add the remaining veggies and sauté, add diced tomato, salt, washed lentils, washed rice and stir well until rice turns opaque. Add tamarind pulp, rasam mix, Bisi Bele Baath mix, 5 cups of water and give it a good stir. Shut the cooker closed and cook for 2 whistles. When cooker cools, serve hot Bisi Bele baath with the fried peanuts and curry leaves. The only downside to this is some of the aroma is lost in the pressure cooking.

Red Moong and Butternut Squash Eriserry Recipe – a Guest Post by Rose of Magpies Recipes

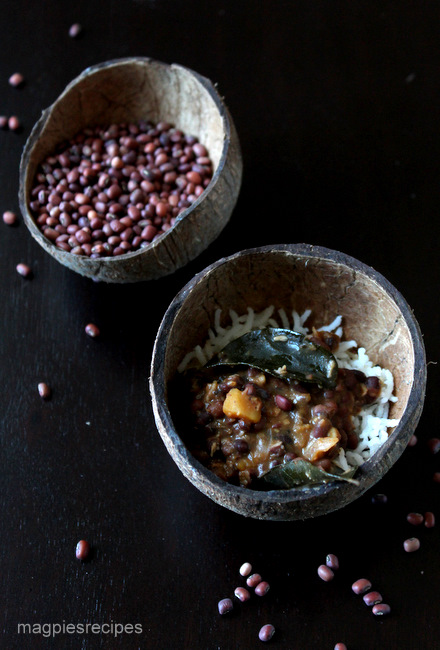
Greetings from the windy city! I am on a cross country road trip right now (posts and pictures coming soon!) and have stopped in Chicago for a day. I have enlisted some of my favorite bloggers to bring you their recipes, while I’m driving 3,000 miles cross country! The first post in my guest post series comes from Rose of Magpies Recipes. Rose is from the state of Kerala, and her blog is full of Kerala recipes cooked with love. I am a huge fan of malayali cooking, and this red moong and butternut squash eriserry (a curry with coconut) is one of my favorites. Take it away Rose!


I am a huge fan of Sala’s gorgeous photographs and wonderful writing as much as I am her warm wonderful personality. When I heard that she was going on a cross country road trip and was wanting guest posts for her awesome blog Veggie Belly,  I sent off a mail to her saying I would love to guest post for her lovely blog, although I have only a few days of packing left to do to head off to India myself! Yes am so excited and just cannot wait to be  home. Am especially longing to introduce my little monkey to my grandmother who is just waiting to meet her first great-grand son!

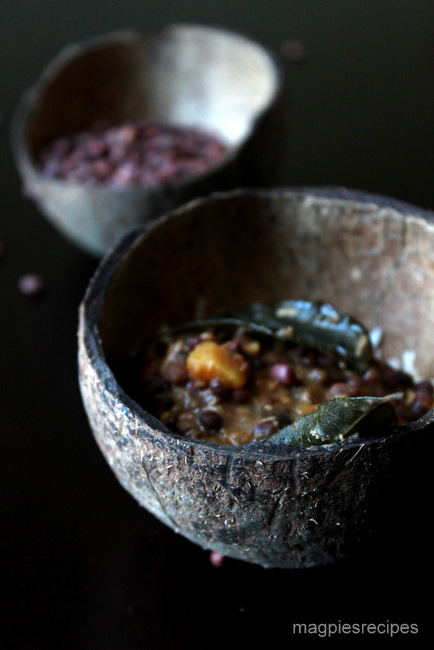
I was thrilled when Sala very kindly said she would love if I did. Thank you Sala! I hope you are enjoying your trip. Since Sala loves Kerala food, I am sharing one of my favourite everyday Kerala dishes, Red Moong and Butternut Squash in Coconut curry (Van Payar Mathanga Eriserry). It is a simple yet comforting and delicious. And perfect for the transition to the fall season, although here in California we still have a few weeks of intense summer left!

While I come from a Syrian Christian family of big meat eaters I also love my veggies and lentils and am married to a lentil lover as well. T can go for weeks on just cherupayar or dal and for everyday eating we are most happy with such simple fare.

Eriserry is a typical Kerala lentil dish and is often part of the Onam Sadhya or harvest festival that happens in the month of September. In Kerala it is usually made with a variety of pumpkin available there, although here I make it with squash or even sweet potatoes. Traditionally fresh coconut is ground into a paste but I use the convenient frozen shredded coconut that is easily available in most Indian grocery stores here. Of course there is a difference in taste but this makes it a very easy dish to make.

Red Moong and Butternut Squash Eriserry Recipe (Van Payar Mathanga Eriserry)

serves 4-6

Ingredients
1 cup dry red moong beans or cow peas  (van payar)
2 cups butternut quash peeled and chopped (you can also use sweet potatoes. But mathanga or Indian pumpkin is traditional)
1-2 tablespoons coconut oil or canola oil
1/2 teaspoon mustard seeds
1/2 teaspoon cumin seeds
1/4 teaspoon turmeric powder
1 teaspoon dried chilli flakes or 3/4 tsp chilli powder-3/4
4-5 curry leaves
1 medium onion, chopped
2-4 cloves garlic, sliced thin (optional)
1 cup coconut Milk
1/4 cup shredded coconut. Do not substitute desiccated coconut 
Salt to taste

Method
Wash the red moong beans or cow peas and leave to soak in water while you prepare the rest of the ingredients. You can also soak them overnight so that they cook faster.

Pressure cook the beans with 2.5 cups of water and salt until they start to become soft ( about 1 whistle and 7 mins on simmer). Once the pressure has released, open the pressure cooker and add the squash and cook for about 2 more whistles until the beans are soft and the squash is fork tender.

If you don’t have a pressure cooker, you can just cook beans and squash in a deep pot instead, but this will take longer.

Meanwhile in a seperate pan or skillet heat the oil and add the mustard seeds and cumin seeds and let them splutter
Now add the turmeric powder, chilli flakes and curry leaves and the chopped onion and garlic if using and stir occasionally until the onions are translucent and starting to turn brown.

Add the shredded coconut and saute until the coconut turns lightly golden.

Add this to the cooked beans and stir well to combine. Heat and let it come to a boil for about 5 mins. Reduce the heat to low and add the coconut milk and let it simmer for about 5 mins. Taste to check the salt and add more if required. Do not let it come to a boil after adding the coconut milk as the coconut milk will curdle.

Serve hot with rice, fried pappadam and pickle. For extra points, serve some sweet payasam for dessert!

Methi Dal or Indian Lentil Soup with Fenugreek – A guest post on Herbivoracious

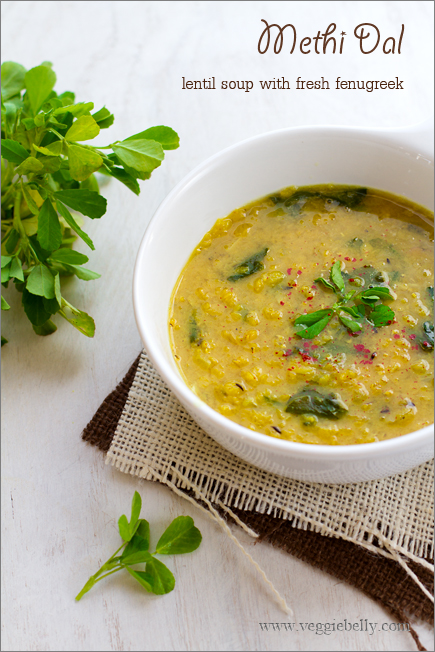
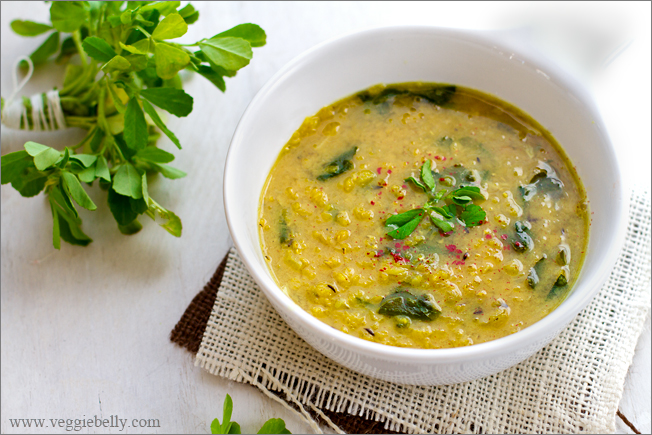
My recipe for this lovely, healthy, homely methi dal comes to you in the form of a guest post on Michael Natkin’s blog, Herbivoracious. I was so honored when Micheal asked me to guest post for him! I’m a huge fan of Herbivoracious, and have been following his amazing vegetarian recipes and techniques for years. I cant wait for Michael’s first book to come out!

Head on over to Herboviracious and read my guest post, a Methi Dal (Indian Lentil Soup with Fenugreek) recipe.

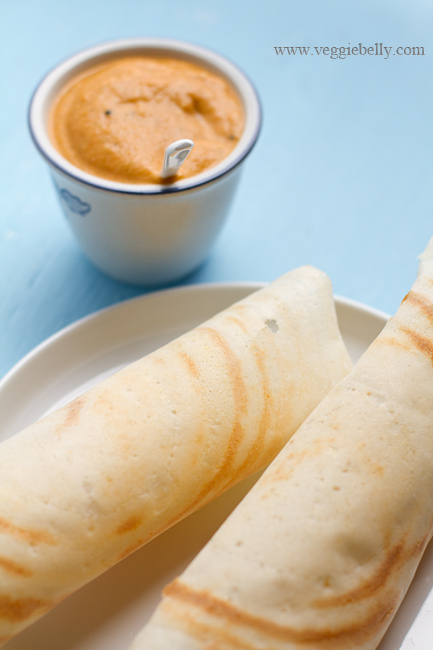
The Perfect Dosa Recipe (Rice and Lentil Crepes)


Perfecting my dosa recipe and method hasn’t been easy. It took a lot of experimentation, but finally I have the best dosa batter recipe and method for you. Read on to learn hot to make the perfect dosa-idli batter recipe, a dosa grinder giveaway, and your questions about dosa and idli batter answered by the experts!
Dosa, Idli Dos and Don’ts

Do use a hot griddle for dosas
Do use your hands to mix the ground batter
Do use whole urad dal (urad gota)
Do use a wet grinder or other similar heavy duty grinder/blender for the batter
Do place the batter in 80-90 degrees F for fermentation
Do experiment with various types of rice and urad dal to find what suits you best
Don’t pour dosas using cold batter
Don’t make dosas on an unseasoned pan (see recipe below for the onion trick)
Don’t use poor quality rice and dal
Don’t use an air tight lid when batter is fermenting
 

Your Dosa and Idli Batter Questions Answered by the Experts

Ive talked to several people about the art and science that is dosa-idli making.  For this post, we have two of the most knowledgeable people on this topic to answer your idli, dosa questions.

Chef KN Vinod, is an award winning restaurateur who runs three of Washington DC’s favorite Indian restaurants Indique, Indique Heights and Bombay Bistro. At his restaurants, Chef Vinod regularly hosts celebrities and politicians including (KR Narayan and Hillary Clinton!). Chef Vinod blogs at http://chefvinod.typepad.com/. You can also find him on twitter and facebook. For today’s Q&A, Chef Vinod has elicited the help of his friend, and food scientist Dr. Danny Chawan.

Ms. Andal Balu is the owner of Atlanta based Inno Concepts, a company which sells kitchen appliance for Indian cooking.  Mrs Balu is a successful business woman, gourmand, and America’s expert on dosa/idli making. Inno Concepts is the generous sponsor of today’s grinder giveaway.

My idli and dosa batter doesn’t fermentation properly. I let the batter sit in the oven with the light on overnight and it is completely unchanged even 10 hours later. Ive tried everything. Help!

 Andal Balu: Use the soaking water to grind the rice and dal for proper fermentation. You have to mix the batter with your hand. If you mix it with ladle, it may not ferment right (body heat from your hands helps kickstart fermentation). Also cover the batter with a lid that fits loosely - do not use an airtight lid.

 Chef Vinod: Fermentation is always a problem in colder places. Our modern living with air filters etc. also inhibits the capture of wild yeast from the air. Sometimes indoor air, particularly in winter with all the doors and windows shut will be low in air borne yeast cells. When all else fails, I would recommend using some yeast. Use half teaspoon in half cup water and a teaspoon of sugar to kick start yeast growth. Add to a gallon of batter.

 Sala’s note: If you’ve tried everything, you might want to change your brand of rice and dal and see if that does the trick. Poor quality ingredients = poor quality fermentation.
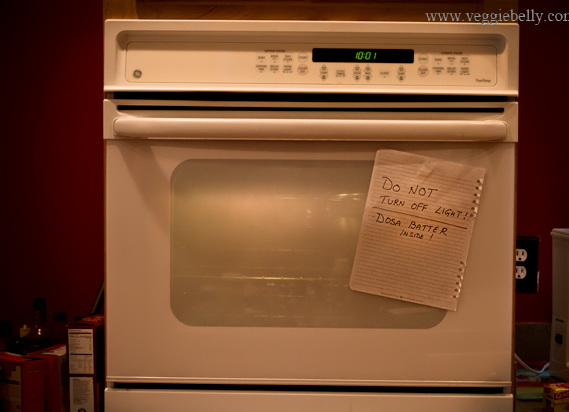
In cold climates, place batter in an oven with the light on for warmth. Leave a note so no one turns off the oven!

What proportion of rice and ural dal do you personally use?

Andal Balu: I use the same proportion for idlis and dosas. 5 cups parboiled (idli) rice, and 1 cup whole urad dal (gotta). I make idlis with this batter the first day, dosa on the second, and uthappams on the third day.  

Chef Vinod: At the restaurant we use 4 cups long grain rice, 1 cup parboiled (idli) rice, 1 cup urad dal, and a little methi seeds

Sala’s note: Everyones recipe will be different because quality of rice and dal used, quantity of batter made, and temperature all affect the ratio. Use these proportions as a guideline and then experiment.

Should I grind the rice and dal separately or together?

Andal Balu: Separately. Grinding dal separately will make it fluffy, resulting in excellent fermentation. It will also volumize the batter when fermenting which is important for fluffy, soft idlis.

What consistency and texture should my ground dosa and idli batter be?

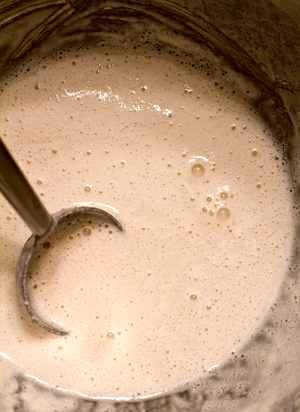
Andal Balu: Grind dal till it is very soft and foamy. Also grind the rice till smooth. Add enough water to the batter so that it is thick, but when you scoop it in your hands, the batter falls through your fingers. This is what I do for both idli and dosa.
Does is matter if I use tap water or filter water for soaking and grinding? 

Chef Vinod: If your tap water is highly chlorinated, it could inhibit fermentation. In this case, use filtered water.

Why do we use fenugreek or methi seeds in dosa-idli batter making?

Chef Vinod: Methi seeds contain compounds high in beta-glucans.  They help hold carbon dioxide, which makes idlis fluffy and soft. Methi seeds also give viscosity to the batter.

If I rinse the dal, will it take away the necessary properties to ferment?  

Chef Vinod: Washing is done to remove any dust, and impurities from the dal and rice. Althought some old time cooks soak the dal and rice without rinsing and wash just before grinding.

How much salt should I add to my dosa and idli batter?

Andal Balu: About 1/2 teaspoon for one cup of dry ingredients (rice + dal) plus more according to taste. Adding enough salt is important for proper fermentation.

How can I get good textured idlis at high altitude? What are the adjustments for altitude?

Andal Balu: The rice needs to be ground finer so it can cook faster at higher altitudes. If the rice is coarse, it will take longer to cook and will feel gritty in the mouth. Make sure a warm temperature is maintained when batter is fermenting.

Chef Vinod: I turned to Dr. Chawan for this. He says changing the proportion of dal and rice for higher altitudes isnt necessary. Fermentation is done by yeast, and yeast grows in high altitudes as well, and produces carbon dioxide which is the key component of making fluffy, soft idlis. Pay attention to the fermentation temperature; make sure your batter is in a warm place. A little glucose or corn syrup will also make your batter rise better.

My dosas always turn out dry and brittle, what am I doing wrong?

Andal Balu: Check the consistency of the batter – is it too thick? Check the temperature of the batter – make sure it is at room temperature, and not straight out of the fridge. Make sure that the pan is hot enough when you pour the batter. Check it by splashing couple of droplets of water on the pan and it should sizzle.

Chef Vinod: Two scientific reasons. 1. Not enough dal in your batter. Protein in dal is responsible for the softness. Try increasing your dal proportion. 2. Amylopectin in rice. According to Dr. Chawan, there are two kinds of starches present in rice and grains – Amylopectin and Amylose. If the rice is low in Amylopectin and high in Amylose it can cause the dosa to be dry and brittle. Sala’s note: Try experimenting with different brands of rice.

Ok, but there is no way I can determine the chemical composition of a bag of rice at the store. Is there a quick fix for dry and brittle dosas?

Chef Vinod:  As a quick fix, if you have some tapioca flour handy, Dr. Chawan recommends trying to incorporate some into the batter as it is very high in Amylopectin. I have not personally  tried it.
My idlis are pale yellow. How do I get white idlis?

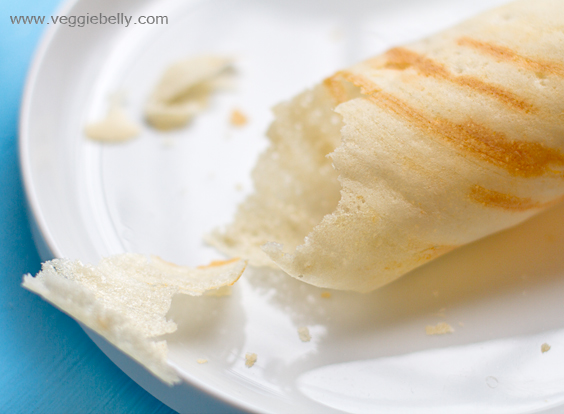
Andal Balu: If the ground batter does not ferment properly, the idlis will be yellowish (see the question and answer on fermentation). Also make sure the consistency of the batter is right – once the urad and rice batters are mixed, take the batter in your hand, it must fall freely back into the vessel.

Chef Vinod: If your batch of urad dal has been contaminated with immature urad beans or partially germinated beans, this will produce some enzymes which will cause idlis to become yellowish or pinkish. Sala’s note: Try a different brand of dal.

I would love some tips on how to make paper thin, crispy dosas

Andal Balu: Grind the rice fine. Don’t use extremely thick batter. Use an iron skillet for best results. Bring refigerated batter to room temperature before making dosas. You can take it out of the fridge ahead of time. Or you can heat some water in the microwave and add to the thick batter to make it thin and to bring it to the room temperature. Between dosas, grease the tawa or skillet lightly with oil and then pour the batter. Add extra oil after the batter is poured on the skillet.

Sala’s note: I add chana dal (soak 3 tablespoons of channa dal with every cup of urad) for super crispy, golden, restaurant style dosas.

How do you get the nice golden color you seen in restaurant dosas?

Chef Vinod: Add a little besan (gram flour) in very less quantities that you cannot make out that besan has been added. OR, add a little sooji (cream of wheat) to make the dosa really golden and crisp. This again is done in very less quantities that you cannot make out.

Andal Balu: You will get nice golden brown dosas if you bring the batter to room temperature. If you use the cold batter, the dosas will stay white.

Sala’s note: I add channa dal (soak 3 tablespoon for every cup of urad dal) for golden colored dosas.
Why are my idlis hard and rubbery? How do I make soft and fluffy idlis?

Andal Balu: Keep four thing in mind for soft, fluffy idlis.
1. proper fermentation (see earlier questions)
2.proper rice:dal proportion
3.don’t overcook idlis, this will make them hard. Steam idlis for about 12 minutes if using a conventional idli steamer, and 15 minutes for an electric one.
4.never pressure cook idlis

What is the proper way to eat a dosa, what are the accompaniments, what do you dip it with? Is there a dosa etiquette?

Andal Balu: There is no dosa etiquette. Enjoy it however you want. Side dishes recommended – idli chilly powder, coconut chutney, tomato chutney, coriander or cilantro chutney, yogurt, Chinese garlic pickle, potato masala, sambar…possibilities are endless! 

Chef Vinod: Dosa is made and served differently from region to region in India – so I would  not  say that a particular way is right or wrong. Most places in south India serve dosas with sambar and coconut chutney.

Sala’s note: Serve yourself a dosa on your plate. Pour sambar into cups, if they are available. Serve chutney, dosa or idli podi (also called gun powder) and potato masala on the plate. Tear off a piece of dosa and dip it into any combination of the sambar, chutney, podi and or potato. Lick your fingers, and enjoy :)


The Perfect Dosa Recipe

Serves about 8

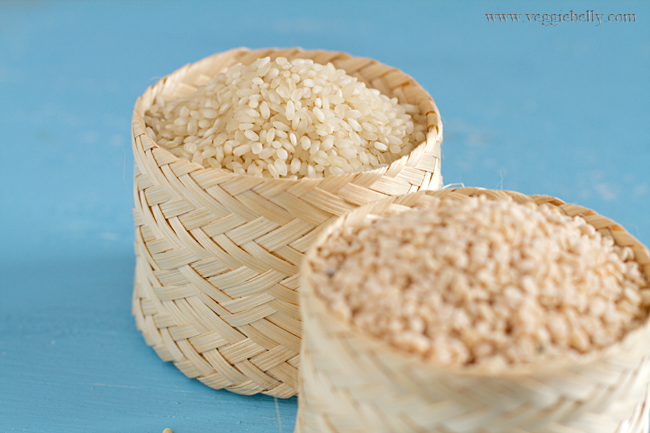
1 cup sona masuri rice (or similar medium grained rice)
1 cup idli rice (parboiled rice)
½ cup whole urad dal (skinned black gram)
½ teaspoon methi seeds (fenugreek seeds)
Salt 1 teaspoon

Special equipemt: a wet grinder. This is a heavy duty grinder that is perfect for dosa and idli batter. You could use a blender instead, but the results wont be the same.

Place the rice in a large bowl. Place the dal and fenugreek seeds in another large bowl. Wash the rice with room temperature water. Drain out the water, and fill the bowl with more water, so that the water is about 2 inches above the rice.

Do the same with the dal and fenugreek – wash, rinse, and fill with water. Let rice and dal soak for about 6 hours.

The dal should now be swollen, and the rice will be easy to break with your fingers.

Pour about 2 tablespoons of the dal soaking liquid into a wet grinder. Turn the grinder on. Then, using your hands, scoop the soaked dal, allowing excess water to drain back into the bowl. Add dal to the grinder, hand fulls at a time. Grind till the dal is fluffy and silky smooth – about 15 minutes (grinding time will vary depending on the grinder and quantity of dal). You should have fluffy clouds of ground dal – think liquid marshmallows.

Sprinkle a little soaking water into the grinder as and when needed, to move the batter along. Turn off grinder, and scoop the ground dal using your hands and put it into a large (4 quart) bowl.

Now grind the rice (no need to wash the grinder). Add 1 cup of the rice soaking liquid into the grinder and turn it on. Add the rice to the grinder. The rice should be ground to a smooth, but ever so slightly gritty batter – about 20 minutes (will vary depending on the grinder and rice). Sprinkle water in the grinder as and when needed.

Using your hands, scoop the rice batter into the bowl with the dal. Add salt, and stir gently using your hands. You should now have approximately 2 quarts of batter.

Cover the bowl loosely, either with a large tea towel, or a lid. The lid should not be air tight.

If you live in a warm climate leave the batter over night in a warm place (about 8 hours) to ferment. Ideal dosa idli batter fermentation temperature is around 90f or 32c.

If you live in a cold climate, turn on the pilot light of your oven. (do not turn on your oven!). Place the batter bowl on the lowest rack, farthest away from the light. The light will give the batter enough warmth to ferment. Leave the bowl in the oven for about 10 hours for dosa batter to ferment. Sometimes, the batter may take up to 18 hours to ferment in colder climates.

The fermented batter should be frothy, and almost doubled in volume. For this recipe, you should land up with at least 3 quarts of fermented batter.

If the fermented batter is too thick, add a little water. For dosas, the batter must be of pouring consistency, but not runny.

Heat a 9 inch nonstick skillet on high heat. Sprinkle a few drops of water on the skillet. The water should sizzle and evaporate away on the count of 4. This means the pan is hot enough to make dosas.
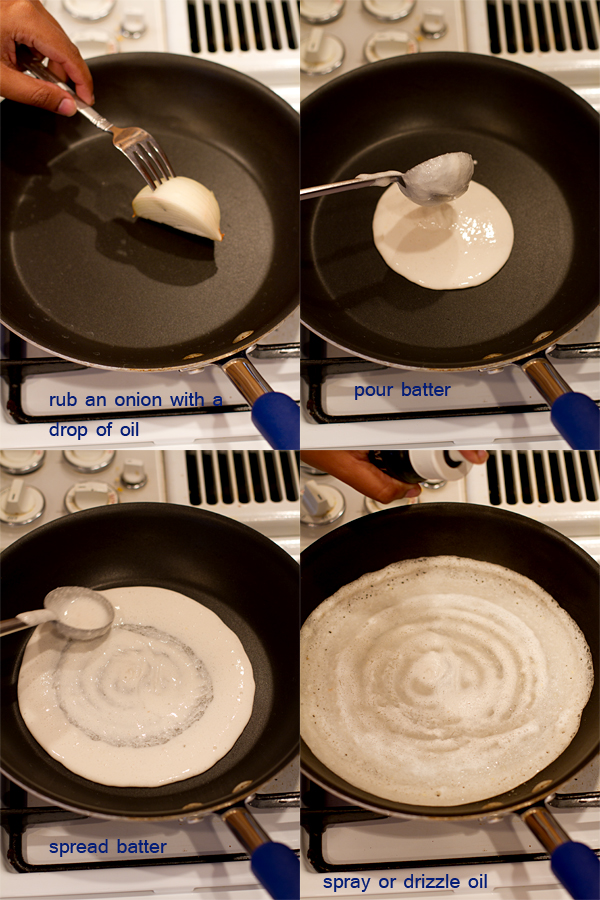
Cut a small wedge from an onion. Stick a fork into the onion (See photos above). Add a drop of vegetable oil to the hot pan, and spread the oil around, using the onion. (Just a drop of oil will do for a non-stick pan.)

Now pour a ladle (1/4 cup) of batter onto the hot pan. Using very little pressure, swirl the ladle in concentric circles, to spread out the batter (see photos).

When the batter is fully spread, spray or drizzle a few drops of vegetable oil all over the dosa.

Cook on medium-high heat till the bottom side of the dosa becomes lightly brown.

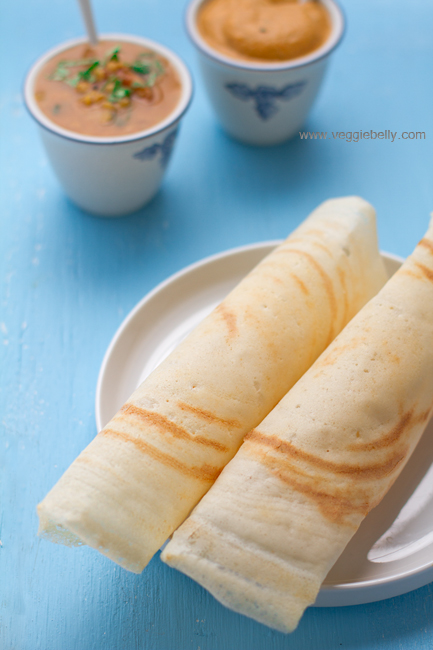
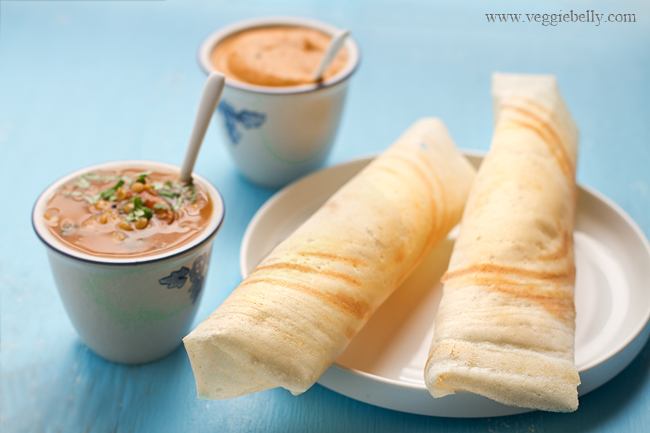
At this point, you can fold the dosa over in half, or roll it into rolls like ive done, and serve. (For extra crispy dosas, flip the dosa over, and lightly brown the other side).

Taste your first dosa, and adjust salt in the batter if needed.

Serve with sambar and tomato chutney.

———————————————————————————————————————–

This giveaway had ended. We have a winner!

Please contact me to claim your prize! veggiebelly@gmail.com


Win an Ultra Pride Plus Wet Grinder!

1.25l capacity
Voltage 110V AC 60Hz
Sleek design, easy to clean
Kneader attatchment for dough
Perfect for grinding dosa, idli, vada batters
More features here

Ive had mine for 6 years and love it :)

** When you entered the giveaway if you checked the ‘send me a coupon’ option, iNNo Concepts Inc will send you a coupon for $10 off Ultra Pride Plus grinder plus a free gift worth $20 or $20 off all other larger sized Ultra grinders plus a free gift worth $20. You can use this coupon between April 9th and April 15th. US & Canada shipping only. No cash redemption.

Related Posts with Thumbnails