Besan Laddoo Recipe

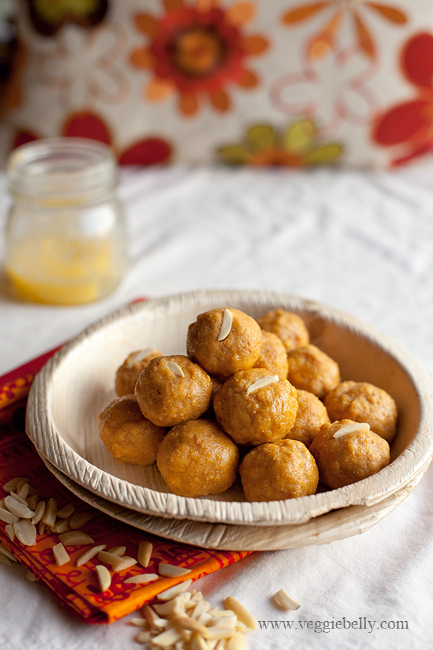
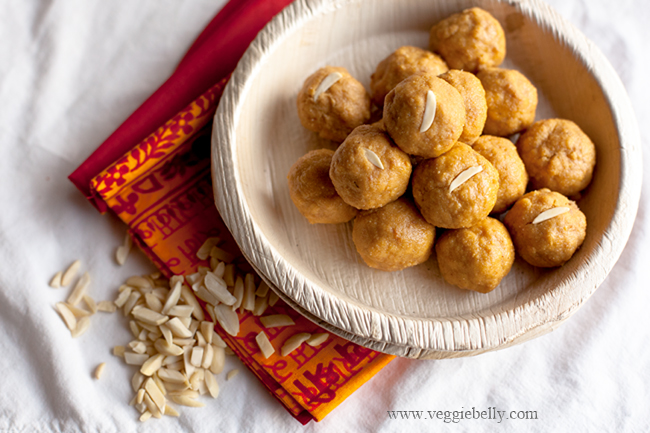
Diwali is around the corner and this besan laddoo or laddu is one of the easiest sweets you can make to celebrate. Diwali is the Indian festival of lights. It celebrates the victory of good over evil and light over darkness. Its one of India’s most important festivals and we celebrate it with fire crackers, new clothes and by sharing sweets and snacks. If you are looking for a simple Diwali sweet recipe, try this besan laddoo. Its gluten free too!
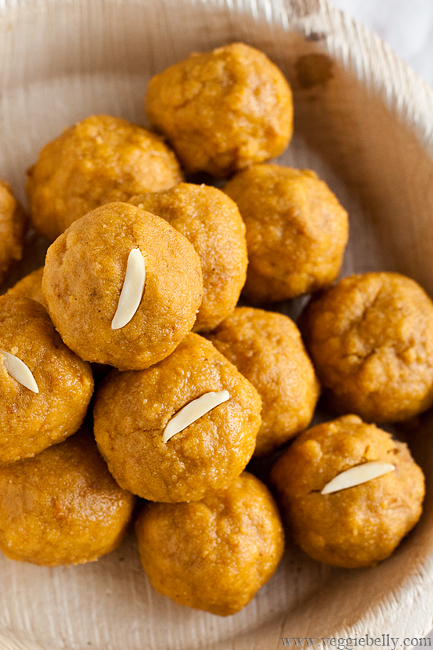
Besan laddoo is made with chickpea or garbanzo or gram flour, ghee, sugar and cardamom. It takes about 30 minutes to make, but most the work is just stirring. There really is nothing complicated about this sweet. If you are new to making Indian sweets, this is a great one to start with.

Some tips
- Make sure you use medium-low heat and stir the flour and ghee  mixture constantly to prevent burning

- You can use fine ground besan or the coarse ground variety. Both work. But I like the fine ground besan, it makes the laddoos melt in your mouth. If you like more texture in your laddus, use the coarse besan.

- The laddu mixture is ready when it turns golden starts to smell nutty. This will happen approximately around the 30 minute mark. If you can smell the besan getting toasted and nutty, taste a small pinch of it. It should taste cooked and not raw. Then its done and ready for the sugar and cardamom.

- When forming the laddoos, if they are too dry and falling apart, add extra ghee to the mixture one teaspoon at a time, mixing well after each addition, untill you can form it into balls.
How to Make Besan Laddoo – a Video 

http://youtu.be/tRWTPOZwJ5Q

Besan Laddoo Recipe

makes about 15

Ingredients
1/2 cup ghee or melted butter (melt 1 stick of unsalted butter). But I recommend you use ghee.
1 1/2 cups besan (chickpea or gram flour)
1 cup sugar
3/4 teaspoon cardamom powder
1 tablespoon slivered almonds, or cashew halves, optional

Method
1. Take a large non-stick skillet and add the ghee or melted butter to it. Heat it on medium-low heat. Once the ghee or butter is warm, add the besan (chickpea or garbanzo flour).

2. Cook this mixture on low-medium heat, stirring constantly. The laddu mixture is done when it looks golden and smells toasty and nutty. This will take 20-30 minutes. Look at the video above to see the different stages of the mixture cooking, and how it looks when its done.

3. When the laddu mixture smells toasted and looks golden, taste a little. It should taste cooked. There should be no sour after taste, if it tastes sour or raw, you need to cook it more. When the mixture is cooked, turn off the heat.

4. Let it cool for about 3 minutes. Then add sugar and cardamom, and mix well. Taste the mixture. If you want, you can add more sugar and or cardamom at this point.

5. Let it cool completely. Then gather about 2 tablespoons of the mixture in your palm of your hands, and press it to form a ball. (See video above).

6. If the mixture is too dry and wont form balls, or if the balls crack or dont hold together, you need to add more ghee or melted butter. Add 1 teaspoon of ghee or melted butter and mix well. Now try to form balls again. If its still too dry, add another teaspoon of melted butter or ghee and mix well. Try again. Keep doing this till you can form the mixture into balls. You shouldn’t need to add more than 2 teaspoons (if that) of ghee or melted butter for this recipe. And make sure you don’t add so much ghee that the laddoos become oily. And add the extra ghee or melted butter only if you need to.

7. When the laddoos are shaped, press an almond sliver or cashew half onto the top. This is optional.

8. Store laddoos in an air tight container, they will keep for a week.

Ghee and Curry Leaf Pasta Recipe

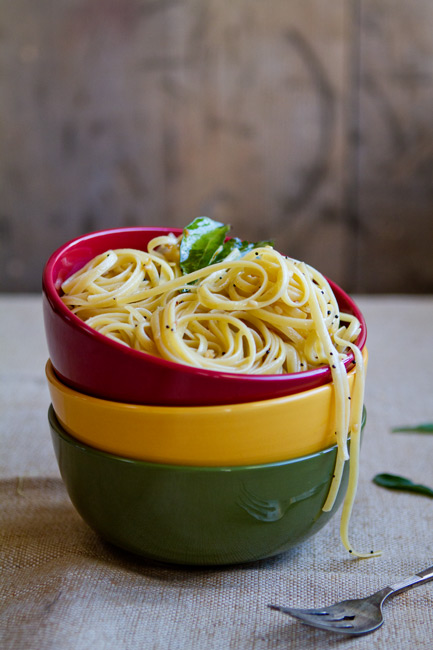
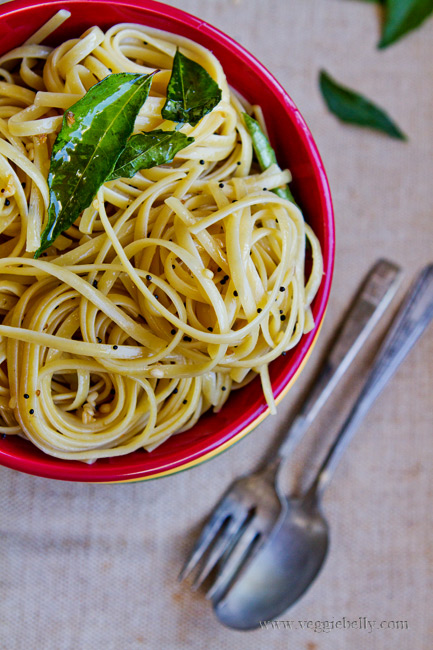
In my last post  I showed you how to make home made ghee. In this post, I share how to use all that delicious ghee – pasta with curry leaf and ghee! I am a pasta lover and a ghee lover, and this is the recipe I created to get my pasta fix and ghee fix all in one recipe.

There is a big difference between making pasta with butter and pasta with ghee. Ghee will give the dish a rich, nutty flavor that butter wont. However, if you don’t have ghee but want to try this recipe, use half butter and half oil instead of the ghee; it wont taste the same as ghee, but it will still be delicious!

This ghee and curry leaf pasta is very mild tasting, and easy to make. Children will love this dish. It also makes a great office lunch to pack, with some steamed vegetables tossed in. For extra flavor, add a teaspoon of ginger garlic paste when tempering the mustard seeds.

You can use any tadka (the whole spices you add to the ghee) items you like – cumin seeds, fennel seeds, green chilis, urad dal, will all taste great.

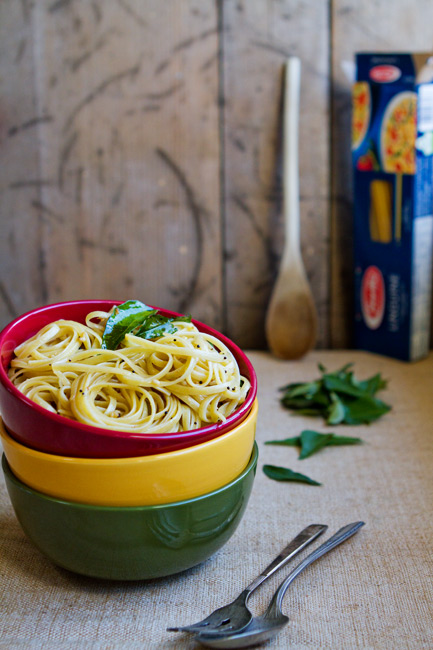
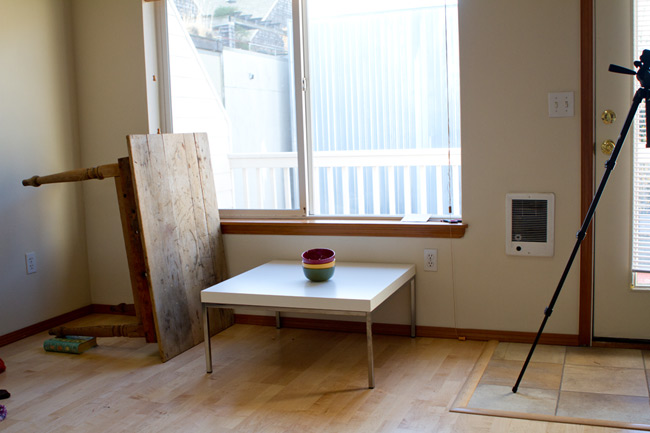
When I was shooting this dish, I wanted a natural, rustic looking background to offset the colorful bowls with pasta. I didnt have anything large enough that will make a convincing background. So heres what I did..

I have a shabby chic table I picked up at an antique store in Spokane, WA. I’ve enjoyed using it in many of my food photos  like my thanksgiving tofu skin roulade, or in the photos of my dal fry mix in a jar. For these pasta photos, I flipped the table and set it behind my bowl of pasta. This created the natural looking background I wanted.

Ghee and Curry Leaf Pasta

Serves about 4

1 lb dry pasta such as linguine, macaroni, spaghetti or bow tie
3 tablespoons liquid ghee
½ teaspoon black mustard seeds
1/8th teaspoon asafoetida
8 curry leaves
salt

Bring plenty of water to boil in a large pot. Add a generous amount of salt to it. Add the pasta and stir. Cook uncovered, till the pasta is al dente (still has a bite to it; is cooked, but not completely soft), about 8 minutes.

Drain the pasta and set aside.

In the same pot or a large wok (non stick is best), heat the ghee, and add mustard seeds. (For extra flavor, add a teaspoon of ginger garlic paste at this point). When they pop, add asafoetida and curry leaves, and stir 30 seconds or till the curry leaves are fragrant.

Add pasta and salt, and toss well. Serve warm.

How to Make Ghee

Ghee is used widely in Indian cooking. Not only is it deeply flavorful, ghee also has a higher smoke point, so its great for sauteing or frying. Indian herbal medicine (Ayurveda) uses ghee as a base for many of its medications. I spent some time at an Ayurvedic retreat in India last summer and my detox concoction was ghee based – I’ve never had a tastier medicine!

Making ghee at home is easier than you think. Here is a step by step recipe and tis for home made ghee.

Should you use salted or unsalted butter for ghee?
I’ve used both salted and unsalted butter successfully but I prefer unsalted.

Salted butter will foam more when boiling. So if you are using salted butter to make ghee, make sure you use a pan that’s large enough to accommodate the foaming, and be very careful when the ghee begins to boil. When it foams, gently stirring it with a wooden spoon will help it subside. If the butter foams and spills over, it can be hazardous, be very careful.

The milk solids from salted butter will be very salty. If you are making any of the ‘by product’ recipes, you wont need to add any extra salt.

How to Make Ghee

Ingredients
2 sticks (1 cup) unsalted butter

Method
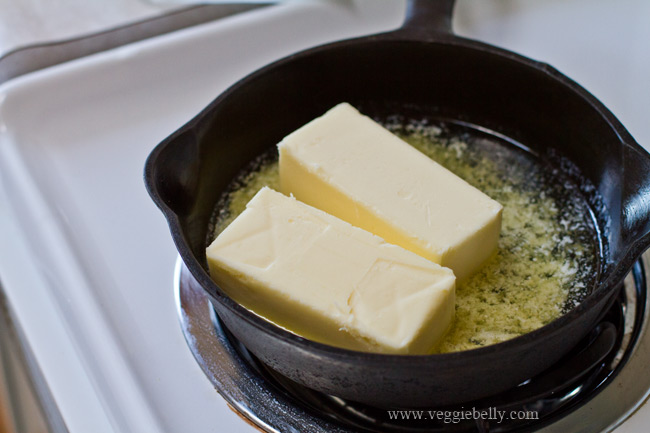
Use a medium sized, heavy bottom sauce pan. Make sure it is dry and clean. Place the butter in the pan, and cook uncovered on medium heat till all the butter melts.

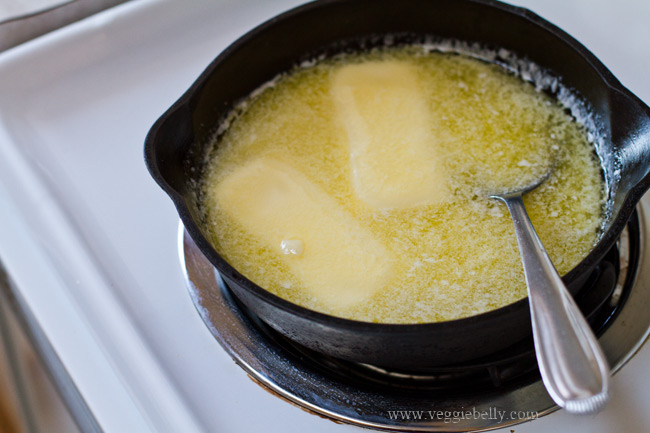
Continue cooking while stirring occasionally till the butter starts to foam and boil. You will hear crackling, this means the butter is boiling.

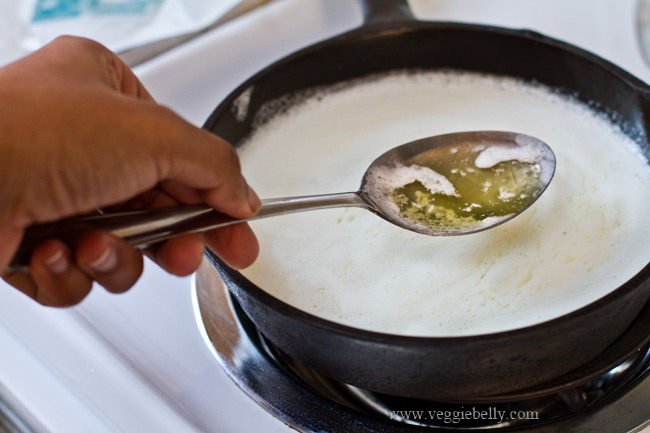
Reduce heat to low, and continue to simmer the butter till it clarifies – when you part the foam on top, you should see the melted butter getting clear.

Continue to simmer the butter till the crackling subsides, about 10 minutes. How soon the ghee is done will vary depending on the quantity of butter you are using. So use the indicators below.

The ghee is done when
-          The crackling subsides. This means most the moisture has been cooked away
-          The ghee becomes a clear golden yellow liquid (part the foam with a spoon to see the ghee). This means the butter is clarified
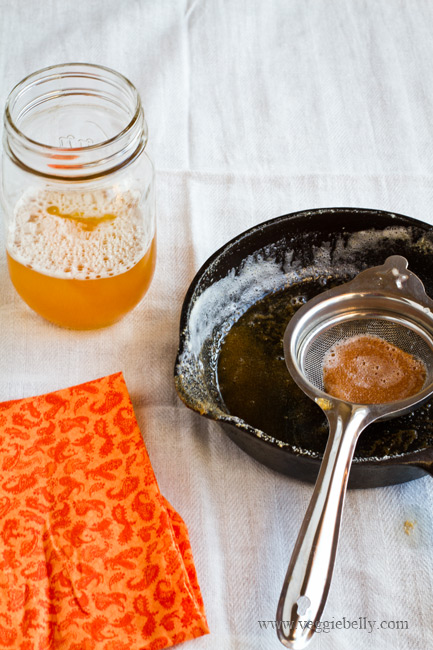
-          The milk solids separate and settle in the bottom of the pan, and are light brown in color

Be careful not to over cook the ghee and burn the solids. If the milk solids are dark brown, or if the liquid ghee turns dark brown, you’ve over cooked it.

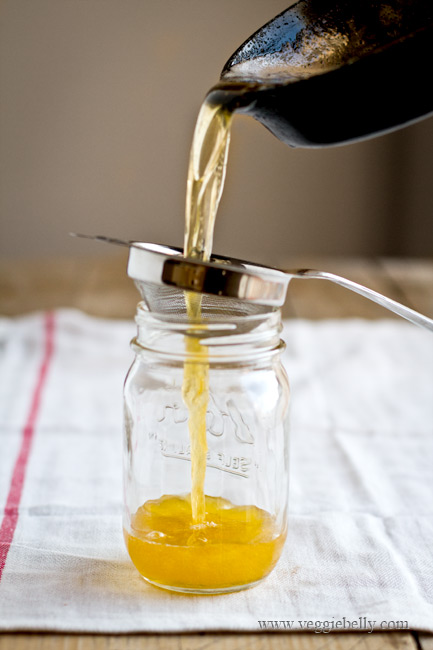
Let the ghee cool for about 20 minutes. Then strain it though a very fine strainer or 2 layers of muslin cloth. Make sure all the milk solids are strained out; strain the ghee twice if needed.

Store ghee is a clean, dry bottle. But don’t put the lid on till the ghee is fully cooled.

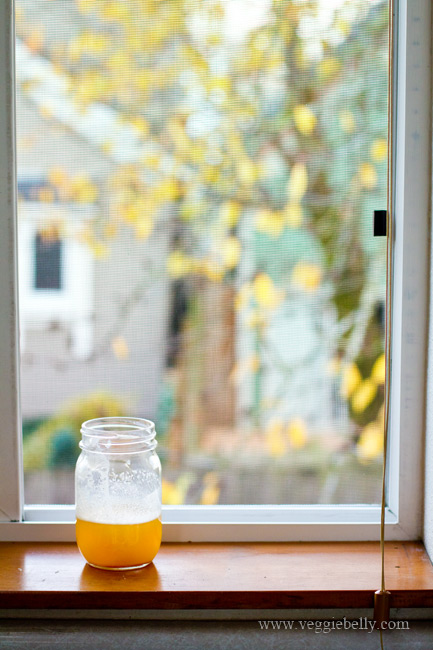
Ghee can be kept at room temperature for 2 months. Refrigerating it wont hurt either.

What do to with the milk solids from ghee making

When you clarify butter (by boiling) to make ghee, the milk solids will separate. They will settle in the bottom of the ghee. If the ghee is made properly, the milk solids remaining will be lightly brown, nutty, and very delicious.

Don’t throw away the milk solids. This is delicious stuff. Here are some things you can do with them:

-          Mix 2 tablespoons of milk solids with 1 clove of minced garlic. Heat on low till the garlic sizzles. Add a pinch of salt. Spread this on toasted pita or baguette slices for a rich tasting, yummy snack

-          Heat 2 tablespoons milk solids along with 6 roughly crushed peppercorns. When the peppercorns are fragrant, add 2 cups cooked rice and some salt. Mix well. We call this vennai chatti sadam (butter pot rice) – a recipe specifically created to use up the by product of ghee making.

-          Add sugar and wheat flour to milk solids. Gently cook. Then form the mixture into balls or laddus. See this video at min. 4:40 for ghee laddu recipe

Use ghee for sauteing vegetables or pasta, drizzle over hot rice, in soups, over popcorn, on toast, or in desserts.

Related Posts with Thumbnails