Thai-Burmese Curry Noodles (Khao Soi). Thailand part 3.

Before I tell you about this amazing noodle dish I learned to make in northern Thailand, here are more pictures from my recent trip. (And in case you missed my previous Thailand posts, they are here and here).

A Thai Market Outside Bangkok

I visited several markets in Bangkok and Chiang Mai. The format seems to be pretty much the same everywhere – vegetable section, fruit section, then there are some bug vendors (yes, insects), rice vendors, fresh noodle vendors, dessert section and prepared foods section. Every single market I went to was extremely clean and organized.

This one was outside Bangkok, in the suburbs where I was staying with my uncle. So this market wasnt touristy, which is always a bonus.

Left: Sapodilla vendor. Right: My uncles wife Da, on her phone & buying guavas. Da showed me around here and so patiently explained everything and translated for me so I could communicate with the vendors 

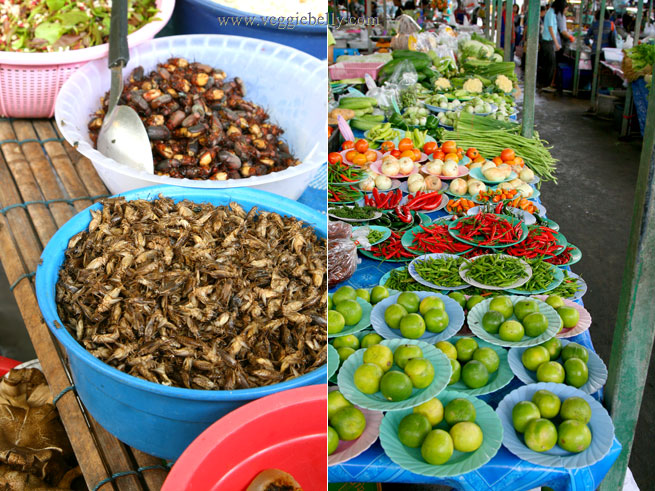
Left: bugs and insects; I was feeling very Andrew Zimmern-ish.  Right: lime, red and green chillies


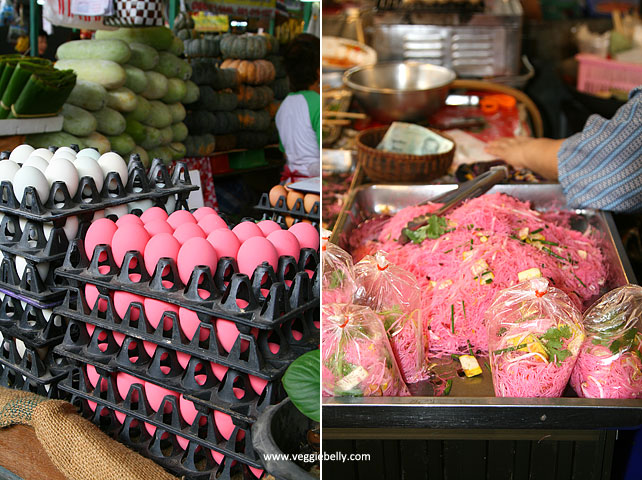
Pink preserved eggs (Chinese thousand year old eggs or century eggs) and pink noodles

Khao Soi Curry Noodles from Chiang Mai (Kow Swear or Khauk Swear in Burma)

Now lets travel up north to the cool mountains of Chiang Mai, Thailand. Chinese Muslim traders have greatly influenced this region’s cuisine. Their delicious, spicy noodle dish, influenced by Burmese cuisine, called Khao Soi was everywhere in this city. My favorite vegetarian Khao Soi is from Aum Vegetarian Restaurant. in Chiang Mai.

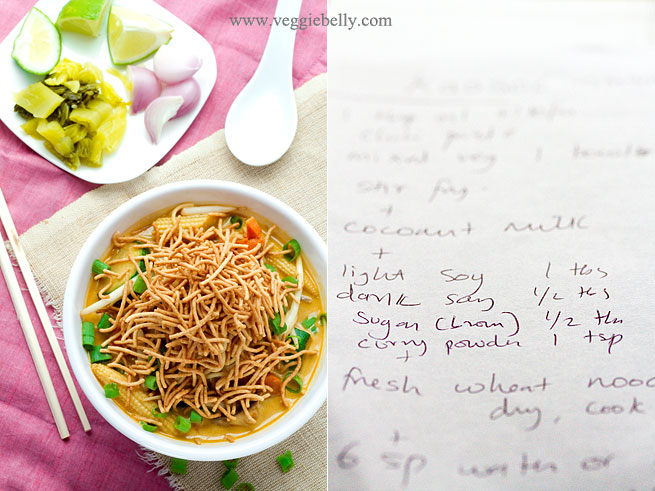
Left: Chiang Mai Aum restaurant’s Khao Soi topped with coconut cream. In the background, chilli paste, lemon iced tea, and British kid.    

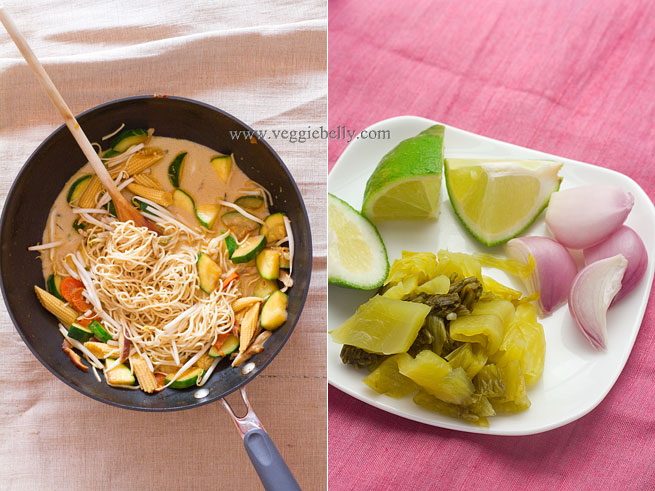
Right: My home made version

When I took a Thai Vegetarian cooking class at May Kaidee’s, Duan the owner and instructor was kind enough to show me how to make Khao Soi, even though it wasnt on the class schedule. See this post  for more on Duan and the cooking class.

Khao Soi, also spelled Khao Suey or Khao Soy, is also eaten in Myanmar or Burma and Laos. The Burmese version of Khao Soi is called Kow Swear or Khauk Swear. From what I understand, the Burmese curry noodles, are also in a coconut milk broth, but use more Indian influenced spices like coriander and do not have the crispy noodle topping. Since both the the Thai and Burmese versions are quite similar, I’m sending this post off to AWED Burma, hosted by Kitchen Swathi 

Other Khao Soi recipes:

Khao Soi by the amazing Chez Pim
A Khao Soi battle between an American guy in Bangkok and a Thai girl in Iowa
A Khao Soi recipe from Rosas Yummy Yums
And then there is this whole blog dedicated to the quest for the perfect Khao Soi in New York city!
A recipe for the Burmese version – Kow Swear on We Are Never Full blog

The version I learned to make at the cooking class had shredded chinese cabbage, cauliflower, and tofu. Ive used shiitake mushrooms, baby corn, carrot, zucchini and beansprouts. But I highly recommend adding some pan fried or deep fried firm tofu to this.

If there is an Asian store where you live, that is best place to buy the specialty ingredients for this recipe. But you may be able to find fresh chinese noodles (not the dry stuff) at the regular grocery store. For the pickled mustard greens, you may have to make a trip to the Asian store (if you want to make your own, here is a good recipe).

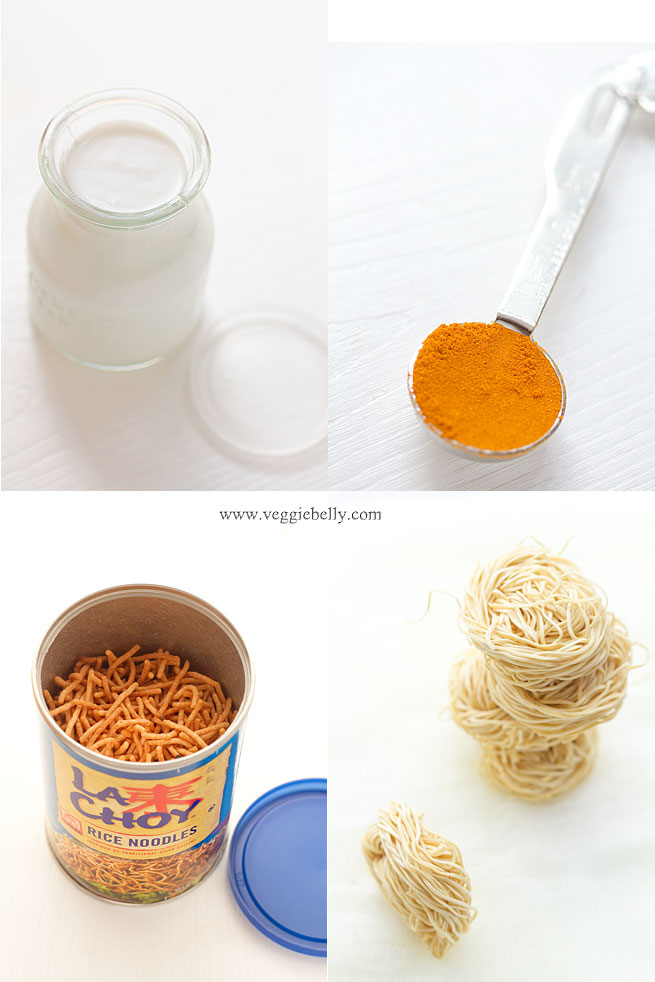
All the amazing Khao Sois I had in Chiangmai were topped with crispy fried noodles – the best part! I didnt feel like deep frying, so I used store bought La Choy brand crispy Asian noodles.

Curry Noodles in Coconut Milk Broth or Khao Soi or Khao Soy Recipe

serves 2-3

1 tablespoon oil
1 cup chopped shiitake mushroom
1 medium zucchini, chopped
1 small carrot, chopped
1/2 cup chopped baby corn
1 tablespoon red curry paste
1 teaspoon curry powder or according to taste
1 tablespoon light soy sauce
1 teaspoon dark soy sauce
1 teaspoon brown sugar
1 cup coconut milk
1 cup water
2 cups fresh Chinese wheat based noodles or about 3 oz dried thin wheat based noodles
1 cup bean sprouts

Toppings and garnishes
1 cup store bought crispy noodles (I used La Choy brand)
2 shallots, chopped
1/4 cup chopped pickled mustard greens (available at Asian stores)
3-4 lime wedges
Chopped cilantro
Chopped green onion

Heat a large wok with oil. Add shitake mushroom, zucchini, baby corn and carrot and cook on high for about 2 minutes. Then add curry paste and curry powder. Toss to coat the vegetables. Add light soy sauce and cook about 30 seconds so the vegetables absorb the liquid. Then add dark soy sauce, brown sugar, and coconut milk. Let the curry simmer for about 2 minutes.

Then pour in water and bring back to a simmer. Taste curry and adjust soy sauce, and sugar to taste. 

Bring a large pot full of water to boil noodles. If using dried noodles, cook in boiling water till noodles are very al dente. If using fresh noodles, boil for about 1 minute. No matter what noodles you use, make sure not to over cook them. Drain well.

Add cooked noodles and bean sprouts to the curry broth. 

Serve Khao Soi in individual bowls, topped with crispy noodles. If you dont have store bought crispy noodles, increase the fresh or dry wheat noodles quantity in this recipe by 1/2 cup. If using dried noodles — deep fry this extra half cup of boiled, drained noodles in oil, till golden. If using fresh noodles, deep fry them as is. Then top Khao Soi with the fried noodles.

Serve with chopped shallots, pickled mustard greens, lime wedges and cilantro on the side.

Lentil Drop Curry or Moong Wadi/Mangodi Curry


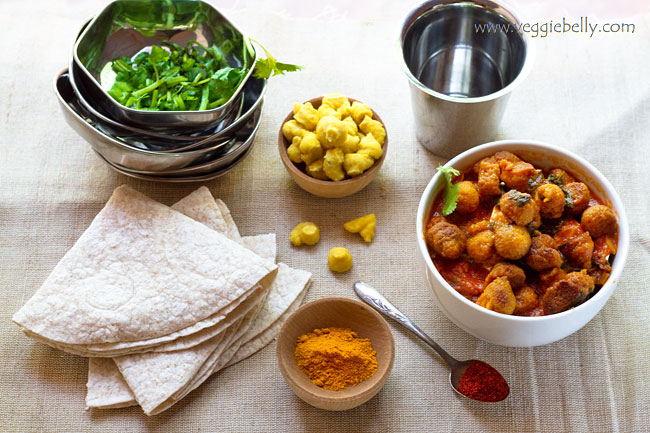
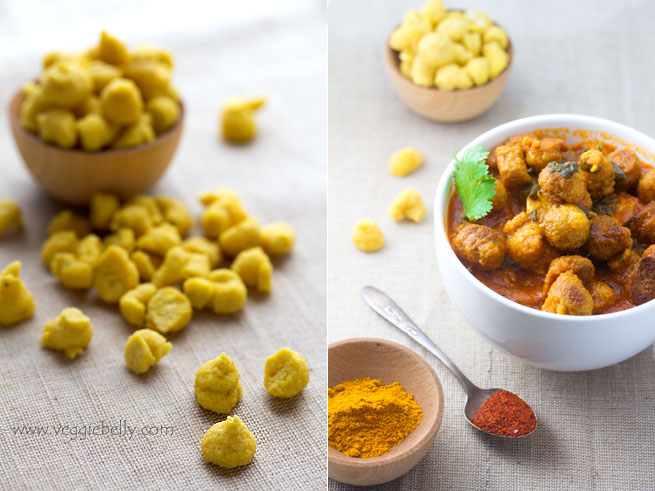
Whoever invented moong vadis is a genius. These little ‘drops’ or nuggets of dried lentils cooked in a curry, are filling and tasty. Also called Mangodi in parts of India, moong wadis are extremely versatile, you can use them in curries, soups or mashed up in chili. Because the lentils are ground up and dried, they have a great meaty texture when cooked. Moong wadis or mangodis are superb soy-free meat substitutes

How to use Moong Wadis

- Always shallow fry or deep fry wadis till golden before using
- Add to tomato based curries along with any vegetable you like (potato is traditional)
- Add fried moong wadis to yogurt based curries like kadhi or mor kulambu
- In the winter months I add extra water to this recipe and turn it into curried lentil drop soup. I serve the soup with a dollop of sour cream or greek yogurt
- Use fried moong wadis in vegetarian and vegan chili recipes instead of immitation soy based ‘meats’

How moong wadis are made: Moong dal and spices are soaked and ground into a paste. Little drops of this lentil dough are then piped onto a baking sheet or other surface and sun-dried for 2-3 days or untill hard. You can store these in an airtight container for several months. See this post for a recipe. I dont bother making moong wadis, I just buy them at the Indian store.

Lentil Drop Curry or Moong Wadi/Moong Vadi/Mangodi Recipe

serves about 6

4 tablespoons vegetable oil
2 cups moong wadi from the Indian store

1 tablespoon vegetable oil
1/2 teaspoon cumin seeds
1 red or green chilli chopped, optional
1/8 teaspoon asafoetida
1 small onion, finely chooped
1/2 tablespoon garlic paste
1/2 tablespoon ginger paste
1/4 cup tomato puree or 2 tablespoons tomato paste
1 teaspoon coriander powder
1/2 teaspoon turmeric
1/2 teaspoon red chilli powder, optional
Juice of 1/2 a lime or according to taste, optional

Heat 4 tbsp vegetable oil in a medium pot. Add the moong wadis to the oil. Fry on medium heat till the wadis are golden brown. Remove the wadis from the pot using a spoon and set aside. In the same pot, heat 1 tbsp oil.  Add cumin seeds and let them sizzle about 20 seconds or till fragrant. Then add chilli if using and cook another 15 seconds. Add asafoetida.
Immediately add chopped onion and cook till onions are soft, about 2-3 minutes. Then add garlic and ginger pastes. Cook, stirring for another 2 minutes. Pour in the tomato puree, add coriander powder, turmeric and red chilli powder if using. Let the gravy simmer for about 2 minutes. Then add the fried moong wadi along with 5 cups of water.

Bring the curry to a boil. Then lower heat, place a lid on the pot and let it simmer for about 20 minutes or till the moong wadis have plumped up and dont taste raw anymore. Taste the curry and add lime juice according to taste. If the gravy is too thick, add more water.

Serve hot with rice, bread, rotis or tortillas.

Rhubarb Raspberry Polenta Cake

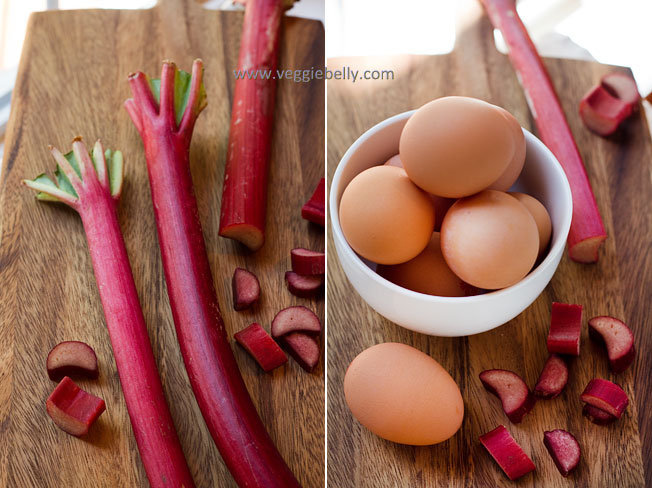
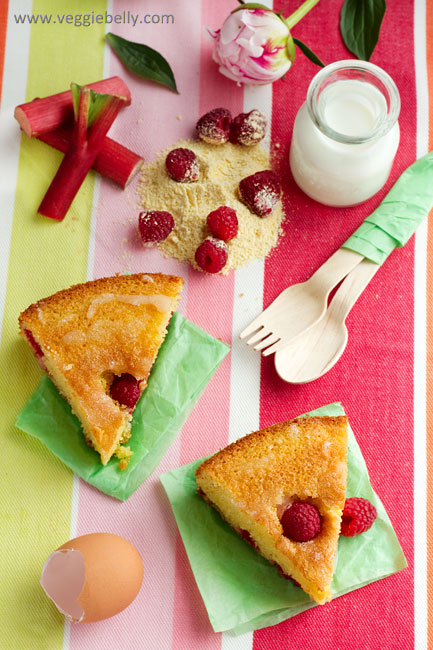
Its rhubarb season! Grocery store shelves are brimming with these beautiful red stalks. I couldnt let spring roll around and not make anything with rhubarb! Usually, rhubarb is used along with strawberries in pies (because rhubarb and strawberry seasons coincide). This recipe features rhubarb, along with raspberries in a polenta or cornmeal cake. If you like corn cakes, you’ll certainly love this dessert version!

Andrea, from Cooking Books blog says its the Scandinavians who know how to best enjoy the tartness of rhubarb. Andrea says,

“I’m not sure anyone appreciates rhubarb the way the Scandinavians do. In the US, it seems like you rarely find rhubarb without strawberry to mellow it’s tartness. But in Norway, rhubarb stands very much on its own. In fact, R remembers as a child being given stalks of raw rhubarb with a small bag of sugar for dipping and munching.”

Tart rhubarb, tart raspberries, in a sweet, cornmeal cake. Just delicious! And I love the ‘corny’ taste and texture of this cake too.

I adapted the recipe from this recipe for raspberry and lemon polenta cake  by Jane Hornby. Jane’s recipe is for a layered polenta cake, filled with a cream cheese filling. I left out the filling all together and simply made a single cake, adding rhubarb.

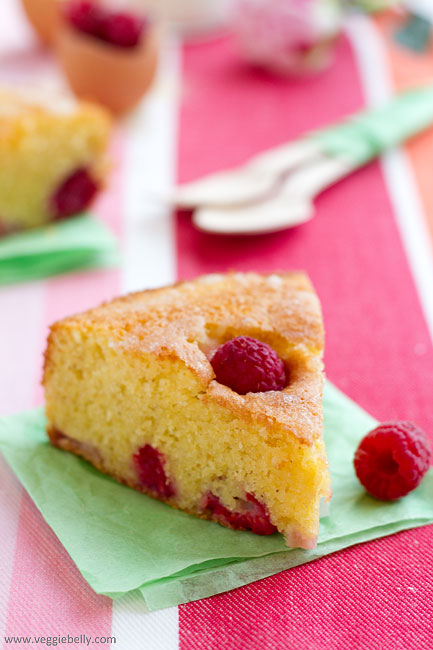
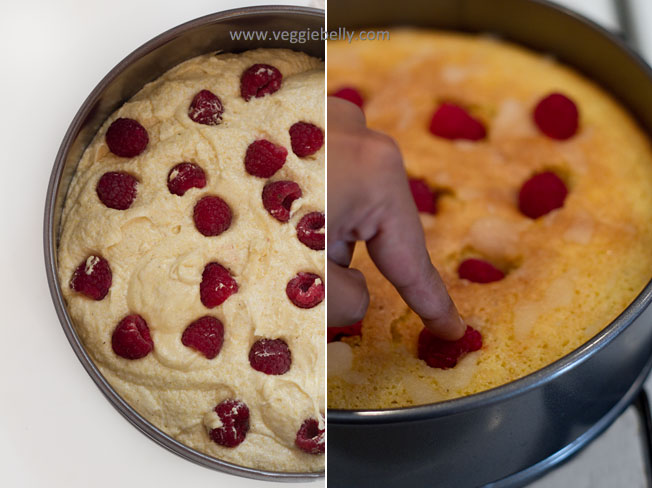
Add most the fruit to the batter and bake half way. Then sprinkle more berries on top of the half-cooked cake and continue baking.

Ever baked a cake with fruits in it and all the fruits sink to the bottom? Jane has the solution! Its a great trick for getting this cake to look beautiful too. Reserve some of the berries and then sprinkle them on top of your cake half way through baking. The cake should still be jiggly when you do this. Gently press the berries into the batter like the picture above and return cake to the oven. The batter will bake around the berries and when its done, you’ll have a perfect, berry studded cake!

You can store this cake covered at room temperature for about 2-3 days or wrapped tightly in the fridge for about 4-5 days. Serve with icecream or homemade rhubarb-raspberry compote.

Rhubarb Raspberry Polenta or Cornmeal Cake Recipe

adapted from this recipe  by Jane Hornby
serves about 8

8 oz or 225 grams sugar
8 oz or 225 grams butter, at room temperature
4 large eggs
1/2 teaspoon vanilla extract
6 oz or 175 grams fine cornmeal or polenta
1.75 oz or 50 grams flour(I used cake flour)
1 1/2 teaspoons baking powder
a pinch of salt
zest of 1 lemon
1 cup chopped rhubarb
1 cup raspberries
1/2 cup sugar
1 tablespoon lemon juice

Pre-heat oven to 375F. Butter a 9 inch cake tin or baking dish and line the bottom with parchment paper.

In a standing mixer, cream the sugar and butter together for about 3 minutes. Then add the eggs to this mixture one by one. Beat on high speed till the mixture is fluffy. Add vanilla and turn off the mixer.

Sift together the cornmeal/polenta, flour, baking powder and salt. Fold this into the egg mixture in 2 batches. Stir in lemon zest. Pour this batter into the baking dish or cake tin.

Reserve about 1/8 cup of the rhubarb and 1/8 cup of raspberries. Sprinkle the rest of the rhubarb and raspberries on top of the cake batter. Smooth out the top. Bake in the oven for about 20 minutes. The cake should still be jiggly, but risen. At this stage, take out the cake from the oven. In a small bowl, combine 1/2 cup sugar with 1 tablespoon lemon juice. Sprinkle the lemon juice-sugar mixture all over the top of the cake.

Then arrange the reserved rhubarb pieces and raspberries on top of the half cooked cake. Gently poke them into the batter (but dont poke them all the way in — see picture in post above).  Return cake to the oven and bake another 10 minutes. Cool cake slightly before removing it from the pan.

Spaghetti and Spinach Balls

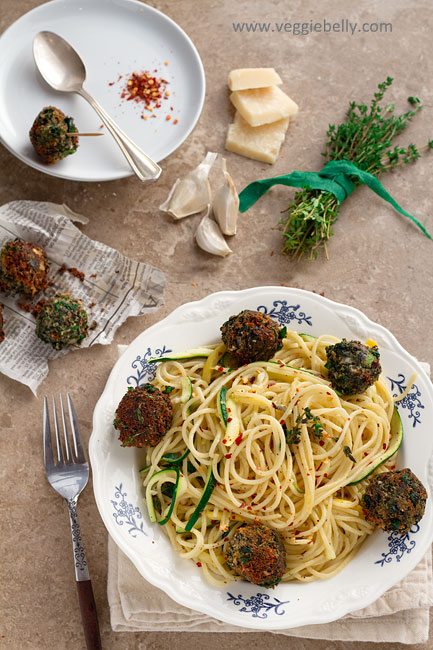
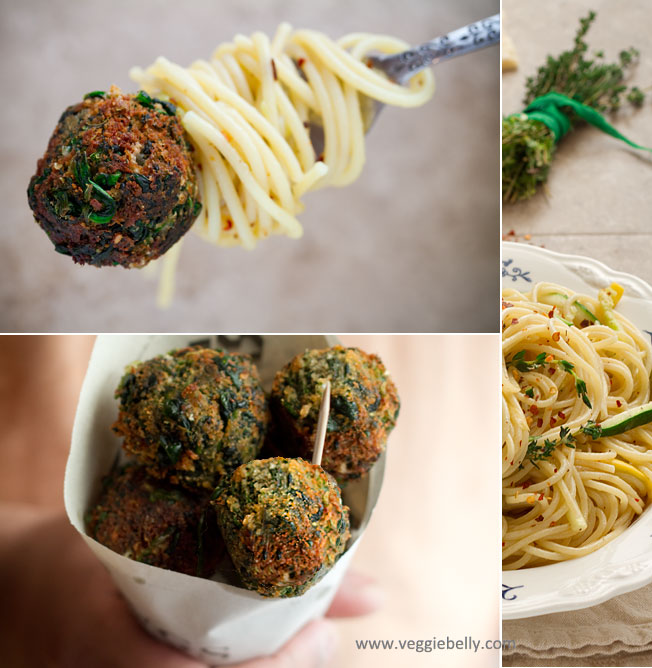
I first had this amazing pasta dish at Italia restaurant in Park Pod hotel, Chennai, India. Wanting to recreate the dish at home, I googled around to see if there were similar recipes. To my surprise I found a very similar recipe that is served at the famous Carluccios restaurant in UK! My recipe is inspired by Antonio Carluccios recipe for pasta with courgette sauce and spinach balls on BBC Food


Not only is Antonio Carluccios recipe delicious, it also has a special story behind it..

Everytime someone orders this dish at Carluccios restaurant, 50p (about 75 cents) is donated on the diner’s behalf to the charity, Action Against Hunger. In just 3 years Carluccios has raised 430,000 pounds for the charity this way!  Take a look at their menu for details. (The restaurant sells this dish as penne giardiniera).

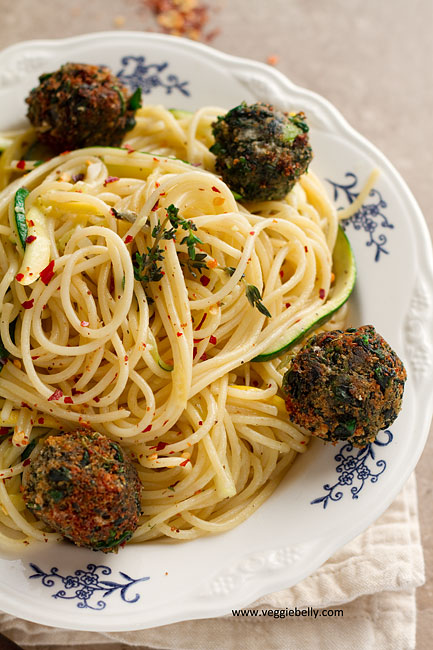
I made several changes to Carluccios recipe. Their spinach balls use eggs, I cut that out. Their recipe required fresh spinach leaves, but I used frozen, thawed spinach because i like the texture of frozen spinach better. I also added fresh thyme and extra garlic to the pasta for extra flavor. The fried spinach and parmesan balls are super tasty! You could even serve them as a snack or appetizer. But I love them in the pasta. These are a great vegetarian substitute  for spaghetti and meat balls.

Some tips:

- Timing is important in this recipe because there are 3 elements to it – the pasta, pasta sauce, and spinach balls. Make the pasta sauce first (using olive oil, thyme, garlic, zucchini and cheese) and keep aside. Then work on the spinach balls. Roll the balls and keep them ready to fry.  Then put the pasta to boil. While the pasta is boiling, fry the spinach balls. This way, the pasta and the spinach balls will be done at the same time and you will have al dente pasta and crispy spinach balls just before serving.
- If you want to use fresh spinach, blanch it in boiling water and squeeze dry before using. Refer to Carluccio’s original recipe which uses fresh spinach.

- If your spinach mixture is too dry and wont form a ball, sprinkle a little water. If the mixture is too moist (you probably didnt squeeze the spinach dry enough), try adding more bread crumbs. Keep in mind that if the mixture is too wet, then end result will be oily.

- You can bake the spinach balls if you wish. But it will work better if you formed the spinach mixture into patties for baking, instead of balls. This way, you will get a crunchier exterior in the oven. Ive never baked these before, but I think a temperature of 400-450f should work.

Spaghetti and Crispy Fried Spinach Parmesan Balls Recipe

adapted from this recipe by Antonio Carluccio
serves about 6

For pasta

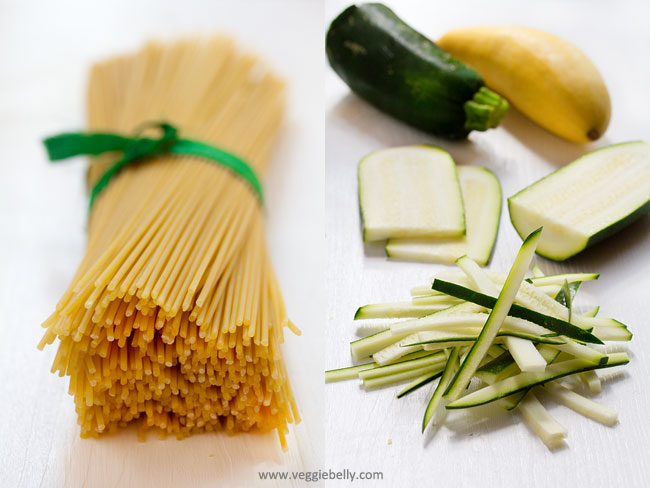
450g or 1 lb spaghetti pasta
8 tablespoons olive oil
3 sprigs fresh thyme
4 garlic cloves, minced
Crushed red pepper, according to taste
2 zucchini or summer squash cut into thin strips (see picture in post)
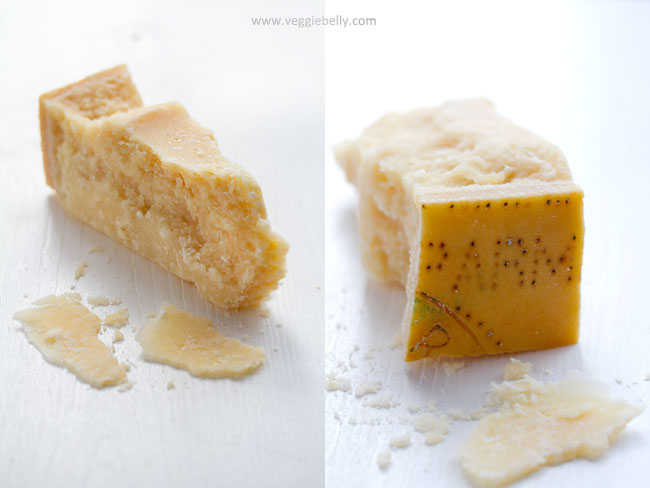
1/2 cup grated parmesan cheese
Salt
Pepper

Bring a large pot of water to boil. Generously salt the water. When water boils, add pasta and cook till al dente.

While pasta is cooking, heat oil in a pan. Add thyme sprigs, garlic and crushed pepper and cook for about 30 seconds. Then add the chopped zucchini. Saute for about 2 minutes or till the zucchini is cooked, but still a little crunchy. Turn off heat and stir in grated parmesan, salt and pepper. This is your pasta ‘sauce’. When the pasta is done, drain the pasta and toss with the zucchini mixture.

For Spinach Balls (makes about 24 balls)

1 lb frozen spinach
1/2 cup grated parmesan
1 cup breadcrumbs
a pinch of nutmeg
1 garlic clove, minced
Salt
Pepper
Vegetable oil for frying

Thaw frozen spinach. Squeeze out as much water as possible. Place thawed, dry spinach in a bowl. Add all other ingredients to the bowl, except the oil. Mix well.

Now test the spinach balls. Make one ball from the mixture, heat the oil, and shallow fry it on medium-high heat. If the balls fall apart, you need to add a little more bread crumbs to bind the mixture. If the extra breadcrumb trick didnt work, and the balls still fall apart, add one beaten egg to the mixture.

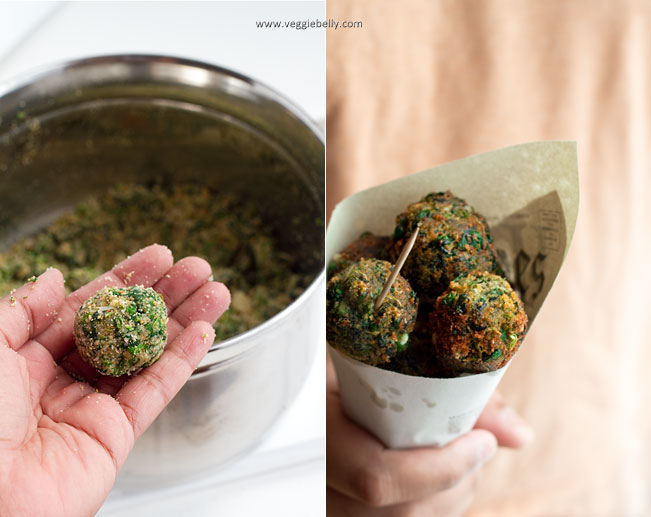
Form the spinach mixture into balls (see pictures in post). Heat a thin layer of oil in a wide, shallow pan.

Place spinach balls a few at a time and shallow fry them on medium-high heat, turning the balls around till all sides are golden and crisp. Remove spinach balls with a slotted spoon and place them on paper towels.

Serve spinach parmesan balls with the spaghetti.

Spiked Blueberry Lemonade

I almost feel bad giving you a recipe for lemonade. I mean, its a no brainer right? Just mix up sugar, lemon juice, and water, thats it. So, to spruce up the humble lemonade, I added some blueberries (and vodka!). The extra tang and brilliant color were fantastic! We loved eating the lemonade soaked blueberies in the end of each glass!
The lemonade will become a stronger color if you let the blueberries sit in the lemonade for a few hours. Use either fresh or frozen blueberries. Other berries would work well too — strawberries, blueberries, huckleberries..yum!  If you are using something with lots of seeds (like raspberries), you may want to puree the fruit and strain the puree before adding it to the lemonade.  
Alcoholic version - Spiked Blueberry Lemonade:  add vodka to this lemonade. You will not be sorry you did!
Blueberry Lemonade Recipe

makes about 8 cups

1 cup sugar
1 cup lemon juice (I used bottled)
6 cups water
1/2 cup fresh or frozen blueberries

Place all ingredients in a pitcher and stir till sugar dissolves. Muddle the blueberries a little using the back of a wooden spoon to release their juices and color. Taste and adjust sugar if needed. Serve chilled.

For spiked lemonade – add 1 to 2 cups of vodka (preferably citron flavor) to above recipe.

Temples, Monks and a Thai Raw Mango Salad with Tofu. Thailand Part 2.

I love Thailand for its sensuous food, elegant people and spectacular sights. Out of the 30 or so countries I’ve visited, Thailand is easily on the very top of my favorites list. Here, I share with you some pictures of Bangkok – a city that is a beautiful mélange of ancient culture and modern lifestyle. You will find serene Buddhist temples along the Chao Phraya river. And a hop away, you will find racy go go bars in Nana plaza. It is incredible that these cultural extremes co-exist. With its night life, beautiful Wats (temples) and amazing food, Bangkok is a truly exciting place. If only Bangkok was cooler, Id move there in a heartbeat!

Above: Wat Pho in Bangkok;  the gigantic reclining Buddha with mother of pearl in His feet

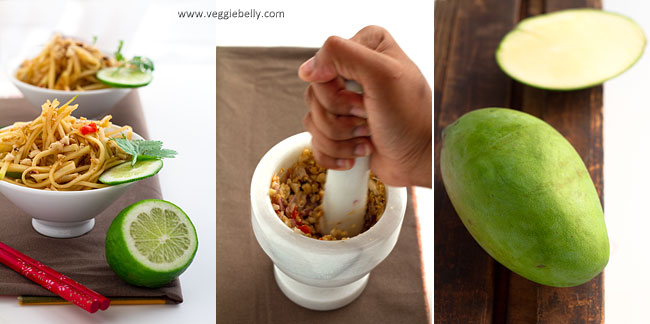
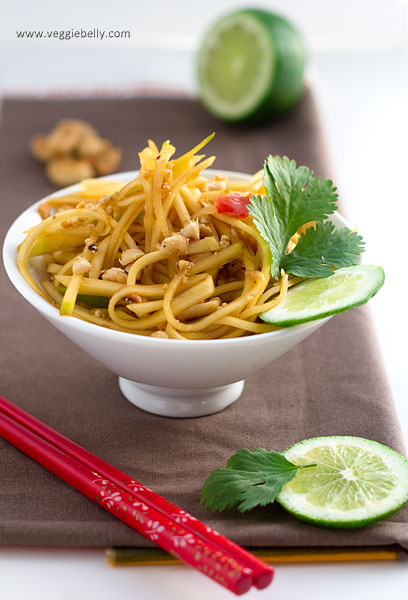
The most memorable part of my trip to Thailand is of course, the food. Thai cooking is seductive; and I cant think of a better recipe to showcase the beauty of Thai food like this one. Salty soy sauce, rich, sweet brown sugar, fresh zesty lime, crunchy, nutty peanuts, hot chillies, and crisp, sour mangoes. Every flavor in the world is packed into this mango salad.

Traditional Thai mango salad doesn’t have tofu in it. I added tofu to make this salad more filling.

Some tips:

Make this salad a day ahead and store it in the fridge. The flavors get so much better the next day
Only use raw, green mangoes (not the ripe yellow ones)
Leave out the chili if you prefer a milder salad
Add strips of pan-fried tofu to make this salad heartier
If you dont have a mortar and pestle, use a food processor to crush the peanuts

Thai Raw (Green) Mango Salad with Tofu Recipe

serves about 4

2 large green, raw mangoes
3/4 cup roasted peanuts
2 shallots, peeled
1 thai red chili (use more or omit according to taste)
3 tablespoons soy sauce
3 tablespoons dark brown sugar
1 tablespoon lime juice
a few sprigs cilantro
6 oz firm tofu, drained (optional)
Salt

Peel the mangoes and cut around the pit. Discard the pit. Grate the peeled mango using a box grater. Alternatively, slice the peeled mango into very thin strips.

Place the roasted peanuts, peeled shallots and red chili in a mortar and pound to a rough paste. Add this crushed peanut mixture to the shredded mango.

In a small bowl, whisk together the soy sauce, brown sugar and lime juice. Add this to the shredded mango and peanuts. Toss well. Taste and add salt if needed. Garnish with cilantro. Serve chilled.

To add tofu to this salad: Drain tofu and pat dry. Cut it into thin strips. Pan fry the tofu strips in a little oil till golden. Toss the tofu with the mango salad.

Broccoli, Baby Potato and Comte (Gruyere) Cheese Tarts in Saltine Cracker Crust


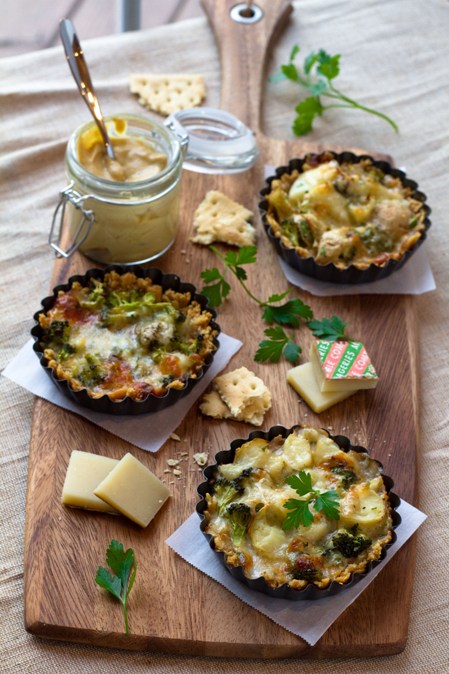
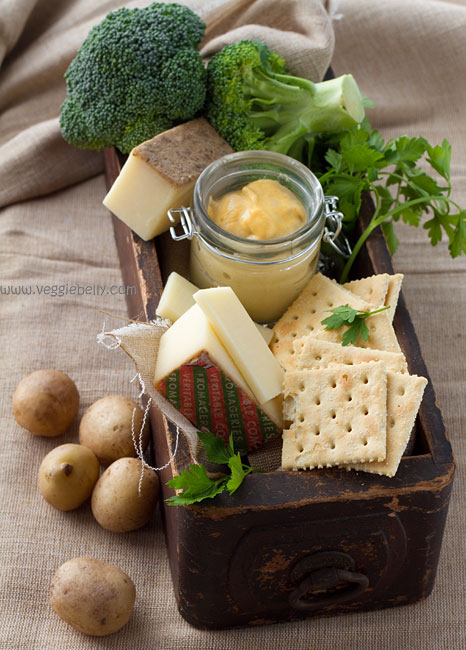
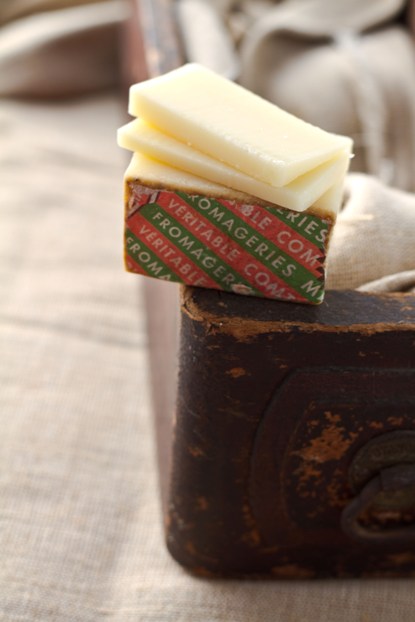
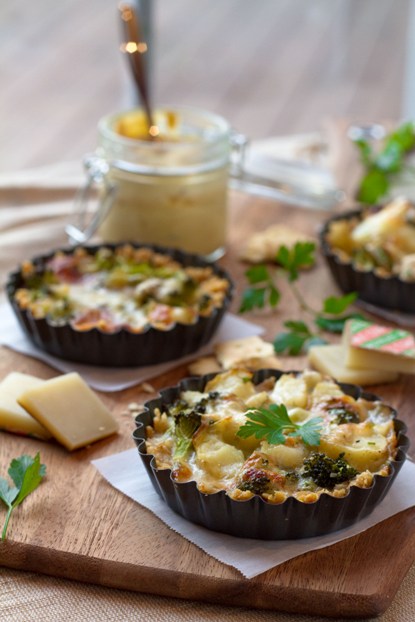
I’d been dealing with a cranky client all week and was exhausted. I wanted a nice gourmet meal, but at the same time I didnt want to leave the house (ever felt that way?). So I used what I had on hand to make this gourmet tasting, gourmet looking, cheesy tart…just what I needed after a stressful day! The gorgeous wedge of french comte cheese Sanjeev picked up a few days ago was simply spectacular in this savory tart.

Comte is a Gruyere type French cheese made from cows milk. Comte is made only with spring and summer milk. I absolutely love this cheese. Actually, I love all cheeses, but I have extra love for Comte. Its slightly sweet, somewhat soft, and melts beautifully.

If you dont like or cant find Comte cheese..

Substitutes for Comte cheese: use Gruyere or fontina instead of Comte. Or if you want to spend less, try a mix of mozzarella and parmesan.

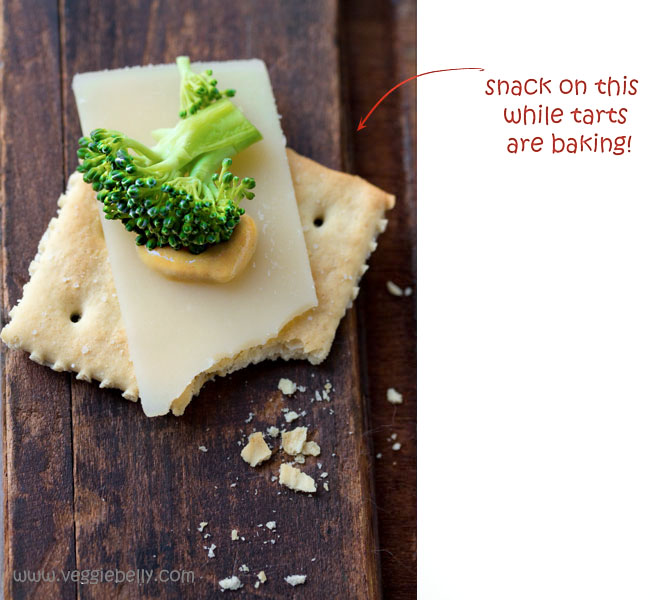
The tarts smelled sooo good in the oven, we were getting hungry quickly! We snacked on the ingredients while waiting for the tarts to bake.

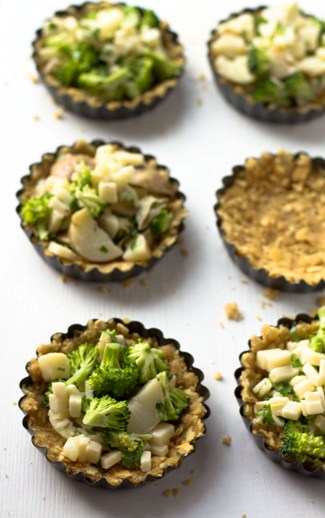
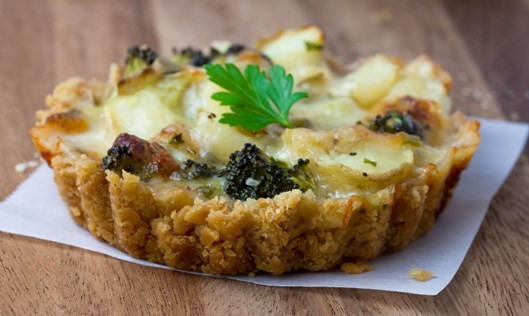
This is a rather heavy, cheesy tart, so I made it in individual mini tart/pie pans. A mini tart along with a salad was a good portion size. If you dont have mini tart/pie tins, you can make this as one large tart and cut it into wedges.

We absolutely loved the saltine cracker crust – it was easy, smelled heavenly, and very yummy!

Broccoli, Baby Potato and Comte (Gruyere) Cheese Tarts in Saltine Cracker Crust: Recipe

makes 6 mini tarts

4oz or 5 small baby potatoes (or use a medium baking potato instead)
1/2 cup low fat milk
1 teaspoon flour
1 teaspoon dijon mustard
3/4 cup comte or gruyere cheese, cut into tiny cubes
1 cup broccoli florets, chopped
2 tablespoons parsley
salt and pepper (keep in mind the cheese, mustard, saltines are all already salty!)

for saltine cracker crust

4oz or 1 sleeve of saltine crackers
4 tablespoons butter, melted
1/2-3/4 cup hot water

Pre-heat oven to 375f.

Wrap the potatoes in a paper towel and micrrowave for 2 minutes or till half cooked. Set aside.

In a bowl, whisk together the milk, flour, and dijon mustard. Then add the cheese, broccoli florets, potatoes, parsley, salt and freshly cracked black pepper and mix well.

To make the saltine cracker crust, place the saltine crackers in a food processor and crush them to a powder. You should get about 1 1/2 cups of crushed saltines. Place this in a bowl, add melted butter and hot water and stir till it comes together like a dough. Now press the saltine cracker crust dough into a non-stick pie or tart pan. Press down on the crust to compact it and also push it up the edges of the pan.

Pour the cheese, broccoli and potato mixture into the tart/pie pan with the saltine crust. Place the pan on a foil lined baking sheet and bake on 375 degrees for about 20 minutes or just till the top of the tart starts to turn golden. Cool tarts a little, then gently lift them off the mould using a knife. Serve tart warm with a salad of your choice.

Twice Cooked Tomato Chutney

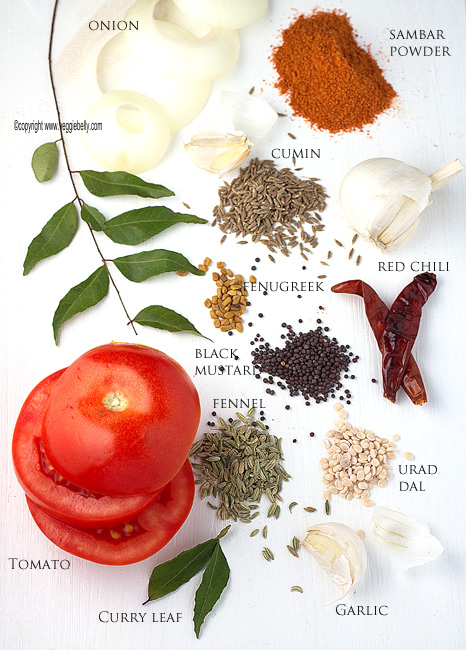
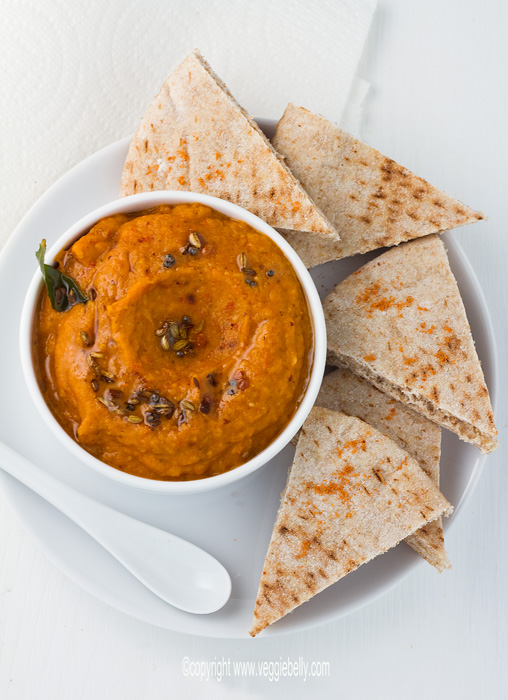
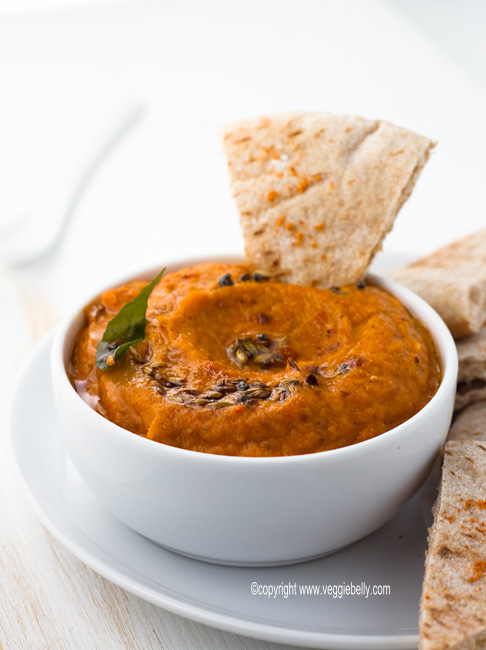
This takes a little longer to make than your average chutney, but well worth the effort. Double cooking  the chutney (once before pureeing, and once after) makes the onion, garlic and tomatoes extra flavorful. I like to add sambar powder to my tomato chutney. Sambar powder is a roasted, powdered blend of spices from south India containing red chilies, coriander seeds, turmeric, lentils and fenugreek. You could leave out the sambar powder if you wish or use only turmeric and chili powder instead.

The recipe below is my ‘special’ version. For a simpler, ’everyday’ version of this tomato chutney, I simply saute the onions, garlic and tomatoes, blend in a blender, temper some black mustard and cumin, add the pureed chutney and cook again. No matter which version I am making, I always twice cook the chutney.

This chutney will freeze well, so if you have a bumper crop of tomatoes this summer, and dont know what to do with them, this is a great option for you. I put the chutney into ice cube trays and place in the freezer. Once they are frozen, I remove the cubes from the tray, put them in a zip lock bag and return to the freezer. This way, you can defrost even tiny quantities of chutney.

Serving tomato chutney with idlis or dosas is traditional. Here, I serve the chutney with pita bread.

Twice Cooked Tomato Chutney with Cumin and Fennel: Recipe

makes about 2 cups

3 tablespoons vegetable oil
1/4 teaspoon each cumin seeds, fennel seeds, black mustard seeds, urad dal (black gram)
1/8 teaspoon fenugreek seeds
1 dried red chili, optional
1/2 cup curry leaves loosely packed
1 large onion (about 2 cups when diced)
8 pods garlic, peeled
6-8 (about 1 lb) ripe tomatoes, diced
1 teaspoon sambar powder

for tempering:
1/2 tablespoon vegetable oil
1/8 teaspoon each cumin seeds, fennel seeds, black mustard seeds, urad dal
a few curry leaves

Heat oil in a large wok. Add cumin, fennel, black mustard and urad dal. When the mustard seeds begin to pop, add fenugreek seeds, red chili if using, and curry leaves. Cook for about 30 seconds. Then add chopped onion and garlic. Cook on medium heat for 2 minutes. Add chopped tomatoes and cook on medium for about 15 minutes or till the tomatoes are completely soft.

Cool the chutney a little and then puree in a blender, along with sambar powder and 1/2 cup water till smooth. (Make sure to vent the blender lid slightly when blending hot stuff).

Wipe the wok, and heat oil for tempering. Add all tempering ingredients. When the mustard seeds splutter, reduce heat and carefully pour the blended chutney into the wok. Be very careful, the chutney may bubble and splatter. Add salt. Cover the wok and cook the chutney on medium-low for about 15 minutes, stirring occasionally. Serve with idli, dosa or pita bread.

Related Posts with Thumbnails