Lentil Drop Curry or Moong Wadi/Mangodi Curry


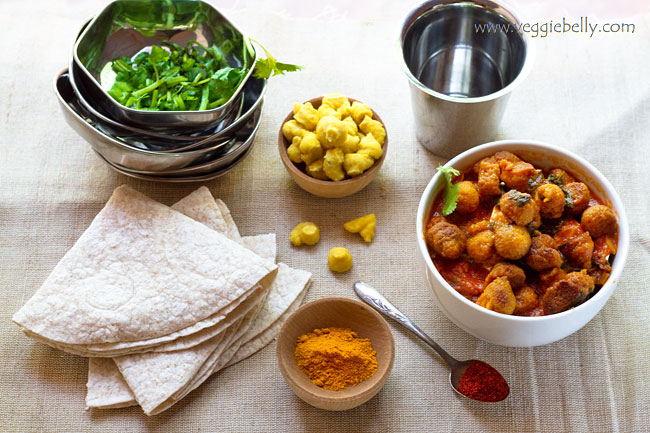
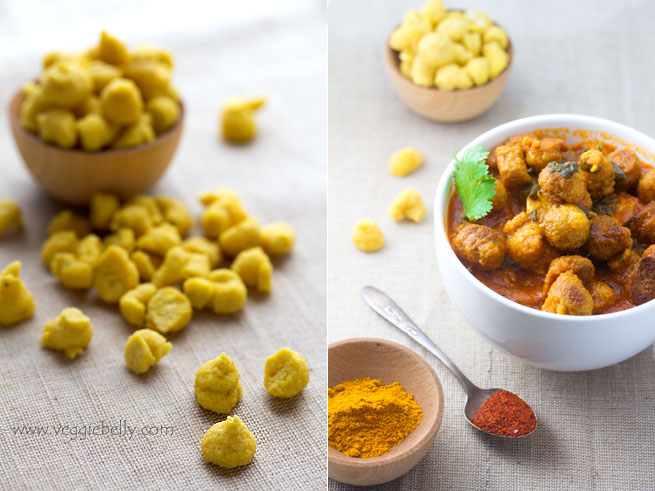
Whoever invented moong vadis is a genius. These little ‘drops’ or nuggets of dried lentils cooked in a curry, are filling and tasty. Also called Mangodi in parts of India, moong wadis are extremely versatile, you can use them in curries, soups or mashed up in chili. Because the lentils are ground up and dried, they have a great meaty texture when cooked. Moong wadis or mangodis are superb soy-free meat substitutes

How to use Moong Wadis

- Always shallow fry or deep fry wadis till golden before using
- Add to tomato based curries along with any vegetable you like (potato is traditional)
- Add fried moong wadis to yogurt based curries like kadhi or mor kulambu
- In the winter months I add extra water to this recipe and turn it into curried lentil drop soup. I serve the soup with a dollop of sour cream or greek yogurt
- Use fried moong wadis in vegetarian and vegan chili recipes instead of immitation soy based ‘meats’

How moong wadis are made: Moong dal and spices are soaked and ground into a paste. Little drops of this lentil dough are then piped onto a baking sheet or other surface and sun-dried for 2-3 days or untill hard. You can store these in an airtight container for several months. See this post for a recipe. I dont bother making moong wadis, I just buy them at the Indian store.

Lentil Drop Curry or Moong Wadi/Moong Vadi/Mangodi Recipe

serves about 6

4 tablespoons vegetable oil
2 cups moong wadi from the Indian store

1 tablespoon vegetable oil
1/2 teaspoon cumin seeds
1 red or green chilli chopped, optional
1/8 teaspoon asafoetida
1 small onion, finely chooped
1/2 tablespoon garlic paste
1/2 tablespoon ginger paste
1/4 cup tomato puree or 2 tablespoons tomato paste
1 teaspoon coriander powder
1/2 teaspoon turmeric
1/2 teaspoon red chilli powder, optional
Juice of 1/2 a lime or according to taste, optional

Heat 4 tbsp vegetable oil in a medium pot. Add the moong wadis to the oil. Fry on medium heat till the wadis are golden brown. Remove the wadis from the pot using a spoon and set aside. In the same pot, heat 1 tbsp oil.  Add cumin seeds and let them sizzle about 20 seconds or till fragrant. Then add chilli if using and cook another 15 seconds. Add asafoetida.

Immediately add chopped onion and cook till onions are soft, about 2-3 minutes. Then add garlic and ginger pastes. Cook, stirring for another 2 minutes. Pour in the tomato puree, add coriander powder, turmeric and red chilli powder if using. Let the gravy simmer for about 2 minutes. Then add the fried moong wadi along with 5 cups of water.

Bring the curry to a boil. Then lower heat, place a lid on the pot and let it simmer for about 20 minutes or till the moong wadis have plumped up and dont taste raw anymore. Taste the curry and add lime juice according to taste. If the gravy is too thick, add more water.

Serve hot with rice, bread, rotis or tortillas.

Mor Kuzhambu or South Indian Yogurt Coconut Curry

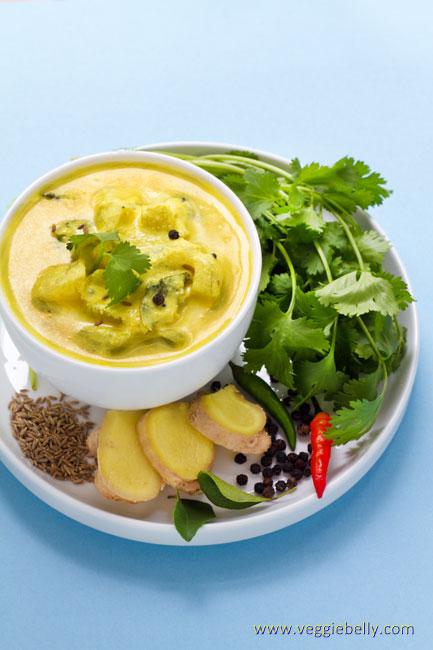
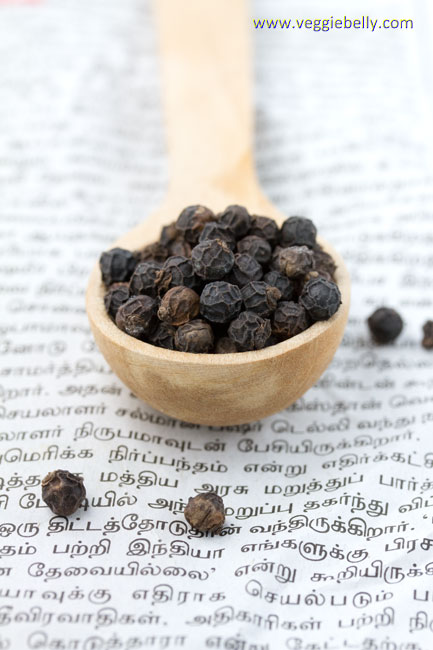
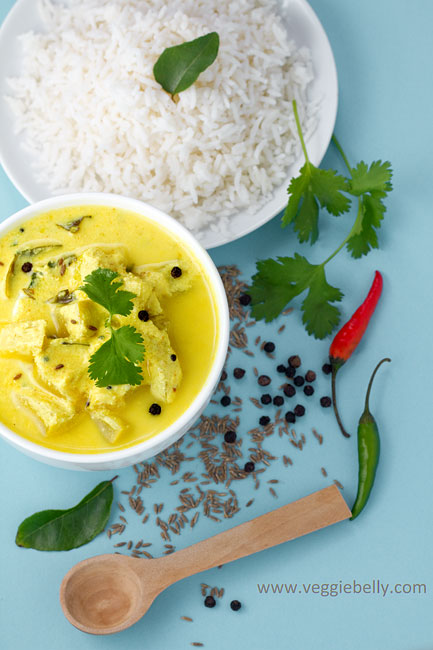
Mor kuzhambu or moor kulambu, however you spell it, is a satisfying south Indian dish made with yogurt and fresh coconut. Mor is buttermilk in Tamil and kulambu is gravy or curry. I use yogurt to make this dish (instead of buttermilk) because it makes the gravy thicker. Peppercorns are wonderful in this dish. You don’t actually eat them, but they impart great flavor. These peppercorns are from my dear friend and fellow food blogger, Nandini’s plantation in India.

Tips

- Use freshly grated coconut or fresh-frozen coconut. Please, none of the dried or dessicated stuff!
- For a lighter version of this dish, use buttermilk instead of yogurt
- Do not let the curry boil once you’ve added the yogurt. Use low heat and stir constantly to prevent boiling
- Remember to only gently re-heat this dish
- Serve mor kuzhambu with steamed rice or curry leaf rice. See this post for my curry leaf rice recipe

A note on what vegetables to use for Mor Kolambu
You can use any vegetable you like, here are some favorites and suggestions*

- Long squash(sorakkai or lauki). Peel the skin, scoop out the seeds and cut into cubes. (This is what I used in this recipe)
- Winter melon(ash gourd, neer poosanikkai or petha). Peel skin, scoop out seeds and membrane and cut into cubes
- Ripe mango. Peel skin, remove pit and cut into cubes
- Corn on the cob. My favorite. Remove husk and cut the whole corn into 1 inch rounds. Will need more water to cook
- Orka(vendakkai or bhindi). Cut into pieces. Make sure you saute okra in oil till it is no longer slimy

Mor Kuzhambu or South Indian Yogurt Coconut Curry Recipe

serves about 6

Grind to a paste
3/4 cup fresh grated coconut
1 tablespoon minced fresh ginger
1/2 tablespoon cumin seeds
2 green chillies (use more or less according to taste)
1/2 cup water

For the gravy
1 tablespoon oil
1 teaspoon black mustard seeds
1 teaspoon whole black peppercorns
a pinch of asafoetida
a few curry leaves
1 teaspoon turmeric powder
2 cups of cubed vegetable (see suggestions in the post above)*
water
salt
a 32 oz tub of plain yogurt
Cilantro for garnishing

Place the ingredients for grinding in a blender and grind into a smooth paste. Set aside.

In a deep pot, heat oil, and add mustard seeds and peppercorns. When the mustard starts to pop and splutter, add the asafoetida, curry leaves, turmeric, and cubed vegetable (see note in the post above for what vegetables to use). Cook on medium heat for about 3 minutes. Then pour about 1 cup water, cover and simmer till the vegetable is cooked; about 7 minutes.

Add the ground coconut mixture, and cook on medium-high for about 2 minutes. Reduce heat to low. Beat the yogurt with a spoon or whisk and add it to the coconut-vegetable mixture. Stir gently and constantly on low heat for about 2 minutes. Do not let the gravy boil once you’ve added the yogurt. Add more water if the kuzhambu is too thick. Garnish with chopped cilantro. Serve with white rice or curry leaf rice.

South African Bunny Chow – my vegetarian version with Chickpeas

South African cuisine is a titillating mix of Indian, British, Malay, Portuguese and Indonesian food. Every group of settlers has left its own mark on the country’s cuisine. Bunny Chow, also called ‘bunny’ is one of the Indian community’s contributions to South African cuisine. Indian immigrant laborers are credited with inventing this dish nearly 200 years ago. They used hollowed out loaves of bread to put their curries in – an easy way to transport their curries while working in sugar cane plantations. The concept of bunny chow is not unlike India’s own pav bhaji – bread eaten with curried vegetables.

Camps Bay in Cape Town

When I first heard about Bunny Chow from a taxi driver in Cape Town, I was intrigued. But this African street food is usually made with meat, and I couldn’t find a vegetarian version while I was in South Africa (I should have searched harder because the original bunny chow was vegetarian!). I was disappointed to say the least. When Meeta announced South Africa as the theme for her monthly mingle, I jumped at the opportunity to make a vegetarian bunny chow.

I used chickpeas as the filling. I also decided to go with a more elegant presentation and used mini ciabatta rolls, instead of the traditional white bread loaf. The mini rolls worked well, they looked cute, were easy to eat and reminded me of panera style bread bowls! The bread ‘bowls’ soaked up all the curry and got finger licking good!

Intrigued? Want to read more?

Cook Sister’s bunny chow recipe
Afar blog’s bunny chow recipe
Bunny chow etiquette

If you dont want to bother hollowing out bread or dont want use as much bread, you could serve the chickpea filling on top of slices of crusty bread – tapas style! But ofcourse, it wont be bunny chow anymore ;)

South African Bunny Chow with Chickpeas Recipe

makes about 6 mini bunnies

2 tablespoons vegetable oil
1 onion, finely chopped
1 tablespoon garlic paste
1 tablespoon ginger paste
1 carrot, diced (1/2 cups when diced)
1 small green pepper, diced (1/2 cup when diced)
1 large tomato, diced
1 tablespoon curry powder ( may need more or less depending on the brand)
1/2 teaspoon turmeric, optional
1/2 teaspoon paprika, optional
1 cup canned chickpeas, drained
2 teaspoons tomato paste
1-2 cups water
1-2 teaspoons lemon juice
salt
cilantro for garnish

6 mini ciabatta or other bread rolls (or 1-2 regular sized loaves of white or crusty bread)

Heat oil in a pan. Add chopped onions and cook on medium heat till the onions are brown. Then add ginger and garlic paste and saute 30 seconds. Add carrot, green pepper, and tomato and cook till the vegetables are soft. Now add salt, curry powder, turmeric and paprika if using, cook 1 minute on medium-high heat.  Add chickpeas, tomato paste, 1 1/2 cups water and bring to a boil. Stir to make sure tomato paste has dissolved. Boil for about 2 minutes. Add more water if the curry it too thick. Turn off heat. Taste,and add lemon juice according to taste.

Cut the tops off the mini bread rolls and gently scoop out the bread inside. Fill the bread ‘bowls’ with the chickpea filling. Garnish with chopped cilantro. Serve along with the scooped out bread for dipping.

If using larger sized loaves of bread, halve or quarter (depending on the size) the bread loaf. Scoop out the bread to form a bread bowl. Fill with chickpea filling. Be careful not to scoop out too much bread, your filling might leak out!

Twice Cooked Tomato Chutney

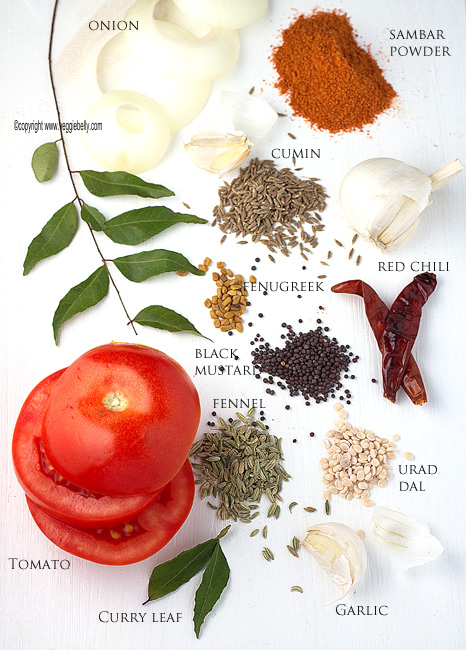
This takes a little longer to make than your average chutney, but well worth the effort. Double cooking  the chutney (once before pureeing, and once after) makes the onion, garlic and tomatoes extra flavorful. I like to add sambar powder to my tomato chutney. Sambar powder is a roasted, powdered blend of spices from south India containing red chilies, coriander seeds, turmeric, lentils and fenugreek. You could leave out the sambar powder if you wish or use only turmeric and chili powder instead.

The recipe below is my ‘special’ version. For a simpler, ’everyday’ version of this tomato chutney, I simply saute the onions, garlic and tomatoes, blend in a blender, temper some black mustard and cumin, add the pureed chutney and cook again. No matter which version I am making, I always twice cook the chutney.

This chutney will freeze well, so if you have a bumper crop of tomatoes this summer, and dont know what to do with them, this is a great option for you. I put the chutney into ice cube trays and place in the freezer. Once they are frozen, I remove the cubes from the tray, put them in a zip lock bag and return to the freezer. This way, you can defrost even tiny quantities of chutney.

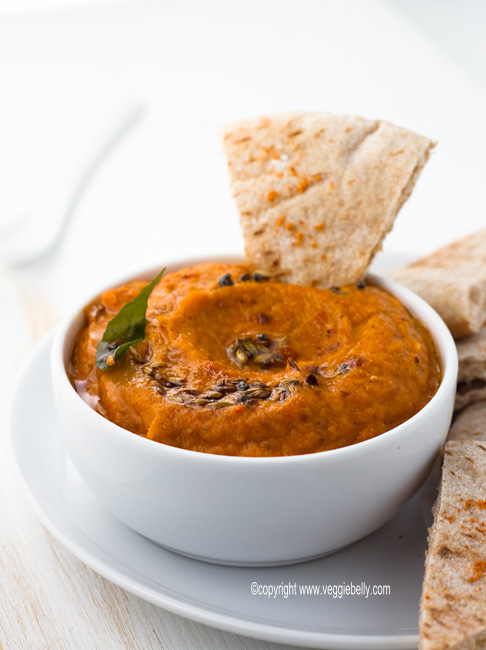
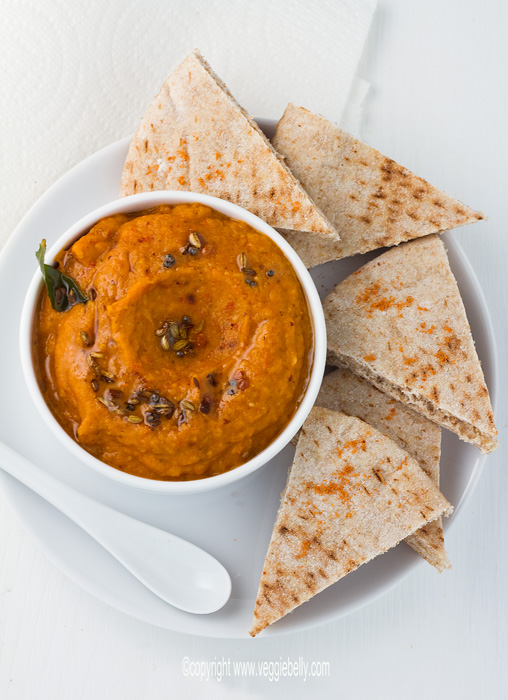
Serving tomato chutney with idlis or dosas is traditional. Here, I serve the chutney with pita bread.

Twice Cooked Tomato Chutney with Cumin and Fennel: Recipe

makes about 2 cups

3 tablespoons vegetable oil
1/4 teaspoon each cumin seeds, fennel seeds, black mustard seeds, urad dal (black gram)
1/8 teaspoon fenugreek seeds
1 dried red chili, optional
1/2 cup curry leaves loosely packed
1 large onion (about 2 cups when diced)
8 pods garlic, peeled
6-8 (about 1 lb) ripe tomatoes, diced
1 teaspoon sambar powder

for tempering:
1/2 tablespoon vegetable oil
1/8 teaspoon each cumin seeds, fennel seeds, black mustard seeds, urad dal
a few curry leaves

Heat oil in a large wok. Add cumin, fennel, black mustard and urad dal. When the mustard seeds begin to pop, add fenugreek seeds, red chili if using, and curry leaves. Cook for about 30 seconds. Then add chopped onion and garlic. Cook on medium heat for 2 minutes. Add chopped tomatoes and cook on medium for about 15 minutes or till the tomatoes are completely soft.

Cool the chutney a little and then puree in a blender, along with sambar powder and 1/2 cup water till smooth. (Make sure to vent the blender lid slightly when blending hot stuff).

Wipe the wok, and heat oil for tempering. Add all tempering ingredients. When the mustard seeds splutter, reduce heat and carefully pour the blended chutney into the wok. Be very careful, the chutney may bubble and splatter. Add salt. Cover the wok and cook the chutney on medium-low for about 15 minutes, stirring occasionally. Serve with idli, dosa or pita bread.

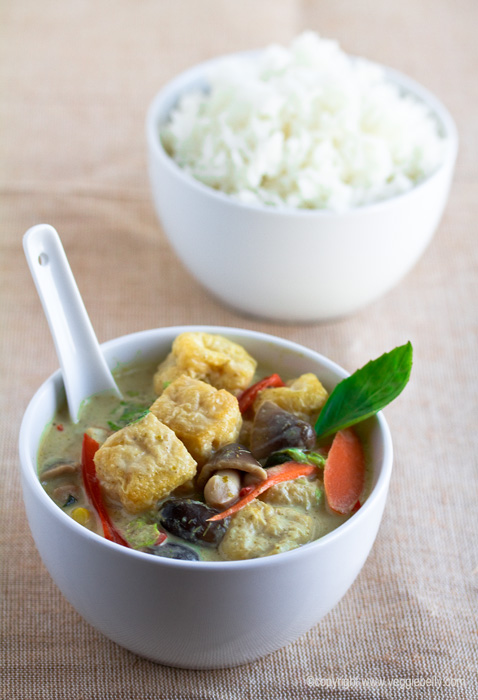
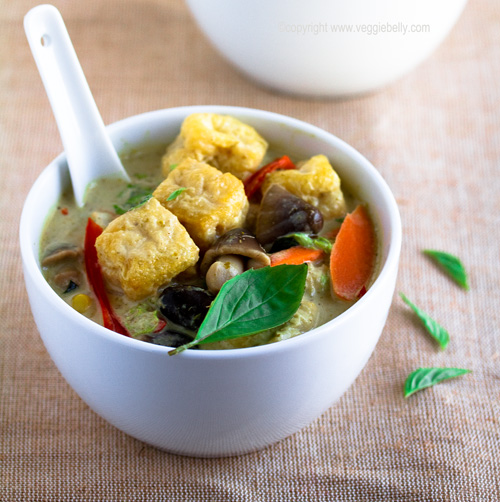
Easy Thai Green Curry (Gaeng Keow Wan)

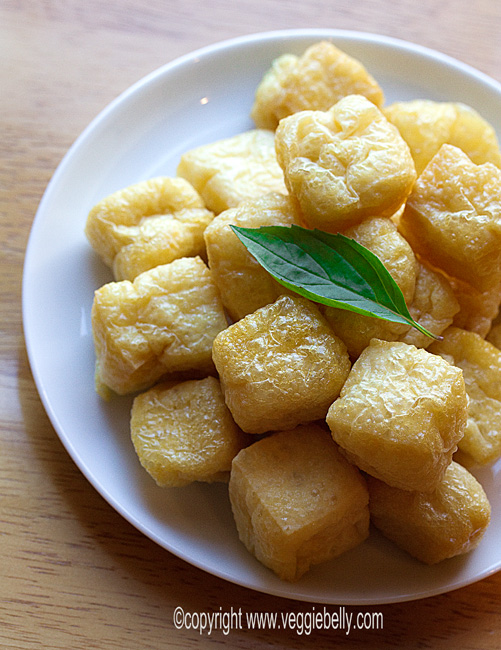
I don’t know what I’d do without an Asian store near me. The one I go to is huge, cheap and stocked with every ingredient you’d need to make any Asian meal imaginable. One of my favorite things at the Asian store is tofu or soy puffs – little cubes of golden fried tofu. When you add tofu/soy puffs to curries, they absorb all the flavor and become incredibly flavorful. If you cant find tofu puffs, oven bake or deep fry some firm tofu and use in this recipe.

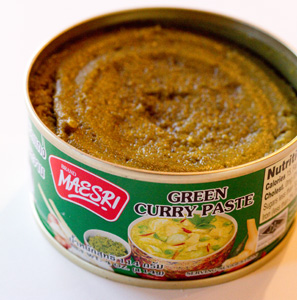
I learned how to make fresh green curry paste when I was in Thailand (more about that in future posts!), but I think store bought green curry paste is good enough when you are in a hurry. No pounding lemon grass in a mortar and pestle here! Freshly made curry paste ofcourse is much tastier, but if you are in a rush, canned paste is just fine.

 The Maesri brand green curry paste I use contains:
green chili
shallots
ginger, garlic
lemon grass
kaffir lime
sugar
galangal
turmeric
coriander
cardamom
cumin

You simply add coconut milk to the paste, boil, then add vegetables, boil again and you are done!

I like to garnish my thai curries with lots of fresh thai basil. Cilantro or green onions will also make great garnishes.

Thai Green Curry (Gaeng Keow Wan) Recipe

serves about 4

1 can (4 tablespoons) green curry paste (you may need to use more or less depending on the brand)
1 can (13.5 oz) coconut milk
1/2 cup water
2 cups napa cabbage or chinese cabbage, shredded
1 medium red pepper, cut into thin strips
1 medium carrot, cut into matchsticks
1 cup fresh or canned straw mushrooms
1/2 cup canned baby corn
1 cup tofu puffs (or firm tofu cubes that have been deep fried)
1/4 – 1/2 cup Thai basil leaves, loosely packed.

Heat a large wok and place the green curry paste, coconut milk and water in it. Bring to a boil while stirring. Reduce heat and simmer for about 5 minutes. Add all other ingredients, except Thai basil, and boil gently for about 4 minutes or till the cabbage has wilted and the vegetables are cooked but not mushy. Turn off heat. (If the green curry is too spicy for you, add more coconut milk). Sprinkle chopped Thai basil on top. Serve with jasmine rice.

Sprouted Mung Bean Curry

There is nothing like coming home on a cold autumn day to a bowl of steamy, cilantro scented, home sprouted beans. The mung beans take about 3 days to sprout, but are well worth the effort. This curry is great with rotis or rice; but I eat it just as it is. The quantities below will make about 8 servings, scale down if you need to.

To sprout mung beans: You need about 3 days to sprout the beans. Start by washing the beans well and soaking them in warm water over night. Then drain the beans and tie them into a bundle using cheese cloth. Place your mung bean bundle in a dish with a lid in a dark place. You will have sprouted mung beans in 2 days! For detailed instructions, see this video from http://showmethecurry.com/

Ingredients

Sprouted Mung Beans – 2 1/2 lbs. See video above for sprouting instructions
Onion – 1 large
Tomatoes – 3
Garlic paste – 2 tbsp
Ginger paste – 2 tbsp
Cumin – 1/2 tsp
Turmeric – 3/4 tbsp
Chili powder – 1/2 tbsp
Cumin powder – 1 tbsp
Coriander powder – 1 tbsp
Lemon juice – 1-3 tbsp
Cilantro for garnish
Oil – 2 tbsp
Salt – 1 1/2 tbsp

Chop the onion and tomatoes.

In a large skillet, heat the oil and add the cumin. When its fragrant, add the chopped onions. Saute till onions are soft. Then add the tomatoes and ginger garlic paste. Cook till the tomatoes break down. Now add the turmeric, chili powder, cumin and coriander powders. Saute for 30 seconds.

Slowly add the sprouted mung beans, salt and 6 cups of water. Bring to a boil. Cook beans on medium heat for about 15 minutes. Beans should be tender but not mushy. Turn off heat, stir in lemon juice and chopped cilantro. Taste the curry before adding the lemon; if your tomatoes are tart enough you might not need the lemon.

Related Posts with Thumbnails