Vegetarian Sri Lanka – Photos and Recipes From the Spice Island

Golden Buddha at Dambulla

My recent trip to Sri Lanka was a dream come true. My grandfather as well as my husband’s grandfather had business ties in Sri Lanka. When he was a young man, my grandfather worked in Colombo. I grew up hearing stories about this beautiful island – stories of colonial bungalows, lush tea estates, Hindu temples, and train rides. I am so excited that I finally was able to make the trip to the spice island and experience its magic for myself.

Vegetarian food in Sri Lanka was easy to find. I found plenty of delicious vegetarian local dishes. Food in Sri Lanka was comfortingly familiar. Rice and coconut feature heavily in Sri Lankan cuisine, just like in South India. But unlike India, they use pandan leaves in cooking, and treat it just like curry leaves.

If you are a vegetarian traveling to Sri Lanka, here are some must-eats..
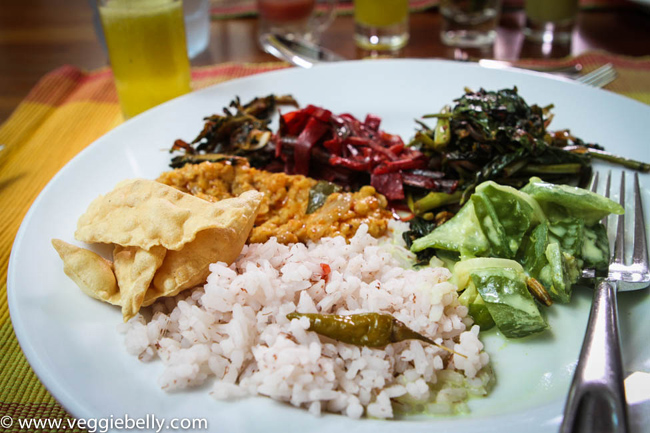
Vegetarian lunch - Red rice, chili pickle, snake gourd with coconut milk, water spinach, beetroot curry, dal curry and papadam


A Vegetarian’s Guide to Sri Lanka

Rice and Curry – This is a staple in Sri Lanka and you will find plenty of vegetarian options. During my trip, I had dal curry, jackfruit curry, snake gourd curry, potato curry, coconut milk curry scented with pandan, pumpkin curry, beetroot curry and cashew curry. If you are a vegetarian and you like rice and curry, you will never be hungry in Sri Lanka!

Sambal – Sambal is a spicy condiment made of crushed red chillies and is ubiquitous on the island at meal time. There are many kinds of Sambal. Lunu miris sambal is made with red chillies, onion, lemon and salt. Pol sambal is made with fresh shredded coconut and red chillies. Katta sambal contains caramelized onions and chillies.

Hoppers – I could eat Sri Lankan hoppers every meal of every day. These bowl shaped rice and coconut milk crepes (Appa) are an iconic breakfast item. Hoppers come in many kinds. I tried honey hoppers sweetened with local honey, egg hoppers, curry leaf hoppers, beet hoppers and spinach hoppers. String hoppers (Idiappa) are steamed rice noodles nests and a Sri Lankan breakfast favorite.

Stuffed Roti – Flatbread stuffed and folded with spicy fillings (vegetarian easily available) are a common street food. Roti is cheap, filling and a great snack.

Kotthu Roti – This street food was my all time favorite. Kotthu roti means “chopped” roti. Shredded rotis are mixed with vegetables and spices and stir fried. Watching street side kotthu roti makers is fun – they throw vegetables and shredded rotis on a griddle and chop them using special flat knives, making rhythmic sounds.

Sri Lankan Chinese – Yes, such a thing exists! Chinese dishes like fried rice, soups and spring rolls are common items on restaurant menus. Chinese food in Sri Lanka is adapted to suit local tastes and to use local ingredients like chillies. I particularly loved Sri Lankan Chinese chili paste – a sweet and hot paste made by sauteing crushed chillies, ginger, garlic, soy sauce and sugar. Its like a Chinese sambal! Some of these pastes contain shrimp, so ask first.

Tea – Sri Lanka is blessed with abundant rainfall and humidity that are conducive to tea growing. Not surprisingly, this tiny country is one of the world’s largest exporters of tea. In Sri Lanka, you will find regular black tea, cardamom tea, ginger tea, and tea sweetened with condensed milk.

Spices – There is an abundance of spices in Sri Lanka. The country’s cooking uses numerous spices like cinnamon, black mustard, cardamom, coriander, cumin, etc. Sri Lankan cinnamon is especially fragrant and tasty, so make sure you bring back a packet or two when you are visiting.
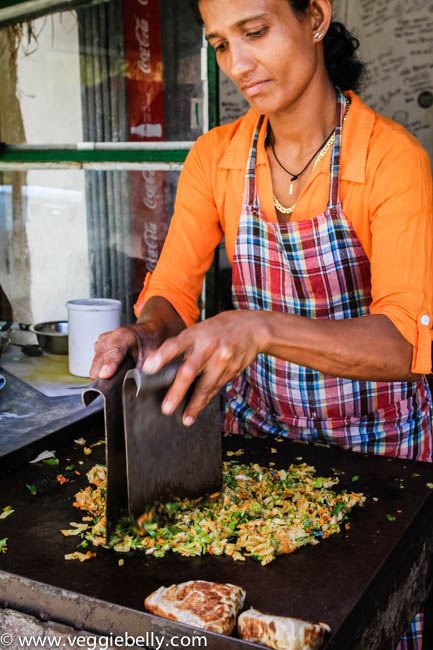
Street side kotthu roti shop in Sigiriya

At Chuti, a street side kotthu roti shop in Sigiriya. The owner is making my lunch.
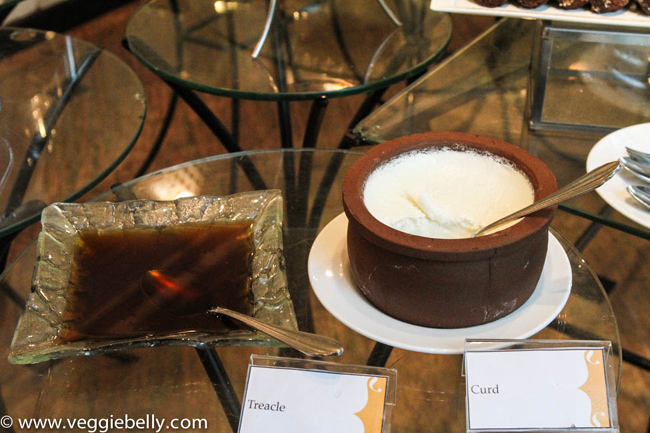
Curd and treacle (coconut molasses)

Pots of wood apple tea and black tea brewing at a street side shack

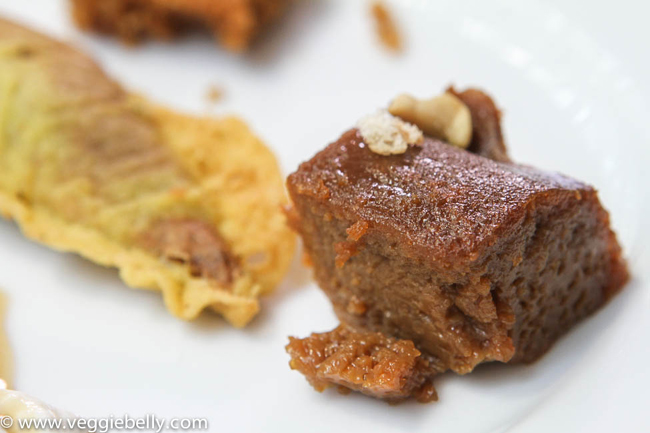
Wattalappan – A pudding of coconut milk, jaggery, eggs and cardamom
http://www.veggiebelly.com/wp-content/upLoads/2014/03/sri-lanka-6.jpg

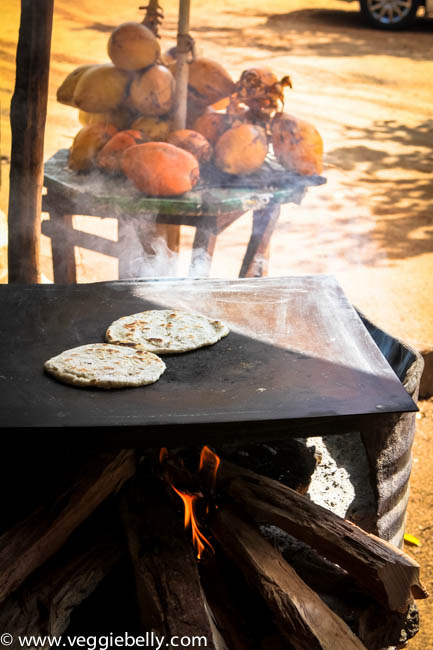
Coconut rotis (recipe below) and king coconuts

http://www.veggiebelly.com/wp-content/upLoads/2014/03/sri-lanka-5.jpg
http://www.veggiebelly.com/wp-content/upLoads/2014/03/sri-lanka-19.jpg
http://www.veggiebelly.com/wp-content/upLoads/2014/03/sri-lanka-18.jpg
View of the library from our room. Vil Uyana eco-resort, Sigiriya.

Exploring Sri Lanka’s Cultural Triangle

http://www.veggiebelly.com/wp-content/upLoads/2014/03/sri-lanka-16.jpg

http://www.veggiebelly.com/wp-content/upLoads/2014/03/sri-lanka-15.jpg

http://www.veggiebelly.com/wp-content/upLoads/2014/03/sri-lanka-14.jpg

Woman in Sri Lankan sari worshiping at Polonnaruwa

Monk at Anuradhapura Maha Bodhi Temple

Entrance to Dambulla cave temples

Dambulla cave temples

Polonnaruwa ruins


Coconut Roti (Pol Roti) Recipe

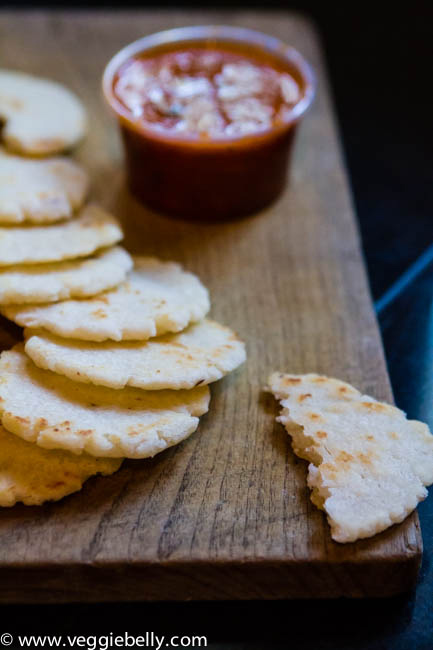
I had coconut roti or pol roti in Sri Lanka almost everyday for breakfast. It is the easiest flat bread you can ever make. And its vegetarian, vegan and gluten free too!

I recommend using fresh shredded coconut. There are so few ingredients in this dish, and the coconut is the highlight, so use the freshest coconuts possible. Good quality fresh frozen shredded coconut is a second option. Also remember to salt the rotis well. The salt will really enhance the coconut taste in these pol rotis.
http://www.veggiebelly.com/wp-content/upLoads/2014/03/patting-pol-roti-sri-lanka-1.jpg

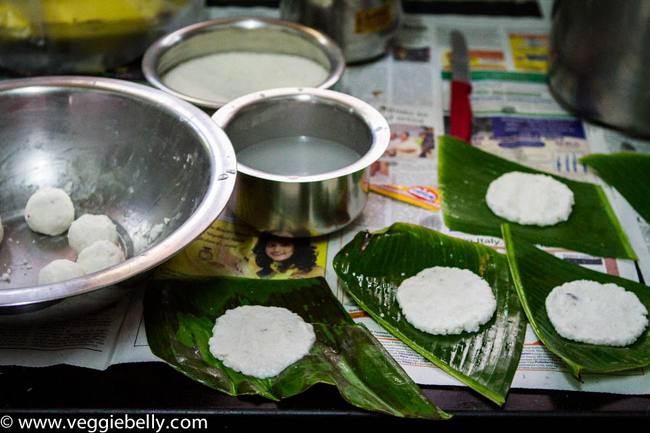
Flatten coconut roti dough on banana leaves or foil

The pol rotis I saw in Sri Lanka mostly had all purpose flour in them. But I prefer using rice flour, its lighter and tastier in my opinion.
http://www.veggiebelly.com/wp-content/upLoads/2014/03/sri-lanka-24.jpg

http://www.veggiebelly.com/wp-content/upLoads/2014/03/sri-lanka-25.jpg

Coconut Roti Recipe
makes about 20 small (3 inch) rotis

Ingredients
1 cup rice flour. Substitute with all purpose flour
3/4 cup fresh shredded coconut
salt
oil

Method
1. Place all ingredients a large bowl. Using water, bind the flour and coconut into a slightly firm dough. When the dough is done, it should not be sticky, and have a consistency that is like chappati dough.
2. Form the dough into lemon sized balls. Take a piece of foil, a zip lock bag or a piece of fresh banana leaf. Spread it with a drop of oil. Oil your palm and fingers with a few drops of oil as well. Put a dough ball on the oiled foil/ziplock/banana leaf. Gently pat it and flatten it into a 0.3cm thick disc (see picture above).
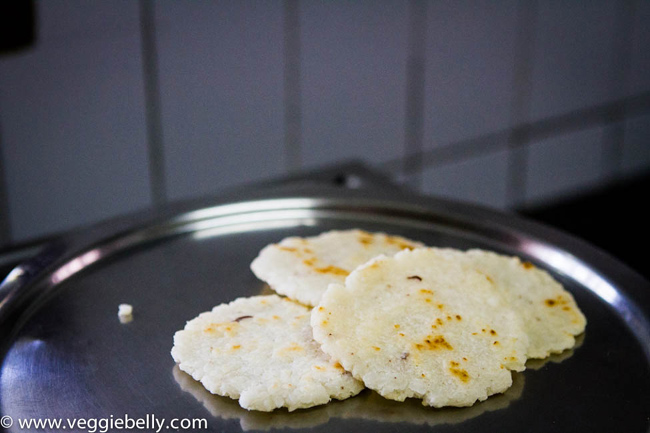
3. Put the flattened roti on a cast iron skillet on medium heat. Put as many rotis as will fit on the skillet. Drizzle a few drops oil around the rotis. Cook, flipping a few times till both sides form brown spots. Remove from skillet and repeat for all the dough balls.
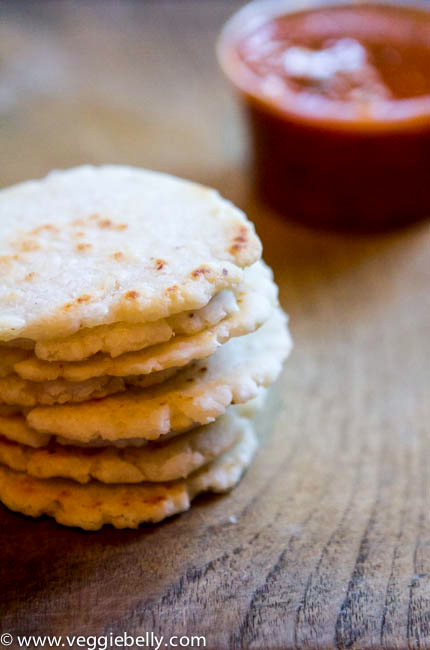
4. Serve with chutney, pickle or sambal.

_____________________________________________________________________

Enter for a chance to win a Sri Lankan Spice and Tea Hamper!

India shipping only!

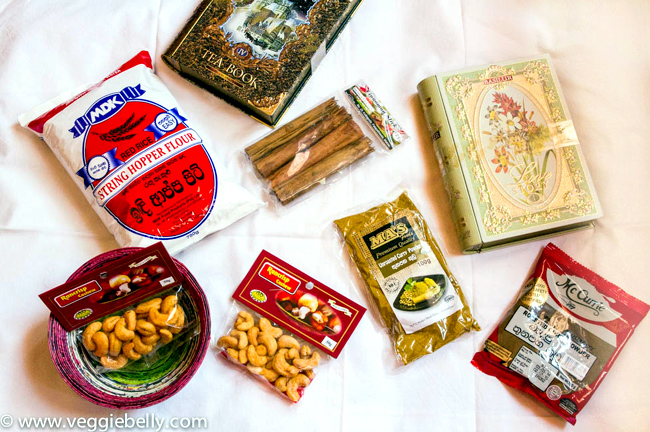
I’ve bought back a ton of goodies from my trip to Sri Lanka and have put together a hamper for you!

One lucky winner will receive this gift hamper containing:

1. Red rice string hopper flour – so you can enjoy this Sri Lankan specialty at home
2. Unroasted curry powder – use it to make a curry for your hoppers
3. Roasted curry powder – perfect for Sri Lankan curries
4. Sri Lankan cinnamon – fat sticks of fragrant cinnamon from the island. A little goes a long way
5. Deviled cashew nuts – careful, they are hot!
6. Hand made paper bowl
7. Balisur Tea Book – Authentic Sri Lankan tea in a tin shaped like a book. You get your choice of black tea or Ceylon green tea with bergamot
8. “Rice & Curry ” a Sri Lankan cookbook by acclaimed writer, S.H.Fernando  – so you can put your goodies to good use :)

a Rafflecopter giveaway

If the Rafflecopter is not working, simply leave a comment below and you are entered!

Rice and Coconut Crepes (Neer Dosa) Recipe


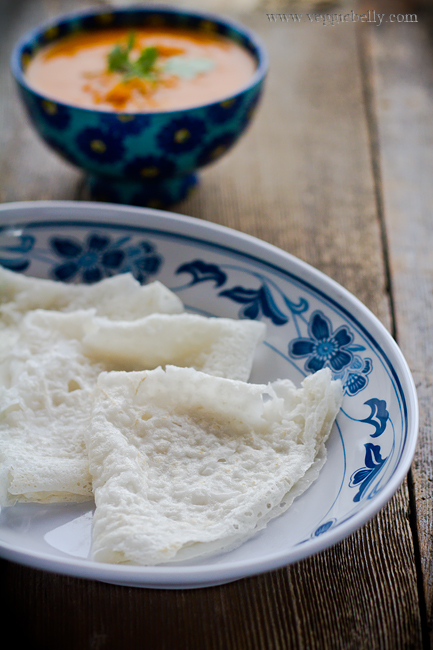
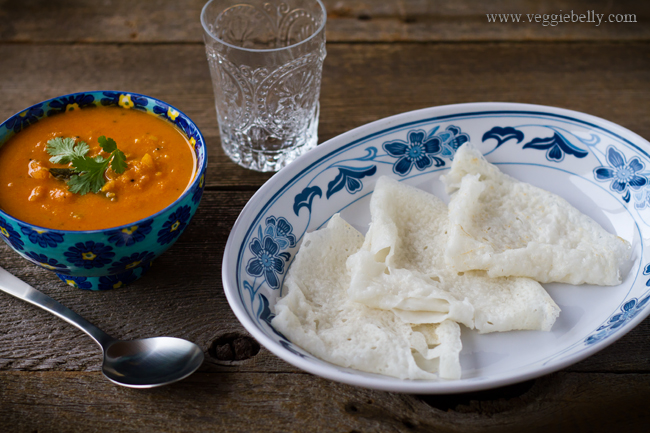
Neer dosa is a savory rice and coconut crepe from southern India. I first had neer dosa when my mother’s best friend Jayanthi Aunty, took me to Mathsya, an Udipi style restaurant in Chennai, India. She insisted I get these delicate, coconutty dosas. But I was hesitant at first. I like my dosas big, golden and crisp. These were quite the opposite – soft and delicate. But still, I let Jayanthi Aunty order neer dosas for me. Now, I’m usually super picky and particular about what I order in restaurants. But with Jayanthi Aunty, its different. I trust her. She’s known me since childhood, and knows what I like and don’t like. Besides, she has impeccable taste in everything from clothes to jewelry to furniture to food. So I wasn’t surprised when the neer dosas arrived. They were fluffy, soft and melt-in-your-mouth delicious.

Thankyou, Jayanthi Aunty for making me get that very first neer dosa. It was love at first site!

After I had my first neer dosa, I set out to perfect the making of neer dosa at home. I don’t live in Chennai, and can’t go to Mathsya for my neer dosa. So I had to figure this out at home. I’ve arrived at this recipe after a lot of trial and error, and I have to say its fabulous. I’ve now been making this neer dosa recipe at home at least once a week!


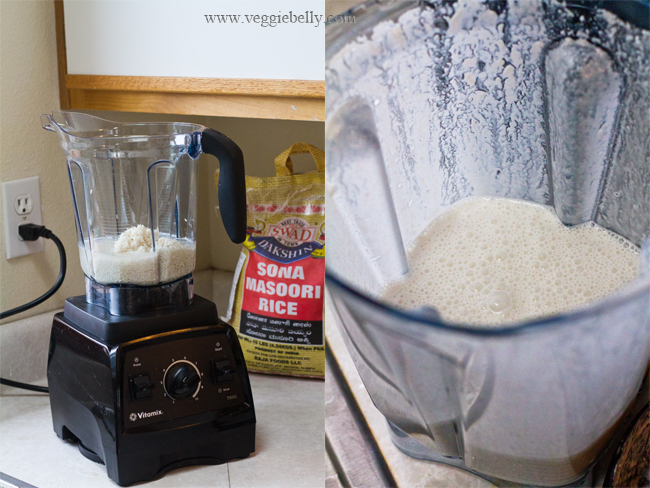
Like all dosa and idli batter, you need a good solid grinder. In my kitchen thats either my Ultra wet grinder or my Vitamix. For this recipe I used the Vitamix. Its easier to clean up after you are done blending and the Vitamix can easily grind the neer dosa batter to the super fine consistency that is key. Don’t have a Vitamix or similar powerful blender? I am giving away a Vitamix to one lucky Veggie Belly reader! Go to this post to enter for a chance to win!

Tips for the perfect Neer Dosa

- Consistency. Batter consistency is important. The batter must be a little thicker than whole milk. Also, grind the batter very finely. If you dip your thumb and index fingers in the batter and rub them together you should feel no grit or grain.

- Hot skillet. Your skillet must be very hot before you pour the batter over it. Sprinkle a few drops of water on your skillet. If the water sizzles and bubbles away within 5 seconds, your skillet is hot enough. A hot skillet is also what makes the holes form in the dosa and makes it lace-like.

- Work quickly. Because you are working with a hot skillet, you must pour and spread the batter very quickly so that a perfectly round dosa forms. The whole process of pouring the batter and swirling the pan so the batter coast it, should take about 10 seconds.

- Practice. Watch the video I’ve included below and practise making a few dosas, you will be an expert in no time.

http://youtu.be/Q8USFqvi9hQ

Neer Dosa Troubleshooting

Neer Dosa sticks to the pan – Your batter might be too thin or too cold. If the batter is too thin, you will have to start over. The ideal consistency of batter is slightly thicker than whole milk. If you are using refrigerated batter, let it come to room temperature first; cold batter will stick to the pan. An under seasoned pan will also make neer dosas stick. Usually the first 2 dosa will stick, and then they will start to come off the pan easily as the pan gets seasoned. A non-stick pan always helps.

Neer Dosas are cracking – Soak the rice longer if dosas are cracking. Adding a little extra cooked rice (1 tablespoon extra cooked rice per cup on raw rice soaked) to the batter will also help bind the batter and prevent neer dosas from cracking.

Neer dosas batter doesn’t coat the pan well – If your batter is too thick, it may not move around the skillet and coat it well to form a proper round. Dilute the batter with water till it is slightly thicker than whole milk. Cold batter also won’t glide and coat the pan, so make sure the batter is at room temperature.

Neer dosas are too brown – Your pan is either too hot or you’ve used too much coconut. But browned neer dosas are still tasty!

Neer Dosa Recipe

makes 16 eight inch dosas

Ingredients

1 cup sona masoori, or any other short grain raw rice
1/4th cup fresh grated or frozen coconut*
1 tablespoon cooked rice, optional
1/2 teaspoon salt
Vegetable oil

*You can vary the coconut quality according to taste. Use as little as 2 tablespoons and up to 1/3rd cup.

Method
1. Soak the rice in plenty of water for at least 4 hours and upto 8 hours (over night). Then drain the water.
2. Place the soaked rice, grated coconut, cooked rice if using, and 1 cup water in a Vitamix or similar powerful blender. Blend on medium speed for about 1 minute. Then crank up the speed to medium high and blend till the batter is very smooth, without grains or grit. If the batter gets hot during blending, throw in one or two ice cubes.
3. Add 1 more cup of water and salt and blend for a few seconds. The batter should be a little thicker than whole milk. If its too thick, add water to dilute it. You should have approximately 4 cups of batter.
4. Let the batter rest, covered for 1 hour. This is optional. You can also use the batter right away.
5. Heat an 8 inch non stick skillet on high heat. When you sprinkle a few drops of water on the skillet, it should bead up and sizzle away in under 6 seconds.
6. Dip a wad of paper towel in oil, and wipe the skillet. This will season the skillet.
6. Mix the batter well, and keep it near you. Pour 1/4th cup of batter into the center of the skillet. Immediately, shake back and forth and swirl the skillet so that the batter coats the bottom of the skillet completely and holes start to form on the surface. (See video above)
7. Drizzle a few drops of oil around the dosa. (If you are using a good non stick skillet, you can get away with not using any oil at all if you wish).
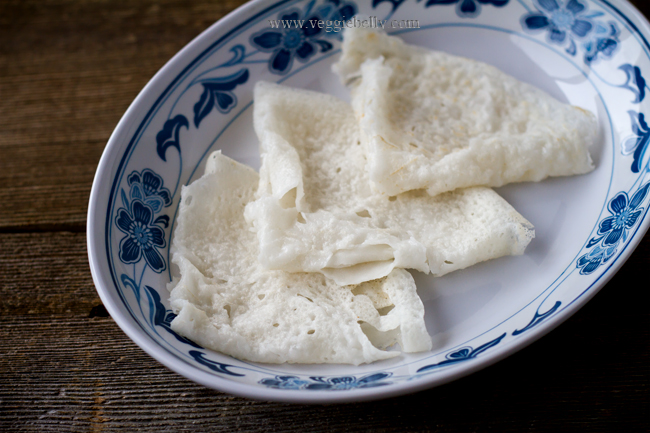
8. Now cover the skillet, reduce heat to medium and cook for about 30 seconds. The neer dosas should not brown. Remove lid, and cook another 30 seconds or till the dosas are no longer liquidy, come off the skillet easily and are still fairly white in color.
9. Fold the dosa into a semi circle and then again in half to form a triangle.
10. Bring the pan back up to high heat, and repeat for the remaining batter.

11. Serve neer dosas with chutney, podi or crushed jaggery

Pumpkin Kootu Recipe

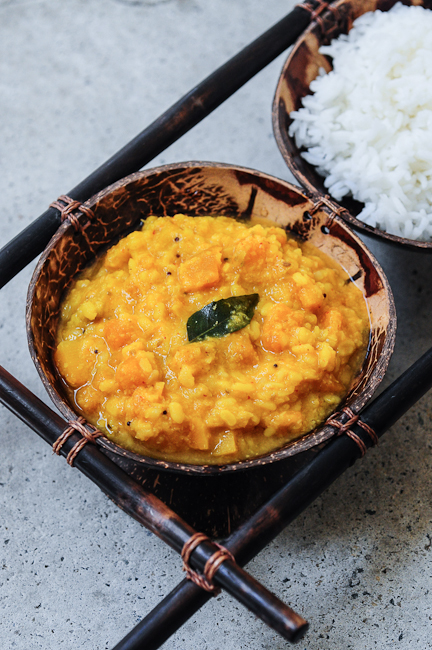
The very talented Nags of Edible Garden blog brings us this easy pumpkin kootu recipe today. A kootu is a side dish of vegetables cooked with lentils. And I cant think of anyone better than Nags to guest post about this traditional South Indian recipe. Her blog is full of everyday, fuss-free Indian recipes. Take it away Nags!

Hello everyone, I am Nags, the writer, cook, and photographer behind Edible Garden. I’ve been blogging for almost 6 years now but haven’t done very many guest posts (this is my 2nd, actually) so please raise a glass with me to Sala’s courage and trust!

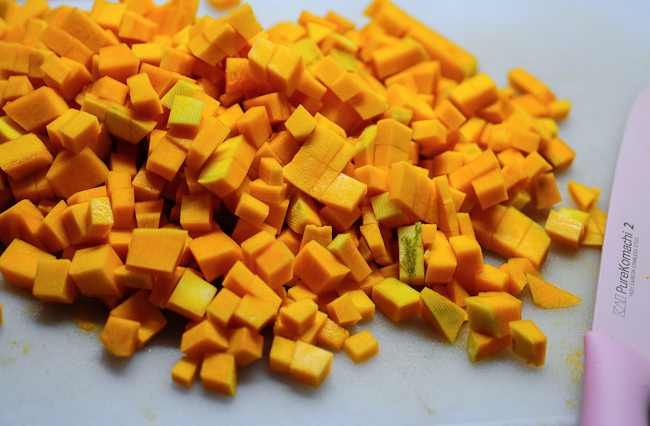
It’s been over 7 years since I moved away from home and started cooking to feed myself, but I have only cooked with pumpkin about 2-3 times in this entire period. I can’t quite figure out why this is because pumpkin is a gorgeous vegetable by all means. It’s a lovely orange-yellow, cooks quickly, lends a mild sweetness to the dish, and is generally well-behaved and easy-going. Well, I can only hope I can make up for my rudeness by cooking with it more, so here’s a simple pumpkin kootu recipe to kickstart what I hope is a great relationship between me and the lovely pumpkin.

But before I go into the recipe, I must say what an honour it is to take up a small part of Veggie Belly. I’ve been in awe of Sala’s recipes and pictures since the day I set my eyes on this website. She has a lovely eye for details, props, colours and food photography. She’s also so very generous. I won a cookbook in a contest in Veggie Belly once but Sala sent me this entire package filled with goodies all the way from the US to Singapore.

Pumpkin Kootu Recipe

Serves 4

Ingredients
3 cups pumpkin (or kabocha or butternut squash), cut into small cubes.
1 cup yellow moong dal
¼ tsp turmeric powder
Salt
Curry leaves
Grind Together to a Paste
½ cup grated coconut
½ tsp red chilli powder
1 tsp cumin seeds
1 clove of garlic
2 shallots, optional
For Tempering
2 tsp oil
¼ tsp black mustard seeds
¼ tsp hing, optional

Method

  1. Add the pumpkin, dal, turmeric powder, salt and 4 cups water to a sauce pan and cook on low heat, covered, until the dal is soft and the pumpkin is very soft.
  2. Add the ground paste to the dal and stir well. If the mixture is too thick, add a bit more water but not too much. I usually wash the blender jar and add that water in which should be sufficient. Throw in the curry leaves. Cook the kootu for about 3 mins. Remove from heat.
  3. Heat oil for tempering in a skillet. Add the mustard seeds. When they pop, add the hing, if using. Add this to the prepared kootu. Adjust salt if required
  4. Serve with steamed white rice and any dry vegetable curry
  5. A variation of this kootu is to use channa dal instead of moong dal and green chillies instead of red chilli powder. Check out this Chow Chow Kootu, for instance.


Indian Coconut Rice. A Guest Post for 6Bittersweets

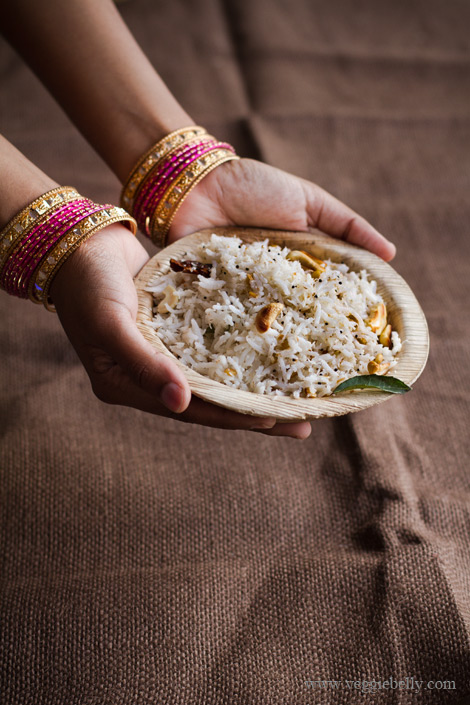
I’m at the airport, about to board my plane to India (and then I’m going to Jordan, Dubai and Israel). I wanted to quickly tell you about my coconut rice guest post over at my lovely friend Xiaolu’s blog 6bittersweets. While I was busy packing and finishing up work before I leave for my trip, I was resorting to easy, filling recipes like this one. This coconut rice is fragrant, easy to make and very flavorful.

Head over to 6bittersweets blog to read my post on this Indian coconut rice recipe !

Thenga Manga Pattani Sundal Recipe

A Guest Post for Shulie of Food Wanderings

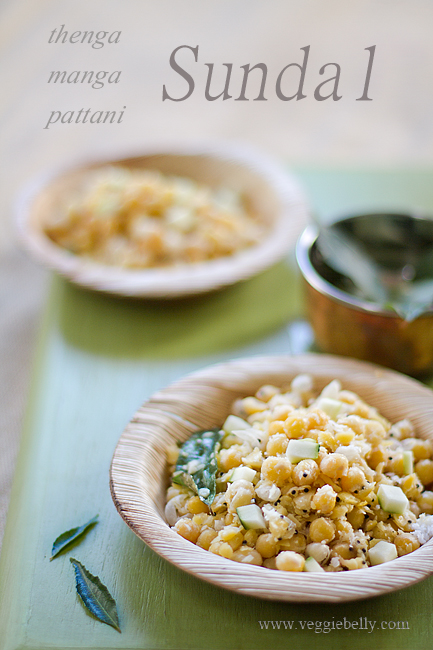
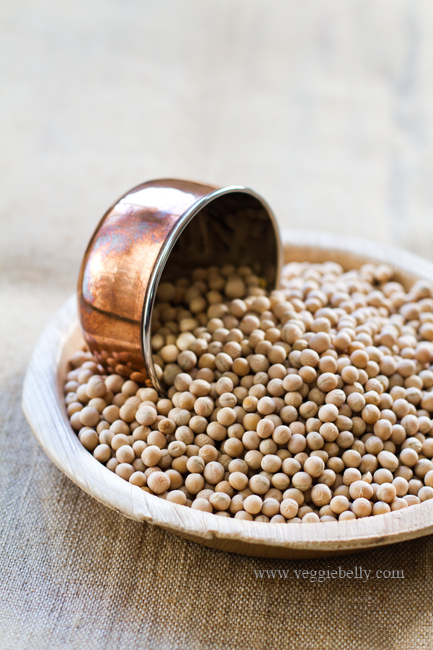
Like me, if you are from the state of Tamil Nadu in India, you know the famous thenga manga pattani sundal you get on the beach in Madras. I see the city growing every time I visit – the buildings get taller, and the cars get fancier. But one thing remains the same – the thenga (coconut) manga (mango) pattani (peas) sundal on the beach. Young boys sell these from huge stainless steel buckets. I hope the tradition of beach goers buying a newspaper bundle of thenga manga pattani sundal on Marina beach never goes away.

For a recipe for this easy sundal, head over to my friend Shulie’s blog, read my guest post there and follow her on twitter.

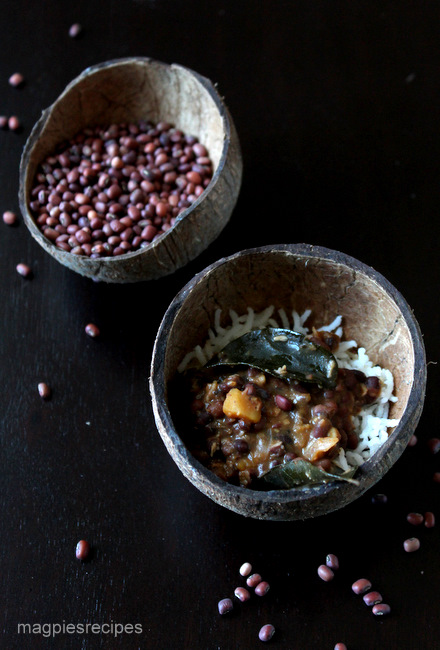
Red Moong and Butternut Squash Eriserry Recipe – a Guest Post by Rose of Magpies Recipes

Greetings from the windy city! I am on a cross country road trip right now (posts and pictures coming soon!) and have stopped in Chicago for a day. I have enlisted some of my favorite bloggers to bring you their recipes, while I’m driving 3,000 miles cross country! The first post in my guest post series comes from Rose of Magpies Recipes. Rose is from the state of Kerala, and her blog is full of Kerala recipes cooked with love. I am a huge fan of malayali cooking, and this red moong and butternut squash eriserry (a curry with coconut) is one of my favorites. Take it away Rose!


I am a huge fan of Sala’s gorgeous photographs and wonderful writing as much as I am her warm wonderful personality. When I heard that she was going on a cross country road trip and was wanting guest posts for her awesome blog Veggie Belly,  I sent off a mail to her saying I would love to guest post for her lovely blog, although I have only a few days of packing left to do to head off to India myself! Yes am so excited and just cannot wait to be  home. Am especially longing to introduce my little monkey to my grandmother who is just waiting to meet her first great-grand son!

I was thrilled when Sala very kindly said she would love if I did. Thank you Sala! I hope you are enjoying your trip. Since Sala loves Kerala food, I am sharing one of my favourite everyday Kerala dishes, Red Moong and Butternut Squash in Coconut curry (Van Payar Mathanga Eriserry). It is a simple yet comforting and delicious. And perfect for the transition to the fall season, although here in California we still have a few weeks of intense summer left!

While I come from a Syrian Christian family of big meat eaters I also love my veggies and lentils and am married to a lentil lover as well. T can go for weeks on just cherupayar or dal and for everyday eating we are most happy with such simple fare.

Eriserry is a typical Kerala lentil dish and is often part of the Onam Sadhya or harvest festival that happens in the month of September. In Kerala it is usually made with a variety of pumpkin available there, although here I make it with squash or even sweet potatoes. Traditionally fresh coconut is ground into a paste but I use the convenient frozen shredded coconut that is easily available in most Indian grocery stores here. Of course there is a difference in taste but this makes it a very easy dish to make.

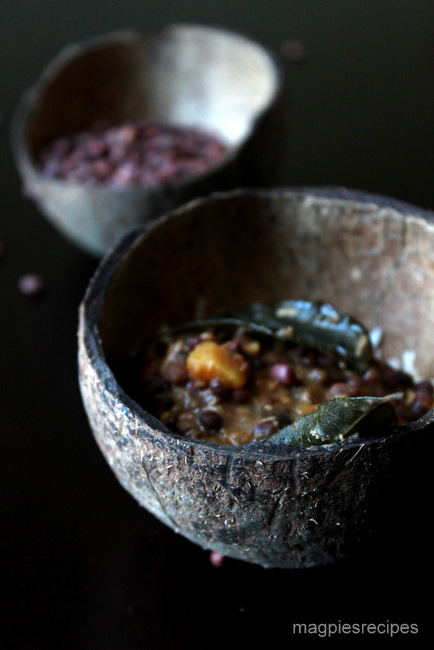
Red Moong and Butternut Squash Eriserry Recipe (Van Payar Mathanga Eriserry)

serves 4-6

Ingredients
1 cup dry red moong beans or cow peas  (van payar)
2 cups butternut quash peeled and chopped (you can also use sweet potatoes. But mathanga or Indian pumpkin is traditional)
1-2 tablespoons coconut oil or canola oil
1/2 teaspoon mustard seeds
1/2 teaspoon cumin seeds
1/4 teaspoon turmeric powder
1 teaspoon dried chilli flakes or 3/4 tsp chilli powder-3/4
4-5 curry leaves
1 medium onion, chopped
2-4 cloves garlic, sliced thin (optional)
1 cup coconut Milk
1/4 cup shredded coconut. Do not substitute desiccated coconut 
Salt to taste

Method
Wash the red moong beans or cow peas and leave to soak in water while you prepare the rest of the ingredients. You can also soak them overnight so that they cook faster.

Pressure cook the beans with 2.5 cups of water and salt until they start to become soft ( about 1 whistle and 7 mins on simmer). Once the pressure has released, open the pressure cooker and add the squash and cook for about 2 more whistles until the beans are soft and the squash is fork tender.

If you don’t have a pressure cooker, you can just cook beans and squash in a deep pot instead, but this will take longer.

Meanwhile in a seperate pan or skillet heat the oil and add the mustard seeds and cumin seeds and let them splutter
Now add the turmeric powder, chilli flakes and curry leaves and the chopped onion and garlic if using and stir occasionally until the onions are translucent and starting to turn brown.

Add the shredded coconut and saute until the coconut turns lightly golden.

Add this to the cooked beans and stir well to combine. Heat and let it come to a boil for about 5 mins. Reduce the heat to low and add the coconut milk and let it simmer for about 5 mins. Taste to check the salt and add more if required. Do not let it come to a boil after adding the coconut milk as the coconut milk will curdle.

Serve hot with rice, fried pappadam and pickle. For extra points, serve some sweet payasam for dessert!

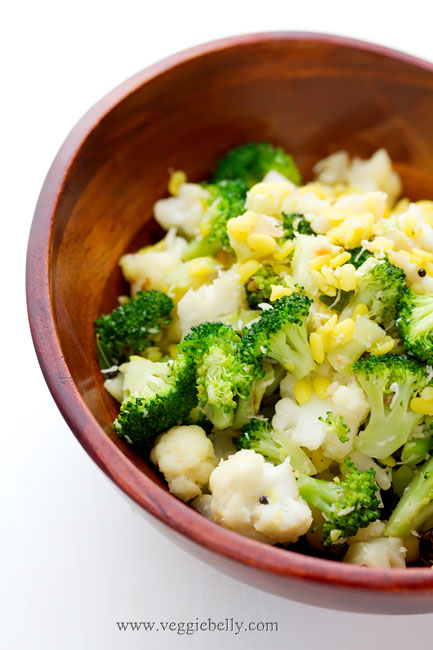
Cauliflower and Broccoli Poriyal with Lentils and Coconut

A poriyal is a beautiful, simple way to enjoy fresh vegetables. This south Indian stir fry (kinda!) usually involves tempering mustard seeds, cumin seeds, chillies and or curry leaves and then adding chopped vegetables - quick, easy and healthy.

I like to add some split mung beans or moong dal to my poriyals for extra body and protein. I also leave the broccoli and cauliflower slightly undercooked so that they are a tad crunchy; over cooking fresh vegetables just doesnt let their flavor shine through. Serve this with rice and pineapple rasam or collard greens dal.

Cauliflower and Broccoli Poriyal with Lentils and Coconut Recipe

serves 6-8 as a side dish

for the lentils
1/4 cup split mung beans (moong dal)
a pinch of turmeric

other ingredients
2 cups of broccoli florets
2 cups of cauliflower florets
1 tablespoon oil
1/2 teaspoon black mustard seeds
2-3 dried red chillies, or according to taste
a few curry leaves
1/8 teaspoon asafoetida
4 tablespoon fresh grated coconut (I use fresh-frozen, grated coconut available at the Asian store. The ones from Thailand are good.)
salt

Bring 3 cups water to a boil in a pot. Add moong dal, turmeric and salt and let it boil till the lentils are cooked through but still holding their shape. Drain well.

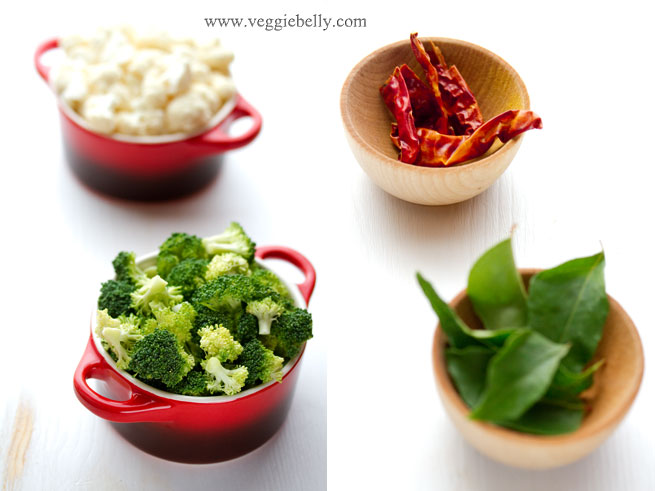
Cut the broccoli and cauliflower into tiny florets as seen in the photos. Heat oil in a wok and add mustard seeds. When they splutter, add the dried red chillies, curry leaves, and asafoetida. Cook for about 30 seconds. Then add cauliflower, broccoli and salt. Cook on medium heat till the vegetables are cooked but still slightly crunchy. If needed, sprinkle some water while cooking the vegetables.

Add the cooked lentils and coconut, stir well, and turn off heat.

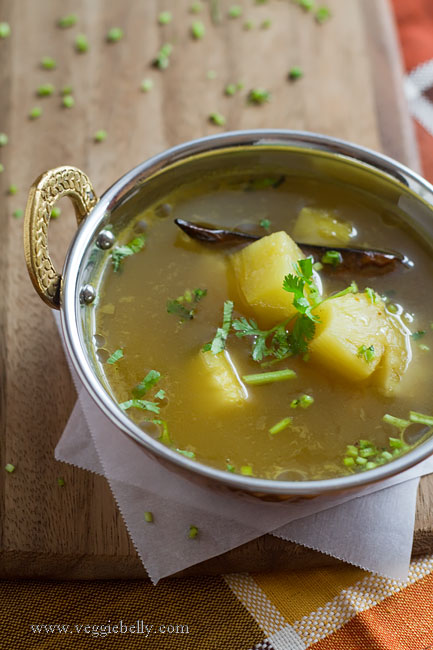
Pineapple Rasam and Tender Coconut Rasam (South Indian Soup)

When I called my grandmother to get a pineapple rasam recipe, the culinary genius she is, suggested that the same recipe will also work with tender coconut. So here you have it – a pineapple rasam recipe and a tender coconut rasam recipe.

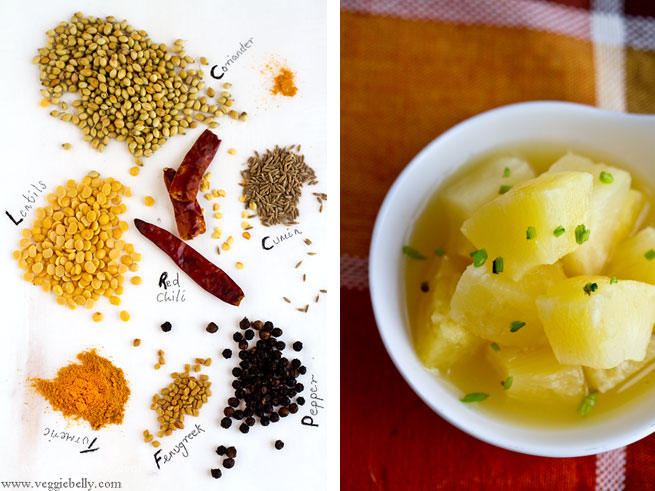
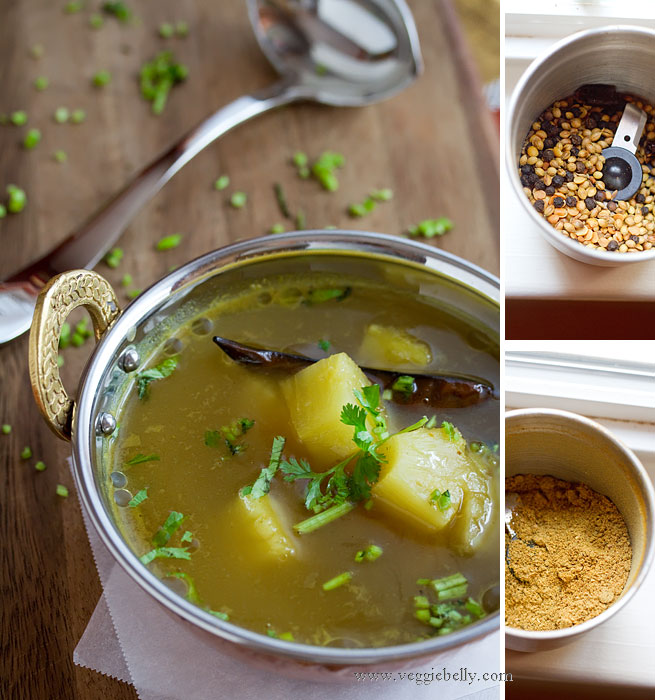
Roast and grind these ingredients for rasam spice powder & cook with sweet juicy pineapple

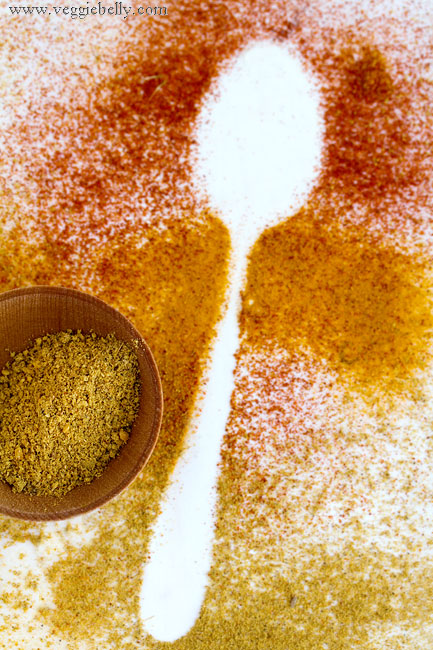
Rasam, also called charu or saaru, is a spiced, thin soup from South India. You can buy rasam powder at any Indian store; but I like home made rasam podi or powder better. Once you’ve made it, it will keep for months in an airtight container.

Serve rasam with rice or in cups like soup. There are several rasam recipes on the internet, the basic spices are the same, proportions and other additions vary according to family and region. This pineapple rasam recipe on Jugalbandi looks great, as does this pineapple rasam recipe on Veg Inspirations, Samayal Arai blog also has a pineapple rasam recipe.


If I want a sweet and savory rasam, I always turn to pineapple. I havent tried my grandmother’s idea of adding tender coconut pulp and coconut water to rasam; but I love the idea and if any of you try the tender coconut variation (see below) I’d love to hear how it turned out.


Pineapple Rasam Recipe

Serves about 4

for tempering
½ teaspoon ghee or clarified butter or oil
¼ teaspoon black mustard seeds
1 dried red chili
A pinch of asafoetida
A few curry leaves

for rasam
a small lime sized ball of tamarind pulp (about a tablespoon)
5 cups water
1 ½ tablespoons rasam powder (recipe below)
1 cup pineapple chunks (I used canned; make sure you buy pineapple chunks in 100% pineapple juice)
½ cup pineapple juice (from pineapple chunks can)
2 tablespoons chopped cilantro
Salt

Heat ghee or oil in a deep pot. Add mustard seeds. When they start to pop, add all other tempering ingredients. Cook for about 30 seconds.

Soak tamarind in 1 cup hot water for 5 minutes. Squeeze the tamarind with your hands, extracting the juices.

Add tamarind juice, 5 cups water and rasam powder to the pot. Boil for about 7 minutes. Add pineapple chunks, pineapple juice, cilantro and salt and boil another 5 minutes.

Serve hot with rice or drink like soup.

Rasam Powder or Rasam Podi Recipe

makes about ¼ cup

for dry roasting
2 tablespoons whole coriander
½ tablespoon cumin seeds
½ tablespoon peppercorns
¼ teaspoon fenugreek seeds
1 tablespoon toor dal or yellow lentils

for oil roasting
Few drops of oil
1 dried red chili, torn into small pieces (this will yield a mild rasam powder, use more chillies if you want it hot)

other ingredients
1/8 teaspoon asafoetida
1/2 teaspoon turmeric powder

In a small skillet on low heat, roast all the dry roasting ingredients one by one for about 1 minute each or till the spices are fragrant and turned color slightly. Place each ingredient in a coffee grinder as you finish roasting.

In the same pan, heat a few drops of oil, and roast the red chili for about 30 seconds. Add to the coffee grinder.

Add asafoetida and turmeric to the coffee grinder. Grind everything to a fine powder. Store in an airtight container. Rasam powder will keep for several months.

Tender Coconut Rasam Recipe

Use the pineapple rasam recipe above. But instead of pineapple chunks, use tender coconut pulp. Instead of pineapple juice, use tender coconut water. Add these right at the end of cooking.

Related Posts with Thumbnails