Zhug – a Yemeni Cilantro Sauce

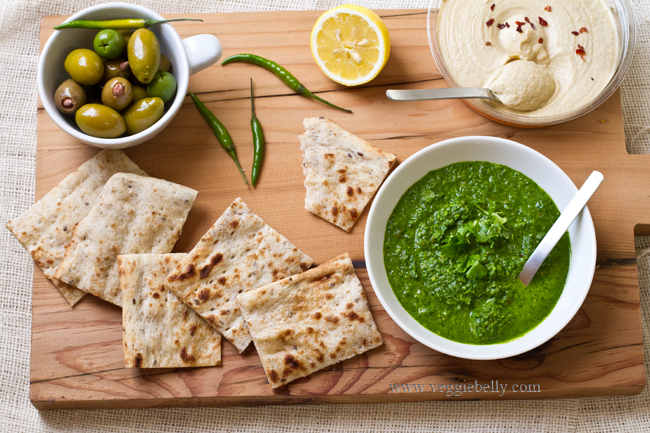
Zhug a Yemenite cilantro hot sauceZhug, also called Skhug, or Zhoug is a spicy hot sauce used in Yemeni cuisine. Yemenite Jews bought zhug to Israel, and it is popular in the country. I had zhug for the first time when I visited Israel and loved everything about it – the color, the simplicity and the freshness. There are two kinds of zhug – red and green. Red zhug is made with red chiles and green zhug is made with green chiles. This recipe is for green zhug.

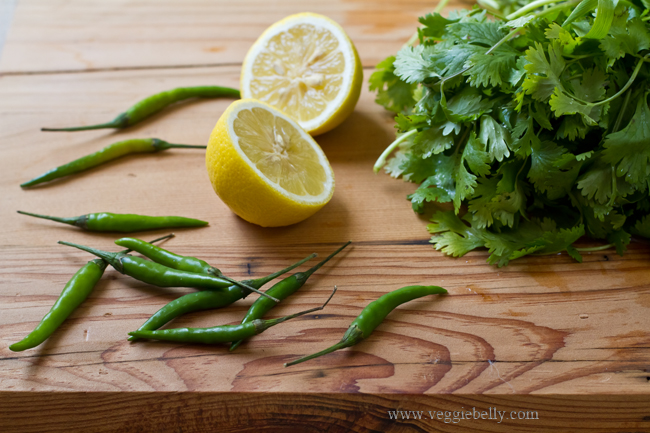
I use 4 Thai green chiles in this recipe. It makes for a spicy zhug. If you want it milder, use less chiles. Alternatively, slit the chile open and scrape out and discard the seeds, this will get rid of most the heat. Then use the chile in this recipe. Green chilis lemon and cilantro for zhug
Some zhugs use half cilantro and half parsley. But I like the all cilantro version. I am greedy about cilantro and always buy more than I need. So this is the perfect use of excess cilantro for me!

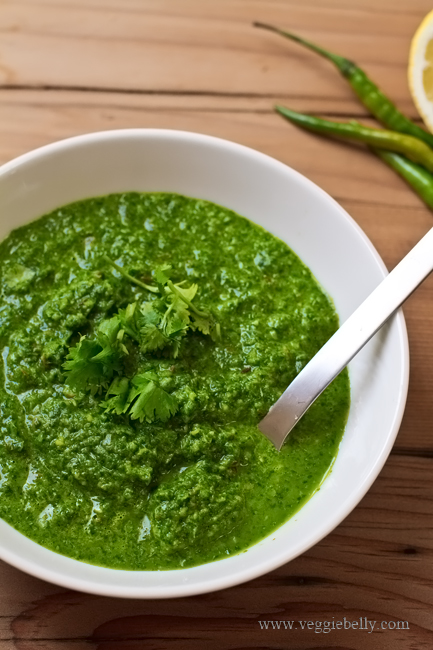
Zhug is very easy to make. All you have to do is simply blend all the ingredients together! It will keep in the fridge, in a airtight container for about a week. Traditionally zhug is made in a mortar and pestle. I use a food processor and grind the zhug to a coarse paste.

How to use Zhug:
Think of zhug as a pesto or chutney. Here are some delicious ways to use this incredibly versatile condiment.
- Stir it into soups
- Spoon it over eggs
- Serve as a dip with vegetables, and pita bread
- Mix it into cooked rice or quinoa
- Use as a sandwich spread; its great mixed with some hummus and slathered on a sandwich!
Zhug with cilantro

Zhug Recipe

makes about 2 cups

Ingredients
2 bunches cilantro (leaves and stems), chopped. (About 3 cups when chopped)
4 Thai green chiles, or according to taste*
2 cloves garlic, peeled
1 teaspoon lemon juice
2 tablespoons olive oil
1/2 teaspoon ground cumin
1/4 teaspoon ground coriander
1/4 teaspoon ground cardamom
Salt

*This will make a spicy zhug. Change the quantity of green chiles according to your taste.

Method
1. Place all ingredients, along with 2 tablespoons of water in a food processor. Blend into a coarse paste. Store the zhug in an airtight container in the fridge for up to a week.

Quick Healthy Tomato Soup & An Ayurvedic Retreat in Kerala

Hello everyone! Sorry I’ve been missing for a while! Offline, non-blog stuff took over. But I’m back now and have  an irresistible line up of vegetarian recipes for you this year!

I’m in Kerala, India right now, on an Ayurvedic retreat. Its something I do once every two years or so, and there is no better place for this all natural detox, than the beautiful state of Kerala! My daily schedule here includes yoga twice a day, meditation, chanting, two Ayurvedic massages, and cooking class.

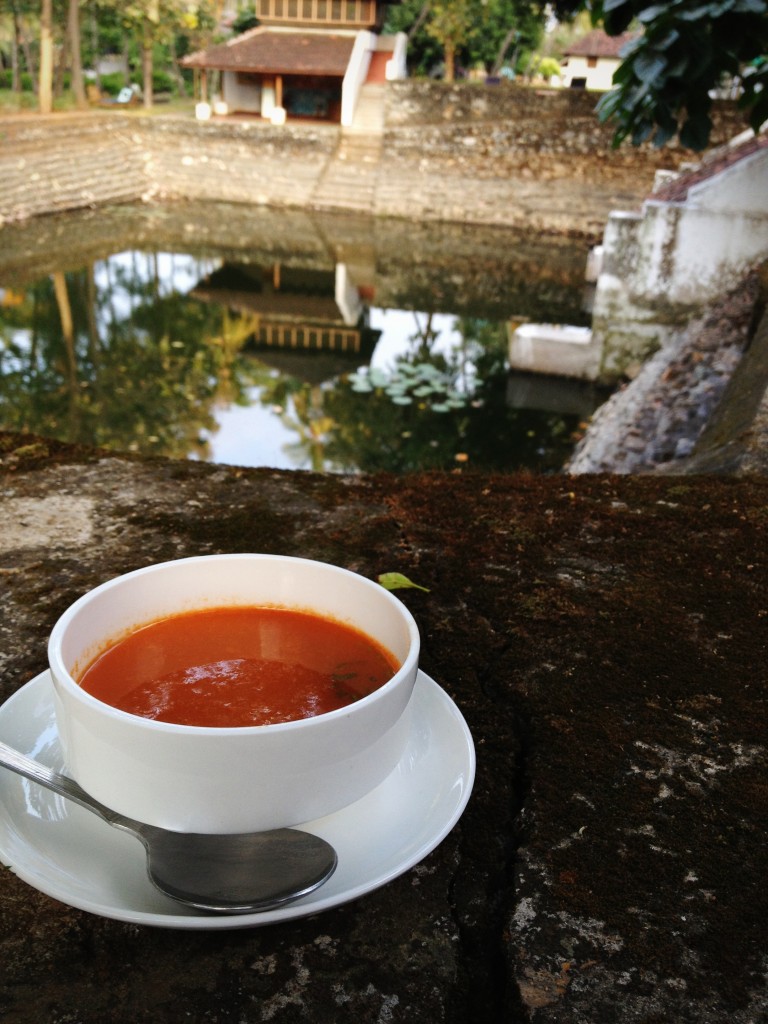
Above is the main building of Kalari Kovilakom, the Ayurvedic center I’m staying at. A beautiful, serene place with lotus ponds, a temple, and the nicest staff. The food here is fantastic and all vegetarian. Its all personalized and cooked according to each person’s Ayurvedic dosha (constitution). And the chef Nishant is ever so willing to share his simple, healthy recipes. 

The dining room..

Whem I’m not doing yoga, meditation, getting massaged or hanging out in the Ayurvedic kitchen, I sit outside my room and catch up on reading. There is no tea or coffee here. Instead everyone gets herbal tea. This one is kapha tea, made with boiling water and powdered cinnamon, cardamom and long pepper.

I love sitting by the pond in the evenings..

..and feeding the fish!

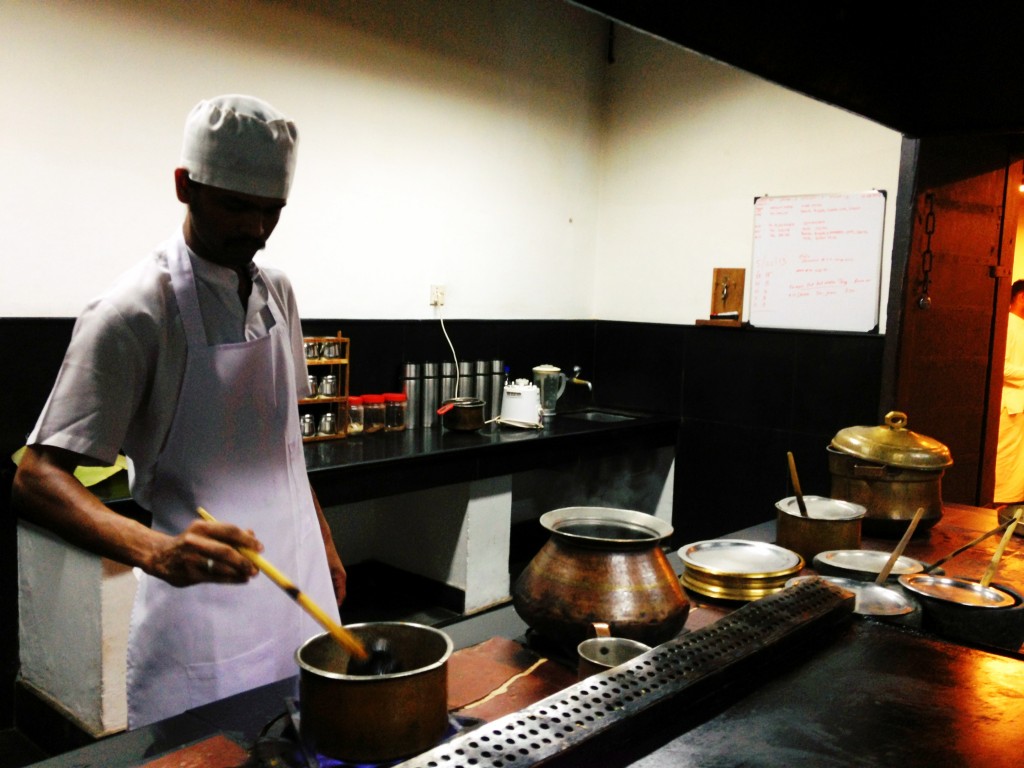
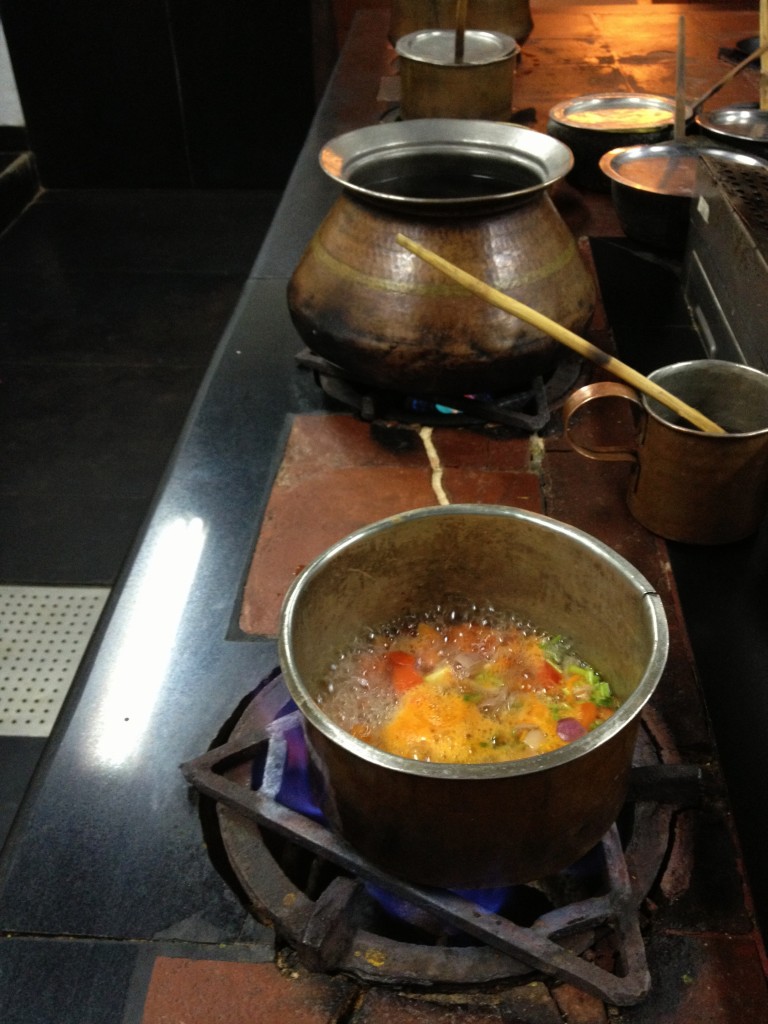
This is the center’s Ayurvedic kitchen. They use traditional cooking vessels made of brass, wood and stone. And im telling you, it makes a huge difference in the taste!

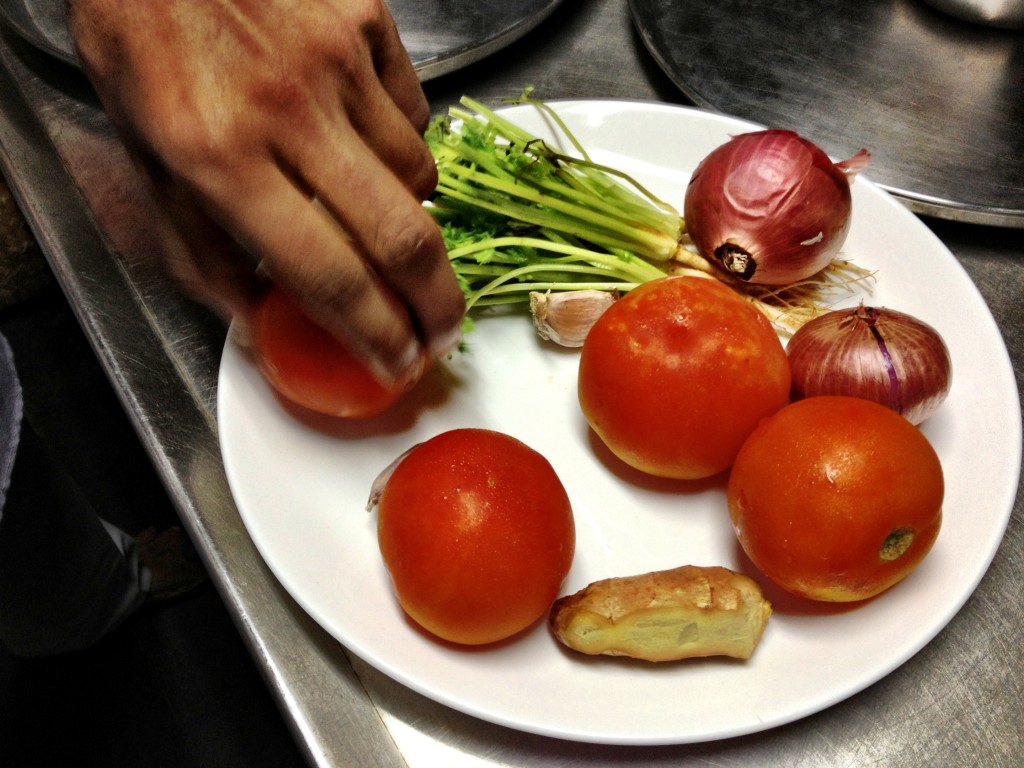
These are the ingredients for this easy tomato soup. (All the vegetables here come from an organic farm..)

Here is is how chef Nishant makes his simple, healthy, ayurvedic tomato soup. I was blown away by the simplicity of it! And there isn’t a drop of oil in it!

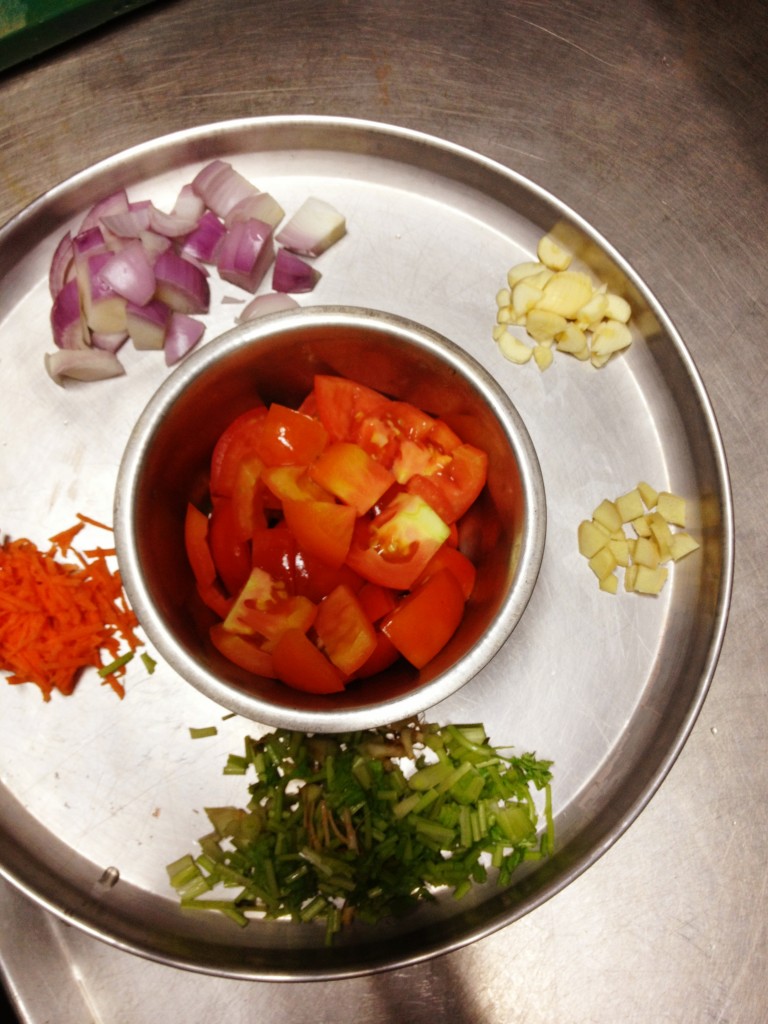
Chop tomatoes, onion, garlic, ginger, carrots and cilantro root. Yes, the root. Cilantro root has a great flavor, so dont throw it away when you buy a bunch! Its perfect in this soup. And the carrot adds some sweetness to the soup, which is a nice counter point to the tangy tomatoes

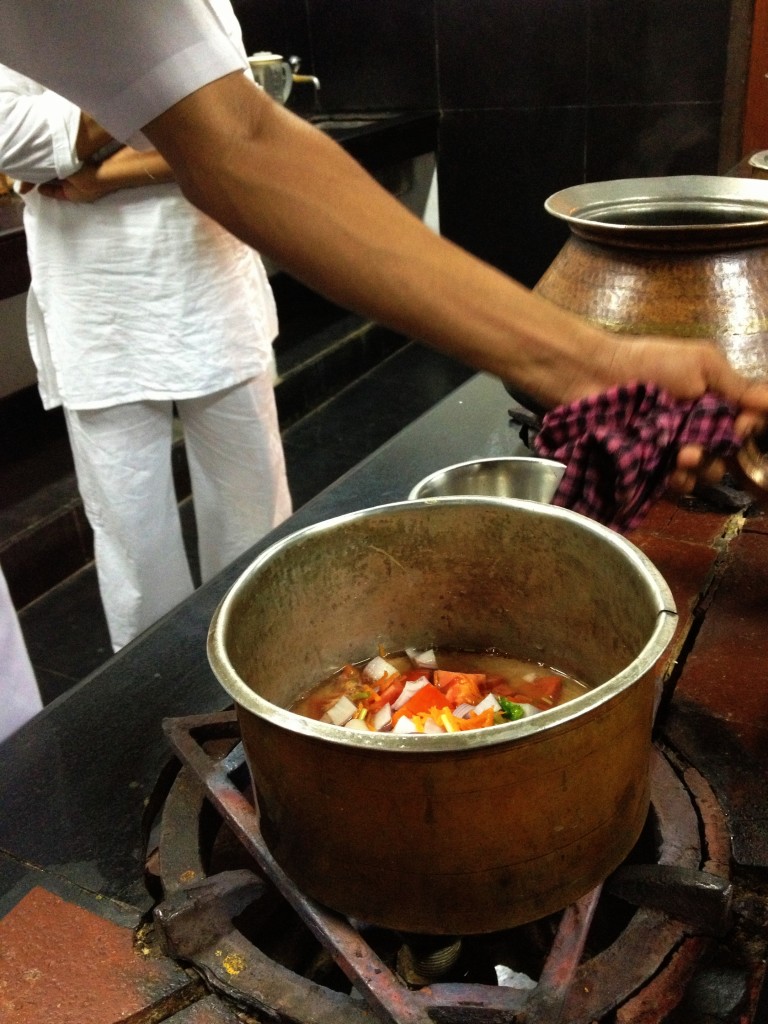
Throw all the vegetables and some water into a pot with salt.

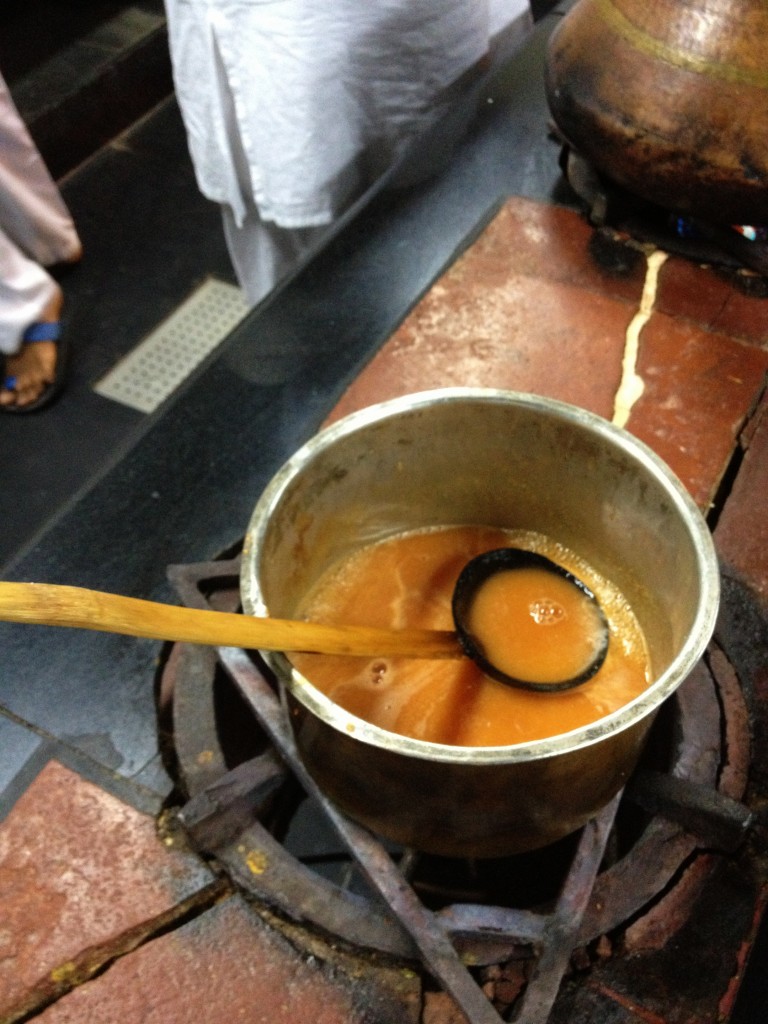
Boil till the tomatoes are soft. Then blend the soup.

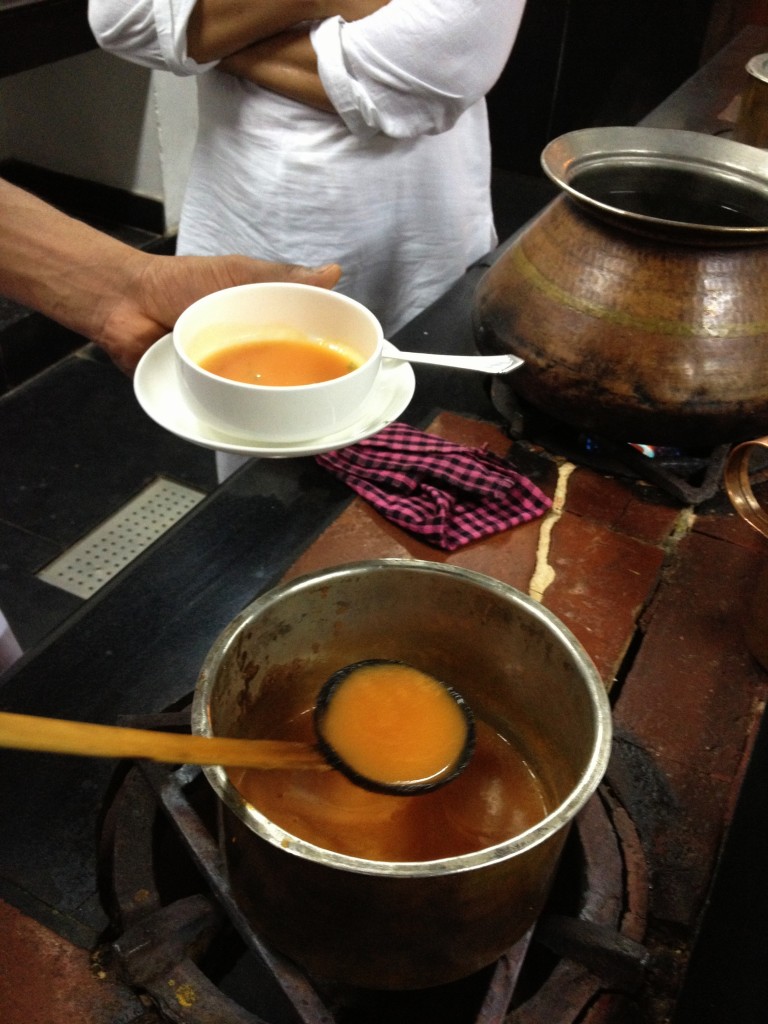
Strain the soup. Return it to the pot and bring to a boil. Adjust salt if needed. Thats it!

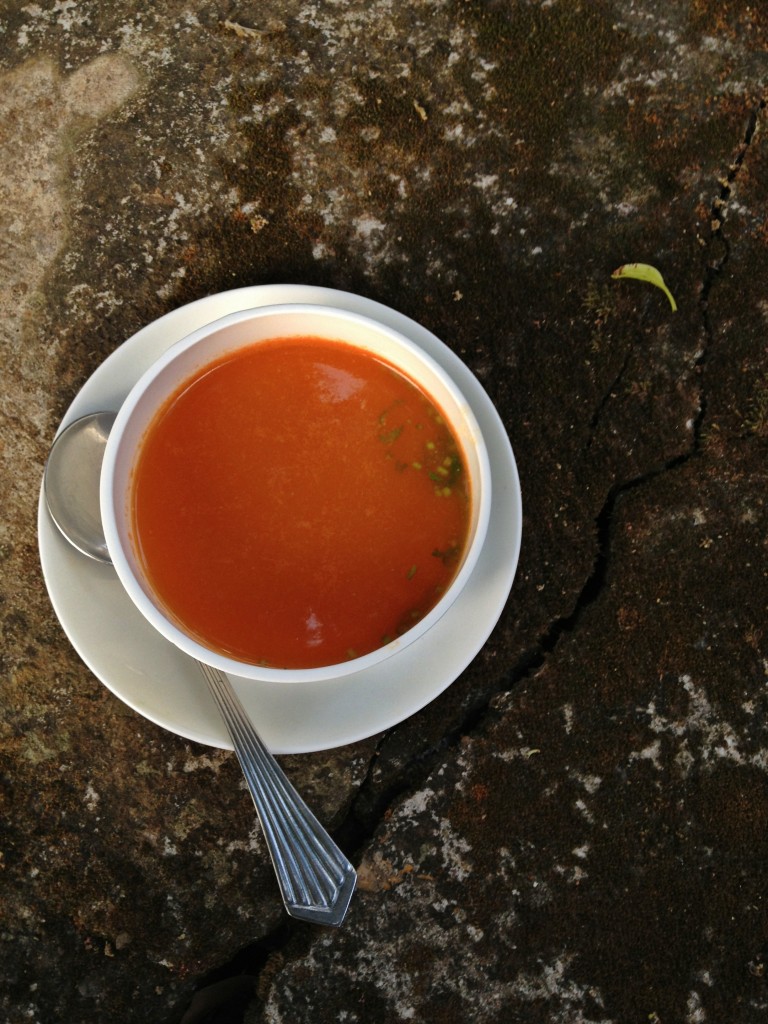
This delicious, super easy, no-oil tomato soup is ready to serve! Needless to say, garnish with cilantro!

Here are some healthy, equally tasty variations to this soup. Keep everything the same, and just switch out the carrots and tomatoes:

Carrot soup – 3 chopped medium carrots, plus half a tomato

Spinach soup – 3 cups fresh spinach

Beet soup – 3 small beets peeled and chopped, plus 1 tomato

Quick, Healthy Tomato Soup Recipe

serves about 2

Ingredients

3-4 medium tomatoes, chopped

1/4 cup grated carrot

1/2 medium red onion, chopped

2 garlic cloves, chopped

1/2 teaspoon chopped ginger

4 cilantro roots, chopped. Substitute with leaves and stems.

Method

1. Place all ingredients in a saucepan, along with salt and enough water to cover the vegetables, about 3 cups.

2. Bring to a boil, and continue to boil till the tomatoes are soft.

3. Let it cool a little, and blend into a liquid. Pass the soup through a strainer, pushing out all the liquid, using a wooden spoon.

4. Return the soup to the saucepan. If its too thick, add some water. Bring back to a boil. As soon as it boils, turn off heat, adjust salt if needed, and serve hot, garnished with chopped cilantro.

Paneer Paratha Recipe – a step by step

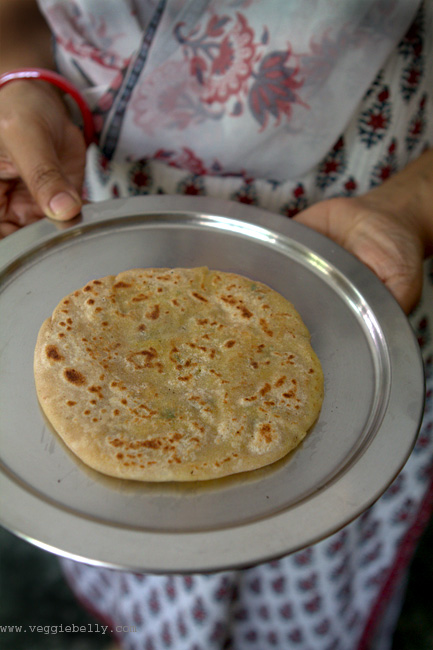
I am vacationing in India right now and enjoying some fabulous home cooked food. Every time I visit India, I ask my mother’s friend Veena aunty to teach me her amazing recipes. Veena aunty has such a love for cooking, you can taste the passion in her food. This time she showed me how to make her paneer paratha recipe. Paneer parathas are Indian flat bread stuffed with cottage cheese. You wont be disappointed with this paneer paratha recipe!

Paneer Paratha Recipe (Cottage Cheese Stuffed Flat bread)

makes 6-8 parathas

for the paratha dough

Ingredients
1 cup whole wheat flour (atta)
1/3 cup all purpose flour (maida)
1/2 teaspoon salt or to taste
1 teaspoon vegetable oil
1 cup water (you may not need all of it)

Method
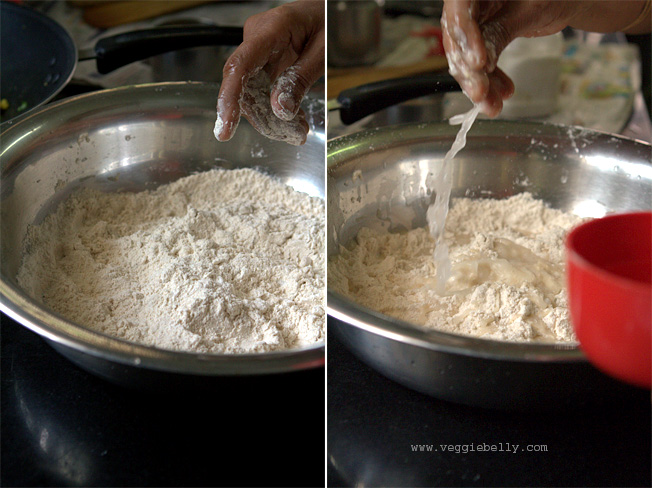
1. Combine the wheat flour, all purpose flour, salt and oil in a large bowl

2. Sprinkle a little water at a time till the dough binds together
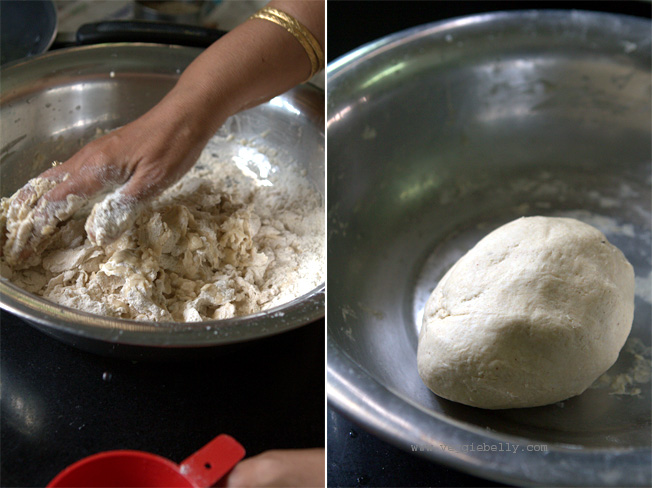
3. Knead the dough, sprinkling water, until it forms a soft, elastic ball

4. Make sure the dough isn’t too wet. If it gets too wet or sticky, add more flour

5. Knead the dough till it is smooth and elastic (think pizza dough)
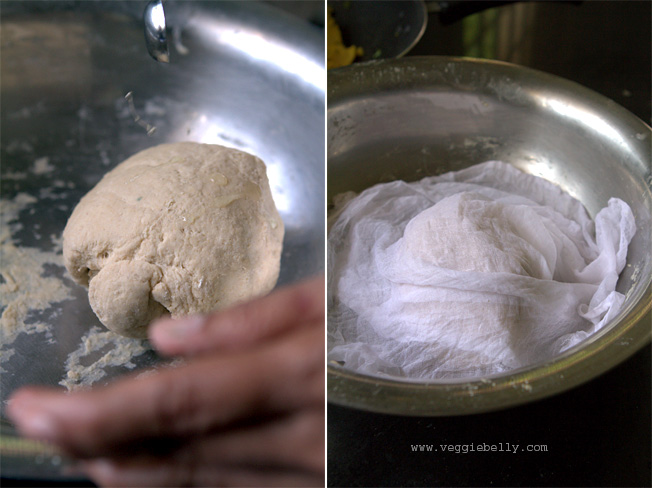
6. Drizzle a few drops of oil over the dough ball, and spread it all over the surface

7. Cover the dough with a damp towel

8. Let it rest for 15 minutes. In the meanwhile, make the paneer filling

for the paneer filling

Ingredients
7 oz paneer, finely grated (about 1 1/2 cups when grated)
1 small onion, minced
3 tablespoons finely chopped cilantro
1/2 teaspoon garam masala
1/4 teaspoon turmeric powder, optional
1 green chili finely chopped or according to taste
salt

Method
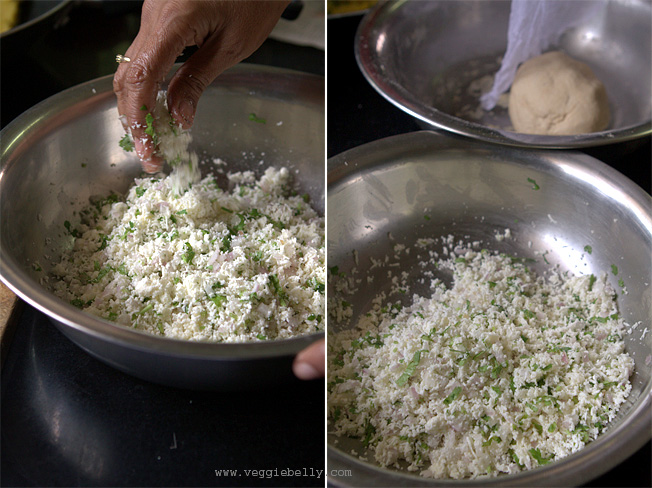
1. Combine all paneer filling ingredients in a bowl

2. Taste the filling and adjust salt and seasonings if needed. If you like it spicier, you can add more minced chilis or garam masala at this point

Make the paneer parathas
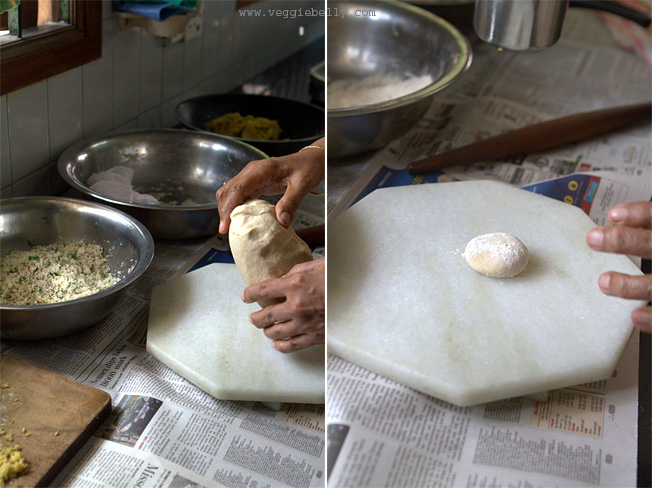
1. Keep a small bowl of wheat flour near you

2. Remove the dough from the bowl, and knead it a few times

3. Divide the dough into 6 equal parts. If you don’t have much experience making parathas, divide the dough into 8 parts, so each paratha is smaller, and therefore easier to make.

4. Take one piece of the divided dough and form it into a ball

5. Dip the dough ball in wheat flour

6. Place it on a clean, flat surface for rolling
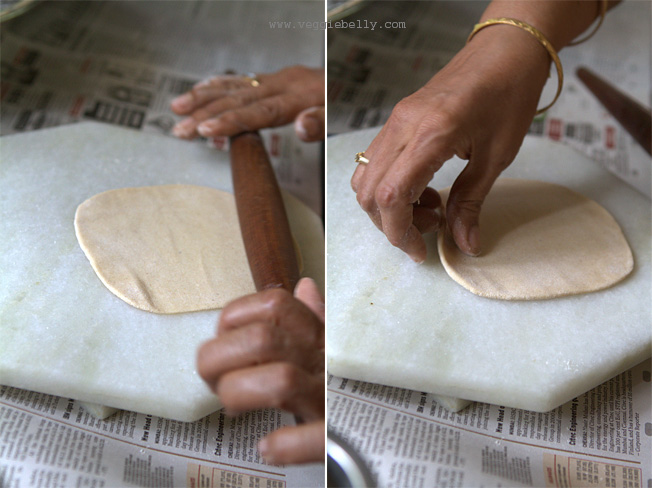
7. Using a rolling pin, roll out the dough into a round using a light touch

8. Turn the paratha 1/4ths of a turn each time you roll it. This will keep it round.

9. Sprinkle a little flour as and when needed.
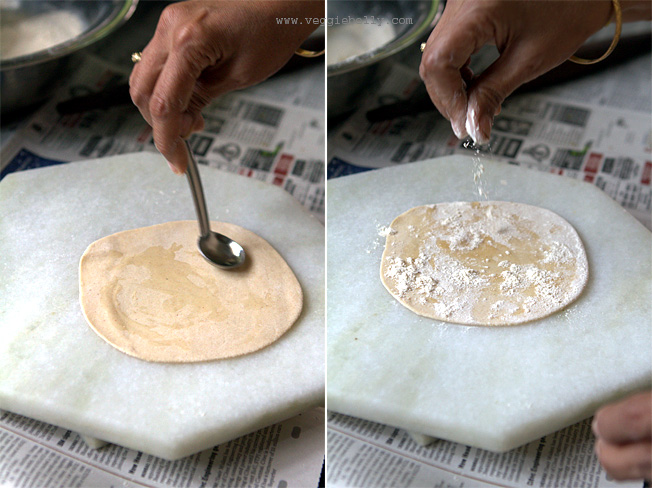
10. When the paratha is thin and even (see picture above), stop rolling, and spread 6 drops of oil

11. Sprinkle a little flour on the oiled side, dust off the excess flour
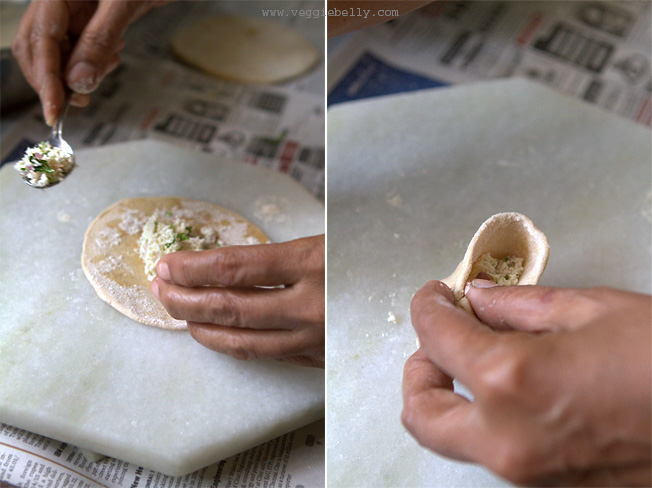
12. Place 2 tablespoons of the paneer filling in the center

13. Gather the edges of the paratha and bring them up, and pleat them over the filling, to form a parcel. If you feel the parcel can hold more paneer filling, add a little more now
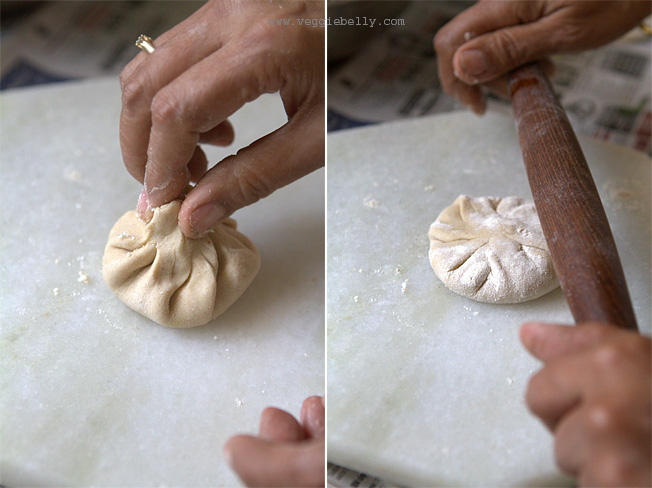
14. Pinch the top to seal the paratha

15. Dip it in flour, flatten it a little, and gently roll it using a rolling pin
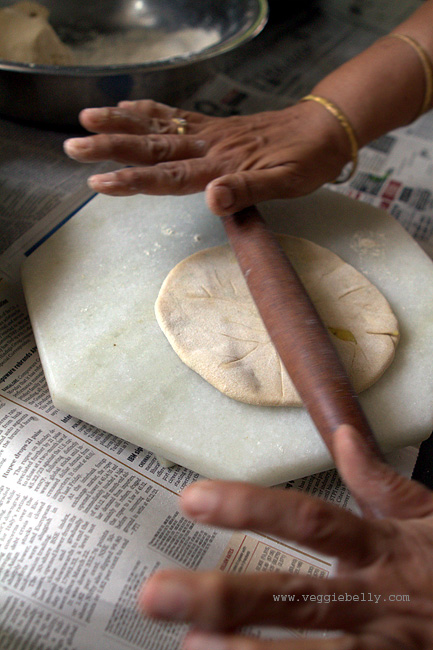
16. Roll gently till the paratha is about 1/4 inch thick
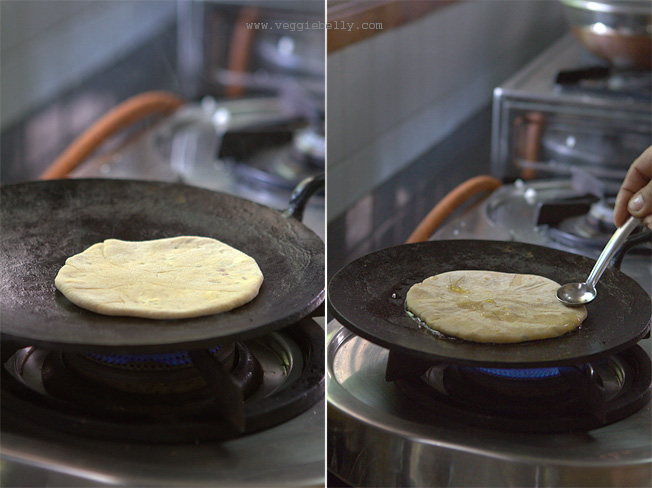
17. Heat a tava, or cast iron skillet on medium heat

18. Place the paratha on the skillet. Cook on medium heat till pale brown spots appear on the under side

19. Then flip the paratha and let pale brown spots appear on the other side
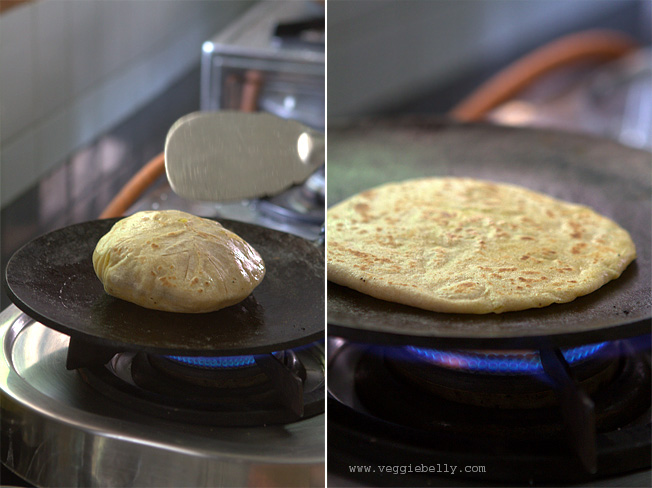
20. Then increase heat to medium-high and drizzle about 1/4th teaspoon of vegetable oil (you can use less oil or oil spray)

21. Cook paratha on both sides till the dough is cooked and lightly browned (but not too dark)
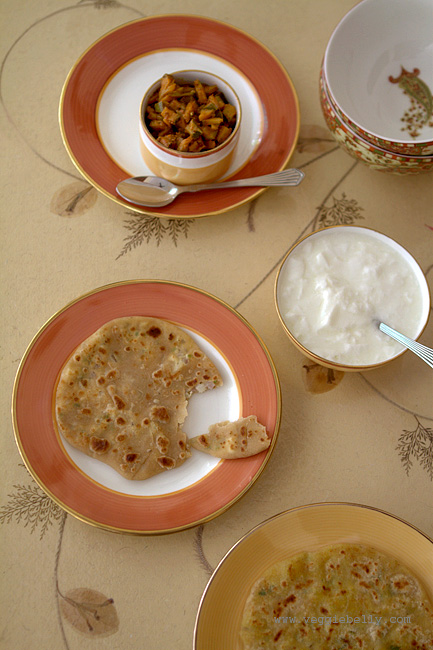
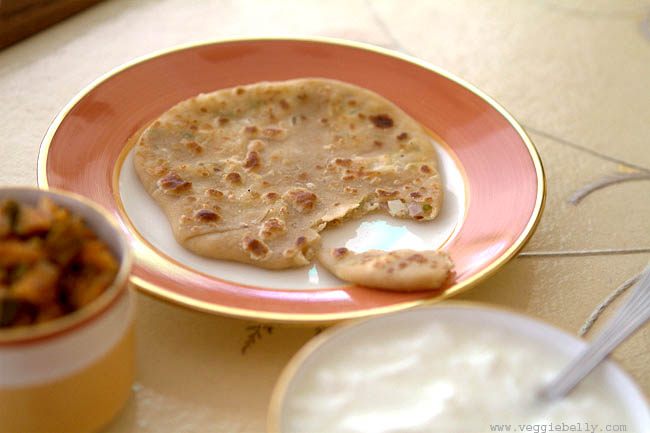
Serve paneer parathas with yogurt or my grandmother’s multi colored raita and my apple pickle.

Paratha making tips

- add enough water to the dough so that it is soft (but not sticky)

- sprinkle wateron the flour a little at a time, this way you are more in control of the final result

- a hard dough will make your parathas stiff

- when kneading, aim for a soft, smooth, elastic dough that is not sticky

- it important to cover and rest the paratha dough for atleast 15 minutes before rolling

- when rolling parathas use a gentle touch

- make sure you chop the filling ingredients very fine. For paneer parathas, the paneer must be grated finely, and the onions and cilantro must be minced. For aloo parathas, the potato must be mashed with no lumps. If you leave large pieces in your filling, it will tear the dough when you are rolling out the parathas.

- when stuffing parathas, you need to use about equal amounts of dough and filling. So if you are using a lime size ball of dough, use about a lime sized mound of filling. However, if you are new to paratha making, lesser amounts of filling may be easier to deal with it, but you will compromise on taste.

- the more you practice making parathas, the better you will get!
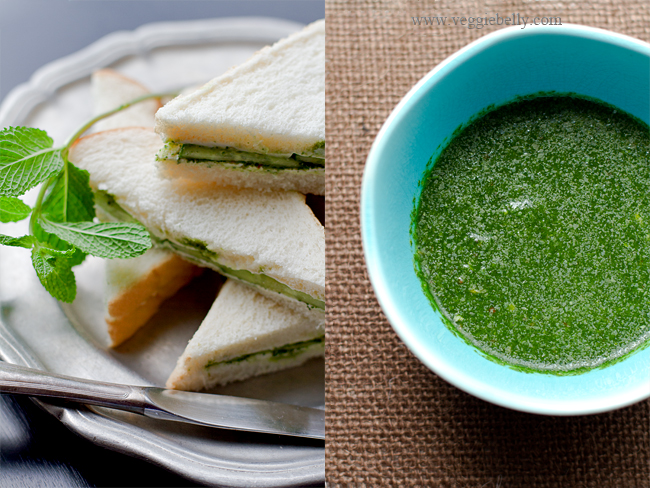
Cucumber Cream Cheese and Cilantro-Mint Chutney Sandwich Recipe

When the weather is nice, we will pack ourselves some sandwiches and lemonade and have a little picnic in our back yard. These cucumber, cream cheese, cilantro-mint chutney sandwiches are our favorite. I’ve made these for several picnics and I really dont know anyone who doesnt like them.

We used to get these sandwiches in India – white bread spread with a little butter, cilantro mint green chutney, and cucumber slices. It is India’s version of English tea sandwiches. I like to use cream cheese in this sandwich recipe; it goes great with the cucumbers and chutney.

Cucumber Cream Cheese and Cilantro-Mint Chutney

Sandwich Recipe

Makes 4 whole or 8 half sandwiches

½ an English seedless cucumber (the one with the plastic wrap)
8 slices of white or soft wheat bread
8 tablespoons cream cheese at room temperature, I used the low fat kind.
½ cup cilantro mint chutney. Recipe below.
Salt

Cut the cucumber into thin rounds.

Take 2 slices of bread. Spread 1 tablespoon cream cheese on one slice. Spread 1 teaspoon (or more if you like) chutney over the cream cheese. Arrange 4-5 slices of cucumber on top. Sprinkle a tiny pinch of salt over the cucumbers.

Spread one tablespoon cream cheese and then one teaspoon cilantro mint chutney on the other slice of bread. Place this on top of the cucumbers, to make a sandwich. Repeat for all bread slices.

Spreading the cream cheese first, and then the chutney will prevent the chutney from soaking through the bread. Serve immediately.

Cilantro Mint Chutney Recipe
Makes about 1/2 cup, enough for 4-6 sandwiches

1 cup cilantro leaves, tightly packed
1/2 cup mint leaves, tightly packed
1/2 fresh green chili or Thai hot pepper, chopped*
1/8 teaspoon cumin seeds
1 garlic cloves, peeled
1/2 tablespoon lemon juice
Salt
2 tablespoons water

*This makes a spicy hot chutney. Use less chili or leave it out if you don’t want it spicy.

Place all ingredients in a food processor and process into a smooth sauce, scraping down the sides of the food processor now and then.

If you are using a blender, you may need to use a little more water. Store the chutney in an air tight container in the fridge.

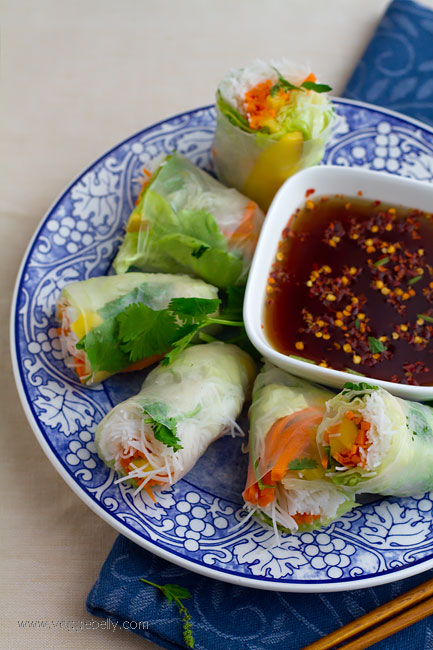
Vietnamese Summer Rolls with Mango and Sweet Chili Dipping Sauce

Another no-cook recipe – these Vietnamese summer rolls or Goi Cuan are bursting with fresh herbs and vegetables. And they will be perfect to take along for a vegetarian picnic.

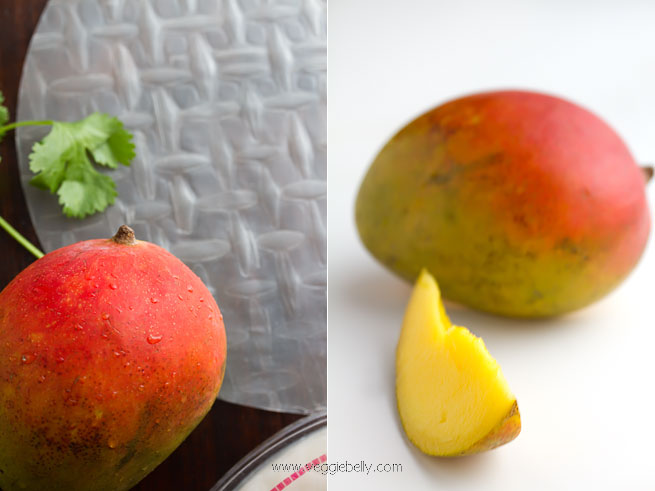
I used mangoes here for some summery, fruity, sweetness. But you can use pretty much any combination of vegetables in this summer roll. I’m not a fan of mangoes, so I made this recipe for our guests (they loved it) and I made myself a roll with carrots and purple cabbage.

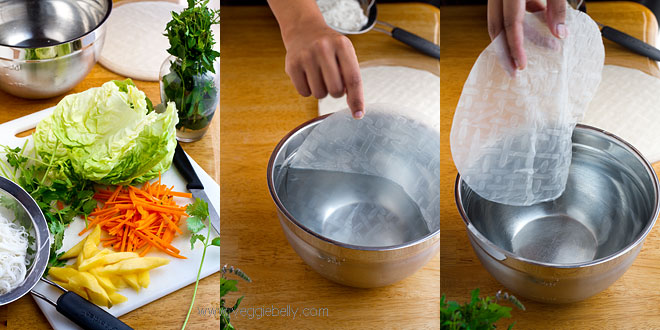
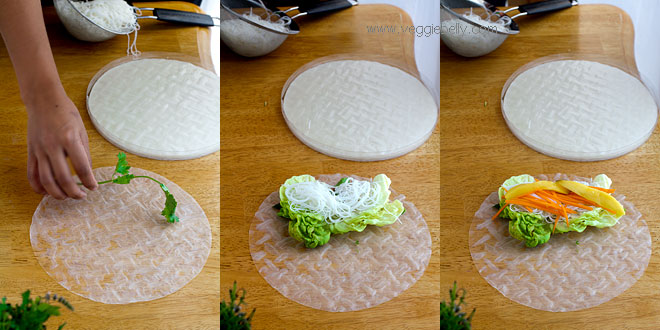
Set up all the ingredients on a clean surface. Dip a rice paper wrapper into a large bowl of water. Make sure all sides get wet. Then remove the rice paper and gently shake it dry. The rice paper will now be pliable. If it isnt, let it stil on the table (not in the water) for a few more seconds.

Place the softened rice paper wrapper on a clean surface. Place filling ingredients on the front (closest to you) 1/3rd of the rice paper wrapper in this order – cilantro, mint, lettuce, noodles, carrot, mango.

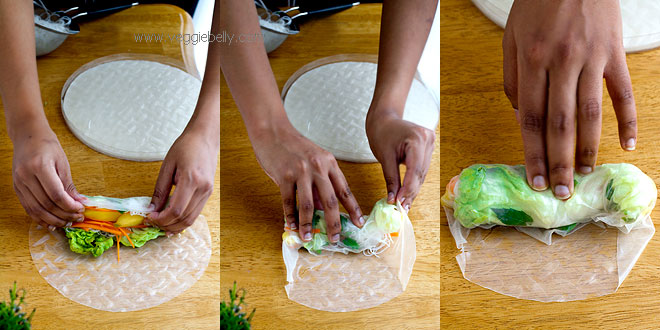
Now fold the front part over the filling and roll. Then fold both the sides in. Roll gently but firmly.

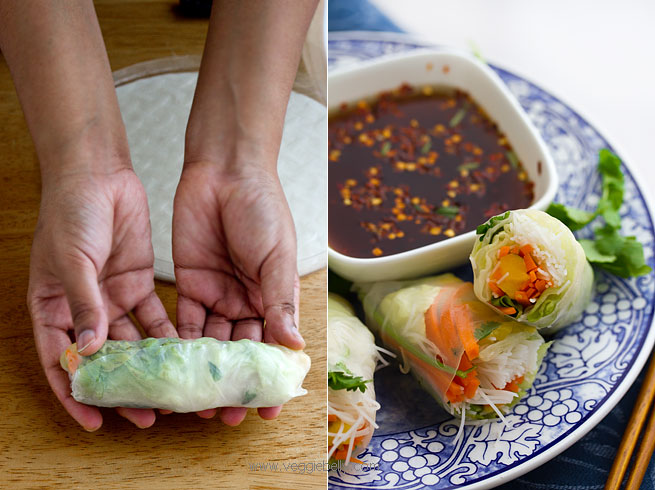
Its that simple! With practice, you will get better and better at rolling. Serve these Vietnamese summer rolls with sweet chili dipping sauce. Regular Vietnamese dipping sauce or Nuoc Cham has fish sauce. See below for my vegetarian Nuoc Cham recipe.

Vietnamese Summer Rolls or Goi Cuan with Mango Recipe

makes 6 rolls

2 oz dried rice sticks or rice vermicelli (available in Asian section of most grocery stores)
6 rice paper wrapper sheets (called ‘bahn trang’ - available in Asian section of grocery store)
a large bowl of water to dip rice paper sheets
6 sprigs cilantro
6 sprigs mint
6 leaves lettuce, rib/stem removed (I like boston lettuce)
1 small ripe mango, peeled and cut into strips (substitute with shredded purple cabbage, cucumbers, savoy cabbage, bean sprouts)
1 carrot, peeled and cut into match sticks

Soak rice sticks in boiling water for about 3 minutes or till soft. Drain well.

Dip the rice paper sheets in water, making sure all sides are wet. Shake off excess water. Place on a clean work surface. Place a sprig each of cilantro and mint in the front 1/3rds of the rice paper sheet. Then place lettuce leaf, a little rice noodles, carrot, and mango slices. Fold and roll the summer roll – see photos above for details on how to roll vietnamese summer roll.

Serve immediately with vegetarian vietnamese dipping sauce (recipe below). To store, put rolls on a plate, cover with a damp paper towel. Then cover plate completely with foil or plastic wrap and refrigerate.

Sweet Chili Dipping Sauce or Vegetarian Nuoc Cham (Vietnamese dipping sauce) Recipe 

makes little less than 1 cup

4 tablespoons light soy sauce
4 tablespoons rice vinegar
2 tablespoons sugar
2 tablespoons warm water
1 garlic clove peeled and crushed
Red pepper flakes or chopped fresh chili to taste

Whisk everything together till the sugar dissolves.

Mor Kuzhambu or South Indian Yogurt Coconut Curry

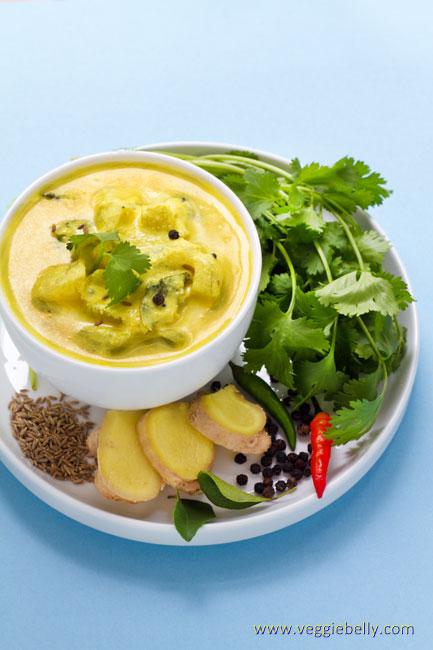
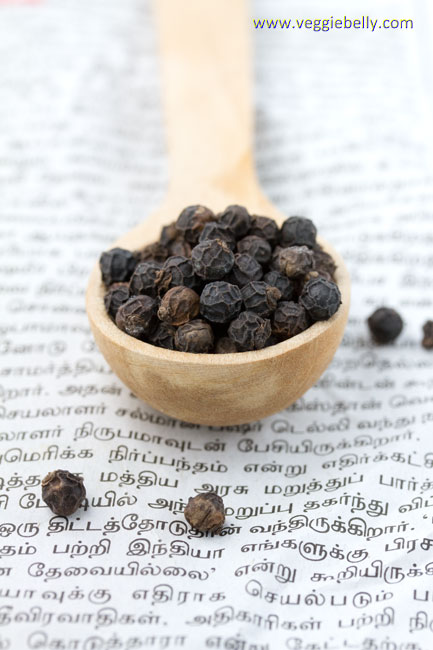
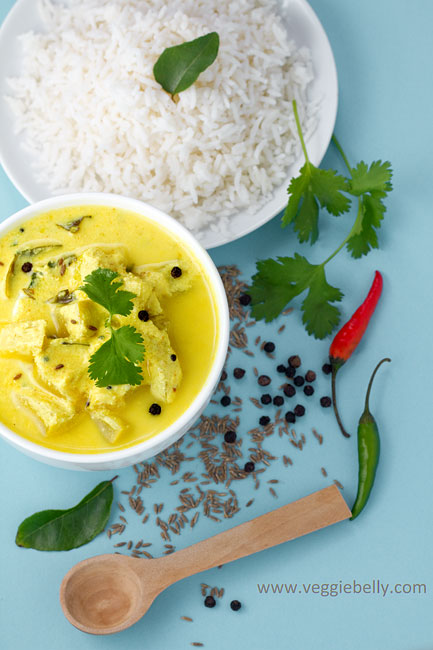
Mor kuzhambu or moor kulambu, however you spell it, is a satisfying south Indian dish made with yogurt and fresh coconut. Mor is buttermilk in Tamil and kulambu is gravy or curry. I use yogurt to make this dish (instead of buttermilk) because it makes the gravy thicker. Peppercorns are wonderful in this dish. You don’t actually eat them, but they impart great flavor. These peppercorns are from my dear friend and fellow food blogger, Nandini’s plantation in India.

Tips

- Use freshly grated coconut or fresh-frozen coconut. Please, none of the dried or dessicated stuff!
- For a lighter version of this dish, use buttermilk instead of yogurt
- Do not let the curry boil once you’ve added the yogurt. Use low heat and stir constantly to prevent boiling
- Remember to only gently re-heat this dish
- Serve mor kuzhambu with steamed rice or curry leaf rice. See this post for my curry leaf rice recipe

A note on what vegetables to use for Mor Kolambu
You can use any vegetable you like, here are some favorites and suggestions*

- Long squash(sorakkai or lauki). Peel the skin, scoop out the seeds and cut into cubes. (This is what I used in this recipe)
- Winter melon(ash gourd, neer poosanikkai or petha). Peel skin, scoop out seeds and membrane and cut into cubes
- Ripe mango. Peel skin, remove pit and cut into cubes
- Corn on the cob. My favorite. Remove husk and cut the whole corn into 1 inch rounds. Will need more water to cook
- Orka(vendakkai or bhindi). Cut into pieces. Make sure you saute okra in oil till it is no longer slimy

Mor Kuzhambu or South Indian Yogurt Coconut Curry Recipe

serves about 6

Grind to a paste
3/4 cup fresh grated coconut
1 tablespoon minced fresh ginger
1/2 tablespoon cumin seeds
2 green chillies (use more or less according to taste)
1/2 cup water

For the gravy
1 tablespoon oil
1 teaspoon black mustard seeds
1 teaspoon whole black peppercorns
a pinch of asafoetida
a few curry leaves
1 teaspoon turmeric powder
2 cups of cubed vegetable (see suggestions in the post above)*
water
salt
a 32 oz tub of plain yogurt
Cilantro for garnishing

Place the ingredients for grinding in a blender and grind into a smooth paste. Set aside.

In a deep pot, heat oil, and add mustard seeds and peppercorns. When the mustard starts to pop and splutter, add the asafoetida, curry leaves, turmeric, and cubed vegetable (see note in the post above for what vegetables to use). Cook on medium heat for about 3 minutes. Then pour about 1 cup water, cover and simmer till the vegetable is cooked; about 7 minutes.

Add the ground coconut mixture, and cook on medium-high for about 2 minutes. Reduce heat to low. Beat the yogurt with a spoon or whisk and add it to the coconut-vegetable mixture. Stir gently and constantly on low heat for about 2 minutes. Do not let the gravy boil once you’ve added the yogurt. Add more water if the kuzhambu is too thick. Garnish with chopped cilantro. Serve with white rice or curry leaf rice.

Sev Puri (Chaat) – Memories of an Indian Summer. My Guest Post for The Kitchn

This is my recent guest article on The Kitchn..

Chaat always brings back memories of carefree childhood weekends spent at my parents’ beach house in India. I’d walk over to the beach in the afternoon when the tide is low enough to pick sea shells. I’d return home with my pail full and stomach empty. A gorgeous bowl of chaat would be waiting for me  – crunchy, sweet, tangy, spicy, filling all at the same time. I’d sit on the verandah eating chaat, listening to the waves crashing near by and watching the kites sail over me.

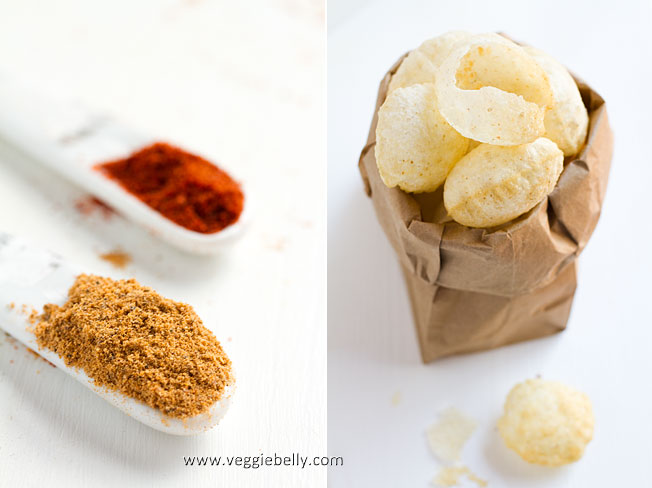
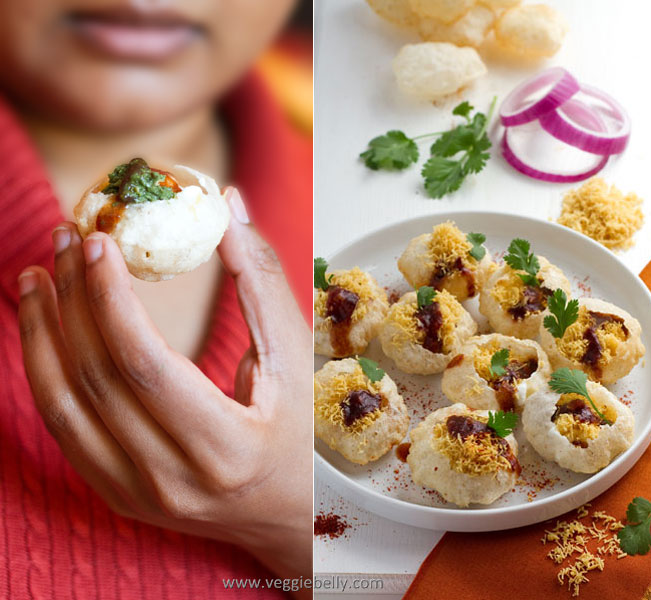
Chaat on weekends still transports me back to those balmy evenings in India. Sev puri is my favorite kind of chaat (‘chaat’ is a general name for this Indian street food; there are several variations). Sev puri are little puffed, fried rounds of dough (puri) stuffed with  crispy noodles (sev), potatoes, onion, yogurt, tamarind chutney and mint chutney. The whole thing is then finished with a sprinkling of amazingly zestful chaat masala – a blend of salt, red chilli, coriander, cinnamon, ginger, anise, pepper, cumin, cardamom, clove, mace, carom and dried mango.

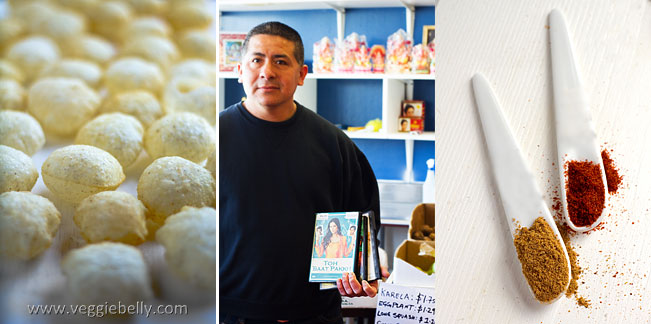
Above: Armando, the man who works at the local Indian store. He is El Salvadorian and his kowledge of Indian ingredients is encyclopedic. He watches all the bollywood movies and gets offended if they dont offer spanish subititles! Gotta love DC/VA!

You will need to make a trip to the Indian store for this recipe. You could attempt to make all the ingredients at home, but that would be time consuming. Why bother when you can buy the same thing at a store!

This is a basic recipe for sev puri; I encourage you to  be creative with it..you are limited only by your imagination. When pomegranates are in season, I like to sprinkle some on top for a colorful, refreshing sweetness. A little chunk of pineapple tucked into the sev puri is divine (toss the pineapple chunks in chaat masala for a delightful sweet-savory flavor).  To make these sev puris vegan, simply leave out the yogurt and use hummus, tahini or cashew butter instead. If you don’t have pani puris, try making this with tortilla chips instead; Scoops! will be perfect for this.

Finally, there is only one way to eat a sev puri – put the whole thing in your mouth! Don’t try to bite into it, just pop the whole thing in your mouth!

Sev Puri (Chaat) Recipe
Serves about 6

1 medium potato, boiled, peeled and diced
½ cup canned chickpeas, drained
3-4 tablespoons finely chopped red onion
40 pani puris* (fried rounds of dough)
½ cup yogurt
½ cup sev* (crispy noodles)
¼ cup date-tamarind chutney*
¼ cup mint chutney*
1 tablespoon Chaat Masala*
1/4 tablespoon red chilli powder or cayenne or paprika
A few sprigs of cilantro

*easily available at any Indian store

Mix together the boiled diced potato, chickpeas, red onion, ¼ teaspoon chaat masala and salt. Set aside. Gently poke a hole on one side of a pani puri. Make it large enough so you can stuff it with the potato mixture. Place some potato mixture inside the pani puri cavity. Top with about ½ tablespoon of yogurt. Sprinkle some sev on top of the yogurt. Then add date-tamarind and mint chutneys. Finish by sprinkling a little chaat masala and chili powder over the top.  Repeat with all pani puris. Serve immediately.

Please Herbs, Stay Alive for Me.

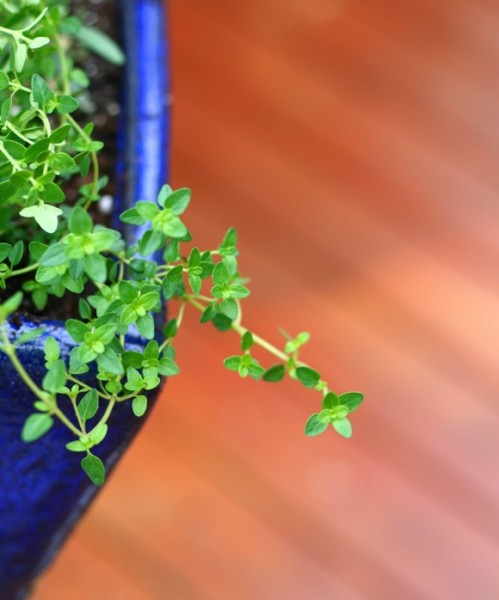
thyme plant in my deck

Is there such a thing as a black thumb? Like, opposite if green thumb? Thats what I am. I just cant keep any plant or green thing alive. I’ve even killed grass. Twice. (Over fertilized and under watered, in case you are wondering).

So this year, Ive challenged myself to planting something and nurturing it. So I planted some herbs on the deck. I figured herbs would be a great place to start. The prospect of cooking with freshly harvested herbs from my planter, hopefully, is motivation enough to take care of them.

I’m already dreaming of what I will cook when the herbs are ready to pluck! Iced tea with that incredibly lemony smelling lemon balm….green pea and mint soup….lavender infused frosting on cupcakes…sandwiches with fresh homemade basil pesto…

…please herbs, stay alive for me…puhllleeeeezzzzeeee..

Planting Herbs
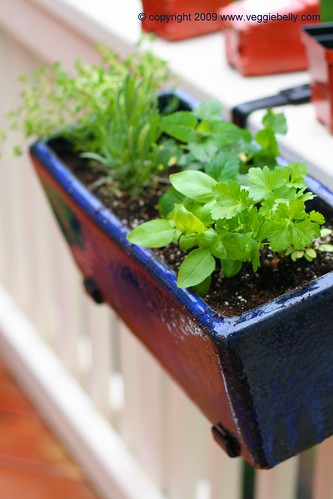
This is the end result of the afternoons labor…

Continue reading

Related Posts with Thumbnails