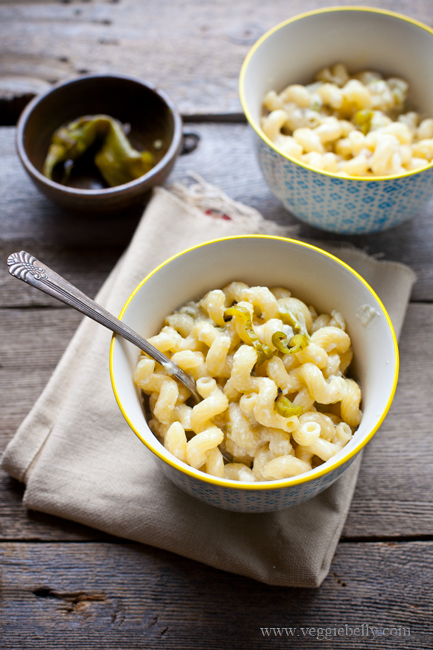
Hatch Chile Macaroni and Cheese

hatch chile macaroni and cheese
I roasted a big bunch of hatch chiles recently. So I’m using them to make macaroni and cheese. Hatch chiles are a type of green chile from New Mexico. If you don’t have freshly roasted hatch chiles, just go ahead and use canned green chiles. I love a spicy mac and cheese , and hatch chiles (or green chiles) are a great way to spice up macaroni and cheese. Feel free to use extra chiles if you like!
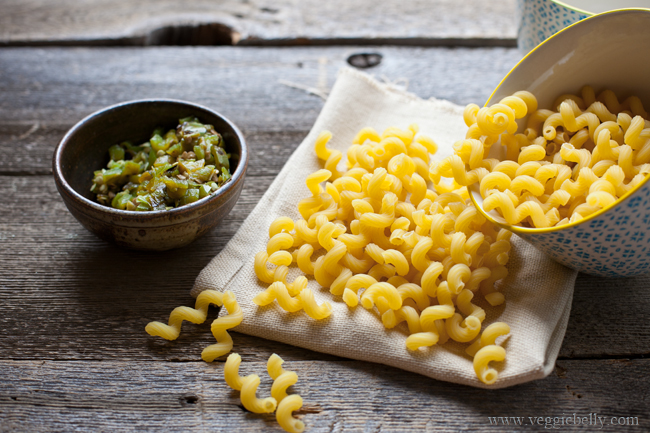
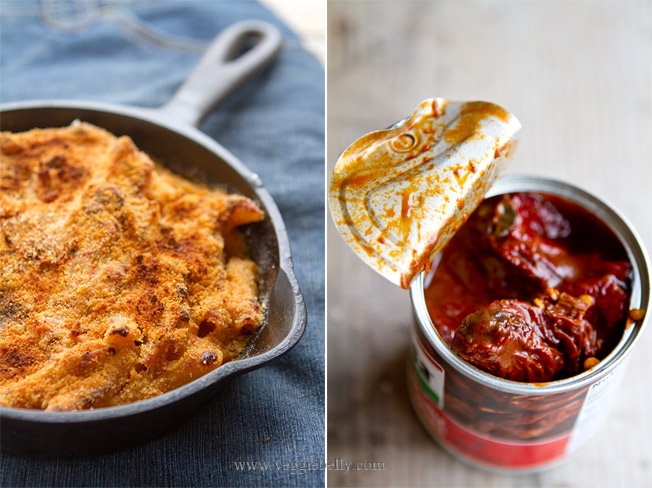
cavtappi pasta and hatch green chiles for macaroni and cheese
How to make the perfect mac and cheese

1. Make sure the pasta is al dente. That is, not over cooked. The pasta should have a little bit to it. Cook it 1 minute less than what the package says
2. Salt the pasta water. This is the only opportunity to give the pasta some salt and flavor.
3. Add cheese a little at a time to the sauce. Make sure a batch of cheese completely melts into the sauce before adding more. This will help the sauce get nice and silky.
4. Add the cheese on low heat. If you add cheese when the sauce is too hot, it will clump up.
5. Make sure the cheese is finely shredded, it will melt better.

Most mac n cheese recipes will have you sprinkle bread crumbs on top and bake the whole thing in an oven. I usually never have patience for that! So I mix the cheese sauce with the pasta and eat it right away!
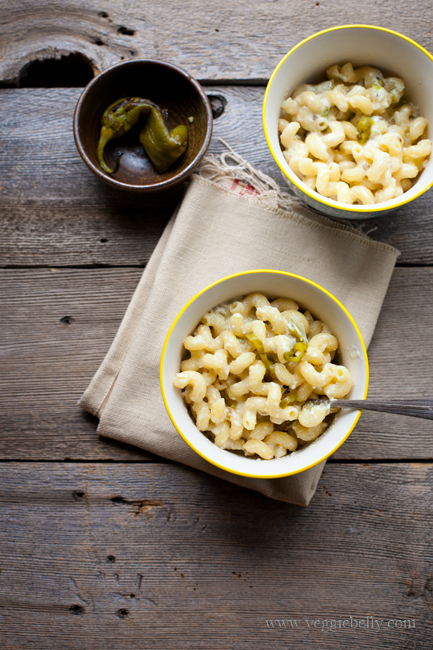
green chile macaroni and cheese
Hatch Chile Macaroni and Cheese

Ingredients
½ lb pasta (elbow macaroni, spiral or cavatappi)
2 tablespoons butter
½ an onion, chopped
1 ½ tablespoons flour
2 cups whole milk
1 1/2 cup shredded cheddar cheese
3/4 cup chopped roasted hatch chiles or green chiles. Freshly roasted or canned.

Method
1. Boil the pasta in plenty of salted water. When it is al dente, drain it and set aside. Make sure the pasta is not over cooked.
2. While the pasta is cooking, work on the sauce. Heat butter in a medium sauce pan. Add the onion and cook until it is soft, about 2 minutes.
3. Sprinkle the flour onto the butter and stir well. Cook on medium-low heat for about 1 minutes, stirring constantly. The flour should not brown. Now slowly pour in the milk, whisking constantly. Let the sauce cook and come to a boil while whisking it constantly.
4. When the sauce has thickened, reduce the heat to low. Add one small hand full of the shredded cheese. Stir until it is completely melted into the sauce. Now add another hand full of cheese and stir it. Keep adding all the cheese one hand full at a time and making sure it is completely incorporated into the sauce before adding more.
5. Fold in the cooked pasta, green chiles and salt. Increase the heat and cook just until everything is hot.

An Amtrak Foodie Adventure and a Portobello French Dip Recipe

I’ve lived in America 11 years and up until a few months ago I hadn’t taken a train journey in this country. I’ve been on an amazing coast to coast road trip, I’ve visited about 25 states of this great country, but I’d never been on a train.

And then Amtrak called. They wanted to send me on a foodie adventure where I’d travel on Amtrak, and dine at the best restaurants at my destination. I said yes right away. And that’s how my first American train trip happened!

Read on for an account of my Amtrak adventure, and an amazing lunch at my destination, and a killer recipe from that restaurant!

Portland to Seattle on Amtrak

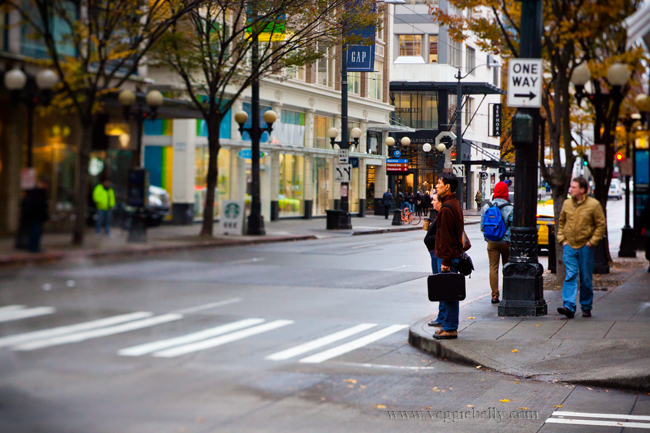
Amtrak said I could pretty much travel to any destination I wanted. The decision was easy. I picked Seattle. Seattle is an easy 4 hour train ride from Portland. Perfect for a quick weekend trip. Besides, I love the food scene in Seattle, which made it the perfect choice for my little foodie train adventure.

Now, we cant visit a city as vibrant and picturesque as Seattle without some special camera equipment, can we?! I’d always wanted to try out Lens Baby lenses (a company  based right here in my wonderful hometown of Portland, OR). So I rented a few from Pro Photo Supply in Portland to take on my trip to Seattle. I got the Sweet 35, Edge 80, and Fish eye. I loved the Sweet 35 and Edge 80 and used them a lot on the trip. Really fun effects, as you can see below.


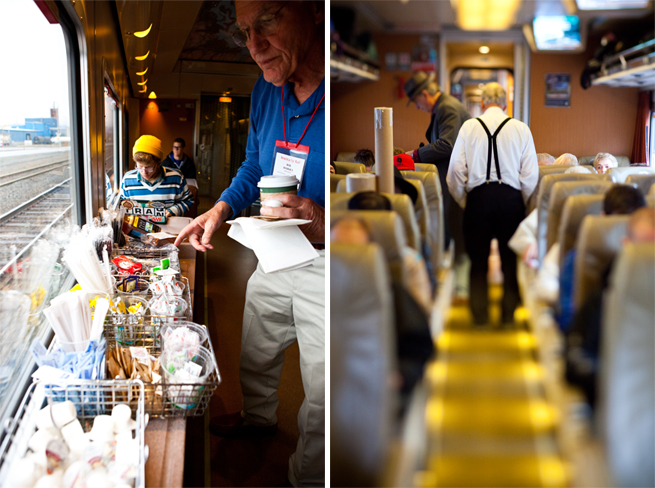
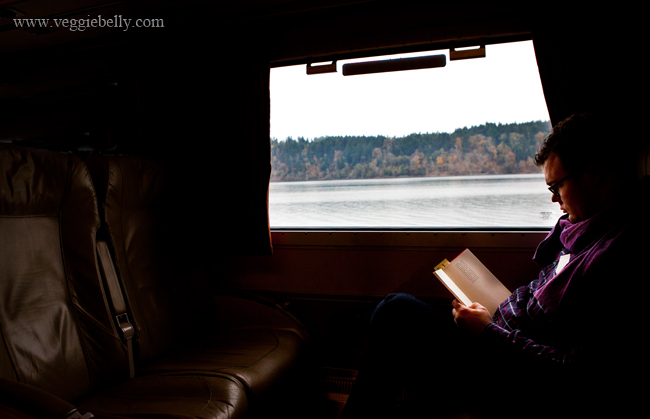
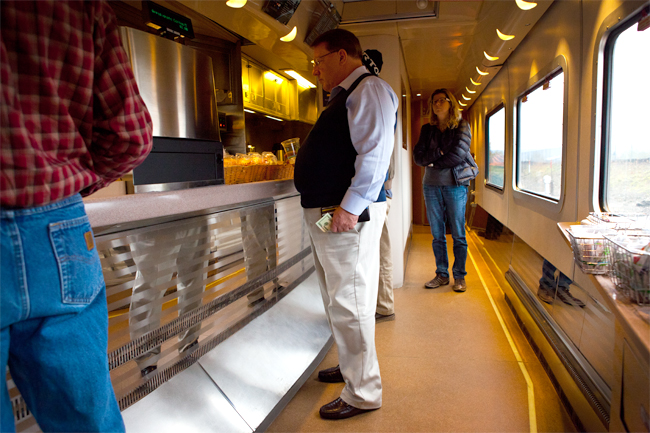
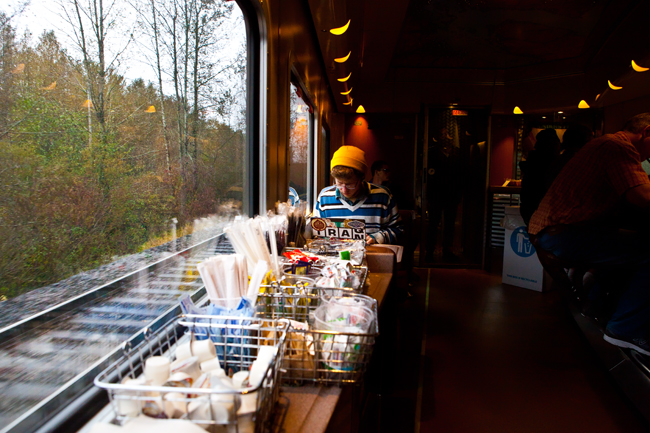
I loved my train ride. For a good part of my trip, I just sank back into my seat and watched the beautiful Pacific Northwest pass by. Then I walked around taking photos, chatting with fellow passengers and hanging out at the cafe car.

Walking around Seattle and Lunch at Cafe Flora

As I didn’t have much time in Seattle, my only agenda for the day was eat, walk around, take photos. I was up early and meandered into Biscuit Bitch at Pike Place for coffee. Their name intrigued me, and I walked in to take a look. Their biscuits and menu looked interesting, and they even had veggie sausage patties, but I didn’t eat anything there. I was saving up for my much awaited lunch.


I asked my readers on Facebook and Twitter for vegetarian friendly restaurant recommendations in Seattle. The suggestion poured in. People recommended Cafe Flora repeatedly. So I decided I’ll go there. And I’m so glad I did – the food and atmosphere were lovely. My friend and I were seated in the beautiful, airy atrium. Cafe Flora is an all vegetarian restaurant, so there was plenty of choice for us! Here’s what we had..

 Masala apple fizz

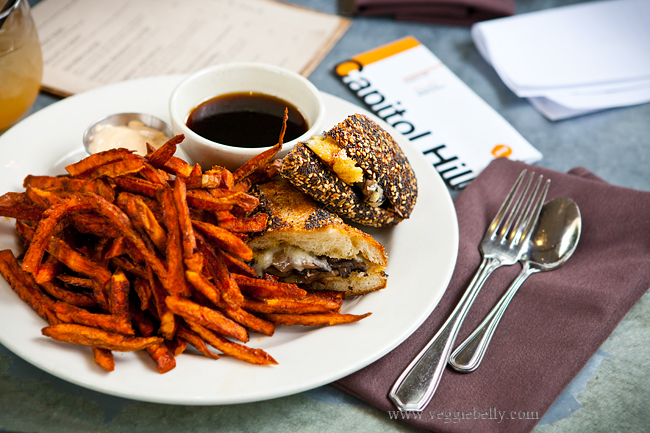
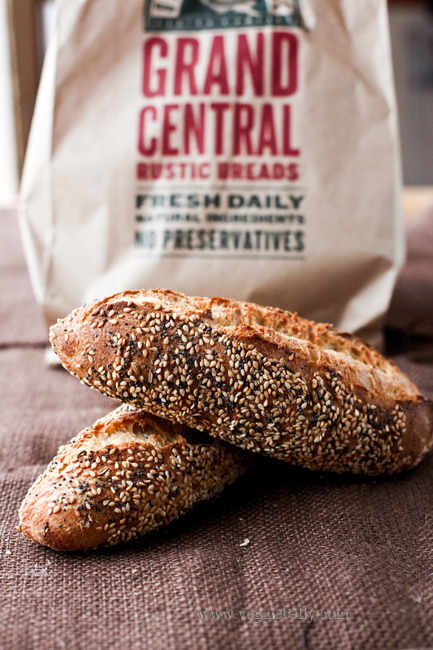
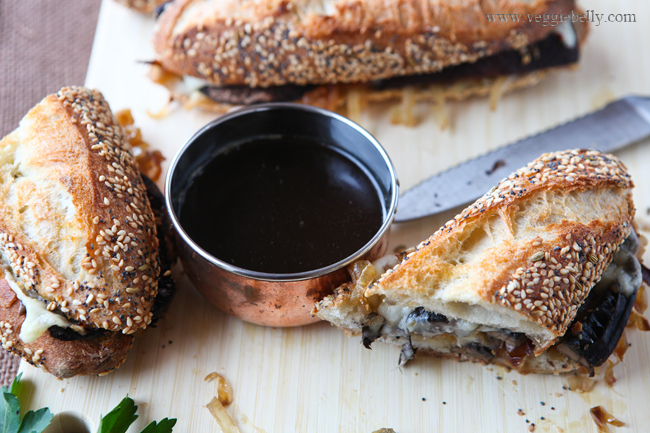
Vegetarian French dip – portobello mushrooms, caramelized onions, Swiss cheese, on a seeded baguette with mushroom garlic au jus. Served with seasoned yam fries. See Cafe Flora’s recipe below.

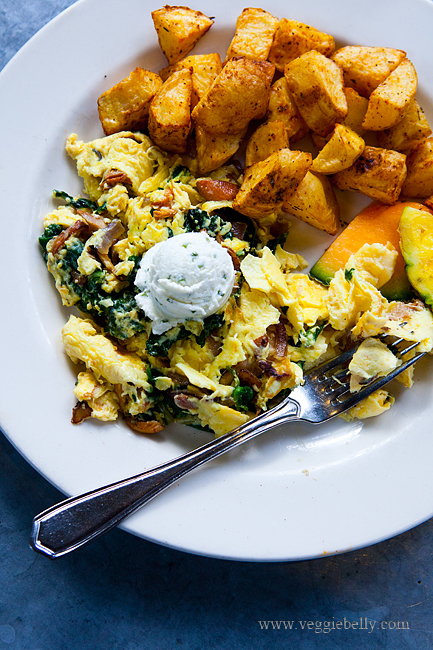
Spinach mushroom scrambled eggs with roast potatoes

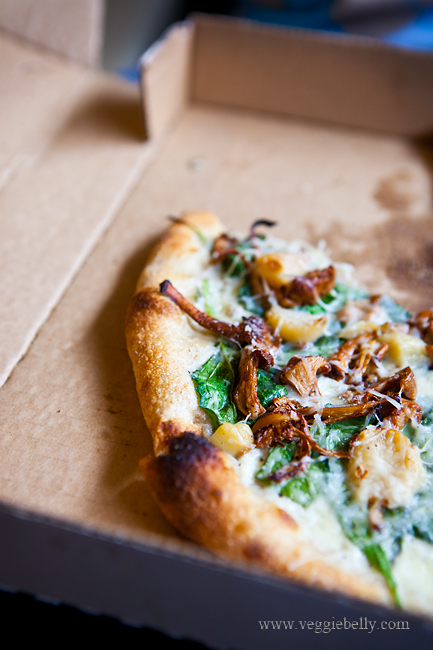
Truffle pizza

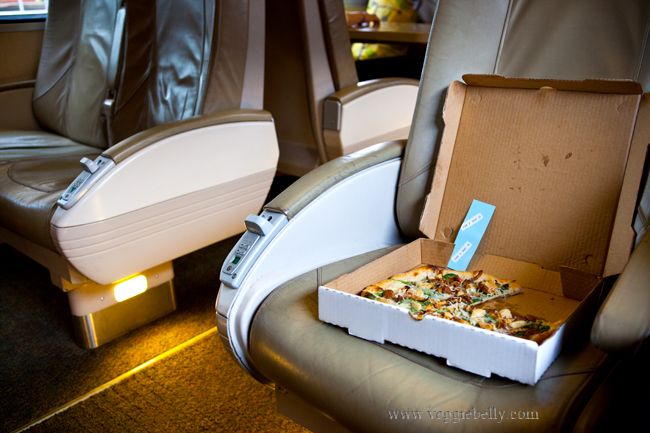
We enjoyed our lunch so much at cafe Flora, that we decided to get a pizza to go so we could snack on the train later! And the truffle pizza we ordered got its own seat on the train ride back to Portland! The other passengers were jealous, I could tell ;)


Cafe Flora’s Portobello French Dip Recipe

Adapted from Cafe Flora Cookbook

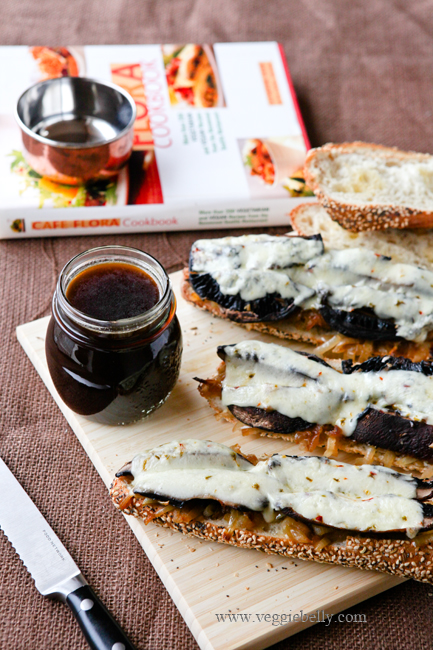
I loved the vegetarian French dip at Cafe Flora so much that I’m sharing the recipe with you. Its from the Cafe Flora Cook Book. The original recipe involves several steps; here I have simplified it a bit.

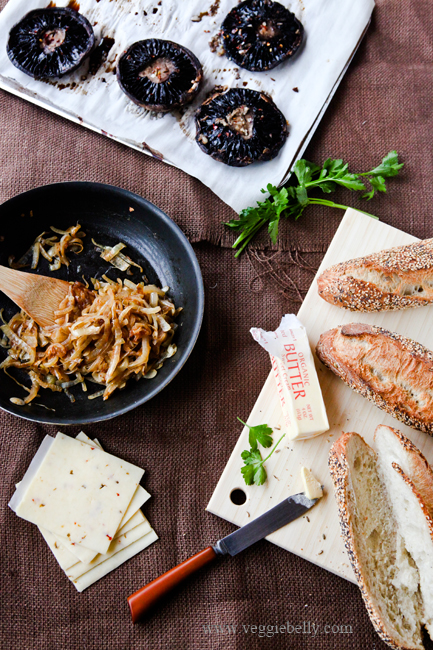
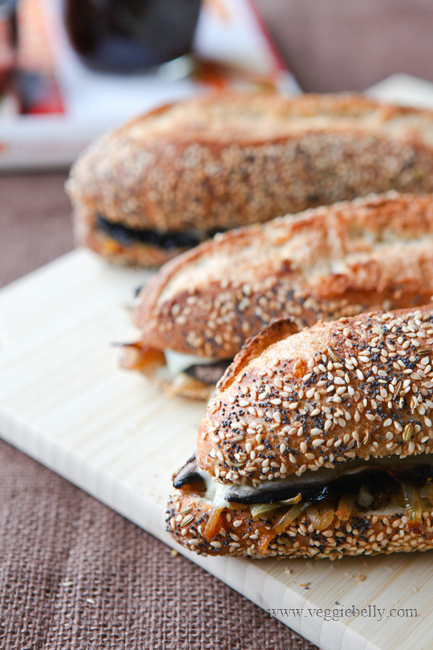
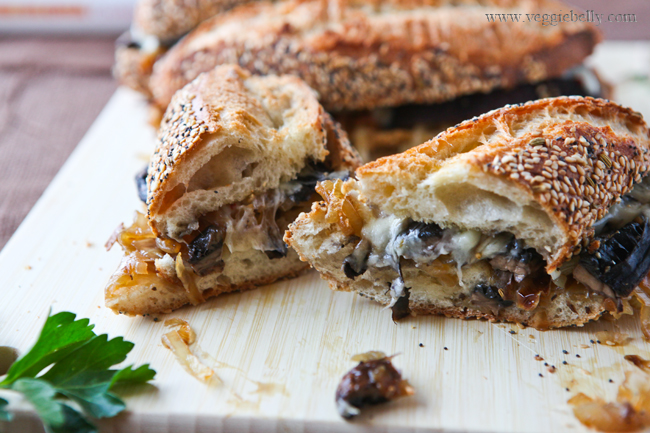
This recipe is truly brilliant – a sandwich made with buttered, griddled  rustic baguette,  roasted portobello mushrooms, sweet caramelized onions, gooey melted cheese, all served with the most amazing mushroom garlic essence or au jus for dipping. Its the best vegetarian sandwich ever.


Serves 4
Ingredients

3 tablespoons olive oil
2 teaspoons minced garlic
3 portobello mushrooms
Salt and freshly ground pepper
1 large yellow onion, halved and sliced thin
1 rustic baguette (I used 3 demi baguettes instead)
1/2 stick butter
4 slices Swiss, mozzarella or provolone cheese
1 1/3 cups mushroom essence (recipe below)

Method
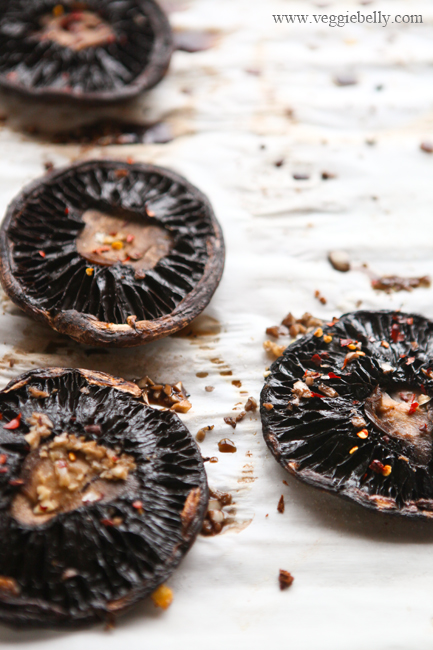
1. Pre-heat oven to 350f. Mix together 2 tablespoons of olive oil and the garlic in a bowl. Remove the stems from the portobello mushrooms (save them for making the mushroom essence). Brush both sides of the portobello mushroom caps with the garlic oil mixture. Sprinkle salt and pepper.

2. Place the porobellos, gill side down, on a baking sheet and bake for about 25 minutes.

3. When the mushrooms are done, let them cool a little so you can handle them. Then cut each mushroom cap into about 8 slices. Set aside.

4. While the mushrooms are baking, work on the onions. Heat 1 tablespoon olive oil in a skillet over medium heat. Add the sliced onion and cook for about 5 minutes. Turn heat down to low, and continue cooking, stirring occasionally till the onions are soft, brown and sweet. About 15 minutes. If the onions stick or burn while cooking, sprinkle a little water on them.

5. Cut the baguette into 4 equal portions. Slice each portion lengthwise in half, so you can make a sandwich. No you’ll have 8 pieces. Spread butter on all baguette slices.

6. Heat a large skillet, and place the baguette slices, buttered and cut side facing down. Griddle the bread till the buttered sides turn golden.

7. Now take 4 of the griddled bread slices, and place them on a baking tray, cut side facing up. Top each slice with one fourths of the portobello mushrooms, one fourths of the caramelized onions, and one slice cheese. Repeat for remaining 3 baguette slices. Bake in a 350f oven till the cheese melts. Top with the remaining 4 baguette slices. Bake for another 2 minutes.

8. Serve the sandwich with warm mushroom essence for dipping (recipe below)

Mushroom Essence Recipe

Ingredients

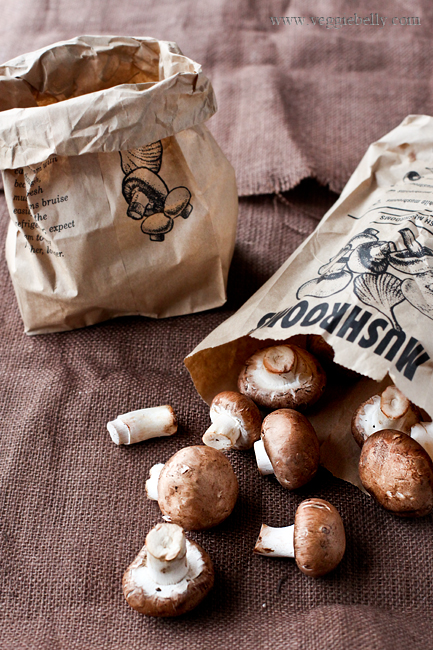
1/2 pound whole crimini mushrooms, stems on
6 cloves garlic, lightly crushed
2 tablespoons tamari

Method
1. Place the mushrooms and garlic, along with 6 cups of water in a medium saucepan. Bring to a boil. Then lower heat and cook on a low boil, till the liquid has reduced to about 2 cups. This will take about 45 minutes.

2. Strain the liquid, and add the tamari. Can be refrigerated or frozen.

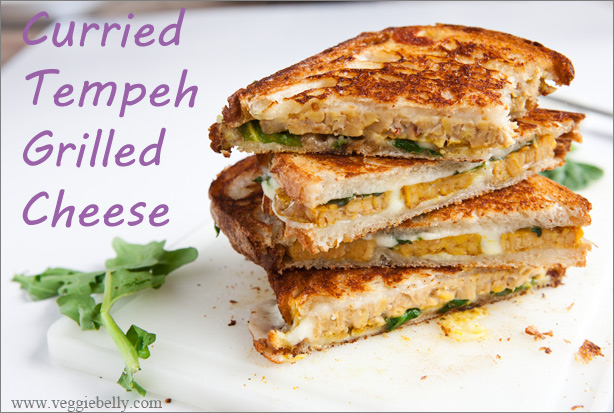
Curried Tempeh Grilled Cheese Sandwich with Mango Chutney

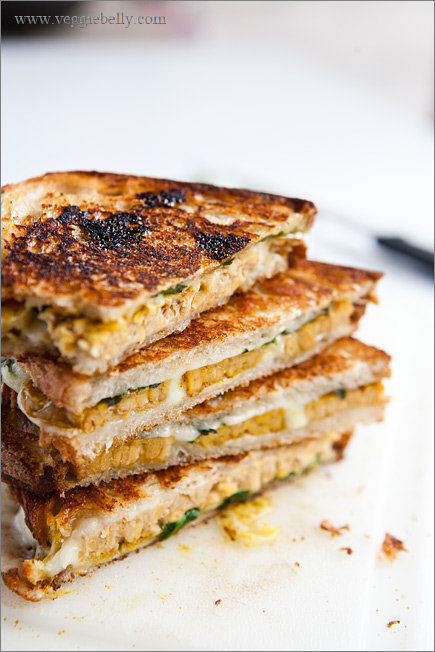
This is more an idea than a recipe. Once you learn how to marinate and cook the curried tempeh, you can vary this grilled cheese sandwich however you like.  If you are in hurry, see the shortcut method in the recipe below. Serve with a salad and my Indian spiced potato chips, and this is an easy, tasty meal any time of the day!

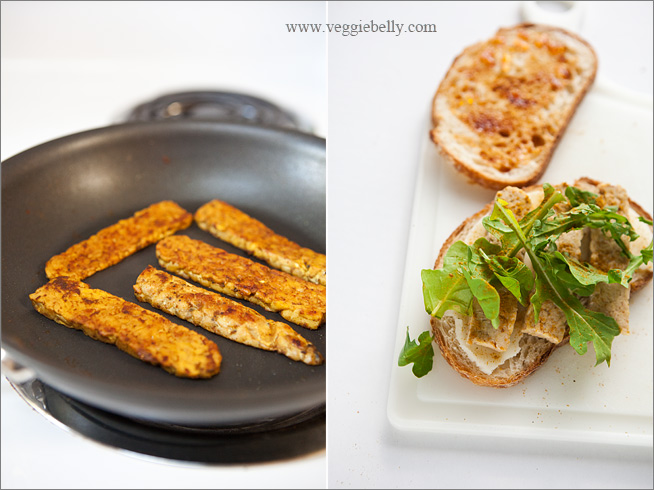
You can marinate and saute the tempeh for extra flavor like on the left. Or if you are in a rush, just toss the tempeh in soy sauce and curry powder and make the sandwich like the picture on the right.

I like to marinate the tempeh in soy sauce and curry powder, so that the tempeh soaks up some of the flavors. I used Frontier Indian curry powder. It contains turmeric, coriander, cumin, lemon peel, black pepper, lemon powder, cardamom, cinnamon, garlic and cayenne. Its mild, the lemon peel gives it a fresh pop, and it works well for the curried tempeh.

Remember, curry powders vary vastly in taste depending on the brand. So use my recipe as a guideline. Make a single grilled cheese sandwich, taste it, and adjust the curry powder accordingly.

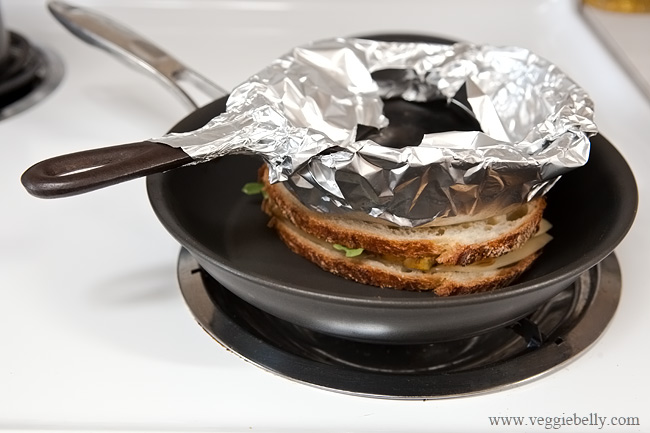
A weight on top of the grilled cheese (panini style)- like a garden brick or cast iron skillet covered with foil – will ensure even cooking, and melt the cheese quickly. Use medium heat and a weight on top of the sandwich and you will have perfectly golden grilled cheeses every time! 
Love grilled cheese and paninis? Check out my friend Kathy’s fun panini blog!

Curried Tempeh Grilled Cheese with Mango Chutney Recipe

Makes 2 sandwiches

Ingredients
For curried tempeh
Half an 8 oz package of tempeh
¼-½ teaspoon curry powder*
1 teaspoon soy sauce
2 tablespoons water
1/2 teaspoon oil

For the sandwich
4 slices of sourdough bread
1 tablespoon or to taste sweet mango chutney. Substitute with apricot preserves
4 slices of provolone or mozzarella cheese
Handful of fresh arugula or baby spinach leaves or kale leaves, torn
1 teaspoon butter
*curry powders vary greatly in their poteny and spiciness. So I really cant give you an exact amount.

Method
For the curried tempeh
1.Slice the tempeh lengthwise into ¼ inch thin pieces. You will need 6-8 slices, about 4 oz
2.Whisk together the curry powder, soy sauce and water in a bowl. Add tempeh to the bowl and gently toss so the marinade is coated well on the tempeh.
3.Cover and marinate the tempeh in the fridge for 30 minutes and up to 2 days.
4. Heat oil in a medium skillet and add the marinated tempeh. Also add any remaining marinating liquid. Cook on medium heat, flipping the tempeh occasionally, till all the liquid has boiled away and the tempeh is brown on both sides.
Now proceed with making the grilled cheese.

Shortcut curried tempeh: If you are in a hurry, skip the marinating and cooking of the tempeh. Leave out the water and oil. Simply toss tempeh in soy sauce and curry powder and continue with the recipe below.

For the grilled cheese
1.Use a small cast iron skillet or a garden brick as the weight for the grilled cheese. Cover the cast iron skillet or bricks with aluminum foil
2. Take 2 slices of bread and slather about 1/2 teaspoon (or more) mango chutney on both the bread slices
3. Place one slice of cheese on top of the mango chutney. Top it with 3-4 slices of curried tempeh and 6-8 leaves of arugula or baby spinach or kale
4. Cover with another slice of cheese, and the other slice of bread, chutney side down
5. Heat ¼ teaspoon butter in a non stick skillet on medium heat. Place the sandwich on the skillet
6. Put the foil covered weight (cast iron skillet or brick) on top of the sandwich. Make sure it is balanced sitting on the sandwich. Let the sandwich with the weight on top cook on medium heat  till the bottom side is golden, about 2 minutes
7. Then remove the grilled cheese sandwich using a wide spatula, add 1/4th teaspoon more butter to the pan. Flip the sandwich over and cook the other side, with the weight on top, till it is golden.

Serve immediately with a salad and Indian spiced potato chips.

Triple Smoky Mac and Cheese Recipe from Herbivoracious Cookbook and a Giveaway

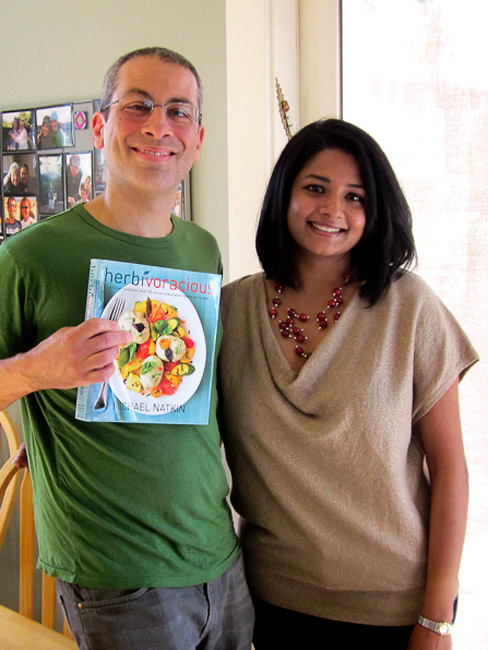
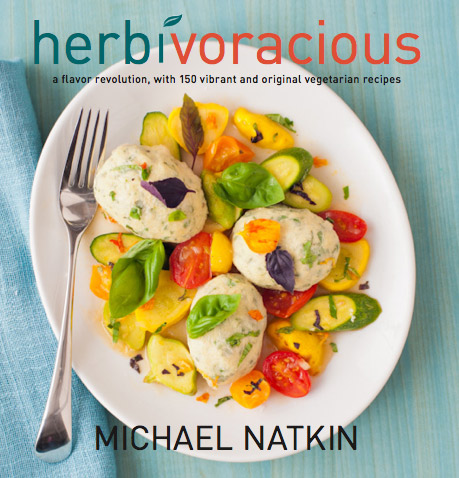
When I received a review copy of my friend Michael Natkin’s new cook book Herbivoracious: A Flavor Revolution with 150 Vibrant and Original Vegetarian Recipes, I was so thrilled and so hungry. Thrilled because Michael is my favorite vegetarian blogger and his site is full of creative vegetarian recipes. Hungry because Michael’s book is one of the best vegetarian cookbooks around, and all the recipes look delicious. Whether you are a vegetarian or an omnivore, you are going to love this book. And it has plenty of vegan and gluten-free recipes as well.

Michael and I, with Michael holding the very first copy of his cookbook! Exciting!

Michael has been a vegetarian since he was 18. When his mother fell sick, he started cooking her macrobiotic meals at home. Since then, Michael has been a devoted vegetarian. And his passion for food is so evident in his uber successful blog, Herbivoracious (same name as the cookbook!).

The blog is an encyclopedia of information, filled with recipes and tips. How does polenta with pan roasted porcini, tomato confit and chevre sound to you?! My personal favorite Herbivoracious blog recipe is the chickpea, spinach and tomato soup – simple yet packed with flavor.

When I received Herbivoracious, the cookbook, I had great trouble deciding what recipe I should make for this post. The chickpea and olive tagine with ras el hanout ( a North African spice mix) sounded yummy. As did the blackbean soup with orange jalapeno salsa, 10 minute chickpea salad with feta and basil, grilled tofu and pepper tacos, red curry delicata squash, and..well..pretty much all the recipes in the book!

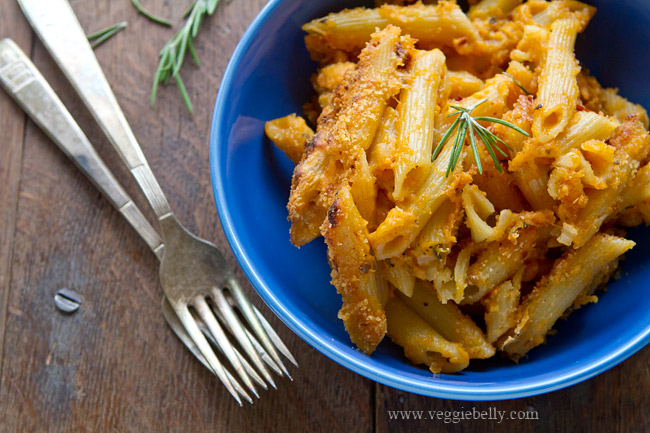
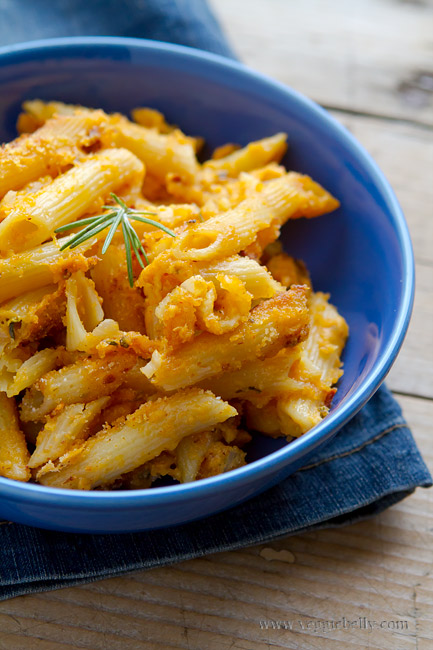
I finally decided to make the triple smoky mac and cheese. Because its cheesy, spicy and comforting – exactly what I needed on a cold, wet Portland evening. It’s the best mac and cheese I’ve had. It was easy to make, and tasted like it came from a high end restaurant. Meat lovers are sure to love this vegetarian mac and cheese. It has so many great smoky flavors going on, my husband thought it had bacon in it! Michael says you can either use smoked cheddar or smoked mozzarella in this recipe. The smoked cheese, plus smoked paprika and chipotle peppers make this mac and cheese wonderfully smoky.

Enjoy Michael’s recipe, and then make sure you enter the giveaway. The book will be out in May and the publisher, Harvard Common Press will send out a copy to one lucky winner as soon as Herbivoracious is published! You can also get your own copy on Amazon through this link Herbivoracious: A Flavor Revolution with 150 Vibrant and Original Vegetarian Recipes

Triple Smoky Mac and Cheese Recipe

A recipe from Herbivoracious Cookbook. Reproduced with permission.
Serves 6 to 8

Ingredients

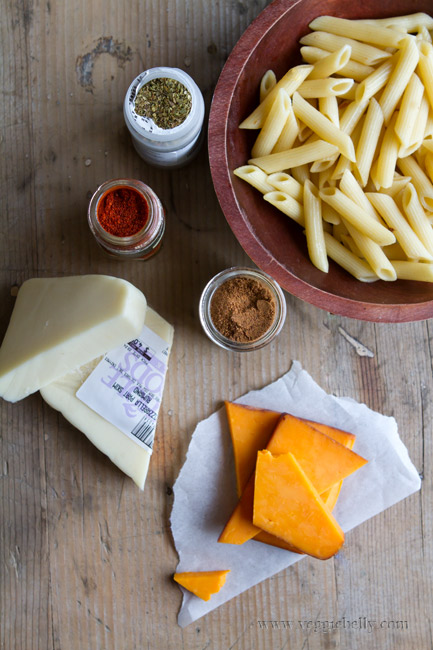
1 pound elbow macaroni (Sala’s note: I used penne because thats what I had on hand)
6 tablespoons (3⁄4 stick) unsalted butter
1⁄4 cup all-purpose flour
4 cups whole milk
Half an onion, finely diced
1 tablespoon smoked paprika
1 teaspoon fresh rosemary leaves, minced
1 canned chipotle chile in adobo sauce, minced, or
1⁄4 cup Frontera brand chipotle salsa
1 teaspoon dried oregano
1⁄4 teaspoon nutmeg (preferably freshly grated)
8 ounces smoked cheddar, grated, or substitute regular cheddar if you can’t find smoked cheddar
8 ounces mozzarella (substitute smoked mozzarella if you’re using regular cheddar), grated
Kosher salt
1⁄2 cups Homemade Bread Crumbs made with 2 cloves minced garlic added. Recipe in the book.

Method

1. Bring a large pot of salted water to a boil. Boil the macaroni according to package directions, draining when it is just becoming aldente. This will bake more in the oven, so don’t overcook it. Drain, transfer it to a bowl, and toss with 2 tablespoons of the butter.

2. Preheat the oven to 350°F and grease a 9 x 13-inch baking dish. (Sala’s note: I baked the mac and cheese in a cast iron skillet instead of a baking dish)

3. Melt the remaining 4 tablespoons butter in a medium saucepan over medium-low heat. Sprinkle in the flour and whisk pretty constantly for 3 minutes. Whisk in the milk. Add the onion, smoked paprika, rosemary, chipotle, oregano, and nutmeg. Bring to a gentle simmer and keep cooking, whisking occasionally, until the sauce begins to thicken, about 5 minutes.

4. Reduce the heat to low. Whisk in the grated cheeses, a handful at a time, stirring each addition of cheese until melted. It is important to do this gradually, to avoid graininess.

5. Taste the sauce and adjust the seasoning to your preference. It will probably need just a little salt, depending on the cheeses. Add more chipotle if you’d like it hotter. Remember that the sauce should be pretty intense, because it needs to flavor a full pound of pasta.

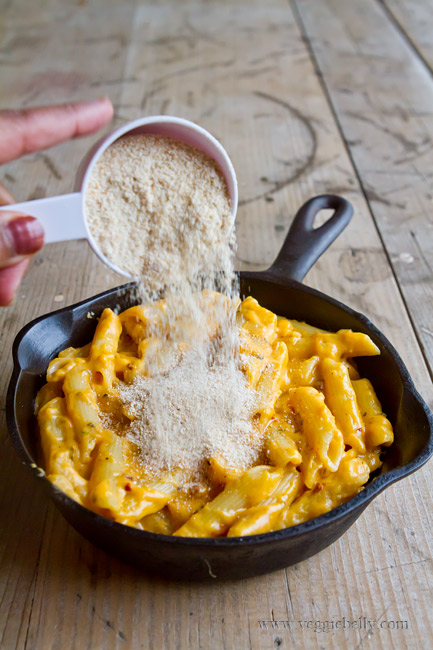
6. Stir the macaroni into the sauce. Pour the macaroni into the baking dish. Scatter the bread crumbs evenly over the top.

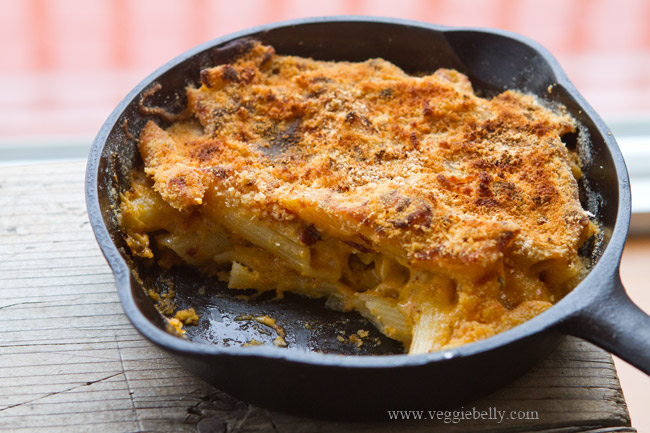
7. Bake until you can see bubbling around the sides and the bread crumbs are nicely browned, about 30 minutes. Let the dish rest for 5 to 10 minutes before serving.

***********************

A Chance to Win Michael’s Herbivoracious Cookbook!

Be One of the First to Receive a Copy!

The awesome people at Harvard Common Press are giving away a copy of Herbivoracious to one lucky Veggie Belly reader!

To enter the contest, just leave a comment and tell me why you’d like to be the one to win this book.

Contest ends Wednesday, April 4th 2012. US & Canada shipping only.

One randomly picked lucky winner will receive a copy of this book when it is published in May!

THIS GIVEAWAY HAS ENDED! The randomly picked winner is comment #7, Cat!

Vegetable, Paneer and Pasta Bake Recipe

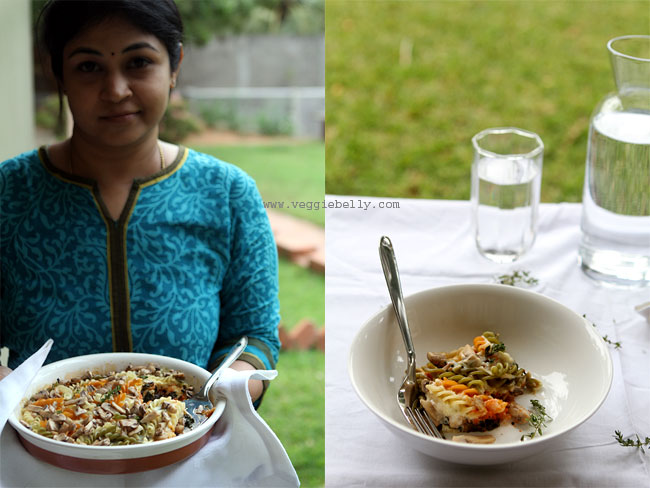
I always enjoy the time I spend with my cousin Meena. She is such a pleasant and genuine person, and the time we spend together is always special. When we met last week (after more than a year!), we spent lazy afternoons gossipping, playing pallankuzhi, and cooking.

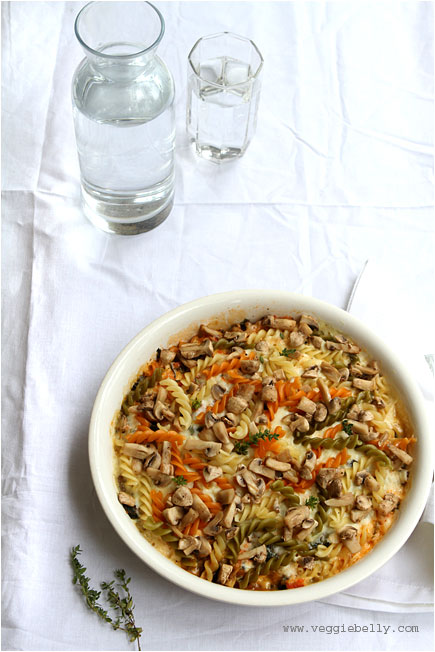
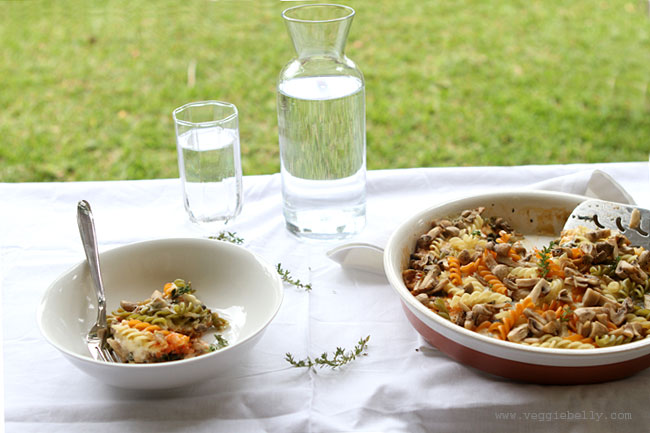
 This delicious vegetable, pasta and paneer bake recipe comes from Meena. She makes this vegetarian bake recipe for her post-swim meal. It is filling, and delicious without being heavy.

Meena didnt use cheese in this recipe, to keep it on the lighter side. But you can add some cheese on the top before baking. Vegans can use soy milk and tofu cubes instead of paneer (althought, I havent tried making the vegan version of this bake).

Meena microwaves the bake, which makes things very quick and easy. You can bake it as well, see instructions below. Remember, all the ingredients here already cooked – you only want to bake or microwave this dish just till the sauces bubble and the mushrooms cook.

Thanks meena, for your precious friendship, and for this delicious recipe that I know I will be making again and again.

There are multiple steps in this recipe, but dont let that put you off. Its well worth the effort. And you can make a big batch of this vegetable, paneer and pasta bake and freeze it.

Watch a step-by-step on how to make vegetable paneer and pasta bake

Vegetable Paneer and Pasta Bake Recipe

serves 3-4
Ingredients for the vegetables & paneer
6 oz paneer (substitute with drained, pressed, firm tofu)

3 cups fresh spinach, tightly packed
3.5 oz white button mushrooms (about 15 medium sized mushrooms)

Method
Cube the paneer and set aside.

Wash the spinach, and chop it. Place the washed, chopped spinach on a small wok. Cover it with a lid. Heat the wok on low heat, just untill the spinach wilts. Then remove from heat and sprinkle a little salt. Set aside.

Wipe the mushrooms clean with a paper towel. If the mushrooms have too much dirt, wash them in water, and drain well.

If the mushrooms are large, cut them in 4, if they are small, cut them in half. Set aside.

Ingredients for the pasta
1 1/2 cups cooked pasta*, such as elbow macaroni, shells, fusili, or penne
*Make sure the pasta is cooked al dente – it should not be over cooked or mushy.

Ingredients for the tomato sauce
4 small tomatoes
1 small onion (1/4th cup when chopped)
4 garlic cloves
1 tablespoon olive oil
1/4 teaspoon dried Italian seasoning
Salt & cracked pepper

Method
Core the tomato, chop it roughly and puree it in a blender.

Peel and chop the onion and garlic finely.

Heat olive oil in a small skillet. Add the chopped onion and garlic. Saute on medium heat till the onion gets translucent, about 2 minutes.

Add the pureed tomatoes and 1/4 cup water to the skillet. Bring to a boil. Now add Italian seasoning, salt and pepper. Let the sauce gently boil, till it thickens a little, about 3 minutes.

Ingredients for the white sauce
1 1/2 tablespoons olive oil or melted butter
1 1/2 tablespoons all purpose flour (maida) or wheat flour
1 cup room temperature or cold milk, preferably whole milk
1/4 teaspoon or to taste, dried Italian seasoning
Salt and cracked pepper

Method
Place the oil or butter in a non stick sauce pan (without heat). Sprinkle the flour over the oil or melted butter. Using a whisk, stir the flour into the oil or butter to incorporate. Place the pan on a stove over low heat. Immediately, pour in milk. Whisk again till the flour dissolves.

Increase heat to medium. Cook the sauce, whisking constantly, till the sauce thickens, about 2 minutes. Now add Italian seasoning, salt, and pepper. Turn off heat.

To assemble and cook the vegetable paneer and pasta bake

Take a medium baking dish, about 8 inches in diameter. Line the bottom with the paneer cubes. Layer the wilted spinach on top of the paneer. Pour the tomato sauce all over. Next, pour the white sauce. Arrange the mushrooms and pasta on top of the white sauce.

Optional step: sprinkle 1/2 cup grated cheddar or mozzarella cheese on top. Meena didnt use cheese in this recipe.

Place the bake in a 400 f oven and bake for 15 minutes or till the sauce is bubbling. If you are baking this in the oven without cheese, you need to pour the white sauce on top of the pasta, so that the pasta doesnt dry out in the oven.

Alternatively, microwave the bake on full power for 5-8 minutes or till the sauce bubbles. Microwave ovens vary.

Serve warm with a green salad.

Paneer Paratha Recipe – a step by step

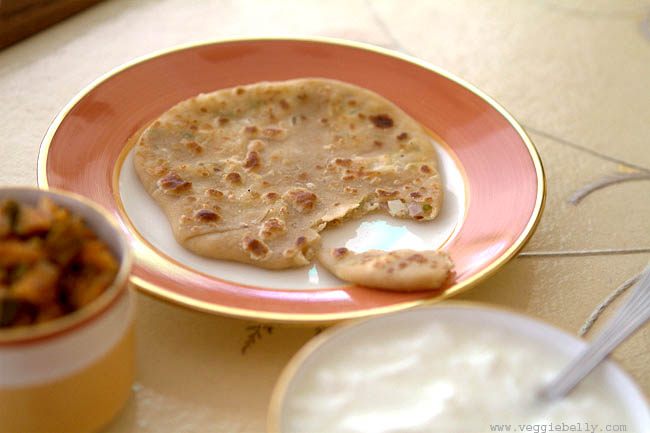
I am vacationing in India right now and enjoying some fabulous home cooked food. Every time I visit India, I ask my mother’s friend Veena aunty to teach me her amazing recipes. Veena aunty has such a love for cooking, you can taste the passion in her food. This time she showed me how to make her paneer paratha recipe. Paneer parathas are Indian flat bread stuffed with cottage cheese. You wont be disappointed with this paneer paratha recipe!

Paneer Paratha Recipe (Cottage Cheese Stuffed Flat bread)

makes 6-8 parathas

for the paratha dough

Ingredients
1 cup whole wheat flour (atta)
1/3 cup all purpose flour (maida)
1/2 teaspoon salt or to taste
1 teaspoon vegetable oil
1 cup water (you may not need all of it)

Method

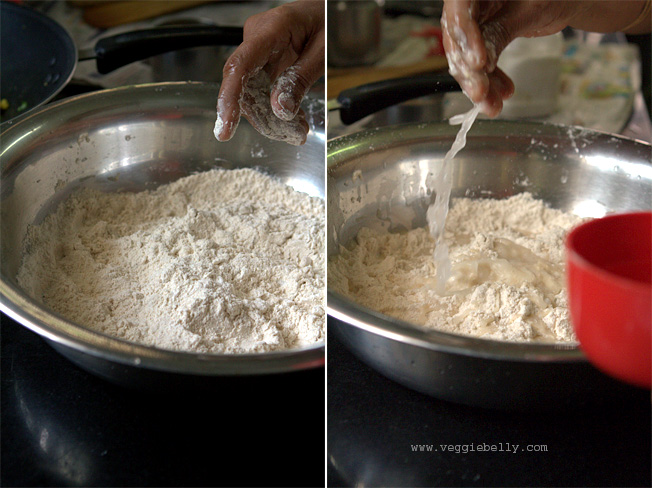
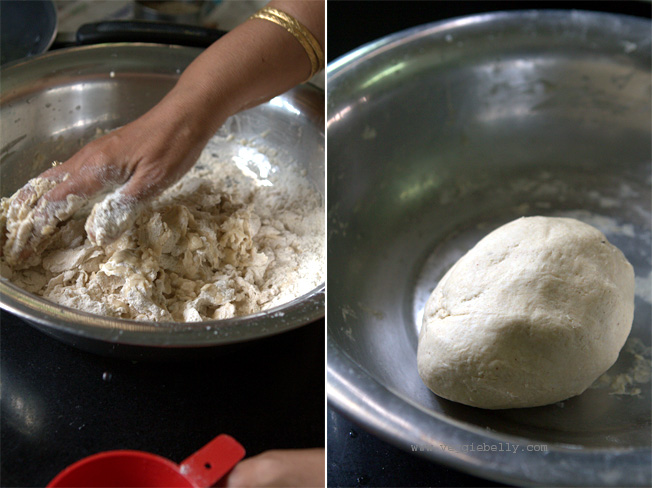
1. Combine the wheat flour, all purpose flour, salt and oil in a large bowl

2. Sprinkle a little water at a time till the dough binds together

3. Knead the dough, sprinkling water, until it forms a soft, elastic ball

4. Make sure the dough isn’t too wet. If it gets too wet or sticky, add more flour

5. Knead the dough till it is smooth and elastic (think pizza dough)

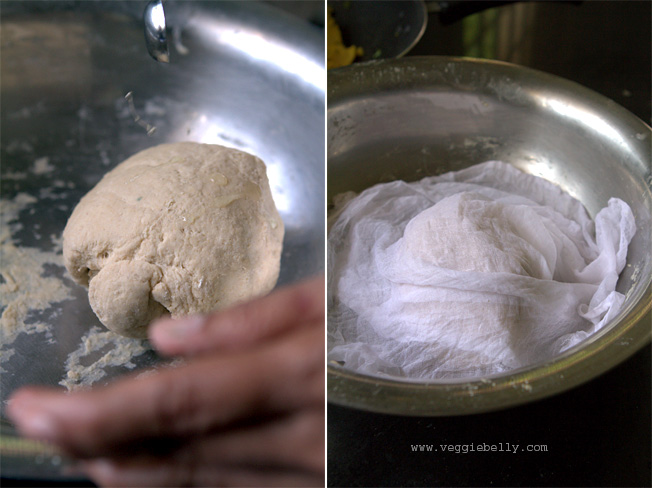
6. Drizzle a few drops of oil over the dough ball, and spread it all over the surface

7. Cover the dough with a damp towel

8. Let it rest for 15 minutes. In the meanwhile, make the paneer filling

for the paneer filling

Ingredients
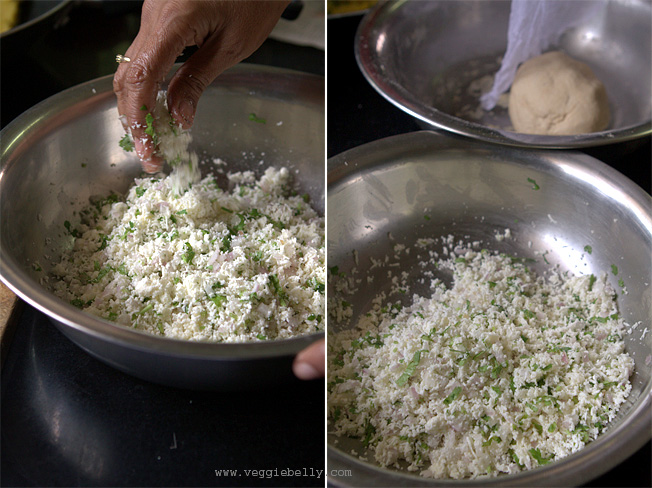
7 oz paneer, finely grated (about 1 1/2 cups when grated)
1 small onion, minced
3 tablespoons finely chopped cilantro
1/2 teaspoon garam masala
1/4 teaspoon turmeric powder, optional
1 green chili finely chopped or according to taste
salt

Method

1. Combine all paneer filling ingredients in a bowl

2. Taste the filling and adjust salt and seasonings if needed. If you like it spicier, you can add more minced chilis or garam masala at this point

Make the paneer parathas

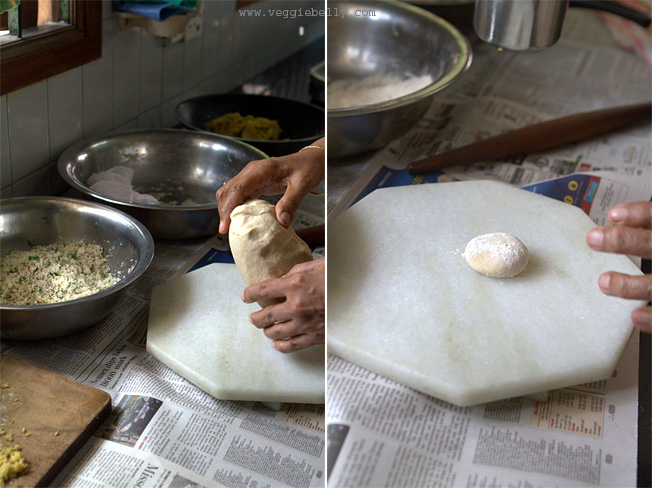
1. Keep a small bowl of wheat flour near you

2. Remove the dough from the bowl, and knead it a few times

3. Divide the dough into 6 equal parts. If you don’t have much experience making parathas, divide the dough into 8 parts, so each paratha is smaller, and therefore easier to make.

4. Take one piece of the divided dough and form it into a ball

5. Dip the dough ball in wheat flour

6. Place it on a clean, flat surface for rolling

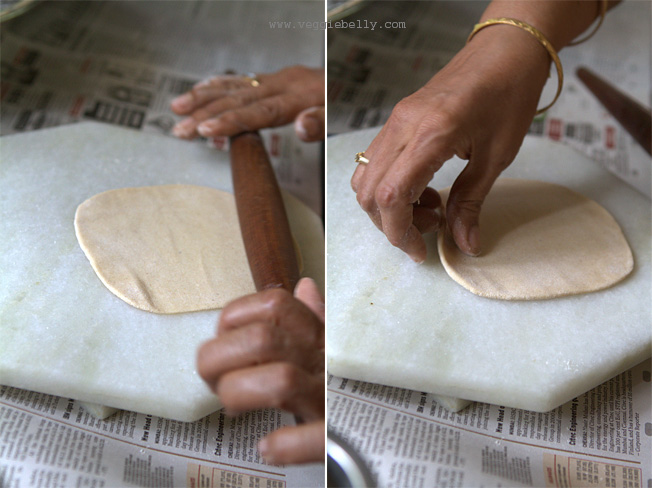
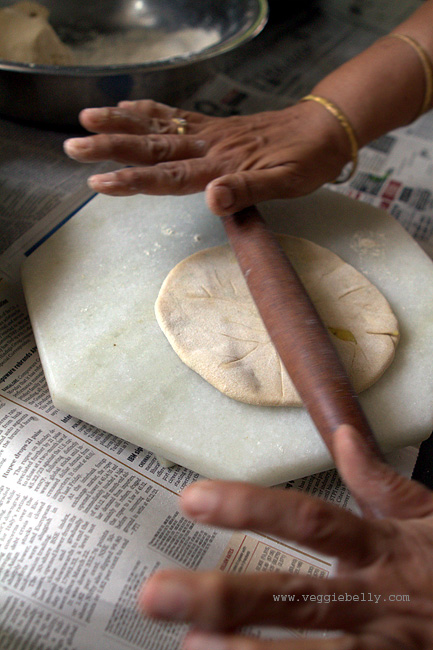
7. Using a rolling pin, roll out the dough into a round using a light touch

8. Turn the paratha 1/4ths of a turn each time you roll it. This will keep it round.

9. Sprinkle a little flour as and when needed.

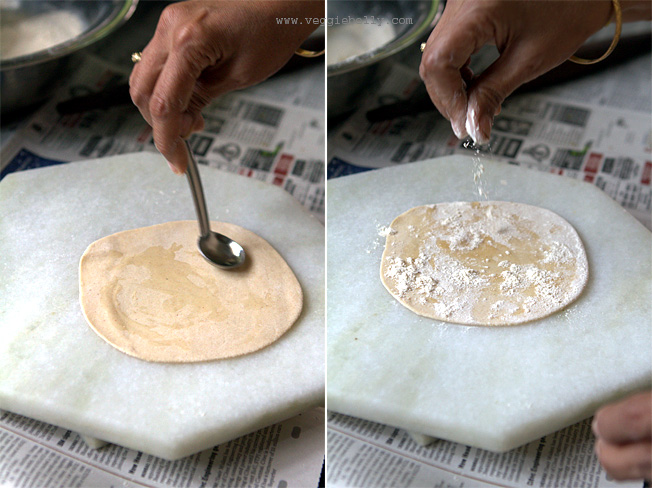
10. When the paratha is thin and even (see picture above), stop rolling, and spread 6 drops of oil

11. Sprinkle a little flour on the oiled side, dust off the excess flour

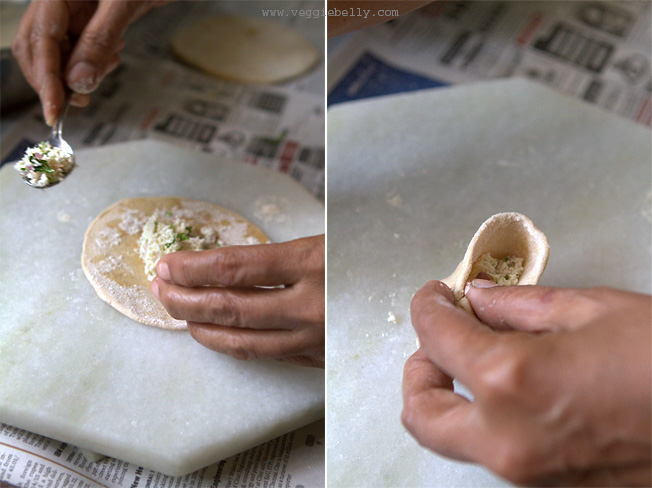
12. Place 2 tablespoons of the paneer filling in the center

13. Gather the edges of the paratha and bring them up, and pleat them over the filling, to form a parcel. If you feel the parcel can hold more paneer filling, add a little more now

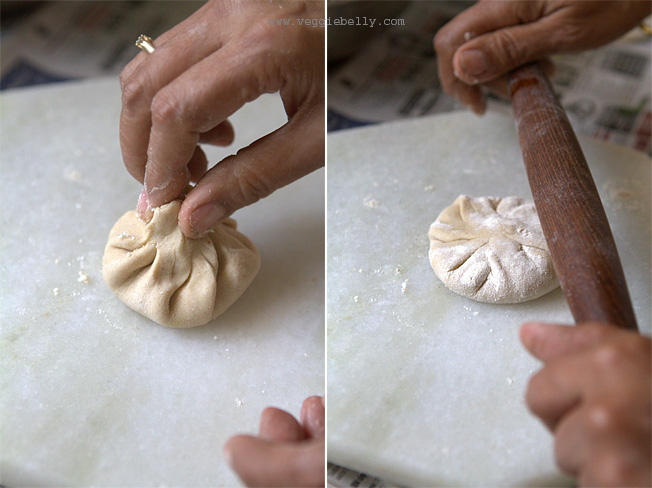
14. Pinch the top to seal the paratha

15. Dip it in flour, flatten it a little, and gently roll it using a rolling pin

16. Roll gently till the paratha is about 1/4 inch thick

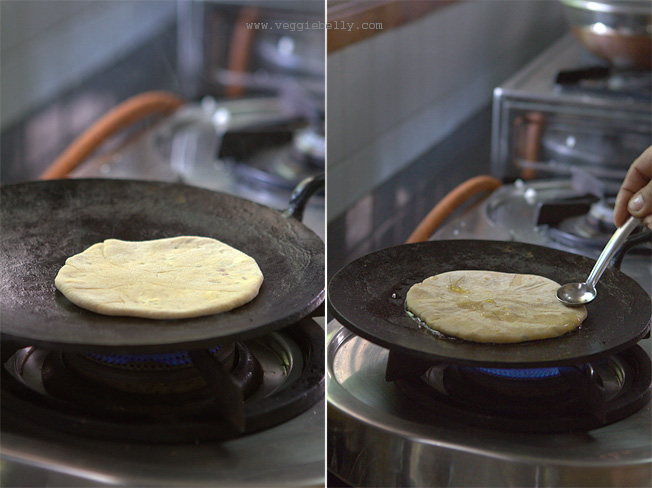
17. Heat a tava, or cast iron skillet on medium heat

18. Place the paratha on the skillet. Cook on medium heat till pale brown spots appear on the under side

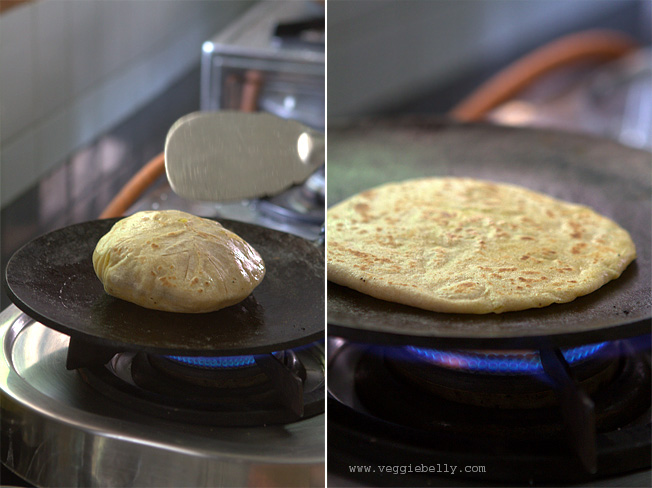
19. Then flip the paratha and let pale brown spots appear on the other side

20. Then increase heat to medium-high and drizzle about 1/4th teaspoon of vegetable oil (you can use less oil or oil spray)

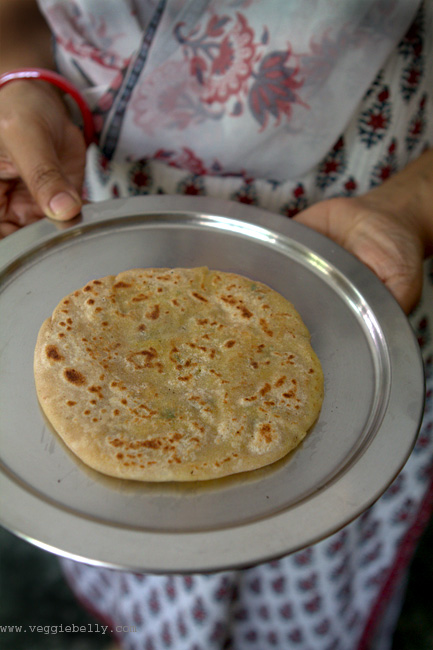
21. Cook paratha on both sides till the dough is cooked and lightly browned (but not too dark)

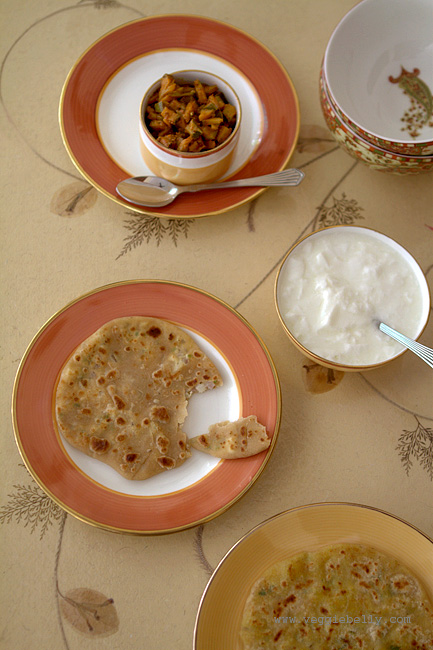
Serve paneer parathas with yogurt or my grandmother’s multi colored raita and my apple pickle.

Paratha making tips

- add enough water to the dough so that it is soft (but not sticky)

- sprinkle wateron the flour a little at a time, this way you are more in control of the final result

- a hard dough will make your parathas stiff

- when kneading, aim for a soft, smooth, elastic dough that is not sticky

- it important to cover and rest the paratha dough for atleast 15 minutes before rolling

- when rolling parathas use a gentle touch

- make sure you chop the filling ingredients very fine. For paneer parathas, the paneer must be grated finely, and the onions and cilantro must be minced. For aloo parathas, the potato must be mashed with no lumps. If you leave large pieces in your filling, it will tear the dough when you are rolling out the parathas.

- when stuffing parathas, you need to use about equal amounts of dough and filling. So if you are using a lime size ball of dough, use about a lime sized mound of filling. However, if you are new to paratha making, lesser amounts of filling may be easier to deal with it, but you will compromise on taste.

- the more you practice making parathas, the better you will get!

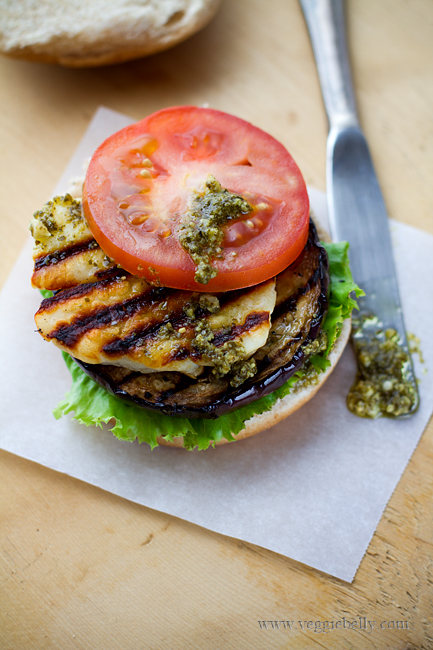
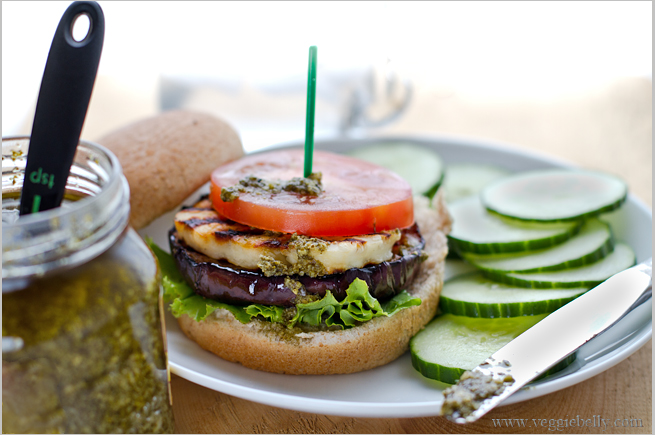
Grilled Eggplant, Halloumi and Pesto Burgers

Here is a vegetarian grilled eggplant, halloumi and pesto burgers recipe that even meat lovers will go crazy for. This is perfect for weekend and holiday grilling.

Halloumi is one of my favorite cheeses. This salty, dense cheese is from Cyprus and is great for grilling. You can substitute halloumi with mozzarella, feta or paneer, but it just wont be the same :(

But if you do use any of the substitutions, remember that you don’t have to grill the mozzarella or feta. If using paneer, sprinkle it with salt after grilling.

The eggplant and halloumi won’t stick if your grill is hot and well-seasoned. If you are doubtful, spray some nonstick spray on the grill grates before starting it up.

Grilled Eggplant, Halloumi and Pesto Burgers Recipe

Makes 4 burgers

1 medium eggplant, weighing about 1 lb.
3/4 tablespoon olive oil
3/4 tablespoon balsamic vinegar
1/4th teaspoon dry Italian seasoning
Salt and pepper
4 oz halloumi cheese

To assemble the grilled eggplant, halloumi and pesto burgers
4 medium sized burger buns
4 teaspoons pesto
Mayonnaise, according to taste. Optional.
2 leaves of lettuce, cut in half
1 large tomato, cut into 4 slices

Cut the eggplant into ½ inch thick rounds, at its widest part. Save the remaining eggplant for another dish. Place the sliced eggplant in a shallow dish.

Whisk the olive oil, balsamic vinegar, Italian seasoning salt and pepper together. When adding salt, keep in mind that the halloumi is an already salty cheese. Pour the whisked ingredients over the eggplant rounds, and toss well to coat.

Slice the halloumi into ½ inch thick slices.

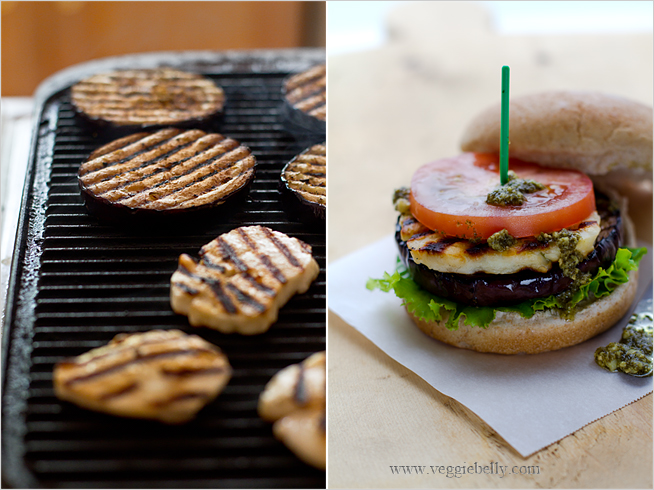
Heat a grill on medium-high heat. You can use an outdoor grill or a cast iron stove top grill like I did.

When the grill is hot, arrange the eggplant slices on the grill, and cook for about 6 minutes on each side or till the eggplant is cooked.

Then grill the halloumi slices on both sides till golden grill marks appear, about 2 minutes per side.

If you don’t have a grill, you can cook the eggplant and halloumi in batches on a large skillet.

You are now ready to assemble the burgers.

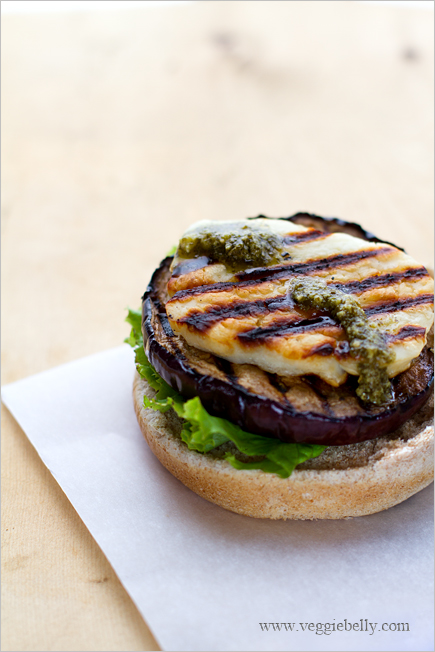
Spread some mayonnaise, if using, on 2 halves of a burger bun. Take one half of a bun, and stack the grilled eggplant, halloumi and spread 1 teaspoon of pesto. Top it with tomato and lettuce. Place the other half of the burger bun on top.

Serve with fries or a chilled cucumber salad tossed with a little olive oil, balsamic vinegar, salt and pepper.

These burgers will go great with my blueberry lemonade or jalapeno lemonade.

Spinach and Taleggio Cheese Quesadillas. 10 Minutes, 4 Ingredients!

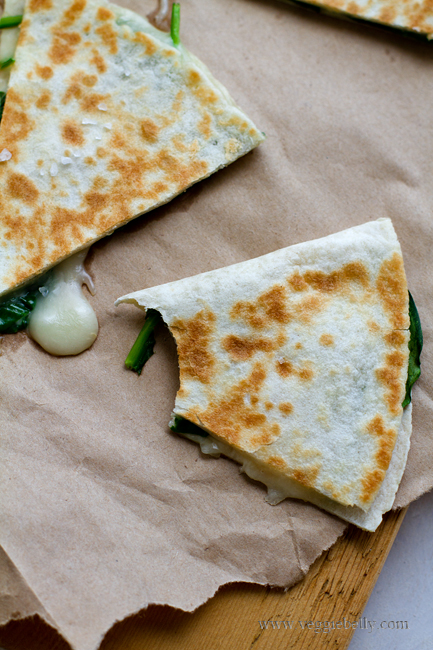
A quesadilla recipe doesnt get simpler than this. Only 10 minutes and 4 ingredients, and I promise you will love this easy cheesy quesadilla!

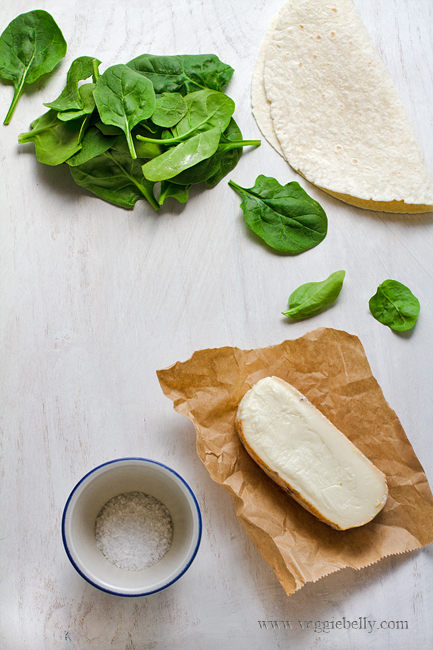
Taleggio is a soft, Italian cows milk cheese. It has a strong fruity smell, but a wonderful mild flavor. You can substitute taleggio with fontina or brie. Since this recipe is simple, and uses very few ingredients, I like to use a “special” cheese like taleggio, where its flavor and creaminess can shine through.

I also like to use asparagus instead of spinach in this recipe. Asparagus and taleggio cheese were made for each other!

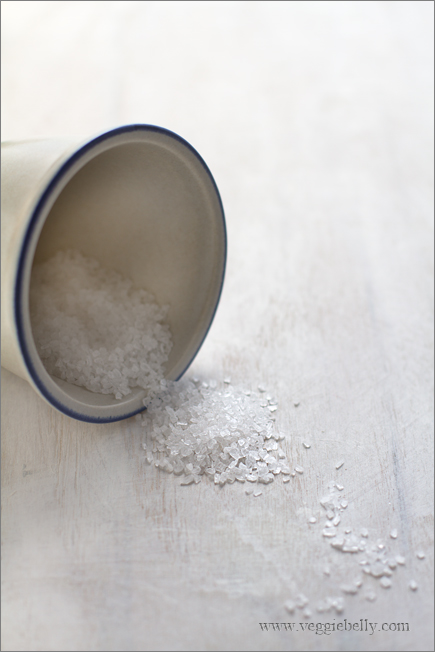
Sea salt is a beautiful thing. It has a coarser grain than table salt, and gives you a pleasant burst of saltiness. Because sea salt is more granular it is perfect for sprinkling over food, or using it in quick recipes, where it doesnt have a chance to dissolve. I used a beautiful bag of salt crystals from the Trapani Saltpans of Italy that I picked up at Eataly in New York.

Easy Spinach and Taleggio Cheese Quesadilla Recipe

makes 1 quesadilla

1 eight inch flour or wheat tortillas
1 oz taleggio cheese (substitute with fontina or brie)
1/2 cup fresh baby spinach leaves loosely packed
1/4  teaspoon olive oil
Sea sat

Lay out a tortilla on a work surface. Trim away the rind of the cheese, and cut into into small pieces. Put the cheese pieces all over one half of the quesadilla. Place spinach leaves on top of the cheese. Fold over the other half to form a half moon shaped quesadilla.

Heat a non stick pan on medium heat, drizzle a little oil. Place the folded quesadillas in the pan, and cook on medium heat for 1 minute or till the tortilla is light brown and cheese is just about to melt. Turn the quesadilla over and lightly brown the other side, about 45 seconds. Dont over cook the tortillas, the cheese will get oily.

Cut into wedges and sprinkle a tiny pinch of sea salt on top. Serve with a lettuce, tomato, cucumber salad and your favorite salad dressing.

Related Posts with Thumbnails