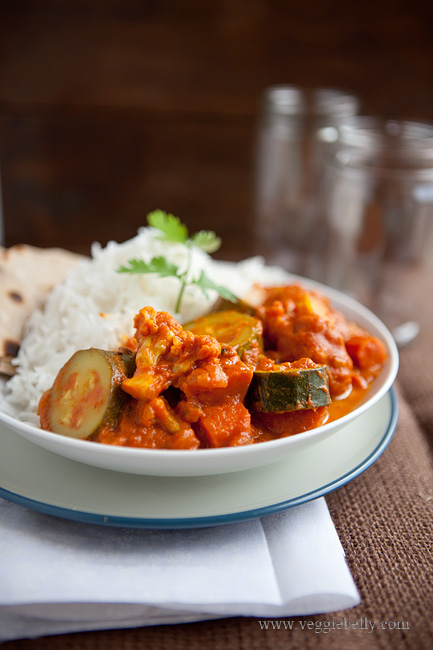
Easy Zucchini and Cauliflower Curry Recipe. Only 8 ingredients!

My husband loves this easy zucchini and cauliflower curry and requests it at least once a week. I will vary the vegetables depending on what’s available and what we are in the mood for. I’ve made this curry with eggplant, green beans and potatoes. I’ve made it with pumpkin and kale. I’ve also made it with cubed paneer,  green peppers and baby corn. This recipe is versatile!
A make ahead tip: Because I make this curry so often (did I mention we love it?!), I’ve started making the curry sauce in bulk and freezing it. It’s easy. Once you are done with step 5 in the recipe below, just spoon the curry sauce into ice cube trays and freeze it. When solid, put the frozen curry cubes in freezer bags and return to the freezer.

You now have a delicious vegetarian, vegan curry base sitting in your freezer to pull out anytime and heat up along with vegetables of your choice!
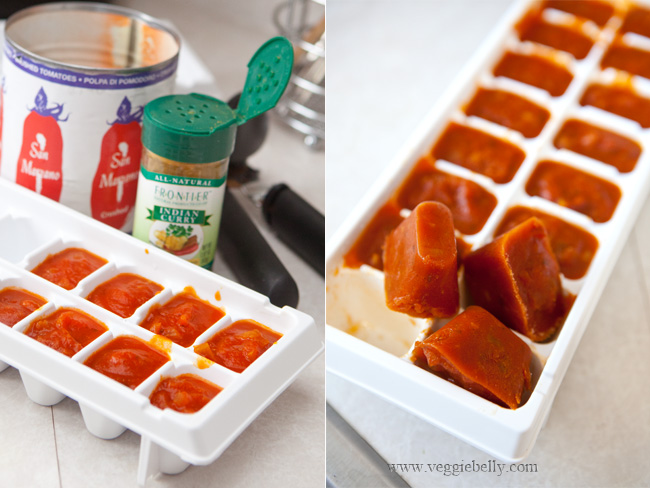
I prefer the taste and convenience of canned tomatoes for this recipe. If you want to use fresh tomatoes, core them, and puree them in a blender. You will need 3 cups freshly pureed tomatoes + about 1 cup water. If the fresh tomatoes make a tart curry, you will want to add a little sugar at the end of cooking.

My favorite tomatoes to use for this curry:
-          Muir Glen fire roasted diced tomatoes
-          San Marzano crushed tomatoes
-          Del Monte diced tomates with basil, garlic and oregano
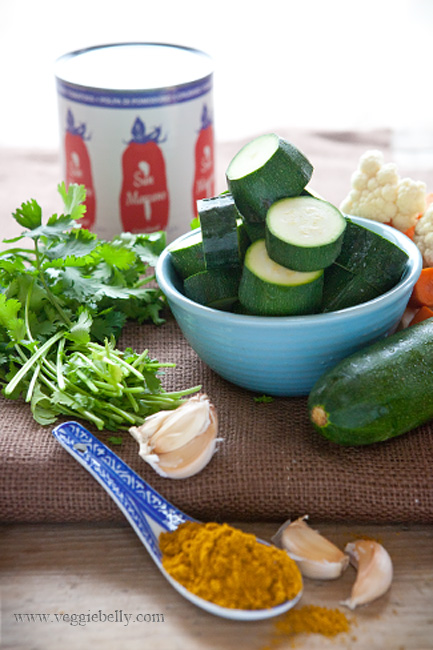
And the curry powder I used is Frontier Indian curry powder from Whole Foods, which is mild, very fragrant, tasty and has a hint of lemon peel. If you use a stronger curry powder, you may want to use less.
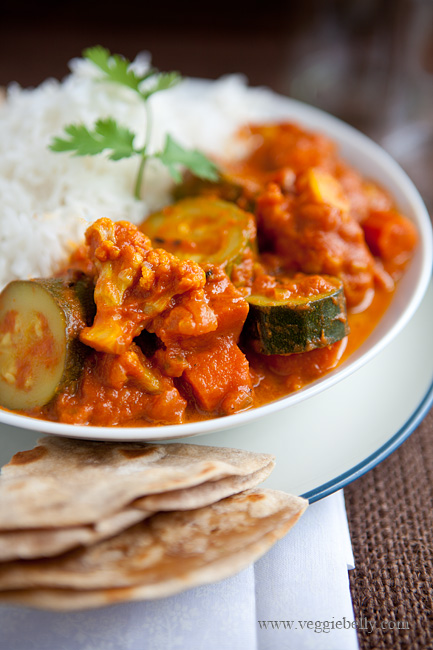
Easy Zucchini and Cauliflower Curry Recipe

serves 3-4

Ingredients
1 ½ tablespoons Oil
½ teaspoon Cumin seeds, optional
A pinch of asafetida, optional
½ large red onion, diced
2 garlic cloves, minced
2 teaspoons curry powder
One 14 oz can of diced or crushed tomatoes. I like San Marzano or Muir Glen.
2 zucchinis, about 12 oz
6 cauliflower florets (about 1 heaping cup of florets)
1 carrot
¼ cup coconut milk
Chopped cilantro or mint for garnish

Method
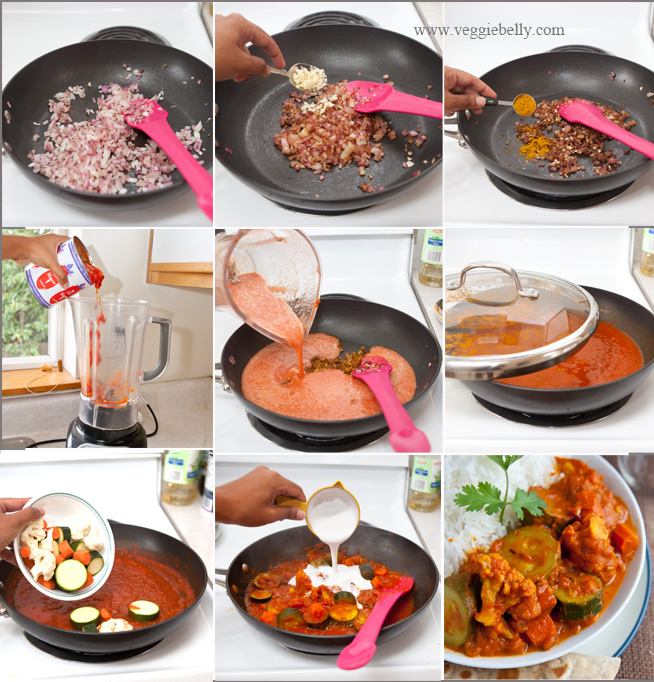
1.Heat oil in large sauté pan. Add cumin seeds if using. When they sizzle, add the asafetida if using.

2. Immediately add chopped onions. Cook on medium heat till the onions are lightly browned.

3. While the onions are cooking, puree the tomatoes. Place the canned tomatoes in a blender. Fill the empty tomato can with water, pour this into the blender as well. Puree well. You should have about 30 oz of puree now. Set aside.

4. When the onions are browned, add minced garlic and stir for 30 seconds.

5. Add curry powder and stir another 10 seconds. Then pour in pureed tomatoes and salt and bring to a boil. Reduce heat to medium-high, partially cover the pan with a lid and let the sauce simmer for about 15 minutes or till the sauce thickens a little. Careful, the sauce will bubble and splatter.

6. While the sauce is cooking, prepare the vegetables. Cut the zucchini into 3/4th inch rounds. Peel and cut the carrot into ½ inch pieces. Break up the cauliflower into florets.

7. Toss the vegetables in the curry sauce, cover and cook till the zucchini is soft, about 10 minutes.

Turn off heat and stir in the coconut milk. For an extra creamy curry, add 1/2 cup coconut milk instead of the 1/4 stated in this recipe.

Garnish with chopped cilantro or mint. Serve hot with brown rice or roti or pita bread. My grandmothers multi colored raita goes well with this dish.

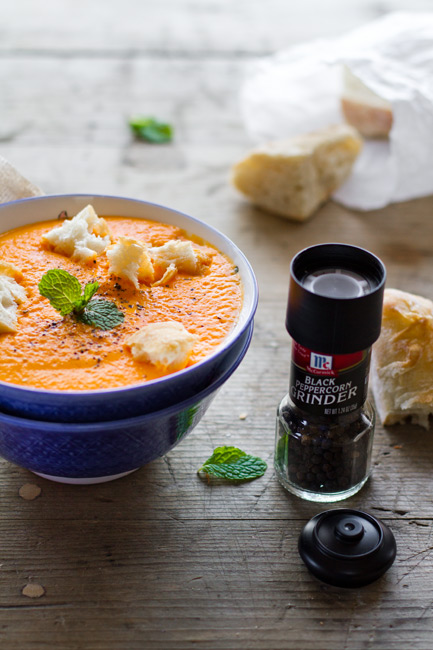
Easy Carrot Mint Soup and a Great Tip for Flavoring Milk Based Soups

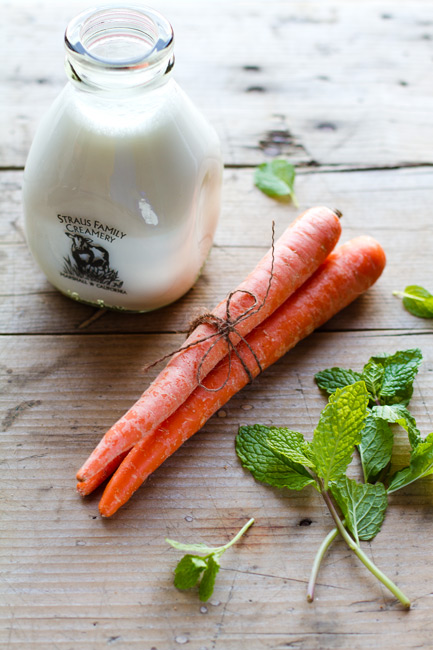
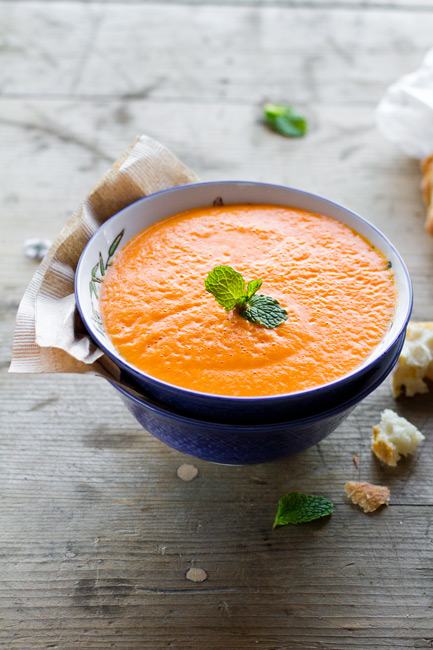
Let’s start the New Year with a simple, yet delicious carrot mint soup recipe, shall we?! This is my go to recipe when I’m feeling like a soup laden with the freshness of herbs and vegetables. This soup is very easy to make and pantry friendly since it uses only carrots, fresh mint, and milk.

I’ve tried this soup before by pureeing the mint leaves along with the carrots, just like my pea and mint soup. The pureeing method works beautifully for the pea and mint soup, but not so well for the carrot soup. When you puree the mint with the carrots, the soup loses it brilliant carotene tinged orange color. So heres how I infuse the mint flavor into the soup. Read on..

How to flavor milk based soups

If you are making a milk based soup with a herb, this is the best way to infuse the herb flavor into the soup. Mint and basil work particularly well with this method, but you can also use cilantro, parsley, rosemary or chives.

Bring the milk to a gentle simmer, and add the herb (mint in this recipe) to it. Turn off the heat, cover the milk and let the herb infuse for about 15 minutes. Then pull out the herb leaves from the milk, squeeze any milk out, then discard the leaves. That’s it! You have herb infused milk! Puree this milk along with cooked vegetables (carrots in this recipe) and you have a beautiful herb infused soup.

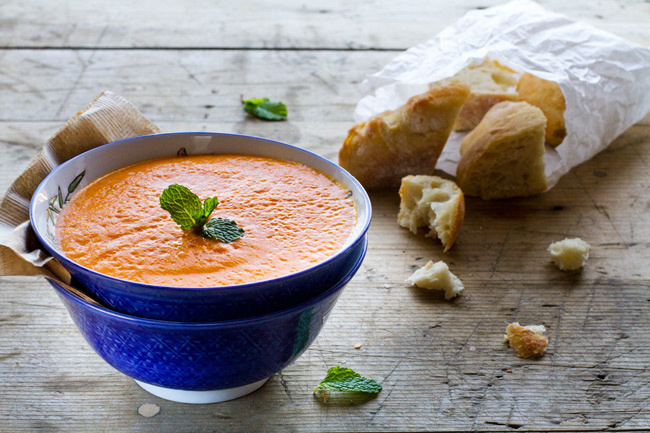
This is a great make ahead recipe. You can make this soup a few days ahead and simple re-heat it in the microwave. I love this carrot mint soup for a work day lunch, packed in a thermos with a paper bag of french baguette. Yum!

Easy Carrot Mint Soup Recipe

Serves 2
Ingredients
6 medium carrots, peeled and cut into chunks (about 1 ½ cups)
1 1/2 cups water
1 cup milk (Whole milk will taste best, but you can use 2% milk too)
4 sprigs mint (about 20 mint leaves)
Salt
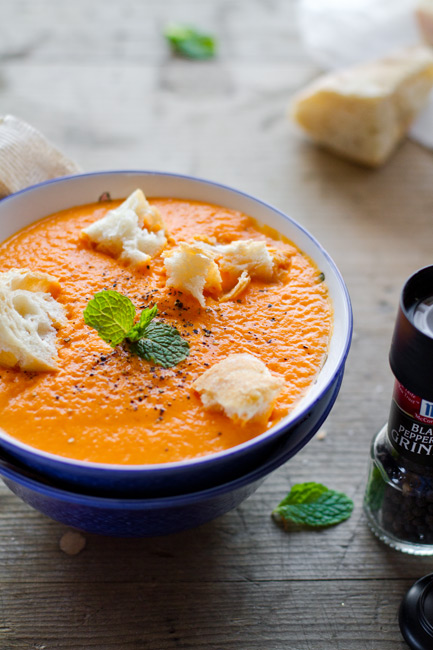
Freshly cracked black pepper
¼ teaspoon sugar, optional

Method
Place the chopped carrots and 1 1/2 cups water in a pan. Bring to a boil. Reduce the heat to medium-low. Cover with a lid and simmer the carrots till they are very very soft, about 40 minutes. When you mash a carrot chunk with the back of a spoon, it must mash very easily. This means the carrots are ready. Alternatively, you can pressure cook the carrots.

While the carrots are cooking, gently heat the milk in a medium saucepan. Just as small bubbles start to appear on the sides, and the milk is about to boil, turn off the heat. Immediately add mint sprigs to the milk and stir. Cover and let it infuse for 15 minutes.

Then fish out all the mint leaves, squeeze the milk out of them, and discard the mint leaves.

When the carrots are cooked, place them in a blender along with their cooking water, the mint infused milk and salt.

Blend to a smooth puree. Add more milk to the blender if needed, to thin out the soup. Be careful when blending hot liquids in a blender, always vent the lid a little.

Taste the soup; if you would like it a little sweeter, stir in the sugar. Some carrots are sweeter than others, so you may or may not need the sugar.

To serve, pour hot soup into bowls, top with cracked pepper and serve with crusty bread.

Easy Cream of Red Lentil Soup

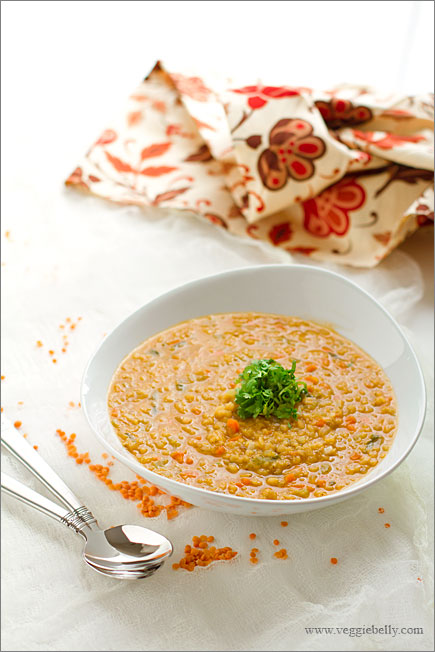
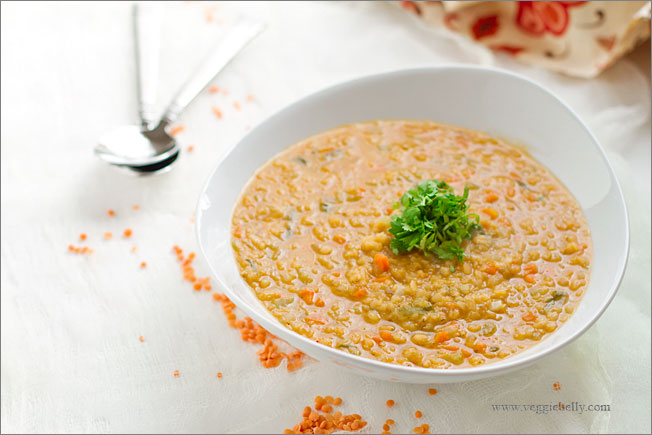
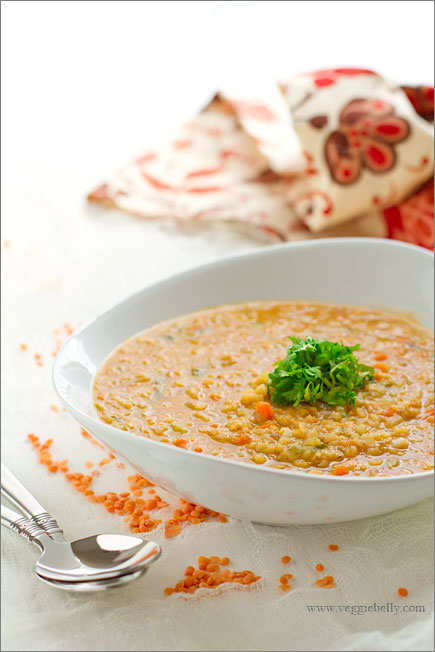
This easy red lentil soup recipe comes together in 15 minutes. Add a touch of cream, greek yogurt or coconut milk (for vegan red lentil soup) and you have a satisfying, easy soup in no time. Serve with crusty bread or over brown rice.

We’ve all had gloopy lentil soup before and hate it! So make sure you dont over cook the lentils. They should be cooked through, but still holding their shape. Their texture and taste is so much better when you dont over cook lentils and make them mushy.

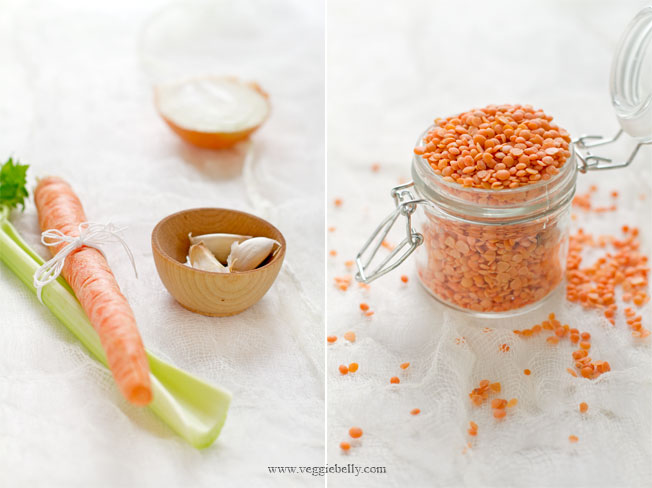
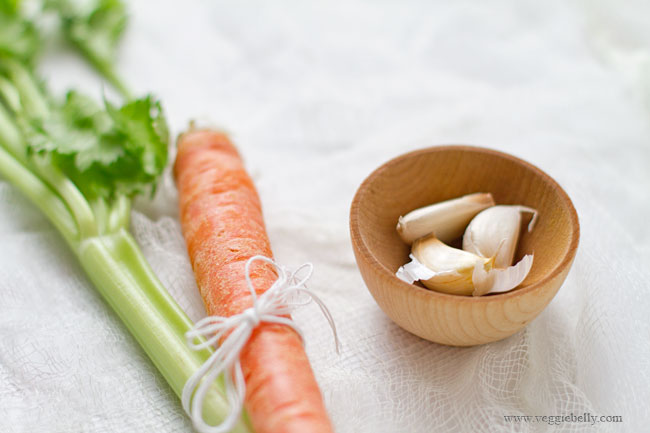
The ingredients are simple for this fuss free soup – carrot, celery, garlic, onion, and red lentils. Then you add a pinch of paprika for heat, if you like, and a little drizzle of cream, greek yogurt or coconutmilk for creaminess. Thats it!

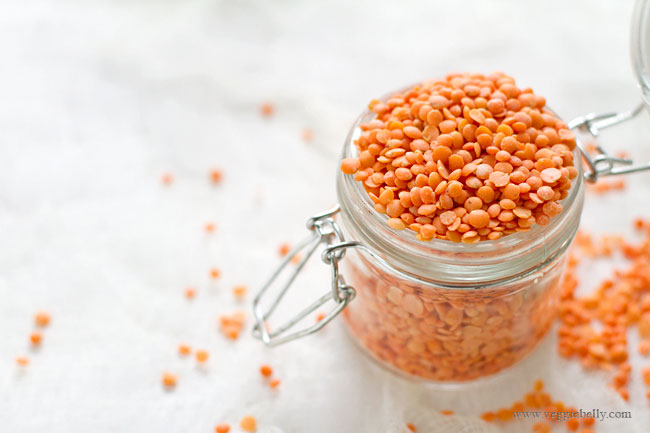
I used masoor dal from the Indian store, which is usually cheaper than other local brands of split red lentils. If you dont have an Indian store near you, Bob’s Red Mill brand red lentils are great.

More lentil soup recipes

Alton Brown’s Lentil Soup recipe with cumin

Giada De Laurentiis Lentil Soup recipe with pasta

Lentil soup recipe from 101 cook books using beluga lentils

Lentil soup recipe  with Cajun flavors on Food Mayhem

Red lentil soup recipe with curry on New York Times

Red lentil soup recipe by Aarti Sequeira

Red lentil soup recipe with sumac on eCurry

Cream of red lentil soup Recipe

serves 2 as a main dish

1 tablespoon olive oil
1 carrot, peeled and chopped finely (about 1/2 cup)
1 celery rib, chopped finely (about 1/2 cup)
1 small onion, chopped finely (about 1/2 cup)
2 cloves garlic, peeled and minced
1 cup dry split red lentils (either Bob’s red mill red lentils or masoor dal from Indian store)
1/2 teaspoon paprika or to taste, optional
salt
2 tablespoons heavy cream or greek yogurt or coconut milk for vegans
For garnish – chopped cilantro or parsley or dill

Heat olive oil in a pan. Add the carrot, celery, onion and garlic. Stir on low heat for about 3 minutes, or till the vegetables are soft. Dont let them brown.

Add the red lentils to the vegetables, and stir for about 1 minutes. Add paprika, salt and 3 cups water. Bring to a boil. Then reduce heat to low, place a lid on the pan, and simmer for 10 minutes or till the lentils are cooked but still holding their shape. Dont let the lentils get mushy. Add more water during cooking, if needed.

When the soup is done, stir in your choice of heavy cream or greek yogurt or coconut milk and turn off heat.

Serve hot, garnished with chopped cilantro, or parsley or dill. Drizzle more cream or yogurt or coconut milk – whichever you are using - over the soup if desired.

Gado Gado – Indonesian Vegetable Salad with Peanut Sauce


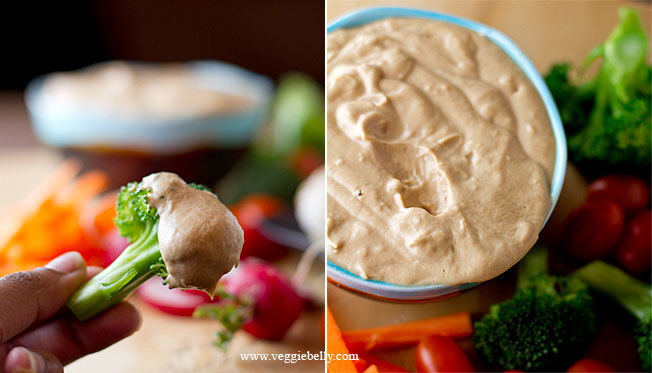
I fell in love with the flavors of gado gado when I first tasted it in Indonesia. It is a quick, easy, healthy salad that you can serve as an appetizer, as a salad course, or pack for office lunch. Typically, the vegetables and peanut dressing are tossed together, or the peanut sauce is poured over the vegetables. Here, I serve it deconstructed on a platter, with the peanut sauce or sambal kacang on the side for dipping.

In Indonesia, the peanut dipping sauce is prepared by pounding together roasted peanuts, garlic, palm sugar, chillies, and shrimp paste. I left out the shrimp paste to make the gado gado vegan. I used peanut butter instead of roasted peanuts – a great shortcut!

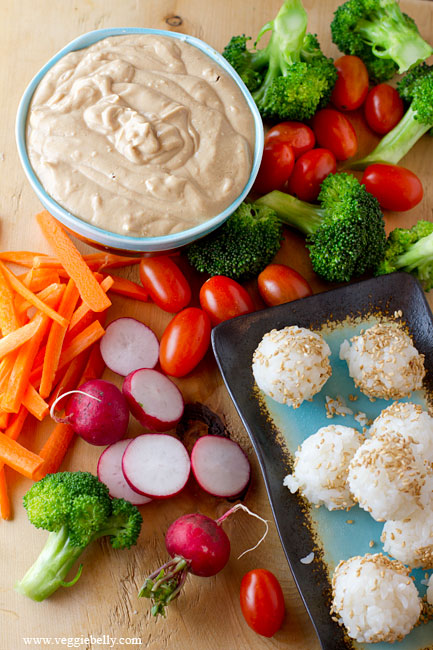
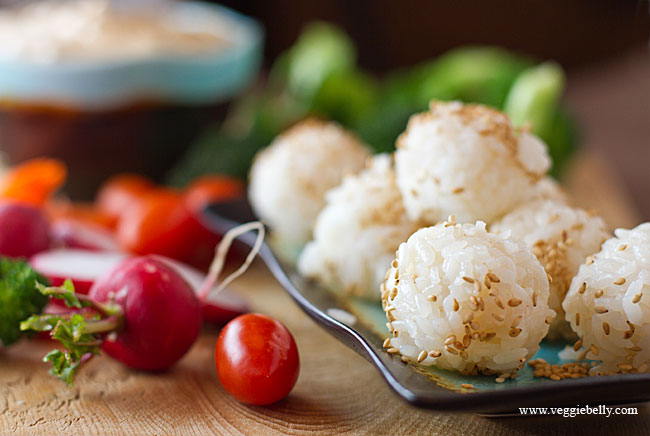
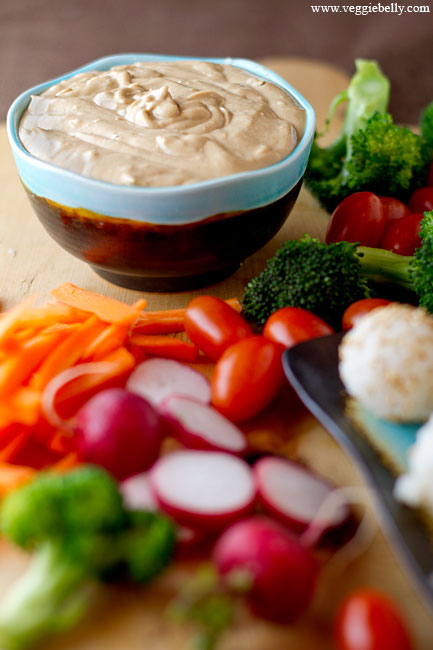
The gado gado I had in Indonesia was served with tomato wedges, beansprouts, tofu and boiled eggs. You can use absolutely any vegetable you like. For this recipe, I served the gado gado peanut sauce with steamed broccoli, cherry tomatoes, carrot sticks, baby radish and rice balls.

Lontong inspired rice balls

These rice balls are inspired by Indonesian lontong (or Ketupatin some parts of Asia). Lontong is cubes of compressed, cooked rice, that is sometimes served with gado gado. Traditional lontong is made by half cooking rice, packing it into a banana leaf lined mould, steaming the rice in the mould, and then cutting it into cubes or discs.

I love the taste of lontong, but wanted to make something quicker but similar for the gado gado. So I simple rolled cooked sushi rice into balls, and coated the rice balls in sesame seeds. Simple, and delicious!

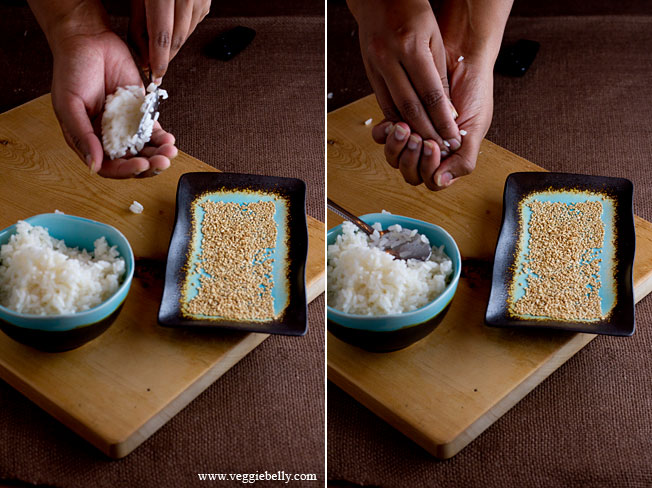
Oil your hands, and scoop a tablespoon of cooked sushi or sticky rice. Using your palm and fingers, gently squeeze the rice into a ball.

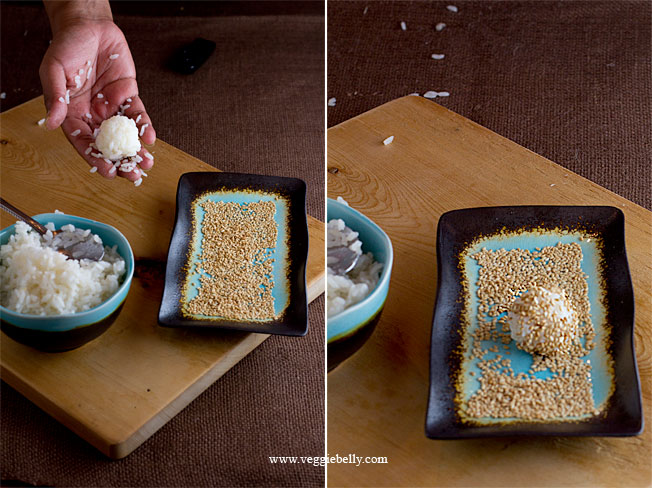
Roll the rice ball into a nice round shape. Roll ther ice ball in toasted sesame seeds.

More Gado Gado recipes

Indonesian Sambal Kacang recipe (peanut sauce for gado gado) from the book Indonesian regional cooking

Agado gado recipe from Rasa Malaysia

Gado gado surabaya style on Indonesia eats

Street sidegado gado making in central Java, Indonesia

Gado Gado with Peanut Sauce Recipe

serves about 6

for Peanut Dipping Sauce (Sambal Kacang)
3-4 cloves garlic, peeled
1 fresh green chili chopped, (use 1/2 for milder sauce, or leave it out)
Salt
1 cup peanut butter
1 teaspoon jaggery or palm sugar or regular white sugar
2 tablespoon lime juice
2 cups hot water

Place the garlic cloves, green chili and salt in a mortar and pestle and pound into a paste.

In a small bowl, add the garlic paste, peanut butter, sugar and lime juice. Pour in hot water a little at a time, while whisking the peanut butter. Stop pouring the hot water when the peanut butter forms a smooth, dippable sauce. You may not need to use all of the hot water.

Taste the peanut sauce and adjust salt, sugar and lime juice if needed. Serve with vegetable crudites.

for Rice Balls with Sesame Seeds

makes about 6 balls

1/2 cup sushi rice (or other similar glutinous, sticky rice)
1 cup water
salt
1/2 cup toasted sesame seeds
1 teaspoon sesame oil

Place rice, water and salt in a pan. Bring to a boil. Then reduce heat to simmer, place a lid on the pan, and cook till rice is done, about 15 minutes. Let the rice cool a little.

Spread sesame seeds on a plate.

Rub a little sesame oil on your hands (so rice doesnt stick). Scoop about 1 tablespoon of cooked rice, and using your palms, form the rice into tight balls. Roll the rice balls in sesame seeds. Rub your palms with more sesame oil if needed. Repeat till you use up all the rice.

Serve rice balls with peanut dipping sauce.

the vegetables
Choose 5 items from this list, and serve about 1 cup each on a platter, along with peanut dipping sauce (recipe above)

Cubed, fried tofu
Pan fried Tempeh pieces
Tomato wedges or cherry tomatoes
Cucumber slices
Green and red pepper strips
Bean sprouts
Baby radish
Carrot sticks
Celery sticks
Boiled potato
Blanched green beans
Lightly steamed broccoli
Rice balls (recipe above)
Boiled egg
Tortilla chips
Pretzel sticks

Vietnamese Summer Rolls with Mango and Sweet Chili Dipping Sauce

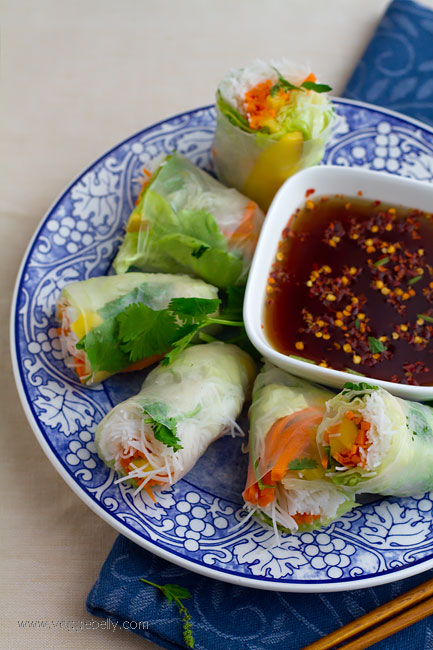
Another no-cook recipe – these Vietnamese summer rolls or Goi Cuan are bursting with fresh herbs and vegetables. And they will be perfect to take along for a vegetarian picnic.

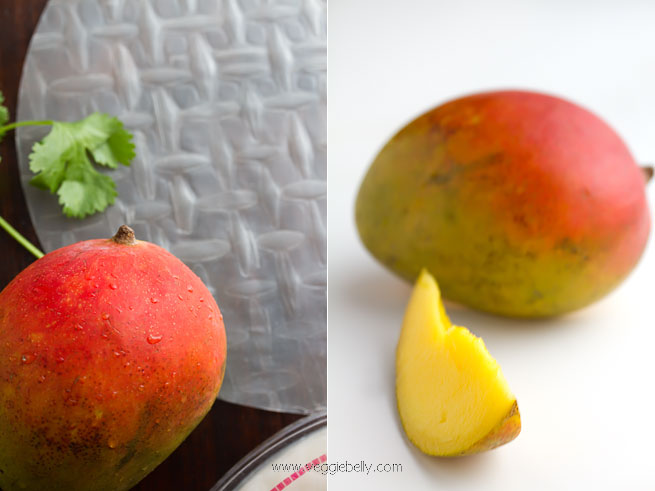
I used mangoes here for some summery, fruity, sweetness. But you can use pretty much any combination of vegetables in this summer roll. I’m not a fan of mangoes, so I made this recipe for our guests (they loved it) and I made myself a roll with carrots and purple cabbage.

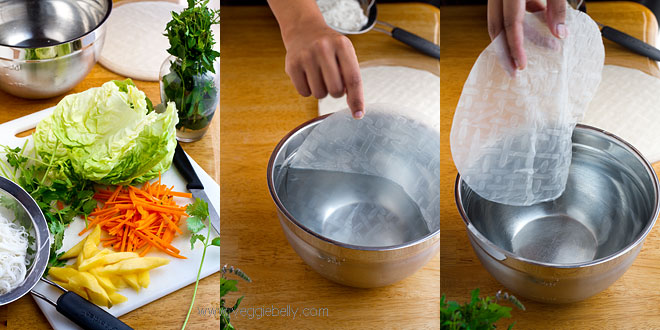
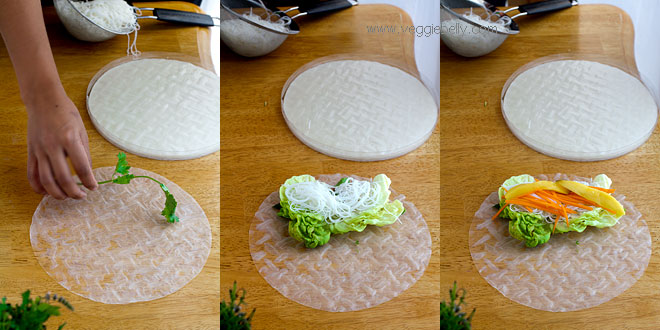
Set up all the ingredients on a clean surface. Dip a rice paper wrapper into a large bowl of water. Make sure all sides get wet. Then remove the rice paper and gently shake it dry. The rice paper will now be pliable. If it isnt, let it stil on the table (not in the water) for a few more seconds.

Place the softened rice paper wrapper on a clean surface. Place filling ingredients on the front (closest to you) 1/3rd of the rice paper wrapper in this order – cilantro, mint, lettuce, noodles, carrot, mango.

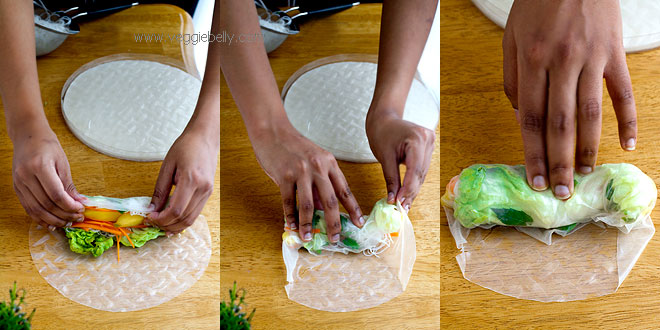
Now fold the front part over the filling and roll. Then fold both the sides in. Roll gently but firmly.

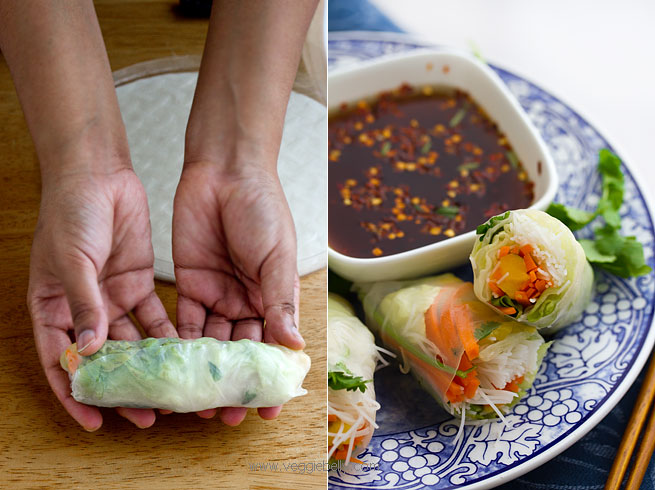
Its that simple! With practice, you will get better and better at rolling. Serve these Vietnamese summer rolls with sweet chili dipping sauce. Regular Vietnamese dipping sauce or Nuoc Cham has fish sauce. See below for my vegetarian Nuoc Cham recipe.

Vietnamese Summer Rolls or Goi Cuan with Mango Recipe

makes 6 rolls

2 oz dried rice sticks or rice vermicelli (available in Asian section of most grocery stores)
6 rice paper wrapper sheets (called ‘bahn trang’ - available in Asian section of grocery store)
a large bowl of water to dip rice paper sheets
6 sprigs cilantro
6 sprigs mint
6 leaves lettuce, rib/stem removed (I like boston lettuce)
1 small ripe mango, peeled and cut into strips (substitute with shredded purple cabbage, cucumbers, savoy cabbage, bean sprouts)
1 carrot, peeled and cut into match sticks

Soak rice sticks in boiling water for about 3 minutes or till soft. Drain well.

Dip the rice paper sheets in water, making sure all sides are wet. Shake off excess water. Place on a clean work surface. Place a sprig each of cilantro and mint in the front 1/3rds of the rice paper sheet. Then place lettuce leaf, a little rice noodles, carrot, and mango slices. Fold and roll the summer roll – see photos above for details on how to roll vietnamese summer roll.

Serve immediately with vegetarian vietnamese dipping sauce (recipe below). To store, put rolls on a plate, cover with a damp paper towel. Then cover plate completely with foil or plastic wrap and refrigerate.

Sweet Chili Dipping Sauce or Vegetarian Nuoc Cham (Vietnamese dipping sauce) Recipe 

makes little less than 1 cup

4 tablespoons light soy sauce
4 tablespoons rice vinegar
2 tablespoons sugar
2 tablespoons warm water
1 garlic clove peeled and crushed
Red pepper flakes or chopped fresh chili to taste

Whisk everything together till the sugar dissolves.

My Grandmother’s Multicolored Mixed Vegetable Raita


My two grandmother’s could not be more different.  One has a PhD, was a career woman and takes pride in the fact that she ‘cant boil a kettle of water’. She is a connoisseur of fine food, but never enters the kitchen herself. My other grandmother works miracles in the kitchen. She can effortlessly turn out simmering pot after pot of the most delectable sambars, kuzhambus, rasams, poriyals, and kootus. She instilled in me a love for cooking; and not a week goes by when I’m not on the phone with my grandmother asking for recipes, techniques or clarifications. As different as they are from each other, both my grandmothers are remarkable women, and I continue to learn so much from them.

 My grandmother (the non-cooking one!), grandfather,  father and aunt. Late 1950s
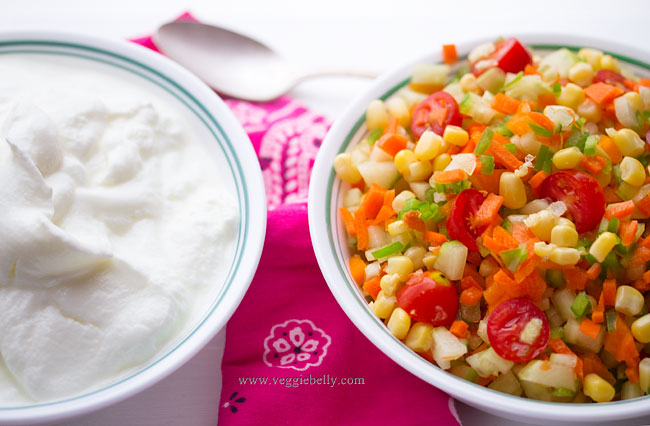


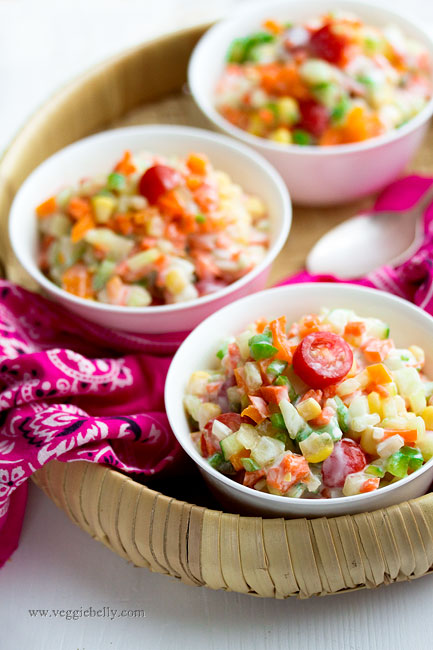
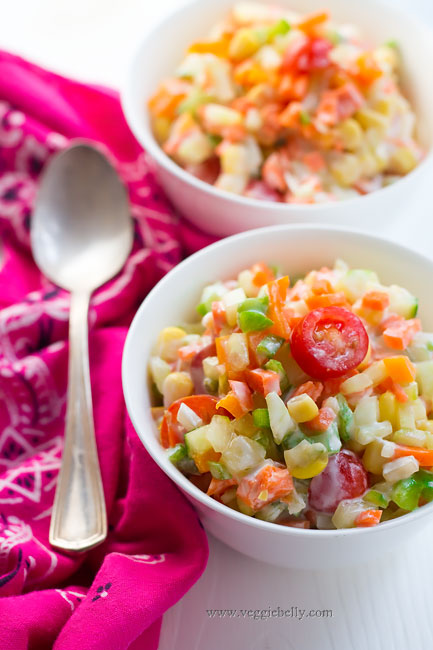
 When its too hot to cook, I always turn to this mixed vegetable raita. Its cool, refershing and there is no cooking involved. I am happy just eating a huge bowl of this for dinner. But this colorful raita will be a great accompaniment to and Indian dinner of rice, roti and curry.

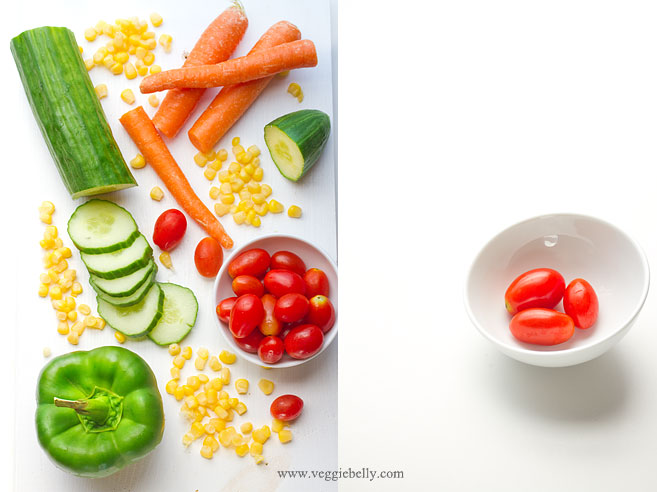
Its easy to remember this recipe – just remember the 6 Cs- cucumber, capsicum, corn, carrot, curd, cherry tomato. Then add pomegranates. Thats it! I didnt use pomegranate seeds in this recipe because I couldnt find any; but I highly recommend you use them!

My grandmother adds salt to the raita only just before serving. If you add salt any sooner, it will draw out the moisture from the vegetables and make your raita watery. And make sure you let the raita sit in the fridge overnight, it tastes much better than eating it right away.

My Grandmother’s Multicolored Mixed Vegetable Raita Recipe

serves about 10 as a side dish

1 large seedless cucumber, the kind with the plastic wrap or 4 small cucumbers (about 3 cups when chopped)
3 medium carrots (about 1 1/2 cups when chopped)
1 small green pepper (about 1/2 cup when chopped)
1 small orange pepper (about 1/2 cup when chopped)
1 cup cherry tomatoes
2 cups drained canned sweet corn
1/2 cup pomegranate seeds (I didnt use, because I couldnt find them)
3 cups yogurt
salt

Peel the cucumber and carrots, and chop into very small pieces. Chop the peppers into tiny pieces as well. Cut each cherry tomato into 2 or 3 pieces.  Mix all ingredients together in a large bowl, except salt. Place the raita in the fridge. Raita tastes better if it sits over night. Add salt just before serving and stir well. Serve chilled.

Thai-Burmese Curry Noodles (Khao Soi). Thailand part 3.

Before I tell you about this amazing noodle dish I learned to make in northern Thailand, here are more pictures from my recent trip. (And in case you missed my previous Thailand posts, they are here and here).

A Thai Market Outside Bangkok

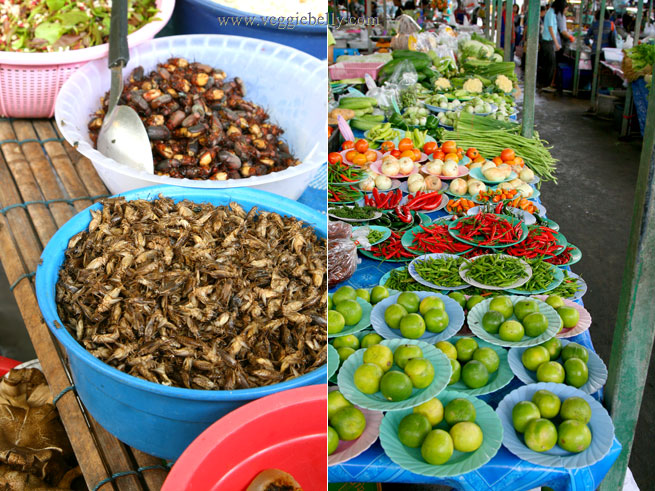
I visited several markets in Bangkok and Chiang Mai. The format seems to be pretty much the same everywhere – vegetable section, fruit section, then there are some bug vendors (yes, insects), rice vendors, fresh noodle vendors, dessert section and prepared foods section. Every single market I went to was extremely clean and organized.

This one was outside Bangkok, in the suburbs where I was staying with my uncle. So this market wasnt touristy, which is always a bonus.

Left: Sapodilla vendor. Right: My uncles wife Da, on her phone & buying guavas. Da showed me around here and so patiently explained everything and translated for me so I could communicate with the vendors 

Left: bugs and insects; I was feeling very Andrew Zimmern-ish.  Right: lime, red and green chillies


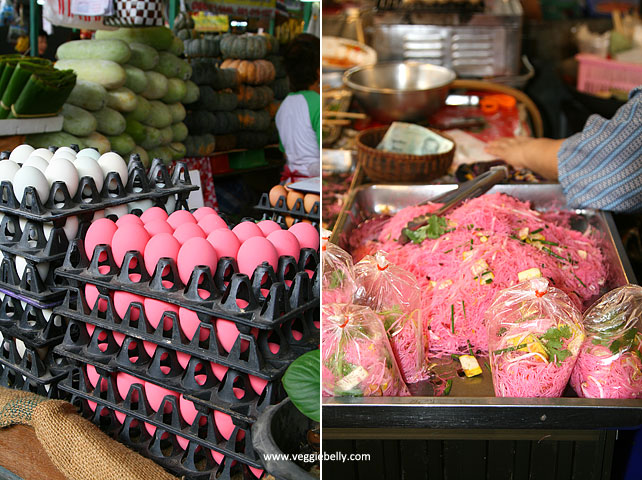
Pink preserved eggs (Chinese thousand year old eggs or century eggs) and pink noodles

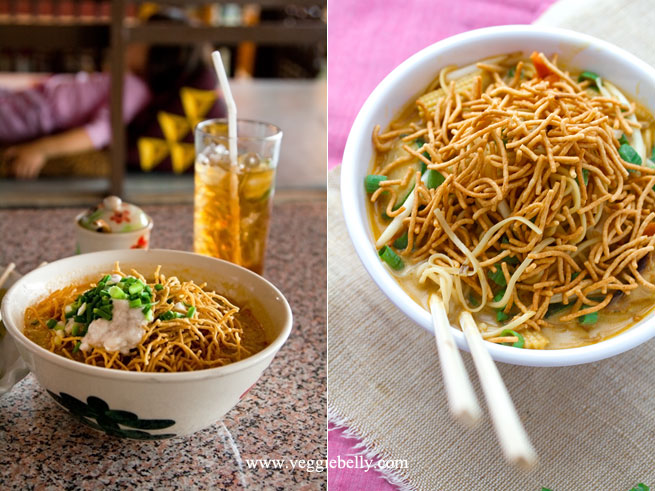
Khao Soi Curry Noodles from Chiang Mai (Kow Swear or Khauk Swear in Burma)

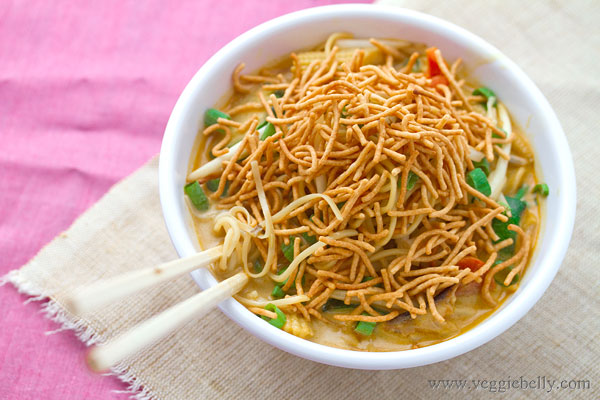
Now lets travel up north to the cool mountains of Chiang Mai, Thailand. Chinese Muslim traders have greatly influenced this region’s cuisine. Their delicious, spicy noodle dish, influenced by Burmese cuisine, called Khao Soi was everywhere in this city. My favorite vegetarian Khao Soi is from Aum Vegetarian Restaurant. in Chiang Mai.

Left: Chiang Mai Aum restaurant’s Khao Soi topped with coconut cream. In the background, chilli paste, lemon iced tea, and British kid.    

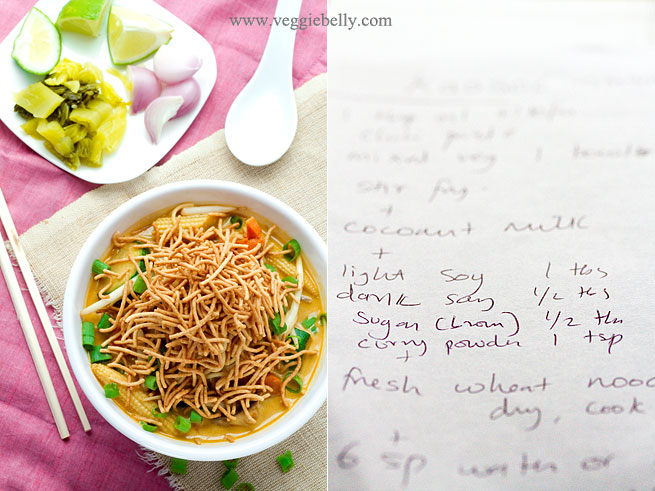
Right: My home made version

When I took a Thai Vegetarian cooking class at May Kaidee’s, Duan the owner and instructor was kind enough to show me how to make Khao Soi, even though it wasnt on the class schedule. See this post  for more on Duan and the cooking class.

Khao Soi, also spelled Khao Suey or Khao Soy, is also eaten in Myanmar or Burma and Laos. The Burmese version of Khao Soi is called Kow Swear or Khauk Swear. From what I understand, the Burmese curry noodles, are also in a coconut milk broth, but use more Indian influenced spices like coriander and do not have the crispy noodle topping. Since both the the Thai and Burmese versions are quite similar, I’m sending this post off to AWED Burma, hosted by Kitchen Swathi 

Other Khao Soi recipes:

Khao Soi by the amazing Chez Pim
A Khao Soi battle between an American guy in Bangkok and a Thai girl in Iowa
A Khao Soi recipe from Rosas Yummy Yums
And then there is this whole blog dedicated to the quest for the perfect Khao Soi in New York city!
A recipe for the Burmese version – Kow Swear on We Are Never Full blog

The version I learned to make at the cooking class had shredded chinese cabbage, cauliflower, and tofu. Ive used shiitake mushrooms, baby corn, carrot, zucchini and beansprouts. But I highly recommend adding some pan fried or deep fried firm tofu to this.

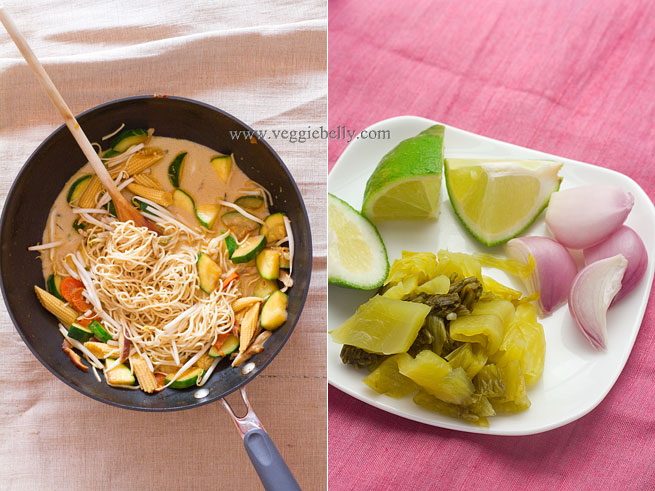
If there is an Asian store where you live, that is best place to buy the specialty ingredients for this recipe. But you may be able to find fresh chinese noodles (not the dry stuff) at the regular grocery store. For the pickled mustard greens, you may have to make a trip to the Asian store (if you want to make your own, here is a good recipe).

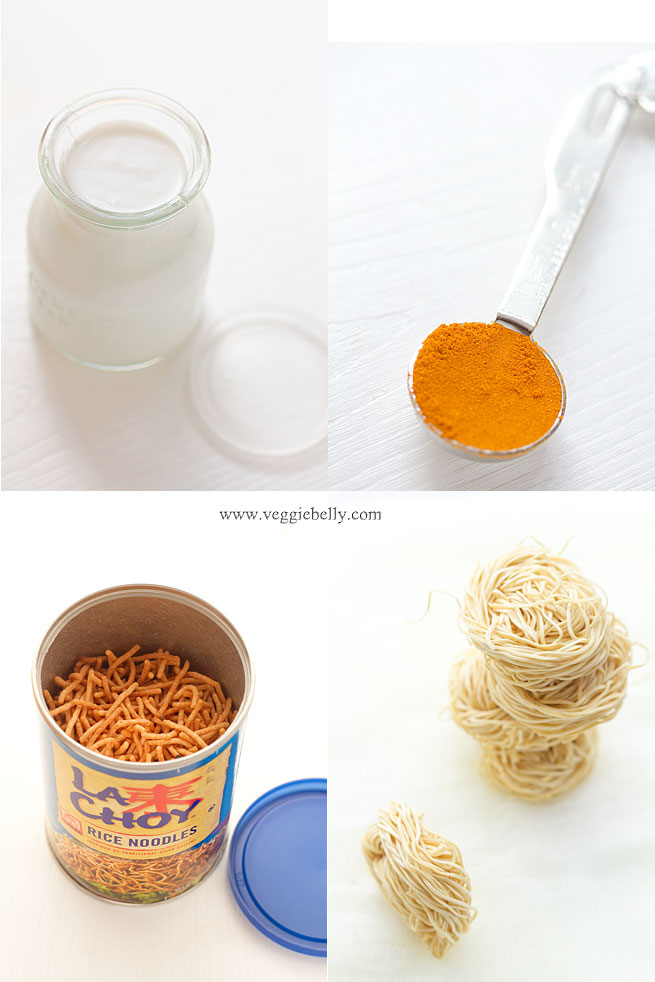
All the amazing Khao Sois I had in Chiangmai were topped with crispy fried noodles – the best part! I didnt feel like deep frying, so I used store bought La Choy brand crispy Asian noodles.

Curry Noodles in Coconut Milk Broth or Khao Soi or Khao Soy Recipe

serves 2-3

1 tablespoon oil
1 cup chopped shiitake mushroom
1 medium zucchini, chopped
1 small carrot, chopped
1/2 cup chopped baby corn
1 tablespoon red curry paste
1 teaspoon curry powder or according to taste
1 tablespoon light soy sauce
1 teaspoon dark soy sauce
1 teaspoon brown sugar
1 cup coconut milk
1 cup water
2 cups fresh Chinese wheat based noodles or about 3 oz dried thin wheat based noodles
1 cup bean sprouts

Toppings and garnishes
1 cup store bought crispy noodles (I used La Choy brand)
2 shallots, chopped
1/4 cup chopped pickled mustard greens (available at Asian stores)
3-4 lime wedges
Chopped cilantro
Chopped green onion

Heat a large wok with oil. Add shitake mushroom, zucchini, baby corn and carrot and cook on high for about 2 minutes. Then add curry paste and curry powder. Toss to coat the vegetables. Add light soy sauce and cook about 30 seconds so the vegetables absorb the liquid. Then add dark soy sauce, brown sugar, and coconut milk. Let the curry simmer for about 2 minutes.

Then pour in water and bring back to a simmer. Taste curry and adjust soy sauce, and sugar to taste. 

Bring a large pot full of water to boil noodles. If using dried noodles, cook in boiling water till noodles are very al dente. If using fresh noodles, boil for about 1 minute. No matter what noodles you use, make sure not to over cook them. Drain well.

Add cooked noodles and bean sprouts to the curry broth. 

Serve Khao Soi in individual bowls, topped with crispy noodles. If you dont have store bought crispy noodles, increase the fresh or dry wheat noodles quantity in this recipe by 1/2 cup. If using dried noodles — deep fry this extra half cup of boiled, drained noodles in oil, till golden. If using fresh noodles, deep fry them as is. Then top Khao Soi with the fried noodles.

Serve with chopped shallots, pickled mustard greens, lime wedges and cilantro on the side.

Shaved Carrot Salad with Pecans and Tangy Honey Vinaigrette

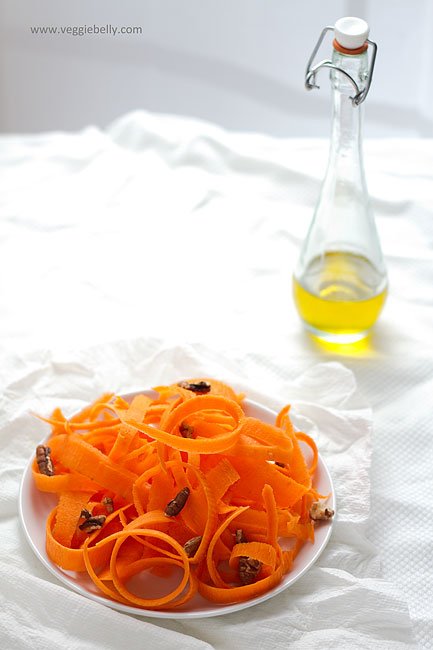
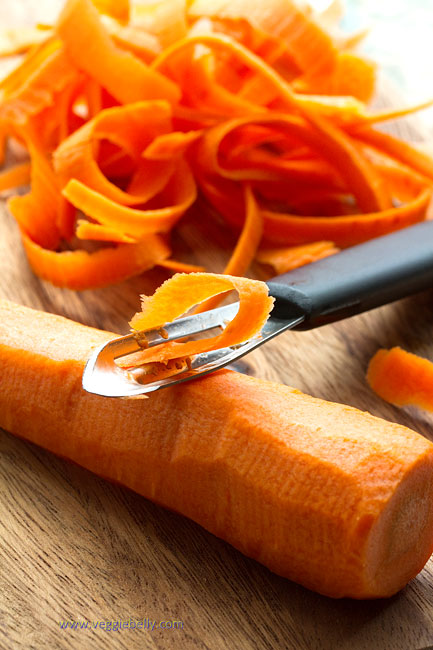
Here’s an easy, simple carrot salad that will be a great side dish. I love packing this for a summer picnic. Sweet, tangy, crisp yumminess! I like shaving the carrots into ribbons or strips using a vegetable peeler. If you wish, you could grate or julienne them.

Tips

- For extra crisp carrots, place the shaved carrots in a bowl of water with ice cubes.  Pat dry before dressing
- When you measure the ingredients for the vinaigrette, measure out the olive oil first. Then use the same measuring cup or spoon to measure the honey. They honey will slip out of the olive oil coated measuring spoon easily
- The vinaigrette will keep for a few weeks in the fridge, so its a great make ahead item!
- I used white wine vinegar for the salad dressing. Apple cider vinegar or balsamic vinegar will also work well. For a citrus touch, try adding lemon or orange juice and zest 

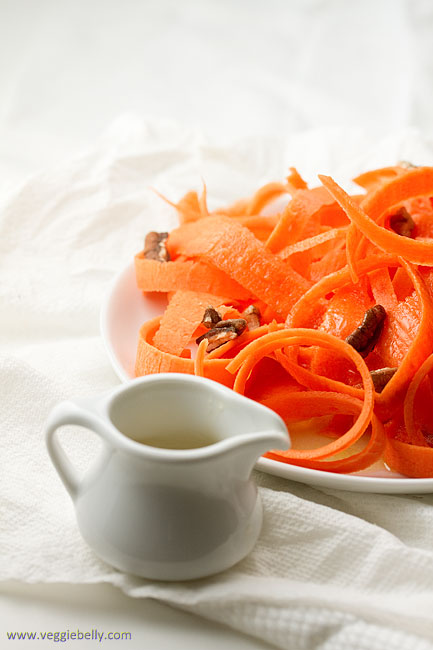
I love serving salad dressing in this mini creamer jug I brought back from my trip to Thailand.

Shaved Carrot Salad with Pecans and Honey Vinaigrette Recipe

serves about 2

3 medium carrots
3 tablespoons chopped pecans
Honey vinaigrette, recipe below

Peel the carrots. Using a vegetable peeler, shave the carrots into long ribbons (see photos above). Lightly toast pecans in a skillet. Sprinkle pecans over shaved carrots. Serve chilled, with honey vinaigrette (recipe below).

Honey Vinaigrette Recipe
Whisk together 2 tablespoons each of olive oil, honey, and white wine vinegar. Add salt to taste.

Related Posts with Thumbnails