Easy Vegetable Pad Thai Recipe

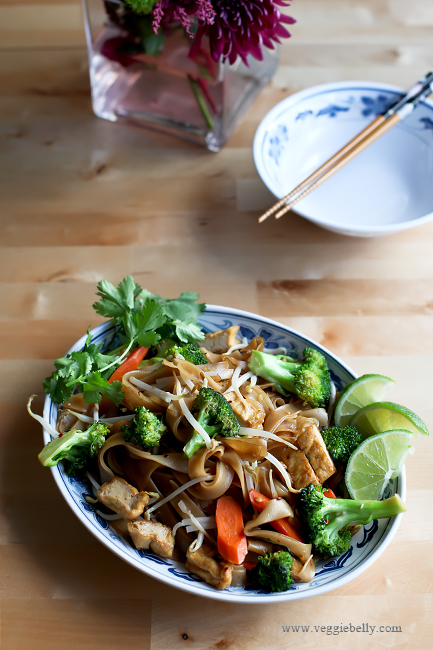
I love Pad Thai and have been experimenting with a recipe that is easy, vegetarian and something you can make with just your pantry ingredients (no tamarind or palm sugar!). When I eat Pad Thai at restaurants I always have to ask for it vegetarian and without fish sauce, and even then sometimes they give it to me with the fish sauce! Probably because the pad thai sauce is pre-made.

My Pad Thai is totally vegan and vegetarian, and the Pad Thai sauce is very easy to make!

But before we get to this delicious home made Pad Thai recipe, here’s a story of how it happened..
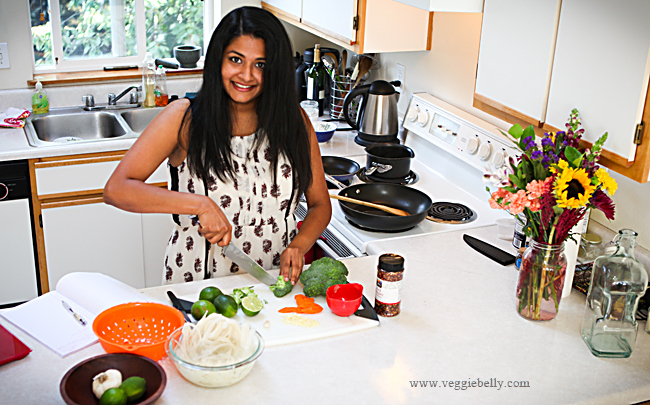
Emilee is a Veggie Belly fan and has been following the blog for a few years. She, her husband and new baby recently moved back home to Portland after living in Beirut, Lebanon.

As a special surprise for Emilee, her family arranged a cooking session for her with me! How sweet is that?! Emilee had no idea what she was in for until she arrived at my door! Imagine her surprise!

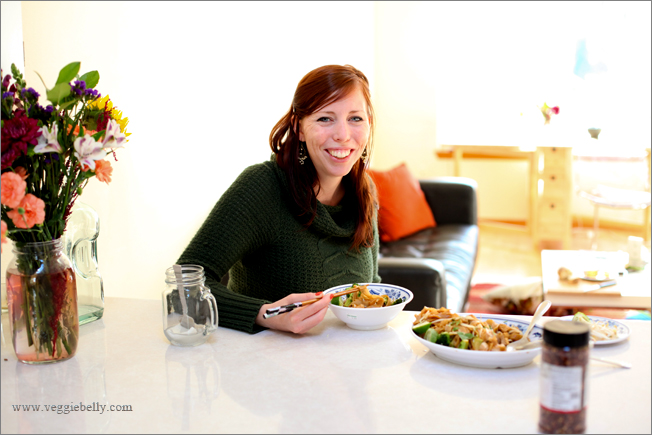
We made this Pad Thai together, and had so much fun chatting and cooking! We talked about food in Lebanon, adjusting to life with a new baby, how awesome Portland, OR is (it really is, trust me!)…all while chopping garlic, squeezing lemons and soaking noodles. My kind of evening!
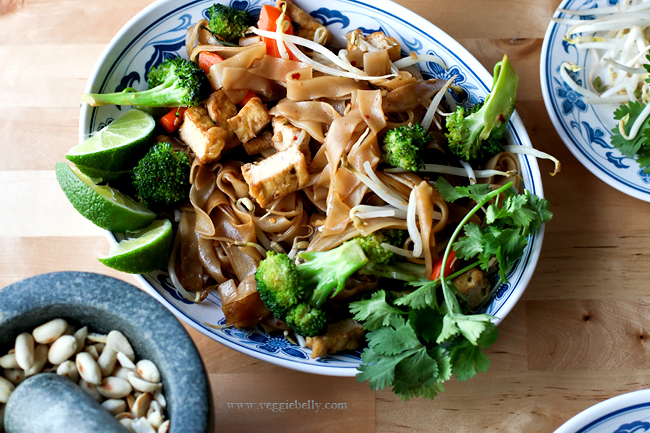
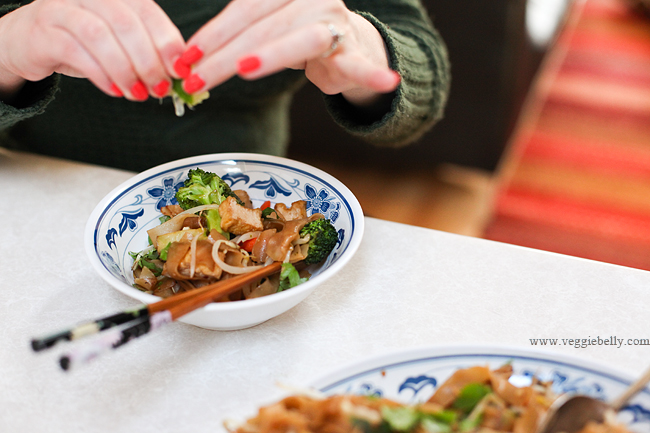
And the noodles turned out delicious! Below, Emilee squeezes a wedge of lime over her noodles because she likes it tangy.

Check out her nails, I love the color!
Thanks Emilee, for cooking with me!
I love hanging out with my readers!
Some tips for making veggie Pad Thai

- The Pad Thai sauce needs to have a balance of sweet, salty and sour. Everyone likes it a different way. Follow my sauce recipe to start with, and then feel free to adjust the sugar (for sweetness), soy sauce (for salt) and lime juice (for sourness)

- Pad Thai noodles are called Banh Pho. Look for the flat wide ones, sometimes labeled as size “XL”. The ingredients must only have rice or rice flour and water.

- Make sure you soak the noodles correctly (see package instructions). If they get too mushy, you’ve either soaked them too long or they’ve spent too much time in the wok. Or both. And if you don’t soak them long enough they will be crunchy.

- When you soak the noodles, they don’t have to soften all the way, but make sure they are soaked enough that they become pliable, and are no longer stiff.

- I like the boil the pad thai sauce. It gives it a deeper flavor, and caramelizes the sugar a bit. If you dont want to do this extra step, thats fine, simply whisk the sauce ingredients together and set aside.
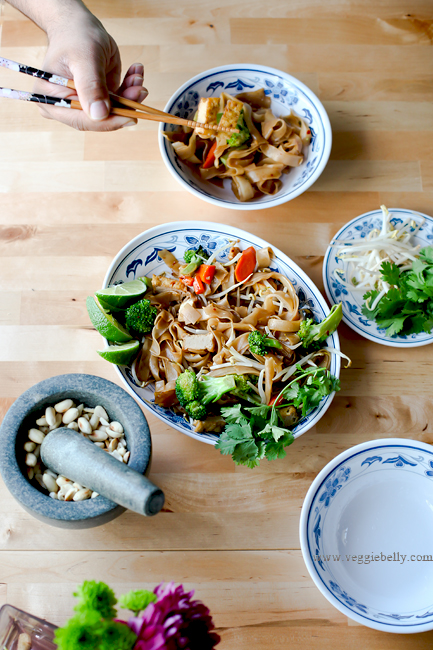
Easy Vegetable Pad Thai Recipe

serves 2-3
Ingredients

for the sauce
3-4 tablespoons light brown sugar
3 tablespoons fresh lime juice (about 2-3 limes)
4 tablespoons soy sauce
1/4 cup water

for the noodles
8 oz wide Pad Thai rice noodles, also called Banh Pho
2 tablespoons vegetable or peanut oil
crushed red pepper, as much as you like
4-6 cloves of garlic, minced
2 cups of broccoli florets
2 medium carrots, peeled and chopped into rounds
1 heaping cup of cubed fried tofu, available at Asian stores
a big hand full of bean sprouts
2 green onions, chopped
3 tablespoons roasted, chopped peanuts
3-4 cilantro sprigs, chopped
1/2 lime, cut into wedges

Method
1. Place all the sauce ingredients in a non stick sauce pan. Bring to a boil. Then reduce heat and simmer on low for about 2 minutes, or till the sauce has thickened just a little. Turn off heat and set aside.

2. Soak and drain the noodles according to package instructions. If the package does’nt have instructions, soak the noodles in warm water for about 15 minutes or till they become pliable. Then drain.

3. Heat the oil in a large wok. Add the crushed red pepper. As soon as they sizzle, add the garlic, broccoli and carrots. Toss on medium-high heat till the broccoli turns bright green and the garlic is fragrant, about 2 minutes.

4. Add the soaked noodles, tofu and the sauce. Toss on medium-high heat till everything is well combine and the noodles are cooked, but still a little chewy, and not mushy.

5. Turn off heat, and add the bean sprouts, and green onions and mix well.

6. Garnish with cilantro and peanuts. Serve with lime wedges on the side.

Stupidly Easy Peanut Noodles

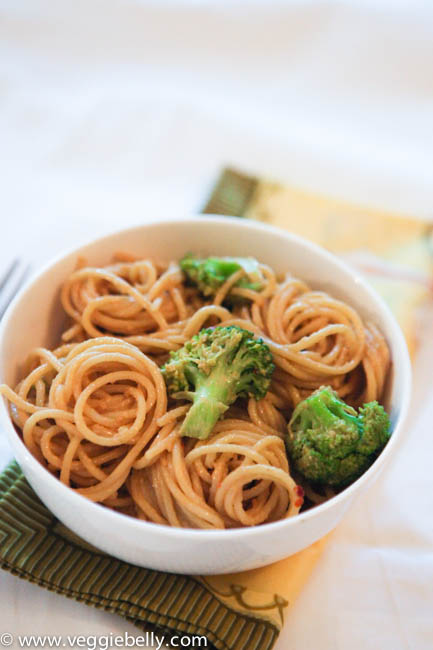
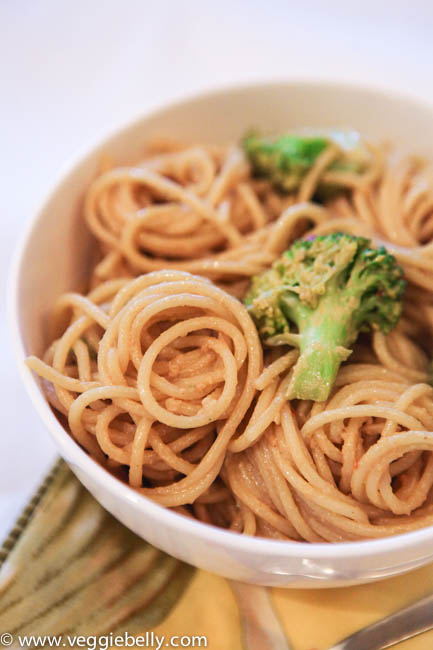
Can you cook pasta? Do you know how to chop garlic? Yes? Then you’re in business! This peanut noodles recipe is easy and fool proof! You can make it ahead of time and it will keep well in the fridge for up to two days. Plus, it tastes great warm or cold. This easy peanut noodles recipe is perfect for a quick dinner, packed lunch or picnic.

Broccoli is easy to chop, and cooks very quickly, so its perfect in this easy, fuss free recipe. But If you want to add other vegetables to this noodle dish, here are some suggestions. Just make sure the total amount of vegetables is about 3 cups.

- Shredded raw cabbage
- Shredded carrots
- Chopped cucumber
- Red peppers cut into strips
- Bean sprouts
- Wilted kale
- Baby corn
- Fried tofu cubes

Easy Peanut Noodles Recipe

serves about 3

Ingredients
2 cups broccoli florets
8 oz linguine or spaghetti

for the sauce
3 tablespoons peanut butter
2 tablespoons soy sauce
3/4 tablespoon lime juice
1 tablespoon sesame oil. Substitute with canola oil.
1-2 garlic cloves, minced
Crushed red chili flakes, as much as you like

2 tablespoons chopped green onion or cilantro or parsley for garnish

Method
1. In a large pot, bring plenty of salted water to a boil.

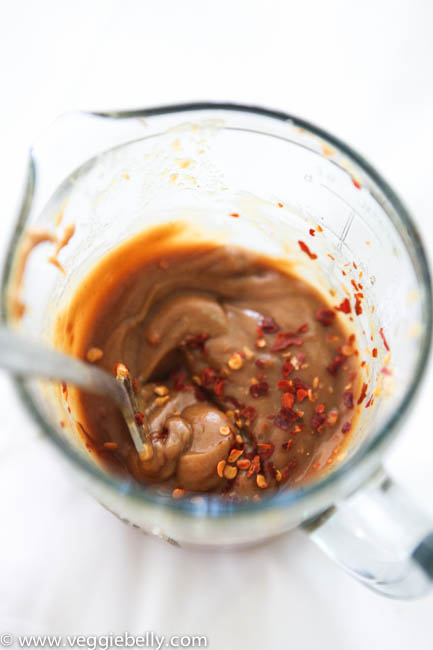
2. While water is coming to a boil, work on the sauce. Place all sauce ingredients (peanut butter through red chili flakes) in a bowl. Add 3 tablespoons of water, and whisk everything together till a sauce forms. Set aside.

3. When the water boils, add the broccoli florets and continue boiling till the broccoli is bright green and crisp-tender, about 1 minute. Using a slotted spoon, remove the broccoli from the water and place in a wok.

4. Bring the same water back to a boil. Then add pasta to the water and cook according to package instructions. Make sure you dont over cook the pasta. Drain well.

5. Add the drained pasta to the wok with broccoli.

6. Pour the peanut sauce all over the pasta and toss well. Taste the pasta, if it needs more salt, add soy sauce half a tablespoon at a time, tossing and tasting as you go.

7. Garnish with chopped green onions, cilantro or parsley. Serve warm or cold.

Broccoli Paratha – a Step by Step Recipe

I make parathas often – they are a delicious, substantial meal and you can fill them with lots of different things. I usually make the traditional paneer parathas or aloo (potato) filled parathas. But lately I’ve been experimenting with different types of fillings. These broccoli parathas are a recent favorite.

Broccoli Paratha Recipe – a Step by Step

Makes 8 parathas

Ingredients for the dough
2 cups whole wheat flour (atta)
½ teaspoon salt
1 cup warm water. You wont need all of it.
¼ teaspoon oil

Ingredients for the filling
1 lb broccoli crowns (without stalks)
¾ cup finely chopped cilantro leaves
½ teaspoon scant garam masala
1/8 teaspoon ajwain (carom) seeds. Substitute with jeera (cumin) seeds
1 green chili, finely minced. Use more or less according to taste.
Salt

More flour for rolling
Oil for frying the parathas

Method

  1. Place the flour and salt on a clean surface
  2. Make a well in the middle of the flour
  3. Sprinkle water in the well a little at a time, mixing the dough with your fingers after each sprinkle. Soon the dough will start to come together and look somewhat like scrambled eggs.
  4. At this point start kneading using the base of your palm.

5. If the dough is too tight, sprinkle more water while kneading. Gather all the loose flour around while kneading.

6. When the dough forms a slightly soft, elastic, non-sticky ball, stop kneading
7.  Drizzle ¼ teaspoon of oil over the surface of the dough and spread it evenly
8. Cover the dough with a damp kitchen towel, and let it rest for about 30 minutes. Remember – flours differ in their elasticity, and some doughs may need to be rested more than others

9. While the dough is resting, working on the filling. Grate the broccoli using the finest side of a box grater. You need about 2 cups of grated broccoli. Do not grate the stems. If your broccoli is wet, make sure to dry it very well before grating.

10. Place the broccoli in a bowl, and add the cilantro, garam masala and ajwain. Mix gently. Add salt to the broccoli filling only in the last minute, otherwise the filling will become soggy.

Note: There are several recipes that recommend you salt the grated broccoli first and then squeeze out the excess water, before proceeding with adding the spices. I’ve tried this method, and there wasn’t much moisture to squeeze out of the broccoli, so I skip this step in this recipe.

However, if you are not experienced with making parathas, it may get a little tricky to roll out these parathas. This is where salting and squeezing the broccoli will help. The salt pulls out the moisture in the broccoli. When you’ve squeeze out all the water, the filling becomes easier to work with.

But I didn’t salt the broccoli. Instead, I added salt in the last minute, so that the broccoli didn’t have much of a chance to let out water. I also worked quickly while filling and rolling.

11. When the dough has rested, knead it gently once more

12. Divide the dough into 8 equal parts. Roll each one into balls. Keep them covered with a damp towel
13. Pour out about ½ cup flour for dipping and rolling. Take one dough ball, and flatten it with your fingers. Then dip it into the flour
14. Gently roll out the dough into a 3 ½ inch round

15. Add salt to the broccoli filling, and mix well. Taste the filling and adjust salt if needed. Place 2 tablespoons of the broccoli filling in the center of the dough. If you haven’t made parathas before, use less filling, it will make it easier to seal and roll

16. Using both your hands, gently bring up the edges of the dough
17. Then gather the edges over the filling. Compact the filling down with your fingers if you need to
18. Now pinch the edges together to seal

19. Gently flatten the parathas using your fingers

20. Dip it in some flour
21. Using a gentle touch, roll out the parathas, sprinkling more flour if it sticks
22. Roll out the paratha into about a 5 inch round

23. Heat a heavy bottom pan on medium heat. Place the rolled out parathas on the pan. Cook till light brown spots appear on one side. Flip the parathas and let brown spots appear on the other side. Then increase heat to medium-high, drizzle about ¼ teaspoon oil over the parathas and cook till golden, about 30 seconds.
Serve hot with yogurt or raita and pickles.

Need more paratha making tips? See this post.

Gado Gado – Indonesian Vegetable Salad with Peanut Sauce


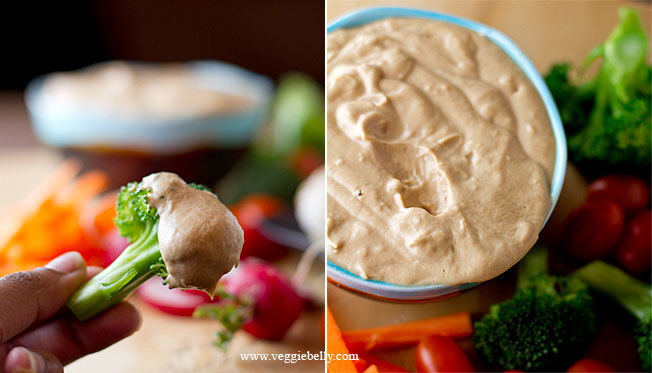
I fell in love with the flavors of gado gado when I first tasted it in Indonesia. It is a quick, easy, healthy salad that you can serve as an appetizer, as a salad course, or pack for office lunch. Typically, the vegetables and peanut dressing are tossed together, or the peanut sauce is poured over the vegetables. Here, I serve it deconstructed on a platter, with the peanut sauce or sambal kacang on the side for dipping.

In Indonesia, the peanut dipping sauce is prepared by pounding together roasted peanuts, garlic, palm sugar, chillies, and shrimp paste. I left out the shrimp paste to make the gado gado vegan. I used peanut butter instead of roasted peanuts – a great shortcut!

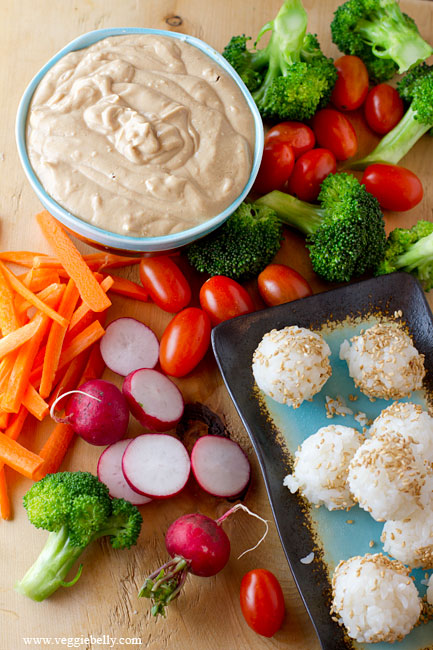
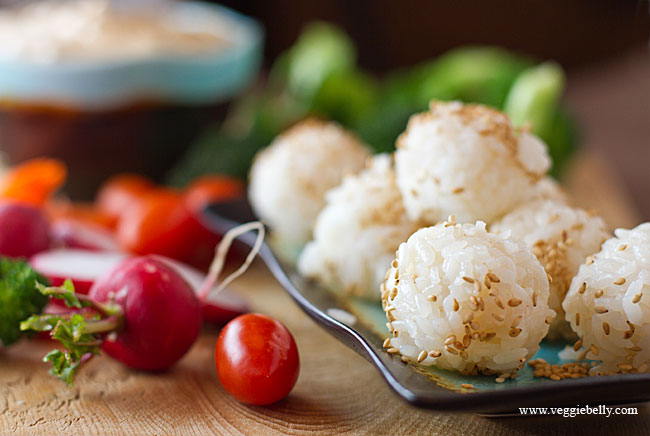
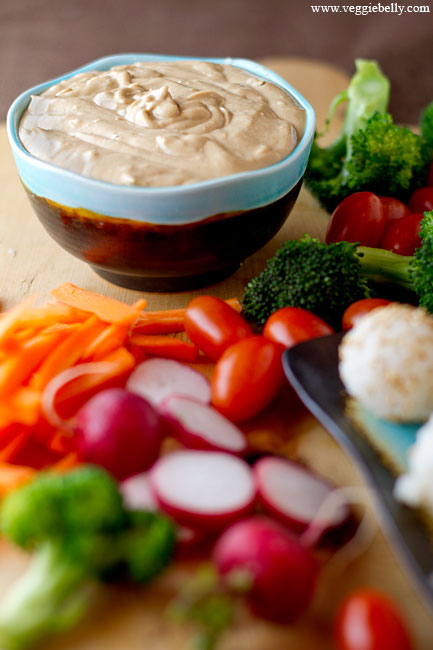
The gado gado I had in Indonesia was served with tomato wedges, beansprouts, tofu and boiled eggs. You can use absolutely any vegetable you like. For this recipe, I served the gado gado peanut sauce with steamed broccoli, cherry tomatoes, carrot sticks, baby radish and rice balls.

Lontong inspired rice balls

These rice balls are inspired by Indonesian lontong (or Ketupatin some parts of Asia). Lontong is cubes of compressed, cooked rice, that is sometimes served with gado gado. Traditional lontong is made by half cooking rice, packing it into a banana leaf lined mould, steaming the rice in the mould, and then cutting it into cubes or discs.

I love the taste of lontong, but wanted to make something quicker but similar for the gado gado. So I simple rolled cooked sushi rice into balls, and coated the rice balls in sesame seeds. Simple, and delicious!

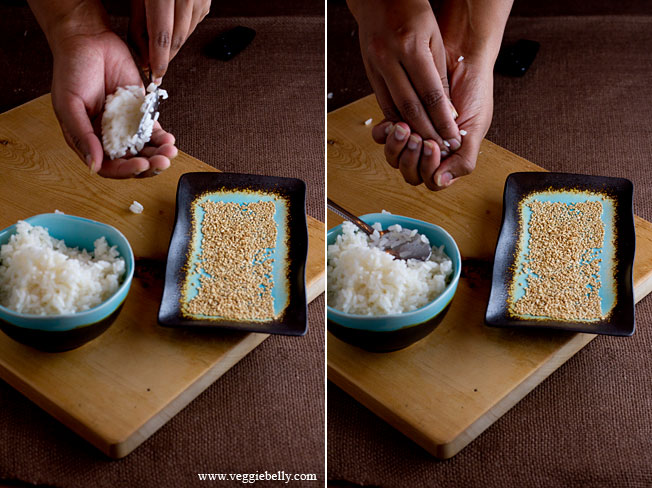
Oil your hands, and scoop a tablespoon of cooked sushi or sticky rice. Using your palm and fingers, gently squeeze the rice into a ball.

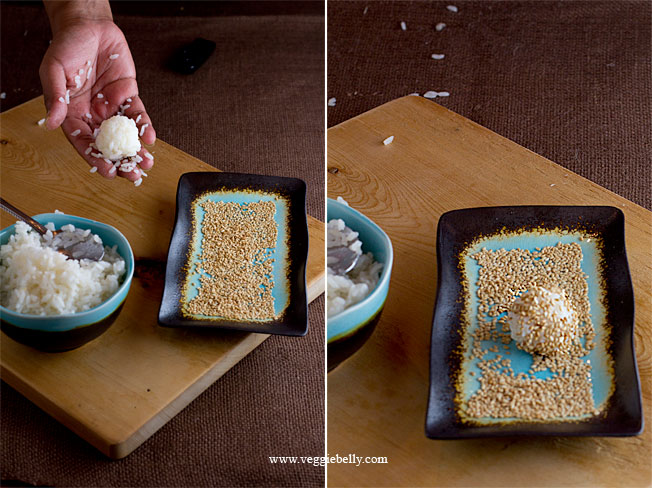
Roll the rice ball into a nice round shape. Roll ther ice ball in toasted sesame seeds.

More Gado Gado recipes

Indonesian Sambal Kacang recipe (peanut sauce for gado gado) from the book Indonesian regional cooking

Agado gado recipe from Rasa Malaysia

Gado gado surabaya style on Indonesia eats

Street sidegado gado making in central Java, Indonesia

Gado Gado with Peanut Sauce Recipe

serves about 6

for Peanut Dipping Sauce (Sambal Kacang)
3-4 cloves garlic, peeled
1 fresh green chili chopped, (use 1/2 for milder sauce, or leave it out)
Salt
1 cup peanut butter
1 teaspoon jaggery or palm sugar or regular white sugar
2 tablespoon lime juice
2 cups hot water

Place the garlic cloves, green chili and salt in a mortar and pestle and pound into a paste.

In a small bowl, add the garlic paste, peanut butter, sugar and lime juice. Pour in hot water a little at a time, while whisking the peanut butter. Stop pouring the hot water when the peanut butter forms a smooth, dippable sauce. You may not need to use all of the hot water.

Taste the peanut sauce and adjust salt, sugar and lime juice if needed. Serve with vegetable crudites.

for Rice Balls with Sesame Seeds

makes about 6 balls

1/2 cup sushi rice (or other similar glutinous, sticky rice)
1 cup water
salt
1/2 cup toasted sesame seeds
1 teaspoon sesame oil

Place rice, water and salt in a pan. Bring to a boil. Then reduce heat to simmer, place a lid on the pan, and cook till rice is done, about 15 minutes. Let the rice cool a little.

Spread sesame seeds on a plate.

Rub a little sesame oil on your hands (so rice doesnt stick). Scoop about 1 tablespoon of cooked rice, and using your palms, form the rice into tight balls. Roll the rice balls in sesame seeds. Rub your palms with more sesame oil if needed. Repeat till you use up all the rice.

Serve rice balls with peanut dipping sauce.

the vegetables
Choose 5 items from this list, and serve about 1 cup each on a platter, along with peanut dipping sauce (recipe above)

Cubed, fried tofu
Pan fried Tempeh pieces
Tomato wedges or cherry tomatoes
Cucumber slices
Green and red pepper strips
Bean sprouts
Baby radish
Carrot sticks
Celery sticks
Boiled potato
Blanched green beans
Lightly steamed broccoli
Rice balls (recipe above)
Boiled egg
Tortilla chips
Pretzel sticks

Cauliflower and Broccoli Poriyal with Lentils and Coconut

A poriyal is a beautiful, simple way to enjoy fresh vegetables. This south Indian stir fry (kinda!) usually involves tempering mustard seeds, cumin seeds, chillies and or curry leaves and then adding chopped vegetables - quick, easy and healthy.

I like to add some split mung beans or moong dal to my poriyals for extra body and protein. I also leave the broccoli and cauliflower slightly undercooked so that they are a tad crunchy; over cooking fresh vegetables just doesnt let their flavor shine through. Serve this with rice and pineapple rasam or collard greens dal.

Cauliflower and Broccoli Poriyal with Lentils and Coconut Recipe

serves 6-8 as a side dish

for the lentils
1/4 cup split mung beans (moong dal)
a pinch of turmeric

other ingredients
2 cups of broccoli florets
2 cups of cauliflower florets
1 tablespoon oil
1/2 teaspoon black mustard seeds
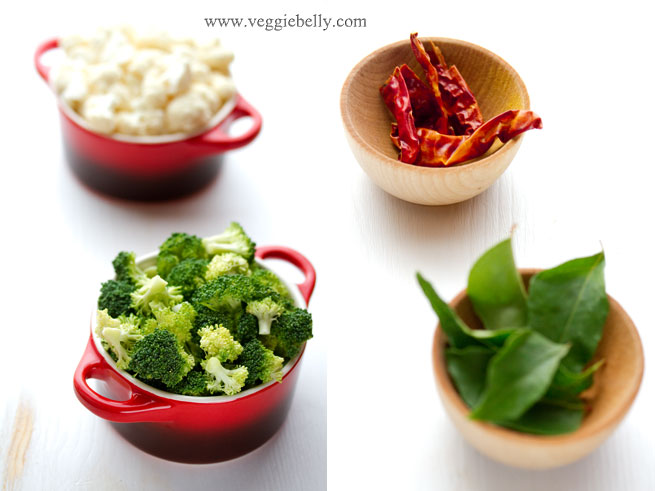
2-3 dried red chillies, or according to taste
a few curry leaves
1/8 teaspoon asafoetida
4 tablespoon fresh grated coconut (I use fresh-frozen, grated coconut available at the Asian store. The ones from Thailand are good.)
salt

Bring 3 cups water to a boil in a pot. Add moong dal, turmeric and salt and let it boil till the lentils are cooked through but still holding their shape. Drain well.

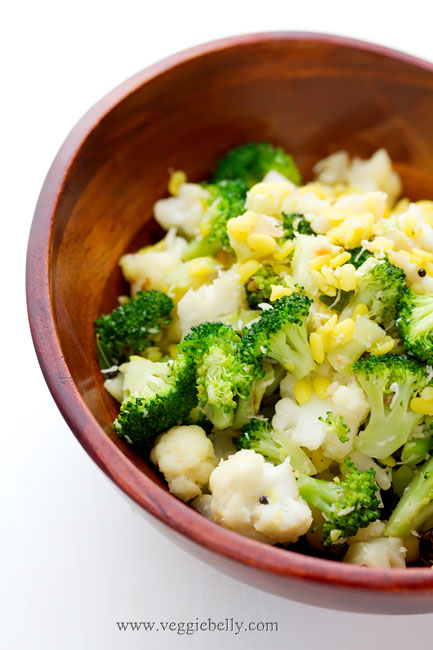
Cut the broccoli and cauliflower into tiny florets as seen in the photos. Heat oil in a wok and add mustard seeds. When they splutter, add the dried red chillies, curry leaves, and asafoetida. Cook for about 30 seconds. Then add cauliflower, broccoli and salt. Cook on medium heat till the vegetables are cooked but still slightly crunchy. If needed, sprinkle some water while cooking the vegetables.

Add the cooked lentils and coconut, stir well, and turn off heat.

Tandoori Grilled Broccoli and Cauliflower Kebabs


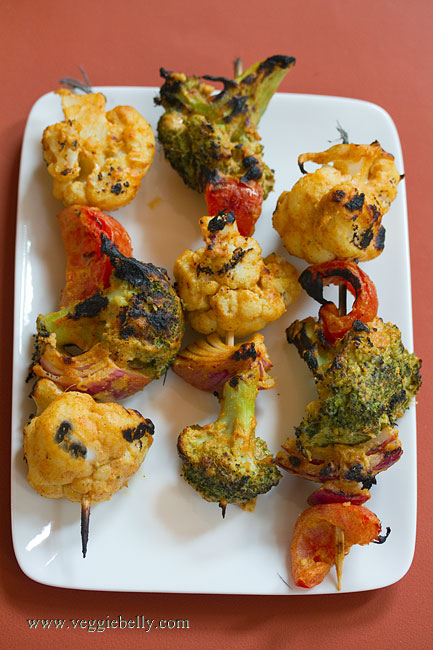
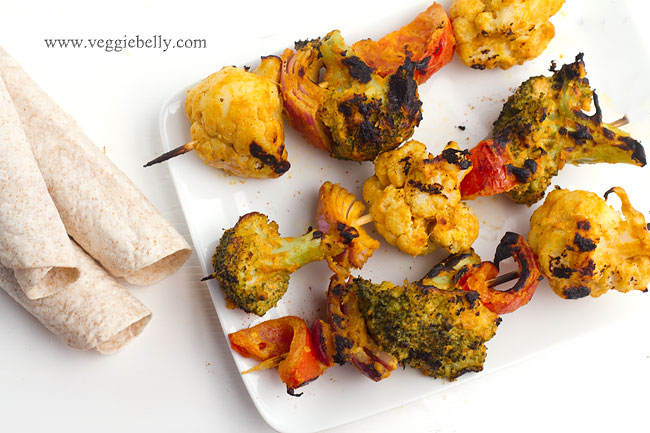
A tandoor is an Indian clay oven. Marinated meat, cottage cheese (paneer) or vegetables are skewered and cooked in the oven. The result is smoky, charred skewers of tandoori yumminess.


Make sure you soak the skewers before grilling, otherwise they will burn on the grill. If you dont have a grill, you can place the skewers in the oven and broil them till brown and slightly charred. Then flip the skewers and broil the other side.
The tandoori marinade recipe I give you is very versatile, you can use it for paneer, tofu, potatoes, even seitan.

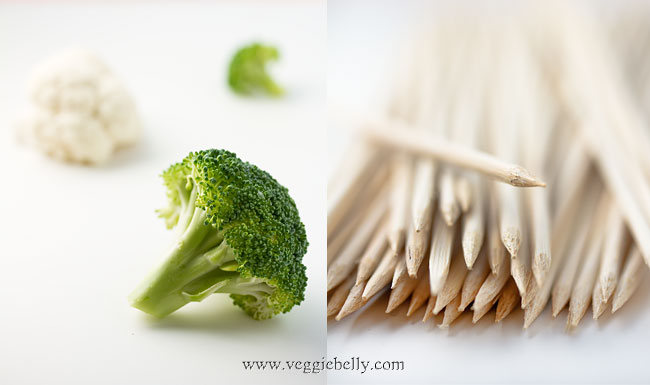
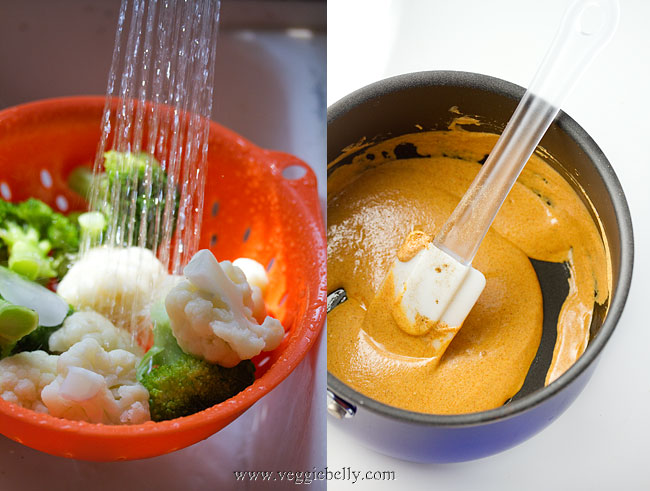
I like to blanch the broccoli and cauliflower before marinating. This reduces grilling time and also makes it easier to thread the skewer into the broccoli and cauliflower.

We usually eat these grilled kebabs with either brown rice, rotis or pita bread and some raita. Here are some recipes on Veggie Belly that will make great accompaniments to these kebabs:

Walnut raisin rice

My grandmother’s multicolored raita

Tamarind Jelly

Tandoori Grilled Broccoli and Cauliflower Kebabs Recipe

serves about 2 as an entree

4 bamboo skewers (about 10 inches long)

1 small head of broccoli
1/2 small head of cauliflower
1 small red onion, cut into 4 wedges
1 large tomato, cut into 4 wedges

for marinade
3 tablespoons chickpea or garbanzo flour (besan)
1/2 cup yogurt
2 tablespoons lemon juice
2 tablespoons vegetable or canola oil
1 tablespoon garlic paste
1 tablespoon ginger paste
1 teaspoon garam masala
1 teaspoon paprika
1/2 teaspoon turmeric powder
1 teaspoon coriander powder
Salt

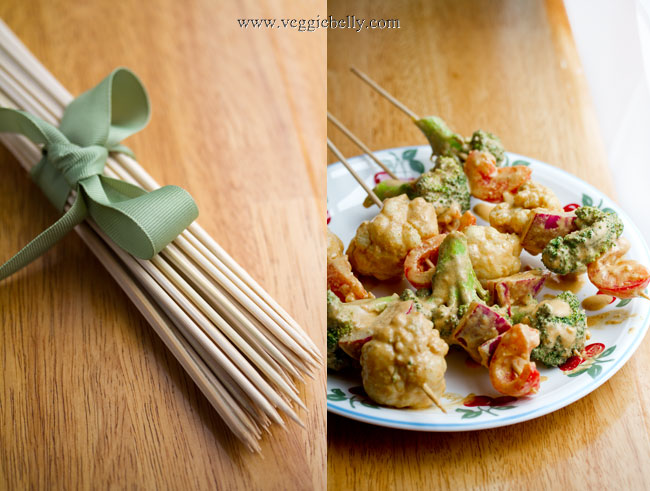
Soak bamboo skewers in water for atleast 30 minutes, to prevent them from burning on the grill.

Cut the broccoli and cauliflower into large florets. You should have 6 florets (about 2 cups) each of broccoli and cauliflower.

Bring water to boil in a medium pot. Add plenty of salt. Add the broccoli and cauliflower florets. Bring back to a boil. Cook for 20 seconds. Then turn off heat and drain the broccoli and cauliflower. Rinse under very cold water to stop the cooking. If the tap water is not cold enough, dunk the broccoli and cauliflower in a bowl filled with water and ice cubes, then drain. Pat dry with a towel. Make sure the vegetables arent wet, if they are they will dilute the marinade.

Whisk all marinade ingredients together in a bowl. Add the broccoli, cauliflower, tomato and onion pieces to the marinade. Mix gently so the marinade coats all the vegetables. Cover and refridgerate for about 30 minutes.

Heat an out door grill to 400f. Skewer the broccoli, cauliflower, onion and tomato pieces. Place on grill and cook till one side of the vegetables is slightly charred, about 1 minute. Then using tongs, flip the skewers and cook the other side. If you dont have a grill, broil the skewers in the oven.
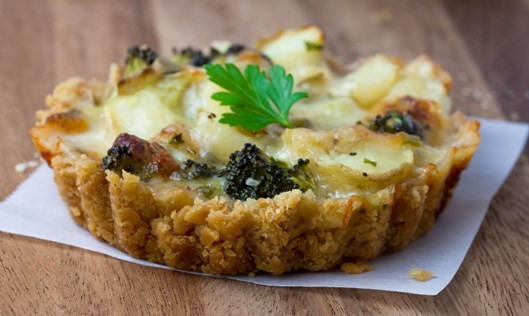
Broccoli, Baby Potato and Comte (Gruyere) Cheese Tarts in Saltine Cracker Crust


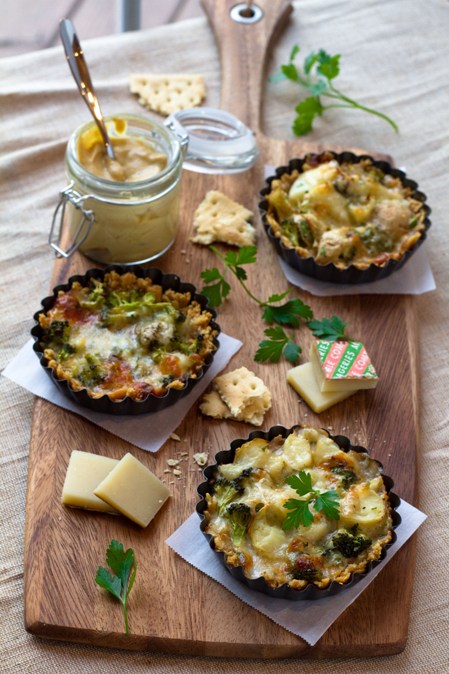
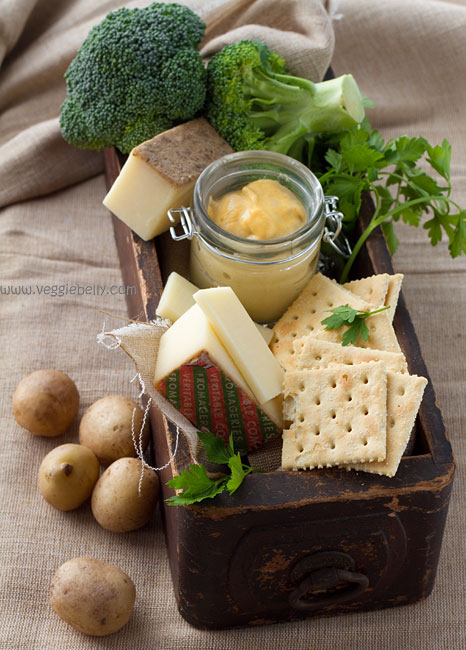
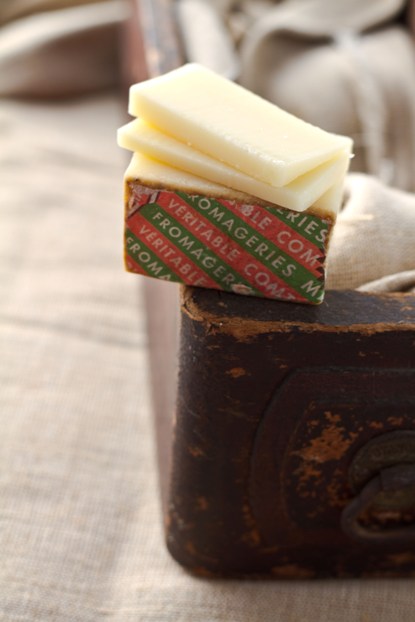
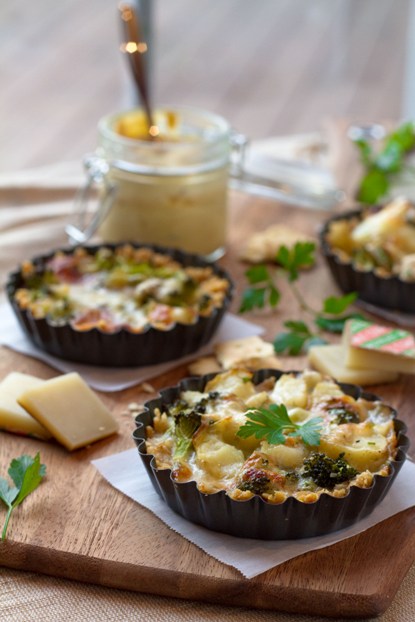
I’d been dealing with a cranky client all week and was exhausted. I wanted a nice gourmet meal, but at the same time I didnt want to leave the house (ever felt that way?). So I used what I had on hand to make this gourmet tasting, gourmet looking, cheesy tart…just what I needed after a stressful day! The gorgeous wedge of french comte cheese Sanjeev picked up a few days ago was simply spectacular in this savory tart.

Comte is a Gruyere type French cheese made from cows milk. Comte is made only with spring and summer milk. I absolutely love this cheese. Actually, I love all cheeses, but I have extra love for Comte. Its slightly sweet, somewhat soft, and melts beautifully.

If you dont like or cant find Comte cheese..

Substitutes for Comte cheese: use Gruyere or fontina instead of Comte. Or if you want to spend less, try a mix of mozzarella and parmesan.

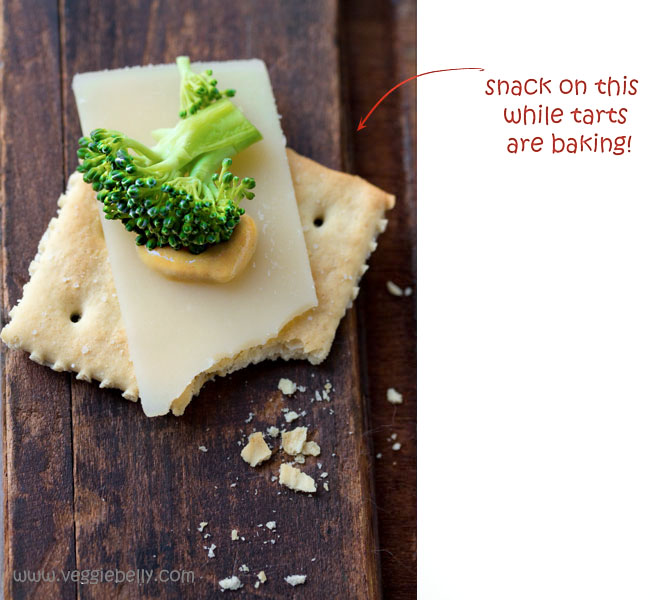
The tarts smelled sooo good in the oven, we were getting hungry quickly! We snacked on the ingredients while waiting for the tarts to bake.

This is a rather heavy, cheesy tart, so I made it in individual mini tart/pie pans. A mini tart along with a salad was a good portion size. If you dont have mini tart/pie tins, you can make this as one large tart and cut it into wedges.

We absolutely loved the saltine cracker crust – it was easy, smelled heavenly, and very yummy!

Broccoli, Baby Potato and Comte (Gruyere) Cheese Tarts in Saltine Cracker Crust: Recipe

makes 6 mini tarts

4oz or 5 small baby potatoes (or use a medium baking potato instead)
1/2 cup low fat milk
1 teaspoon flour
1 teaspoon dijon mustard
3/4 cup comte or gruyere cheese, cut into tiny cubes
1 cup broccoli florets, chopped
2 tablespoons parsley
salt and pepper (keep in mind the cheese, mustard, saltines are all already salty!)

for saltine cracker crust

4oz or 1 sleeve of saltine crackers
4 tablespoons butter, melted
1/2-3/4 cup hot water

Pre-heat oven to 375f.

Wrap the potatoes in a paper towel and micrrowave for 2 minutes or till half cooked. Set aside.
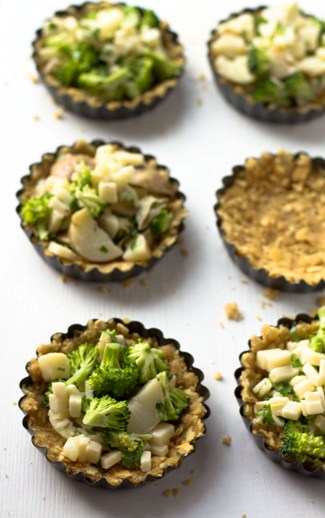
In a bowl, whisk together the milk, flour, and dijon mustard. Then add the cheese, broccoli florets, potatoes, parsley, salt and freshly cracked black pepper and mix well.

To make the saltine cracker crust, place the saltine crackers in a food processor and crush them to a powder. You should get about 1 1/2 cups of crushed saltines. Place this in a bowl, add melted butter and hot water and stir till it comes together like a dough. Now press the saltine cracker crust dough into a non-stick pie or tart pan. Press down on the crust to compact it and also push it up the edges of the pan.

Pour the cheese, broccoli and potato mixture into the tart/pie pan with the saltine crust. Place the pan on a foil lined baking sheet and bake on 375 degrees for about 20 minutes or just till the top of the tart starts to turn golden. Cool tarts a little, then gently lift them off the mould using a knife. Serve tart warm with a salad of your choice.
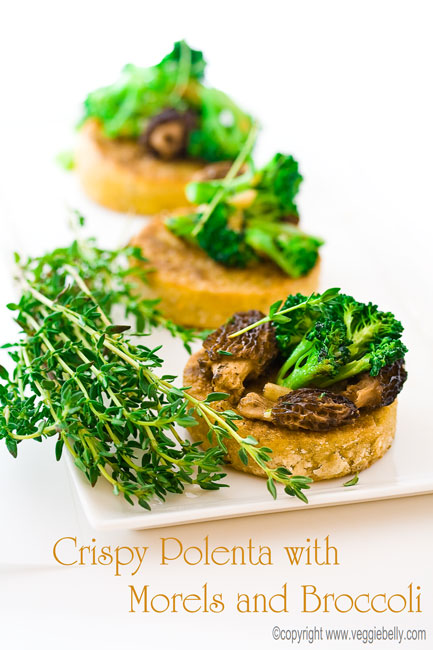
Crispy Polenta with Morel Mushrooms and Broccoli

polenta-with-morels-and-broccoli2

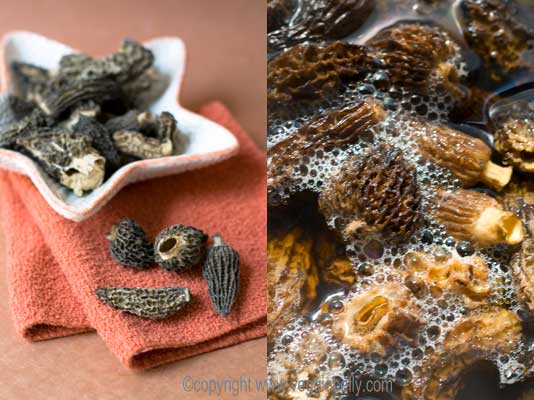
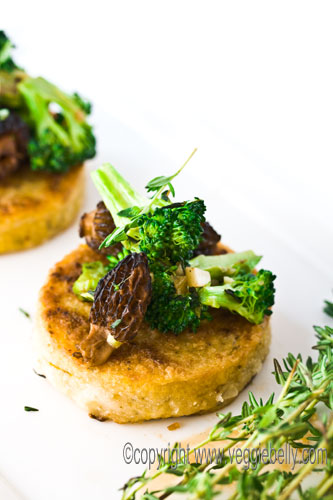
This is a great meal for a week night. Its filling, tasty, and doesnt take too long to make. I used store bought polenta to speed things up. If you havent tried morel mushrooms, you absolutely must! They are earthy, incredibly flavorful and have a great texture. Fresh morels are only in season very briefly in the spring. But you can buy dried morels all year long. I used Melissa’s brand morel mushrooms. They are little expensive but well worth the splurge. Chanterelles or porcini mushrooms will also be great in this recipe.

dry-and-soaked-morels

Here is a trick for getting extra flavorful sauce: Instead of soaking the mushrooms in water, soak them in half water and half vegetable stock. Then use this liquid to make the sauce.

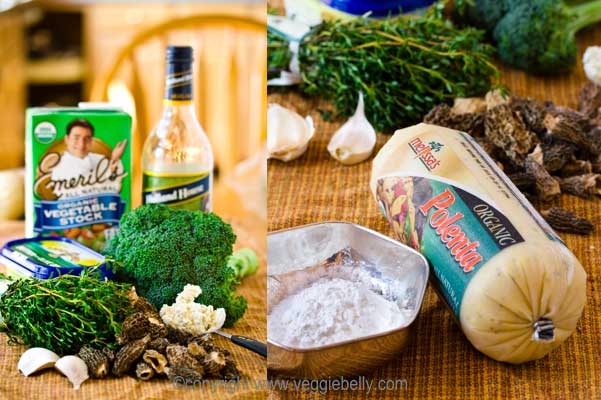
store-bought-polenta

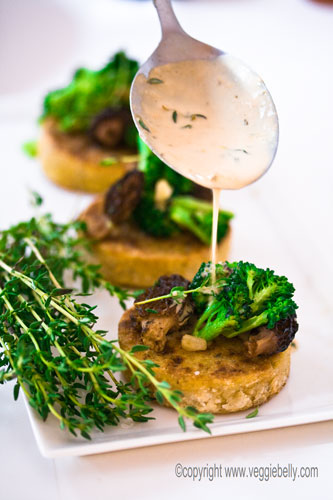
Saute soaked morels and broccoli and set aside. Then make a sauce with the morel soaking liquid, vegetable stock, a little wine and a few spoons of any soft, creamy cheese. I used Emeril’s vegetable stock which I received from foodbuzz. For the cheese, I recommend Alouette cheese spread for a wonderful creaminess. You could also use cream cheese, goat cheese, blue cheese or heavy cream. Store bought polenta makes this recipe easy to pull together. Just cut up the polenta into rounds, dredge in flour and pan fry till its crispy and golden.

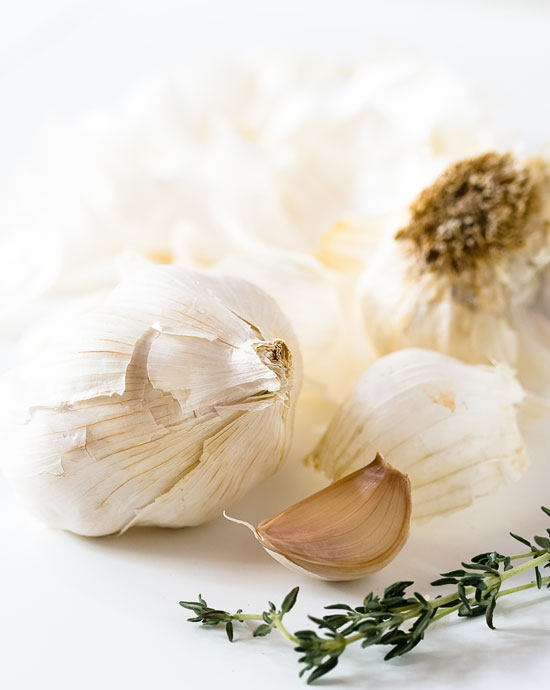
garlic-and-thyme

Garlic and thyme add great flavor tot his dish. This photo goes to Jugalbandi’s Click event, this month’s theme is allium.

polenta-with-morels-and-broccoli1

You could add the sauteed vegetables back in sauce and then top the polenta with it. Or..

polenta-with-sauce

…top the polenta rounds with the vegetables and pour the sauce over.

Crispy Polenta with Morel Mushrooms and Broccoli Recipe
serves 3-4
1 tube (1 lb) store bought polenta
2 tbsp flour
1 tbsp corn startch
2 tbsp oil

Cut the polenta into about 3/4th inch discs. Mix the all purpose flour and corn startch together. Dredge the polenta rounds in flour. Pan fry them till golden brown.

1 cup vegetable stock + 1 cup water
1 oz dried morel mushrooms
2 cups broccoli florets
4 sprigs fresh thyme
2 pods gralic, minced
4 tbsp white wine, optional
Salt and pepper
4-6 tbsp alouette cheese spread or any soft cheese or heavy cream
3 tbsp butter or oil

Bring the stock and water to a boil. Turn heat off and add the dried mushrooms to the stock. Let it soak 20 minutes. Squeeze out the mushrooms, reserving the stock.

Heat butter or oil in a pan. Add the broccoli and soaked mushrooms, saute on medium for 3-4 minutes. Add the garlic and thyme. Cook another minute. Then add the wine if using, salt and pepper and cook on high for 1 minute. Pour in the mushroom soaking liquid and the cheese spread. Simmer on low for a few minutes till the mixture thickens. Serve over crispy polenta rounds.

Related Posts with Thumbnails