Easy Potato Curry (Dry)

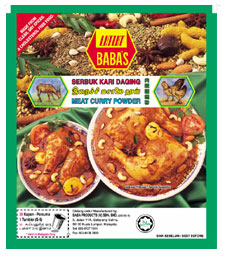
The secret to this easy, vegan potato curry is Baba’s curry powder. Its a Malaysian made curry powder, and you can buy it online or possibly at a Asian/Malaysian foods store. My pantry is never without Baba’s meat curry powder and Baba’s fish curry powder.

Photo from www.babas.com.my

I highly recommend Baba’s curry powders. Although they are meant for meat, the curry powders themselves contain no meat and they are fantastic to add to vegetables, curries and lentil dishes.

Baba’s meat curry powder Ive used in this recipe contains coriander, fennel, cumin, cinnamon, cardamom, star anise and cloves.


Substitute Babas curry powder with sambar powder or any yellow curry powder. How much you will need to use depends on the brand and how spicy it is.


Notes:

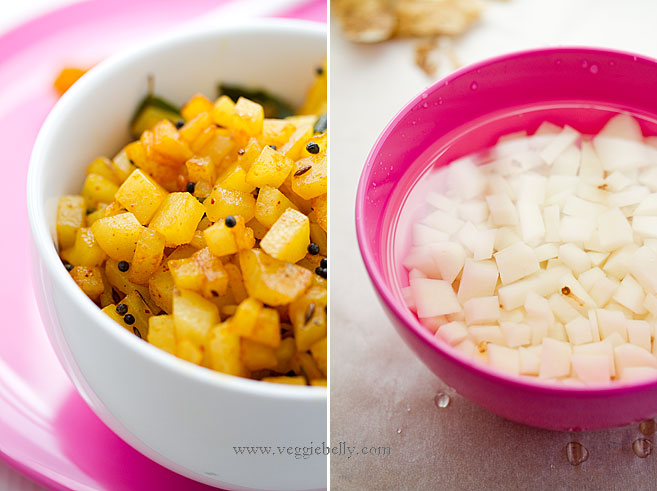
- When chopping potatoes, keep them in a bowl of water to prevent them from discoloring

- If the curry gets too dry while cooking, sprinkle a little water

- Potatoes will cook sooner if you cut them into smaller cubes

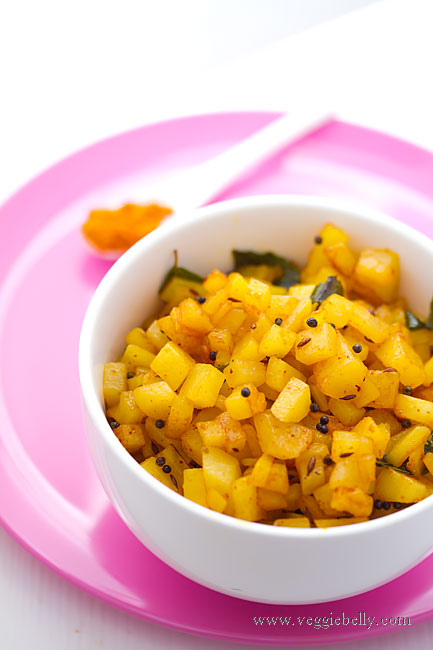
Easy, Vegan Potato Curry or Potato Masala or Potato Poriyal Recipe

serves about 2

1 large potato (about 1 1/2 cups when cut into small cubes)
2 tablespoons vegetable oil
1/8th teaspoon black mustard seeds
1/8th teaspoon cumin seeds
1/2 teaspoon urad dal (black gram)
a pinch of asafoetida
1 dried red chilli, or according to taste
a few curry leaves, optional
1-2 teaspoons Baba’s meat curry powder or sambar powder or any yellow curry powder (how much curry powder you’ll need depends on the brand you use)
salt

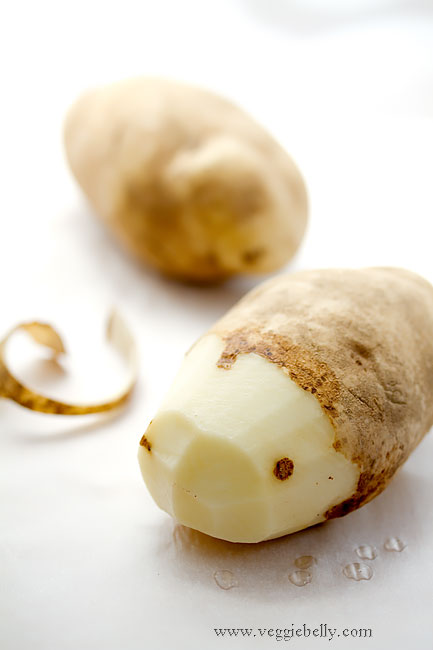
Peel and cut the potato into small cubes. Heat a non stick wok with the oil and add mustard seeds. When they pop, add cumin seeds. When they start to sizzle, add urad dal, asafoetida, red chili and curry leaves. Cook about 20 seconds or till fragrant. Add the cubed potatoes, curry powder, 2 tablespoons water and salt. Cook on medium heat till the potatoes are cooked, about 6 minutes.

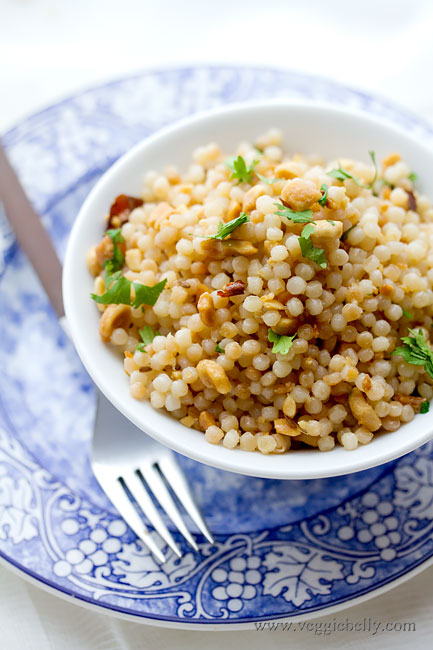
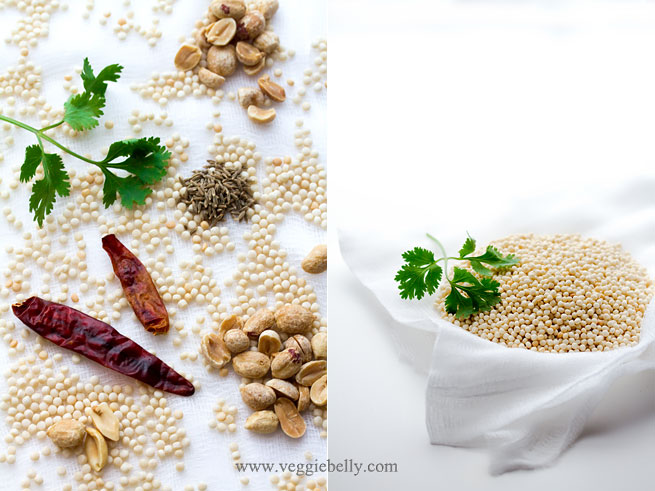
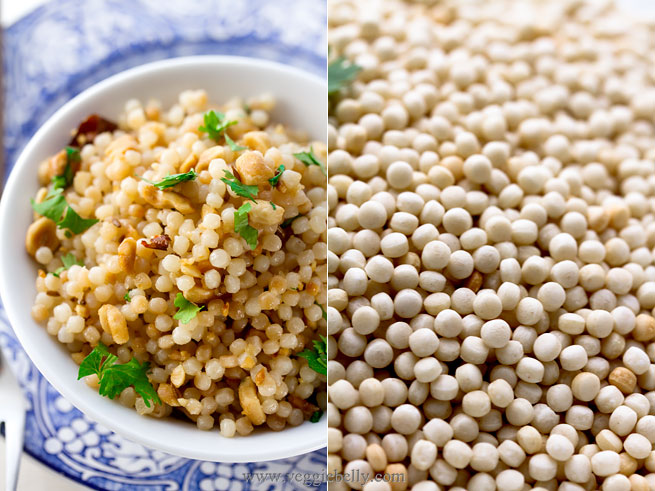
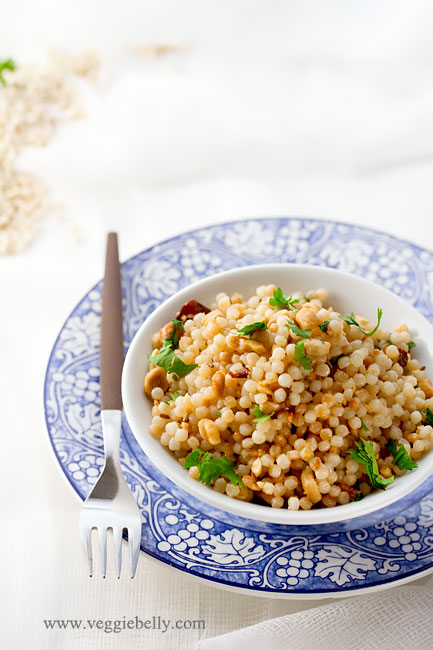
Easy Israeli Couscous with Roasted Peanuts. Ready in 10 minutes.

I am blessed to I have friends whom Ive known since childhood. These are the people I can be myself with and I know will support me through anything.

One such friend is Vidya. As children, Vidya and I hung out in each others’ houses all the time. We’ve shared much, and had a lot of fun together. And through the years, no matter where in this world we were, we’ve kept the close friendship going.

A few winters ago, Vidya drove up from North Carolina to visit me. She came bearing a tub of marinated olives and a delicious merlot. We sat in my kitchen late that night, talking, eating, drinking and watching the snow fall. We were warmed by friendship and wine.

Vidya then made us a midnight snack – Israeli couscous with cumin and roasted peanuts. We chatted and sipped wine as Vidya cooked the nutty, chewy, cumin scented dish. There we were, old friends, in the middle of a winter’s night; cooking, laughing and enjoying the sisterhood of a 20 year old friendship.

Thankyou Vidya, for so much more than just this recipe.

Vidya’s recipe for israeli or pearl couscous is a shortcut version of Indian sabudana or sago kichdi. The traditional recipe uses sabudana (tapioca pearls). But I like Vidya’s version with israeli couscous, its easy to make and you really cant mess it up. This is a great, 10 minute vegan snack or side dish.

Israeli couscous, also called pearl couscous or mograbiah or ptitim is a type of pasta from the Levant region. If you dont have pearl couscous on hand, sustitute with cooked orzo or tapioca pearls.

Check out this curried Israeli couscous (mograbieh) recipe on gourmet sleuth. Vegan Yum Yum has a simple, vegan recipe for lemon pearl couscous.

But its this  couscous and mograbhia (israeli couscous) recipe on Dana Treat that really reminded me that I havent made this israeli couscous recipe in a while. Dana said she has a big load of israeli couscous and is always looking for recipes. Dana, this is for you :)  

I use 1/2 cup peanuts in this recipe, which is on the peanutty side. Thats how I like it. If you feel this is too much, reduce the amout of peanuts to upto 1/4 cup.

Israeli Couscous (Pearl Couscous or Mograbiah) with Roasted Peanuts Recipe

serves about 4 as a side

for the couscous

1 tablespoon oil
1 cup israeli couscous or pearl couscous, uncooked

for sauteing

1 tablespoon oil
1/2 teaspoon cumin seeds
a few curry leaves, optional
2 green or dried red chillies (or according to taste), chopped. Use jalapenos instead if you dont want it too spicy.
1/2 cup roasted peanuts, crushed lightly (this will be on the peanutty side, reduce the amount of peanuts if you wish)
1 tablespoon lemon juice
2 tablespoons chopped cilantro
salt

Heat oil in a large non stick skillet. Add couscous. Stir the couscous on low heat till it turns color and becomes light brown. Add 2 cups water. Bring to a boil. Reduce heat, cover the skillet and simmer till all the water is absorbed, 5-7 minutes. Couscous should not be mushy. 

While, couscous is cooking, take a wok, heat the oil and add cumin seeds. When they start to sizzle, add the curry leaves, and green or red chillies and cook for about 15 seconds. Add the cooked israeli couscous, peanuts, lemon juice and salt. Stir well. Turn off heat. Adjust lemon juice according to taste. Add cilantro. Serve warm.

My Grandmother’s Multicolored Mixed Vegetable Raita


My two grandmother’s could not be more different.  One has a PhD, was a career woman and takes pride in the fact that she ‘cant boil a kettle of water’. She is a connoisseur of fine food, but never enters the kitchen herself. My other grandmother works miracles in the kitchen. She can effortlessly turn out simmering pot after pot of the most delectable sambars, kuzhambus, rasams, poriyals, and kootus. She instilled in me a love for cooking; and not a week goes by when I’m not on the phone with my grandmother asking for recipes, techniques or clarifications. As different as they are from each other, both my grandmothers are remarkable women, and I continue to learn so much from them.

 My grandmother (the non-cooking one!), grandfather,  father and aunt. Late 1950s


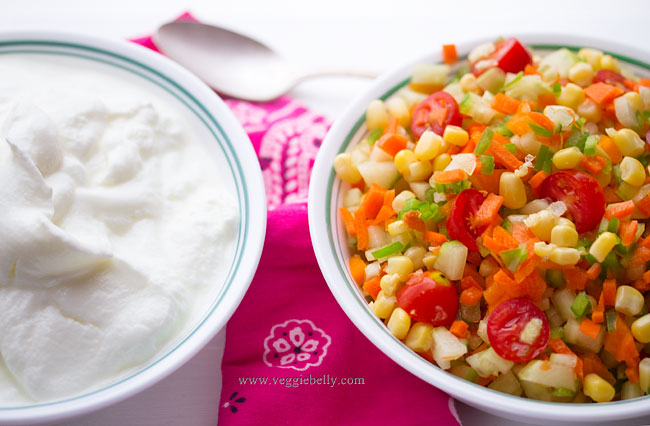
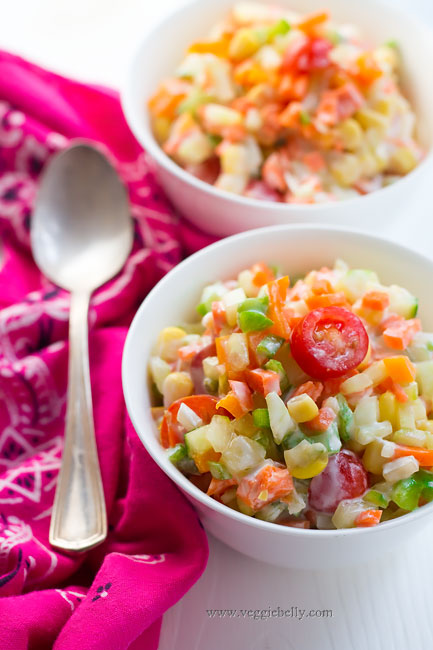
 When its too hot to cook, I always turn to this mixed vegetable raita. Its cool, refershing and there is no cooking involved. I am happy just eating a huge bowl of this for dinner. But this colorful raita will be a great accompaniment to and Indian dinner of rice, roti and curry.

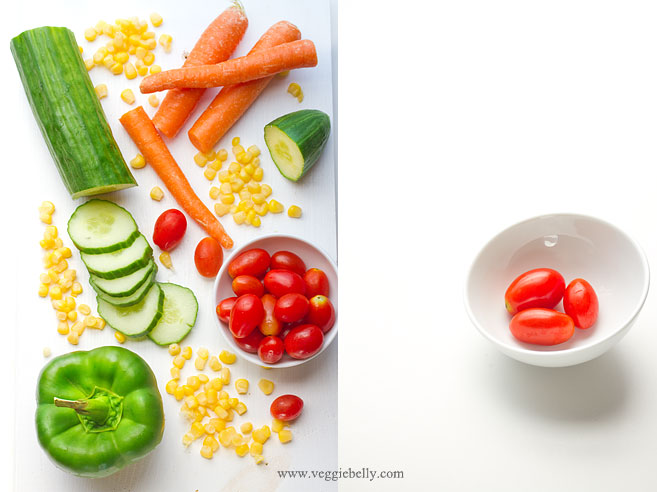
Its easy to remember this recipe – just remember the 6 Cs- cucumber, capsicum, corn, carrot, curd, cherry tomato. Then add pomegranates. Thats it! I didnt use pomegranate seeds in this recipe because I couldnt find any; but I highly recommend you use them!

My grandmother adds salt to the raita only just before serving. If you add salt any sooner, it will draw out the moisture from the vegetables and make your raita watery. And make sure you let the raita sit in the fridge overnight, it tastes much better than eating it right away.

My Grandmother’s Multicolored Mixed Vegetable Raita Recipe

serves about 10 as a side dish

1 large seedless cucumber, the kind with the plastic wrap or 4 small cucumbers (about 3 cups when chopped)
3 medium carrots (about 1 1/2 cups when chopped)
1 small green pepper (about 1/2 cup when chopped)
1 small orange pepper (about 1/2 cup when chopped)
1 cup cherry tomatoes
2 cups drained canned sweet corn
1/2 cup pomegranate seeds (I didnt use, because I couldnt find them)
3 cups yogurt
salt

Peel the cucumber and carrots, and chop into very small pieces. Chop the peppers into tiny pieces as well. Cut each cherry tomato into 2 or 3 pieces.  Mix all ingredients together in a large bowl, except salt. Place the raita in the fridge. Raita tastes better if it sits over night. Add salt just before serving and stir well. Serve chilled.

Grilled Corn with Miso Butter


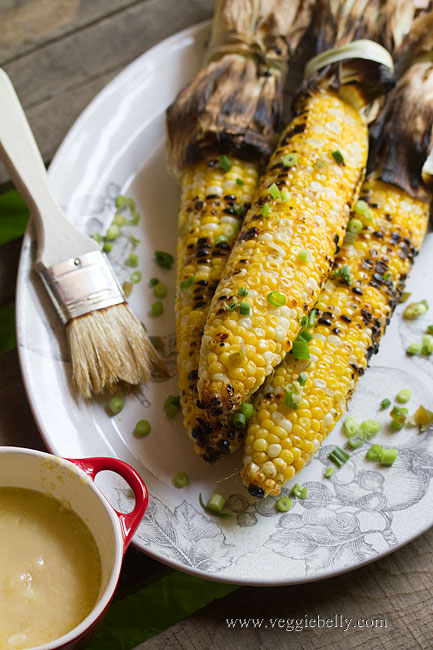
We didnt grill anything over July 4th weekend because I was away in Atlanta for a dear friend’s wedding reception. But I will share a lot of vegetarian and vegan grilling recipes with you in the next few weeks.  To start off, here is an easy grilled corn recipe with miso butter.

I used Miso butter to add a special touch to plain old grilled corn on the cob. I love the depth and umami flavor of miso; and it goes really well with the sweetness of grilled corn. If you dont have or dont like miso, use soy sauce as a substitute.

How to use miso butter
toss with popcorn
slather the miso butter on grilled tofu
top baked potatoes
use it was a dipping sauce for steamed vegetables
toss with pasta

Grilled Corn on the Cob with Miso Butter Recipe

serves about 4

for miso butter
1 tablespoons miso paste (substitute with soy sauce)
4 tablespoons unsalted butter, at room temperature
1/2 tablespoon lime juice
salt

for grilled corn
4 corns on the cob, husk and silk removed

for garnish
chopped green onion
chopped pickled jalapenos

Mix all ingredients for miso butter together and set aside.

Heat an outdoor grill to about 400f. Place corn on grill and turn the corn occassionally so that all sides are grilled evenly. Corn will be cooked in about 12 minutes. When done, remove the corn from the grill using tongs.

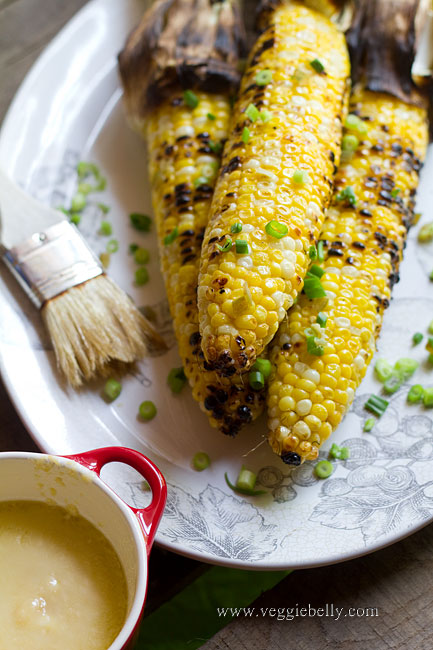
Brush miso butter over the corn and serve immediately. Garnish with chopped green onion and jalapenos.

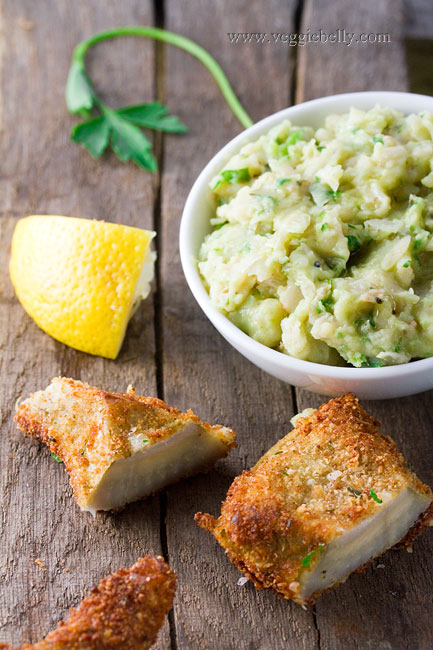
Crispy Breaded Artichoke Hearts with Garlic Mashed Marrow Beans


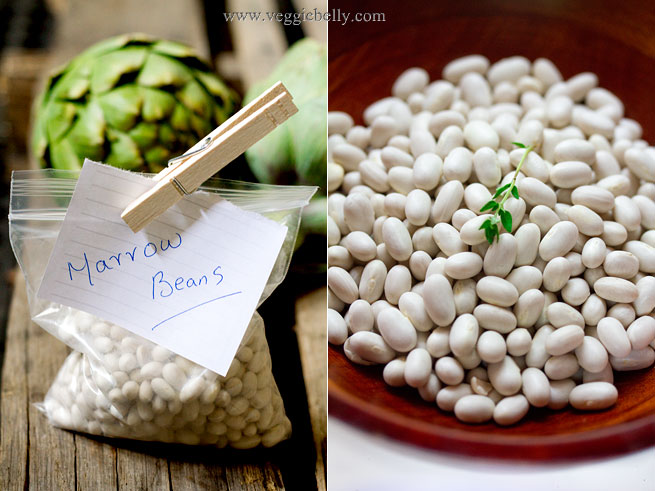
When Marx Foods sent me a packet of Marrow beans to sample, I was eager to use them along with crispy fried artichokes. This recipe is inspired by Yotam Ottolenghi’s recipe for fried artichoke hearts with fava beans (broad beans). If you havent read Ottolenghi’s new vegetarian cookbook, Plenty, you absolutely must buy it. Its my new favorite vegetarian cook book.

Lets talk about Marrow beans. Theyre also called Marrowfat beans. They are earthy, creamy beans that are great when mashed or pureed. They have a meaty flavor somewhat like pork/bacon. These heirloom beans are used in the Mediterranean and were popular in America in the 1800s. You need to soak these beans over night, then change the water and boil them till tender. Marrow beans will also be great in bean dips, stews or soups.

Ottolenghi’s recipe is based on the Roman Jewish style of cooking artichokes – deep frying them in olive oil. Ottolenghi uses panko bread crumbs; I used Italian flavored bread crumbs because thats what I had on hand. He then serves the fried artichokes with crushed fava beans or broad beans. I serve mine with mashed marrow beans. I think mashed chickpeas or cannellini beans will also be nice. If you dont care for the mashed beans part of this dish, you can serve up these fried artichokes just with some garlic mayonnaise.

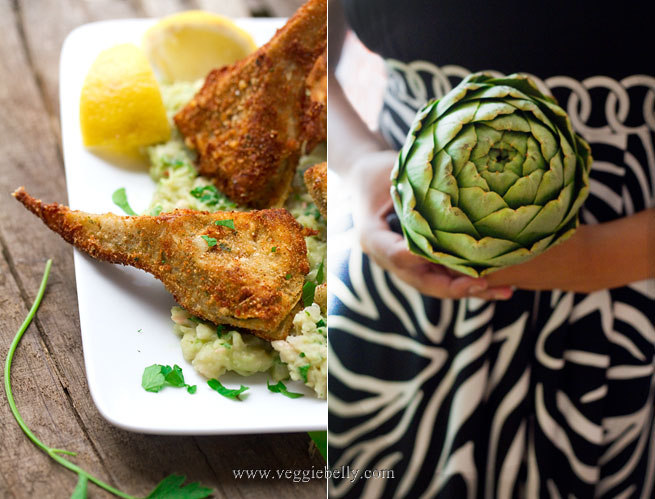
For a step-by-step tutorial on how to clean an artichoke heart, see this post.

Crispy Fried Artichoke Hearts with Garlic Mashed Marrow Beans

adapted from this recipe by Yotam Ottolenghi
serves 3-4 as an appetizer

for mashed marrow beans
1/2 cup marrow beans, soaked overnight in plenty of water
2 sprigs fresh thyme
1 clove garlic, finely chopped
2 tablespoon lemon juice
2 tablespoon olive oil
3 tablespoons finely chopped fresh parsley or basil (Ottolenghi uses mint and dill)
salt and pepper

for fried artichokes
2 jumbo or 4 regular sized artichokes
1 egg
1/2 cup italian flavored bread crumbs or panko bread crumbs
2 tablespoons grated pecorino romano cheese (or parmesan or grana padano)
extra virgin olive oil for shallow frying
salt

Drain and rinse the marrow beans that have been soaking over night. Place beans and thyme sprigs in a large pot with plenty of water. Bring to a boil. Then reduce to a simmer, place a lid on the pot and let the beans simmer till they are cooked through, about 45 minutes. Drain when done.

While beans are cooking, work on the artichokes. Trim and prepare the artichokes hearts; see this post for a tutorial. Place fresh artichoke hearts in a pot full of boiling water, turn down to a simmer and cook artichoke hearts till they are fork tender, about 7 minutes. Make sure artichokes are not mushy; they must be cooked but still firm. Removed to a kitchen towel and pat dry. If using canned or frozen artichoke hearts, skip the boiling; but pat them dry.

Whisk the egg in a bowl. In a plate, combine the breadcrumbs and pecorino romano. Heat a small skillet with olive oil, about half way up.

Dip artichoke hearts in the egg and coat well.  Then dredge them in the breadcrumb mixture, pressing the breadcrumbs to the artichoke hearts. Shallow fry the artichokes, a few at a time, till they are golden on all sides. Make sure oil is very hot. Remove fried artichokes to a paper towel and sprinkle some salt over them. When you salt the artichokes, keep in mind that the breadcrumbs and cheese are already salty.

Once the beans are cooked, drain them, remove and discard the thyme sprigs and place the hot beans back in the pot. Add all other ingredients for the beans. Mash using a potato masher.

To serve, spread some mashed beans on a platter and arrange fried artichokes on top. Serve with lemon wedges.

Omelette Rollups or Roulade with Smoky Fried Potatoes, Cream Cheese and Watercress


Here’s a recipe inspired by the Spanish frittata — I kept the potato which is traditionally used in a frittata, but I take it in a totally different direction. This roulade or roll up is a stuffed omelette with smoked paprika, fried potatoes, peppers and water cress. You can make this the previous day of a party and just cut it up and serve the day of. This is a great make ahead appetizer for entertaining!
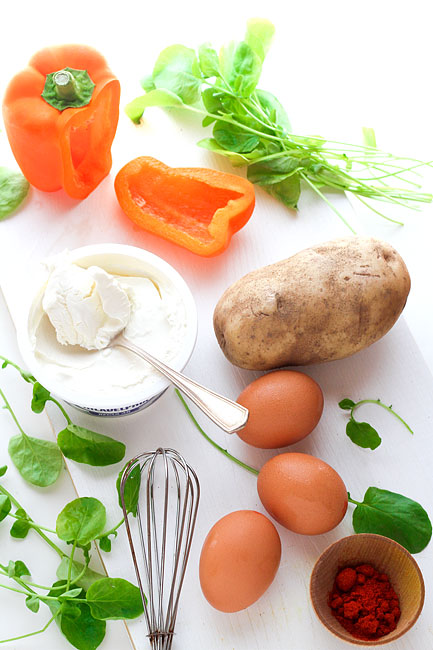
Use any vegetables or cheeses you like. I enjoy the peppery bite of watercress with the creamy cheese. The orange bell pepper adds color, and the fried potatoes make these omelette pinwheels fun and filling.

(almost) Step-by-step instructions for omelette rollups
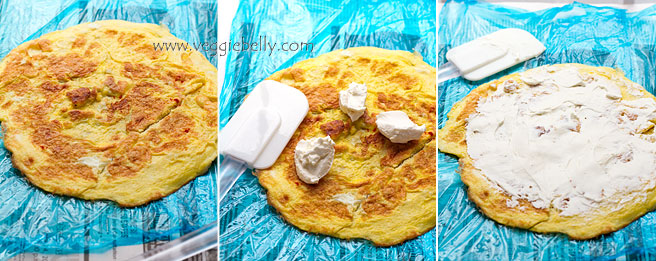
- Place cooked omelette on a large pice of cling film. Cling film must be about twice as long and wide as the omelette
- Let omelette cool completely
- Once cool, gently spread cream cheese over the omelette. Dont spread cream cheese all the way to the edges of the omelette. Leave a little space for the filling ooze out when rolling
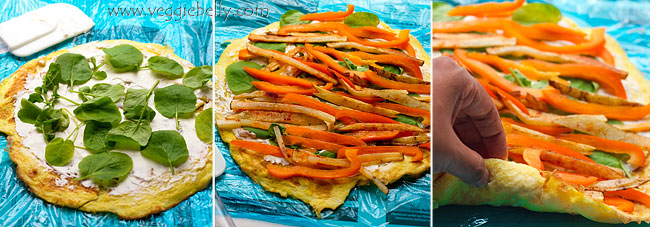
- Place a single layer of watercress leaves over the cream cheese
- Then arrange julienned peppers and fried potato sticks alternatingly. Place them horizontally. They should be in a single layer.
- Pick up the end of the omelette thats closest to you and begin rolling
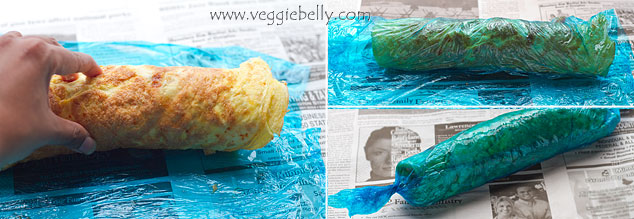
- Roll gently, but tightly. Take care not to tear the omelette. You will now have an omelette ‘sausage’
- Now pick up the cling film that the omelette is on, and roll the omelette ‘sausage’ to make a package. Make sure you wrap and roll the cling film tightly over the omelette ‘sausage’
- Twist the ends of the package
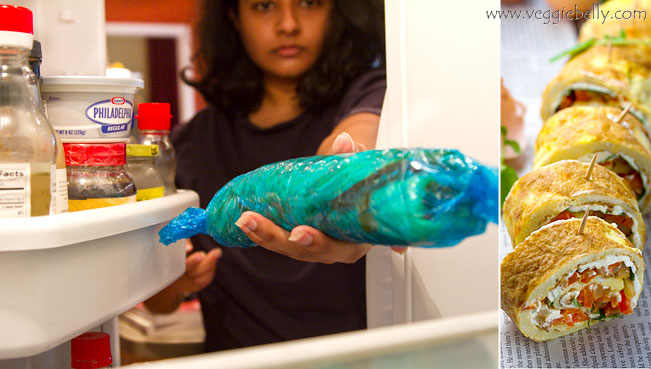
- Place in the fridge for about 30 minutes. This will make the roulade easier to cut
- After 30 minutes, take out the package from the fridge. Carefully remove cling film.
- Place 6-8 tooth picks at regular intervals on the omelette roll.
- Using a sharp knife, cut inbetween each tooth pick, to get spiral shaped omelette pinwheels
- Serve at room temperature 

How I took the ‘inside the fridge’ photo above

I cleared out a section of the fridge and placed my camera inside the fridge, facing out. You need a remote trigger for your camera and a reasonably wide angle lens to do this (focal length for this was 34mm).

It took a few test shots and changing the setting to get the exposure right. Then its easy, I just opened the fridge, and clicked the remote as I was placing the roll up inside the fridge.

If you dont have a remote for your camera, set your camera on the self timer.

You can do this from inside the oven too (make sure the oven is not on!). 

Notes & Tips

- Omelette must be completely cool before rolling
- Cream cheese must be at room temperature, this will make it easier to spread
- Dont over cook the omelette. Cooking on high heat or for too long will make your omelette dry and you will risk tearing it while rolling
- Make sure the omelette is not too thick, or it will be difficult to roll. A 12 inch diamater pan is perfect for a 6 egg omelette
- If you find cooking and flipping over a 6 egg omelette is difficult, make 2 roulades instead. Use a 6 inch pan and make two 3 egg omelettes. This way, they will be easier to handle and flip over, compared to a large single omelette

Omelette Rollups or Roulade with Smoky Fried Potatoes, Cream Cheese, Bell Pepper and Watercress Recipe

serves about 3-4 as an appetizer

For the omelette
6 large eggs
1/8 teaspoon of smoked paprika (substitute with chilli powder, regular paprika or cayenne)
salt
non-stick spray or olive oil

For the smoky potatoes
2 tablespoons olive oil
1 small potato
a pinch of smoked paprika, use more if you like it spicy
salt

Other ingredients
6 tablespoons cream cheese, at room temperature
1/2 green or red or orange pepper, julienned
1/2 cup watercress leaves loosely packed

Make the omelette: Whisk the eggs, smoked paprika and salt. Heat a 12 inch diameter nonstick skillet and spray with non-stick spray or 1 tablespoon olive oil. Pour the egg mixture into the pan and cook on medium heat till the underside of the omelette is slightly golden. Carefully flip the omelette over and cook the other side till done. Using a large spatula, trasfer the omelette to a large sheet of cling film. Let omelette cool completely.

Make the potatoes: While omelette is cooling, make the smoky potatoes.  Scrub the potato clean. Leave skin on. Cut the potato into batons. Heat olive oil in a pan and add the potato sticks in a single layer. Fry the potatoes till golden. Remove cooked potatoes onto a paper towel and sprinkle with smoked paprika and salt.

Make the rollup: When the omelette is completely cool. Spread the cream cheese over the omelette. Then arrange the water cress leaves in a single layer. Place the pepper juliennes and smoky potato sticks over the watercress layer. Make sure the peppers and potato only form a single layer. Gently roll omlette. Wrap the omlette roll in cling film, gently but firmly. Place the package in the fridge for 30 minutes. Then cut into pinwheel pieces.

For detailed step-by-step instructions and photos see post above.
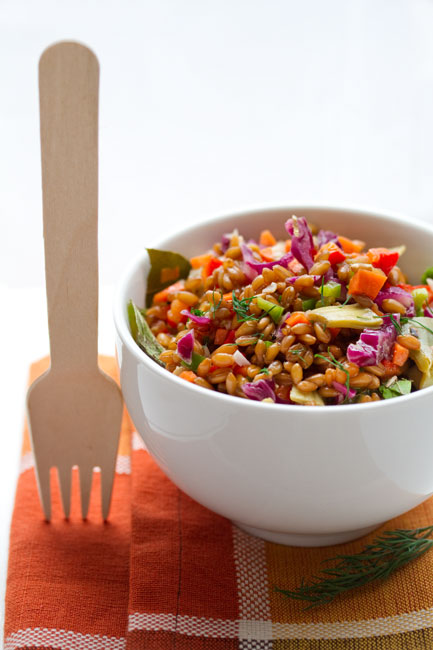
Wheat Berry Confetti Salad with Artichokes, Peppers, Dill and Mint

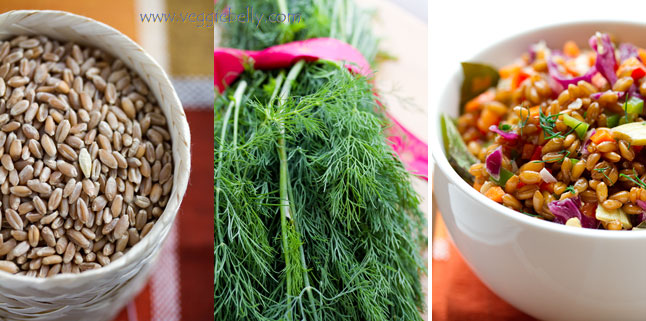
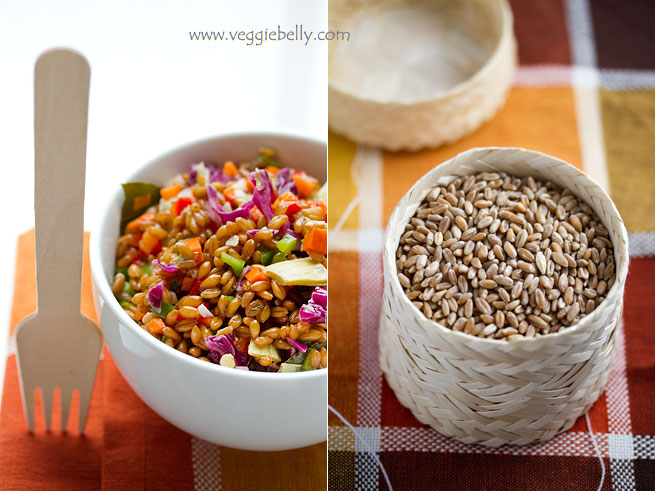
Wheat berry is the whole wheat kernel containing the wheat germ and wheat bran.  Wheat berries have heaps of fiber and protein. They have a sweet, nutty flavor and a chewy texture. They are tasty, easy to make and good for you. I buy wheat berries at Whole Foods. This recipe has a great confetti of color from all the different vegetables. Not only is this a colorful, healthy salad, its also vegan!

How to cook wheat berries

- Boil wheat berries in salted water and drain when done

- They will take anywhere between 1 to 2 hours to cook. I usually cook mine for about 1 1/2 hours.

- After one hour, start tasting the wheat berries. Turn off heat and drain when they are done to your satisfaction.

Wheat Berry Confetti Salad with Artichoke Hearts, Roasted Red Pepper, Green Pepper, Purple Cabbage, Yellow Sweet Corn, Dill and Mint Recipe

serves about 4

1 cup hard wheat berries
1-2 dried bay leaves
10 cups water
4 tablespoons olive oil
1-2 cloves garlic, finely minced
2 tablespoons white wine vinegar
1 teaspoon brown sugar
salt and pepper
1 large artichoke heart (bottled or frozen), chopped
1/2 cup chopped roasted red peppers
1/2 cup chopped green peppers
1/4 cup shredded purple cabbage
1/4 cup canned sweet corn, drained
1/2 tablespoon chopped fresh mint
1/2 tablespoon chopped fresh dill

Place the wheat berries, bay leaf, and water in a large pot. Salt the water generously. Bring to a boil. Then reduce heat to medium. Place a lid on the pot and crack the lid open to let steam escape. Let the wheat berries boil for about 1 1/2 hours or till done. After an hour of cooking, start checking the wheat berries for doneness. Remove from heat when wheat berries are done to your liking. Drain and set aside.

In the same pot, heat olive oil. Add the minced garlic and let it sizzle for about 20 seconds. Turn off heat and let the oil cool a little. Then stir in white wine vinegar, brown sugar, salt and pepper. Add cooked wheat berries to pot and mix well. Then add all other ingredients and mix well. Serve at room temperature. This salad will taste better if left in the fridge overnight.

White Bean(Cannellini), Asparagus and Basil Hummus or Dip

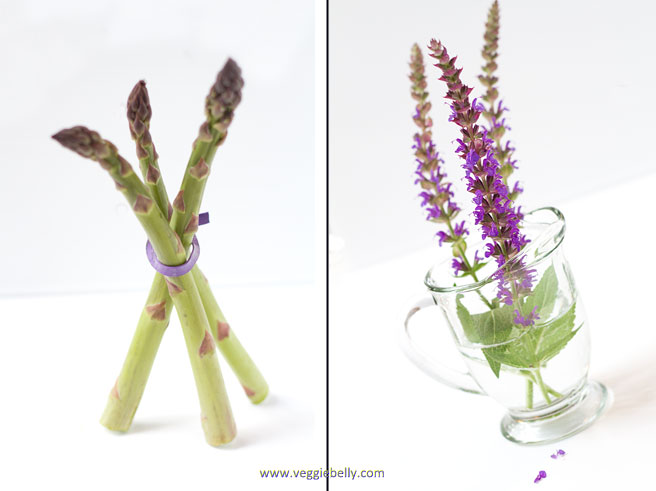
We have a lot of Salvia plants in our garden. I particularly love the ones around our mail box. Come spring, and the Salvia erupt into a glorious bloom. This year, our Salvia are particularly lush and gorgeous, probably because of all the rain. Nothing makes me happier than coming home to these purple tufts of Salvia, buzzing with bees.

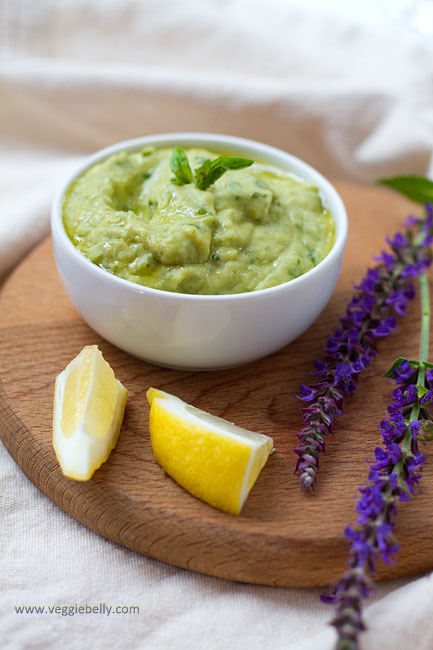
Just as the blooming of Salvia flowers remind me of the joys of spring, so do the stalks of asparagus at the farmers market. I made a healthy, vegan dip or hummus with fresh asparagus stalks and some white beans. This dip come together in no time and is a lighter alternative to creamy store bought dips. I also like using this as a spread for sandwiches.
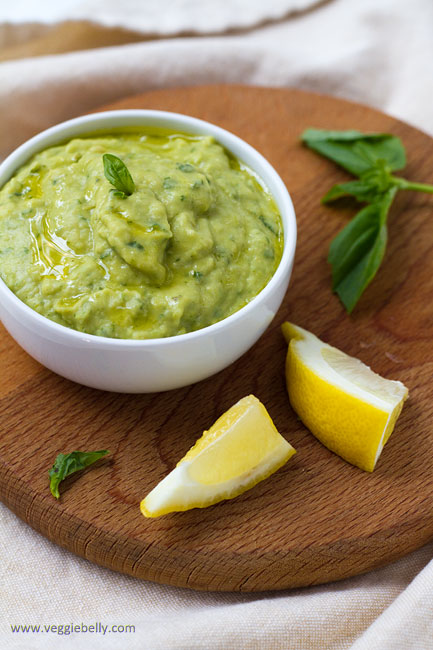

White beans or cannellini beans add a nice creaminess to this dip/spread without the added fat. I used asparagus because it is now is season. Broccoli or spinach would also work.  

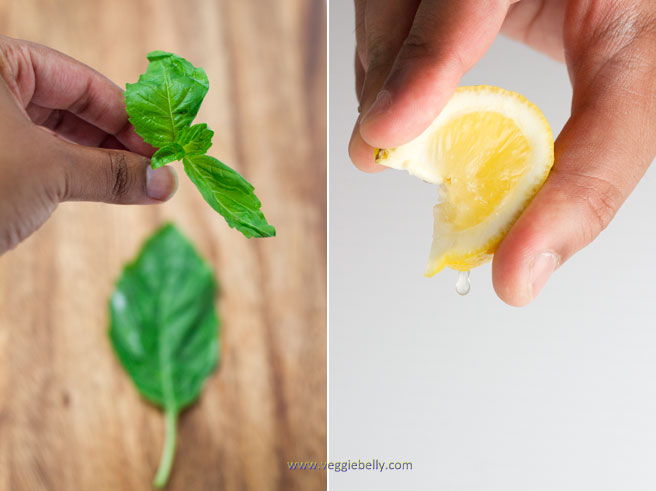
Basil and lemon juice add a fresh, bright taste. If you like it more lemony, stir in some lemon zest.

Here are some other white bean/ cannellini bean based dips around the web

Giadas white bean dip. Gotta love Giada!
Cannellini bean dip with sage and rosemary by Andrea Meyers
Easy white bean dip on cheap healthy good blog

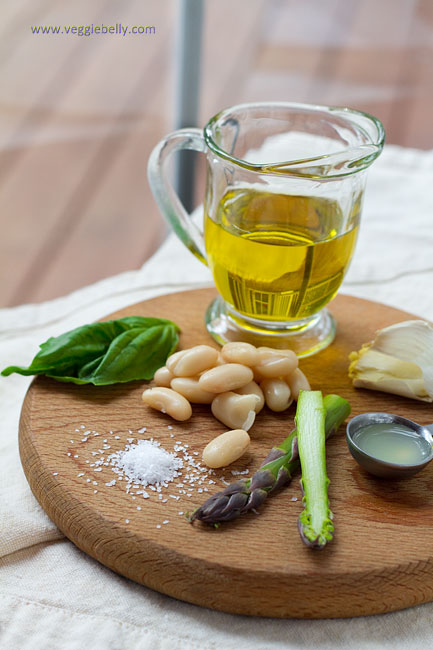
White Beans (Cannellini), Asparagus and Basil Hummus Dip Recipe

makes about 1 1/2 cups

6-8 stalks of asparagus
one 15 oz can white beans/cannellini beans, washed and drained well
1 garlic clove, peeled
1/4 cup olive oil
1/2 cup basil leaves
2-3 tablespoons lemon juice
salt and pepper

Chop off and discard the tough ends of the asparagus stalks. Chop the asparagus into pieces. Boil asparagus in some water, till asparagus is tender. Drain well and place asparagus in a blender. Place all other ingredient in the blender as well. Puree as smooth or as chunky as you like. Serve chilled with vegetable crudites, chips or pita bread.

Related Posts with Thumbnails