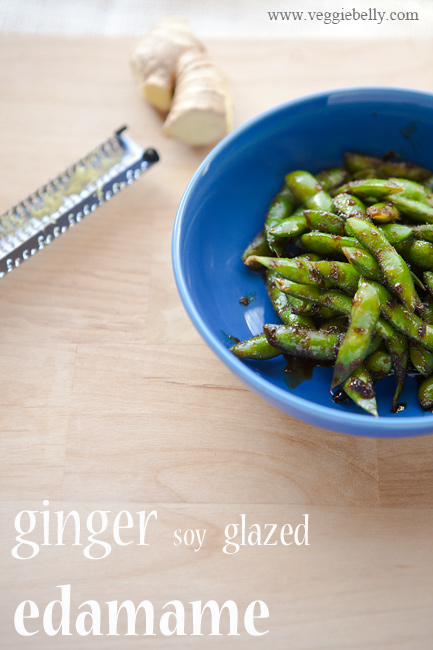
Ginger Soy Glazed Edamame Recipe

This ginger soy glazed edamame is the best healthy snack you can make in 10 minutes! Its quick, its easy, and its vegan too. Tossing steamed edamame in the ginger soy glaze makes it more interesting, and more tasty of course, than plain old steamed edamame.
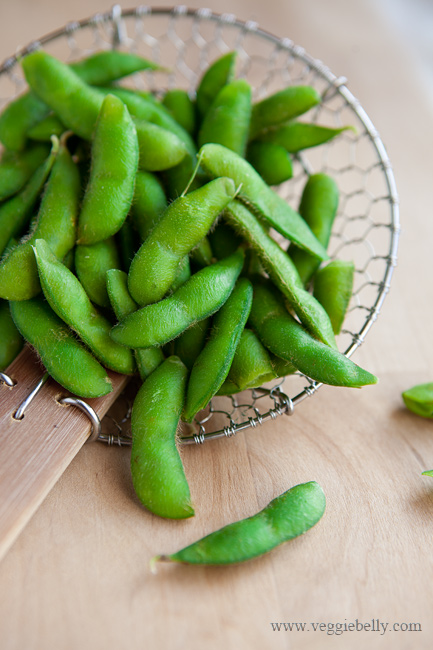
I always have frozen edamame in its shell on hand. You can also use shelled edamame, but I think sucking the beans out of the shells is half the fun!
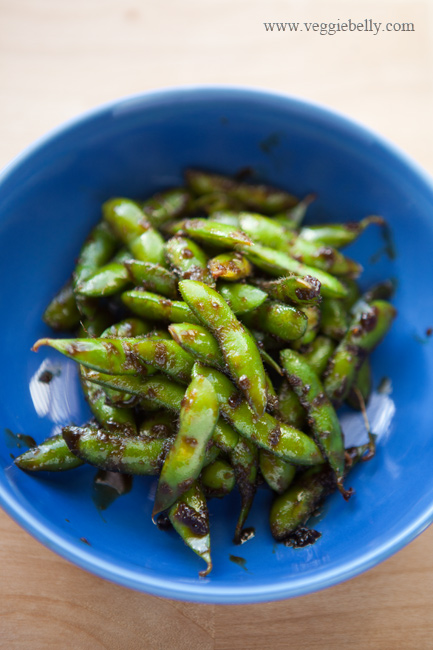
The ginger soy glaze is super easy to make and insanely delicious. You may want to make a big batch and store it in a glass jar for future use! Just remember to cook the sauce/glaze on medium to low heat so that the sugar doesn’t burn. And use a non stick pan to make washing up easier.
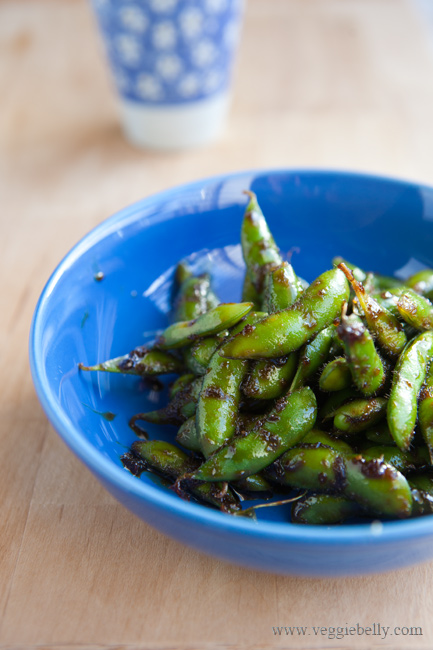
Ginger Soy Glazed Edamame Recipe

Serves 1 as a snack

Ingredients
1 cup frozen edamame with shell
1 1/2 tablespoons brown sugar
2 tablespoons soy sauce
a pinch of crushed red chili fakes, optional
2 tablespoons water
1 teaspoon sesame oil (substitute with canola or vegetable oil)
1/4 teaspoon fresh grated ginger
¼ teaspoon fresh grated garlic

 
Method

  1. Cook the edamame according to package directions. Then pat it dry with a towel and set aside.
  2. Whisk the brown sugar, soy sauce and water in a small bowl and set aside.
  3. Place the sesame oil, ginger and garlic in a medium non-stick sauce pan on medium heat. Let it sizzle for about 30 seconds.
  4. Then add the brown sugar, soy sauce, chili fakes and water mix. Let the sauce bubble gently on medium to medium-low heat. Cook till the sauce thickens and reduces to about 2 tablespoons. This will take about 4 minutes. Stir the sauce frequently while cooking. Remember, the sugar in the sauce will burn easily; if you find this is happening, reduce the heat.
  5. When the sauce has thickened, add the steamed edamame and toss well. The sauce should be thick enough that it coats and sticks to the edamame. If you find the sauce is too watery, cook on medium heat till the sauce thickens and coats the edamame.

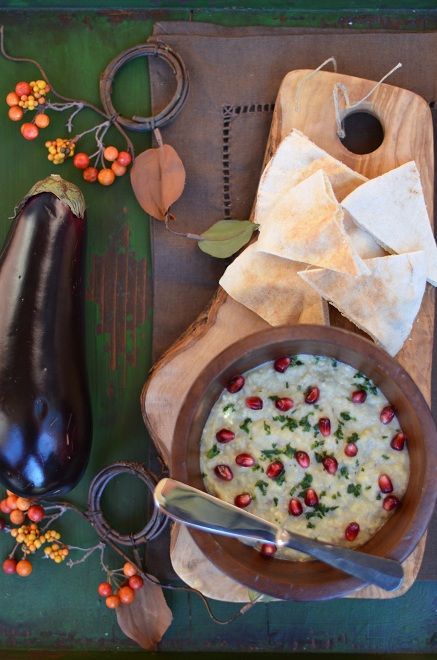
Baba Ganoush Recipe – a Guest Post from Shulie of Food Wanderings

Hello from Tel Aviv! I am traveling in Jordan and Israel on a business trip, and have taken a few days off to explore the amazing food scene here. I will be posting lots of photos and recipes from my trip when I get back! But right now, please enjoy this Baba Ganoush recipe guest post from Shulie of Food Wanderings. Her blog is full of lovingly created food, recipes (have you seen her mouthwatering India series?) and great photos! Make sure you say hello to Shulie on Twitter and Facebook too! Take it away Shulie..

When Sala asked me to guest post for her while she was traveling, I said yes, of course. You probably remember Sala from her guest post, White Peas Sautéed with Green Mango and Coconut, in the India Series on my site. Sala is a well seasoned traveler and I cannot wait to hear her impressions from her quick couple of days trip to Israel, while she is, for the first time, in the Middle East. Sala, thank you for having me as a guest in your Veggie Belly space.

Sala wanted me to make a dish from home and Baba Ghanoush is always at the table whether at homes or restaurants in Israel. Baba Ghanoush, an eggplant dip or salad, more widely known as a Lebanese dish, is wide spread throughout the Levant, Egypt and the Balkans. The Levant is the crossroads between Western Europe, Eastern Mediterranean and Northern Africa.

There are many variations to this eggplant dip/salad that is mostly served in Israel as a mezze, starter, along with many mezzes at the table. We make it the traditional way with olive oil and tahini but some in Israel make it with mayonnaise too.  The grilling and charring of the eggplant, otherwise known as an aubergine, prior to scooping the flesh/pulp  to make the salad lends it a smoky flavor. In Arab homes in Israel and the Middle East, the Baba Ghanoush is made from a variety of an eggplant called Baladi which is probably the best eggplant variety I have ever tasted. This wild variety eggplant is sweeter and the flesh so white and delicate inside.

You can whiz the Baba Ghanoush to a dip or spread consistency with all the other ingredients in the food processor, but traditionally in Israel and to this date, we chop it in a back and forth motion with a cleaver or a sharp knife. Think of mincing meat.  Whiz or chop the eggplant to consistency desired. I add the lemon to the eggplant immediately after being scooped, to avoid oxidizing and then add a bit more, later, to adjust for flavor. Charring of eggplant can be done for five minutes on top of a stove top, outside grill or the oven broiler.

The Baba Ghanoush is a delicious and healthy dish for your Holiday or New Year’s Eve cocktail party as a hors d’oeuvre with pita chip or fresh pita wedges.

Baba Ghanoush Recipe
serves about 2

Ingredients
1 large eggplant (1 lb)
1 large garlic clove, minced
Juice of a 1/2 small lemon
1 teaspoon tahini paste (could you use an extra teaspoon according to taste)
1 tablespoon mild olive oil
1/4 teaspoon salt or to taste


Garnish
Handful pomegranate seeds/arils
1 teaspoon finely chopped parsley

Method
Prick the eggplant with a fork in a few places on its surface. Grill on an out door grill or broil in an oven until charred on all sides, about five minutes.

Halve eggplant and scoop pulp. Add juice of 1/2 lemon to the pulp and stir. Mash the eggplant with a fork, or chop with a knife or whiz in a food processor. Add minced garlic, olive oil, tahini and salt and whiz/mix quickly.

Adjust the salt and lemon juice if necessary.

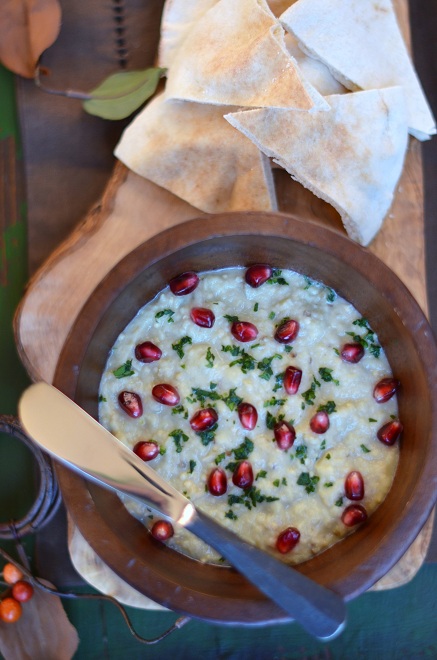
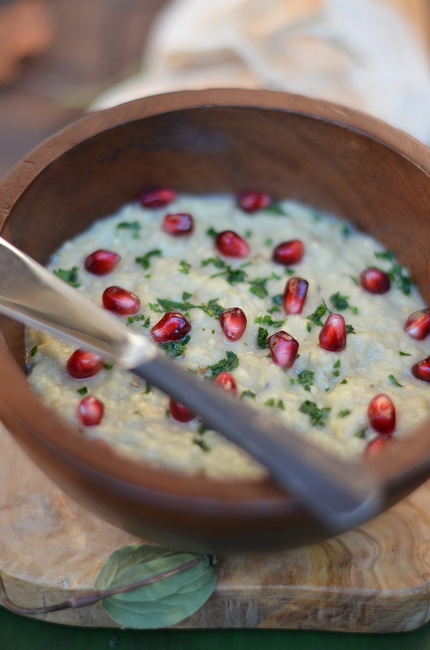
Serve in a bowl garnished with parsley and pomegranates seeds. Serve with pita chips or fresh pita wedges. Bon Appetit!

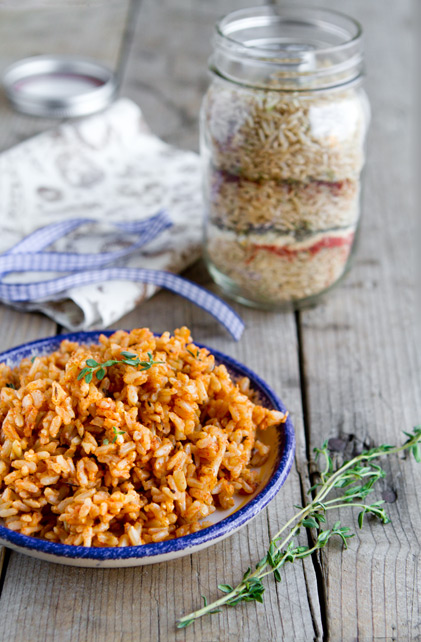
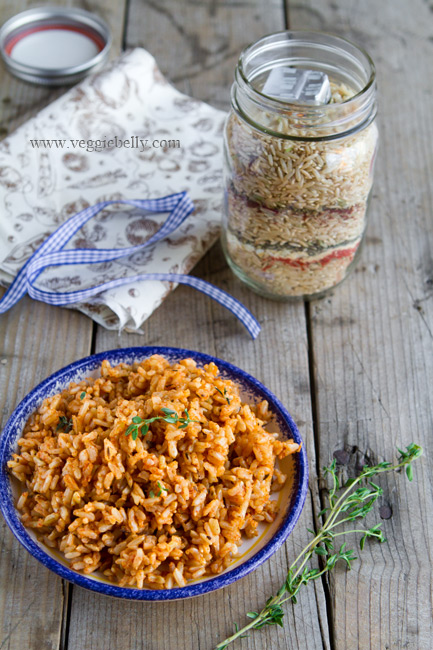
Cajun Dirty Rice Mix in a Jar. Homemade Holiday Gift Ideas for Vegetarians.

Do you love giving homemade holiday gifts? Do you have friends or family who are vegan or vegetarian? If you answered yes, this is the perfect vegetarian friendly, homemade Christmas food gift idea for you! This cajun dirty rice mix in a jar takes just minutes to put together, and is very affordable too!

I sent a jar of this cajun dirty rice mix to my friend Mahi, who is a vegetarian and fellow foodie. Make sure you visit her new blog Bite Out of Life for easy recipes, restaurant reviews and passionate food commentary.

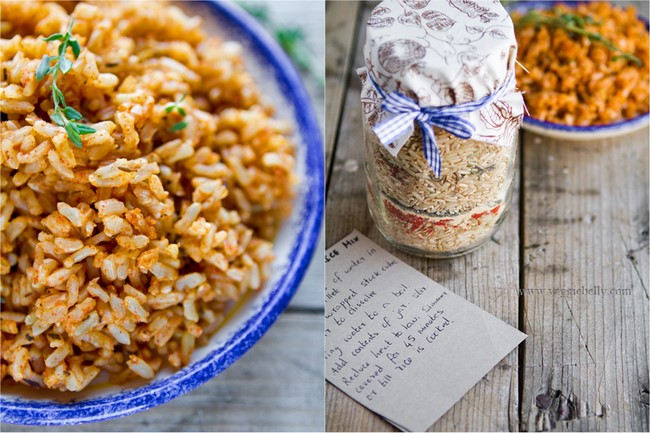
Its a lot of fun to make this mix-in-a-jar-gift. Pick whatever fabrics you like for the jar, and match it with a cute ribbon. Any piece of scrap fabric lying around will do. But if you are making a lot of these gift jars, then a trip to the fabric store will be well worth it.

If you buy the rice for this recipe from the bulk aisle, it will work out pretty cheap. I use brown rice in this recipe, but white will work just as well. But remember that white rice will cook sooner, so you will have to change the cooking time to 10-15 minutes in your recipe card.

If you plan ahead, you really dont have to go buy new jars. Just save up jars of pasta sauce, jams etc. All you need is a jar with a tight fitting lid. Wash the jars well, and soak them in soapy hot water to remove the labels. I prefer to use glass jars because they are clear and show off the contents well.

Cajun Dirty Rice Mix in a Jar Recipe

For the gift jar
one 1 pint jar with a tight fitting lid
a 5″x5″ piece of fabric
a thin rubber band
some ribbon
Cardstock or any thick paper for writing instructions

Ingredients
1 cup brown rice. (You can also use white rice, but reduce cooking time to 10-15 mins in the instructions)
2 teaspoons paprika
3/4 teaspoon garlic powder
1/2 teaspoon dried oregano
1/2 teaspoon dried thyme
1 large stock cube with its wrapping, I like knorrs

Cut a rectangle piece of paper (about 4×3 but doesnt have to be exact). Place the paper in the mouth of the jar to form a funnel. Pouring the ingredients through the funnel into the jar will be easier and less messy.

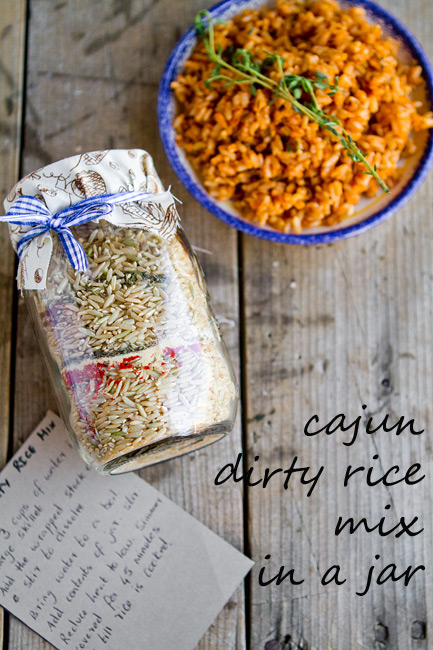
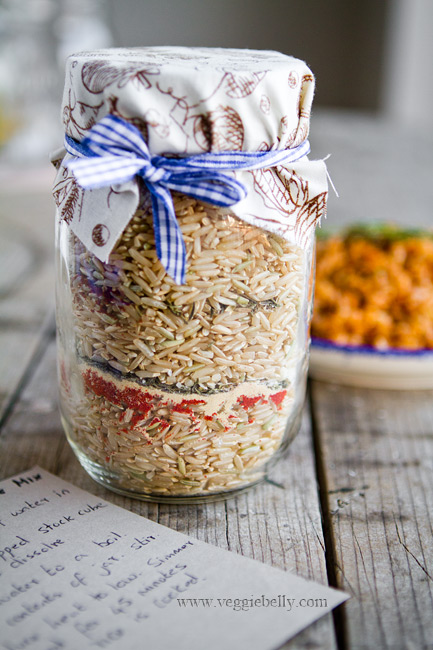
Layer the ingredients one at a time into the jar in this order – half the rice, paprika, garlic powder, oregano, thyme, remaining half of rice, wrapped stock cube.

Fit the lid on the jar and screw it on tight. Cover the lid with the fabric square. Place a rubber band over the fabric to secure it around the neck of the jar. Tie a ribbon in a bow around the neck of the jar, hiding the rubber band.

Write or print out these instructions on a thick piece of paper and attach to gift jar:
“Bring 2 cups of water plus the stock cube to a boil in a large sauce pan. Stir so the stock cube dissolves. When the water boils, add remaining contents of the jar. Stir. Reduce heat to low. Cover the pan with a lid. Simmer for 30 minutes or till the rice is cooked, but not mushy.

Serves 4 as a side dish.”

Pierce a little hole in the upper corner of the instructions paper, and tie it to the ribbon. Or place the instructions against the jar, and tied it around the jar using ribbon or a rubber band.

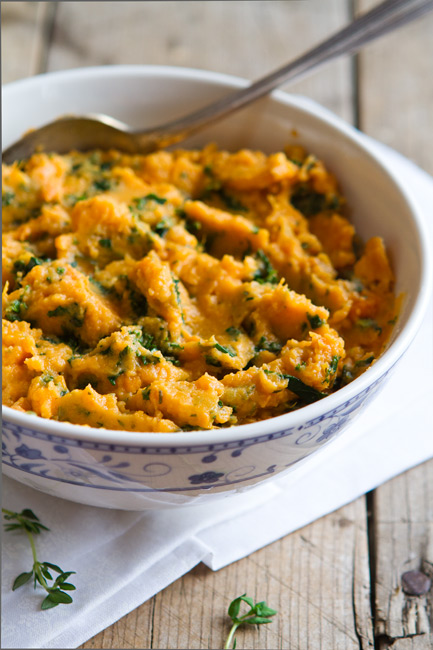
Kale and Goat Cheese Mashed Sweet Potato. A Vegetarian Thanksgiving Recipe

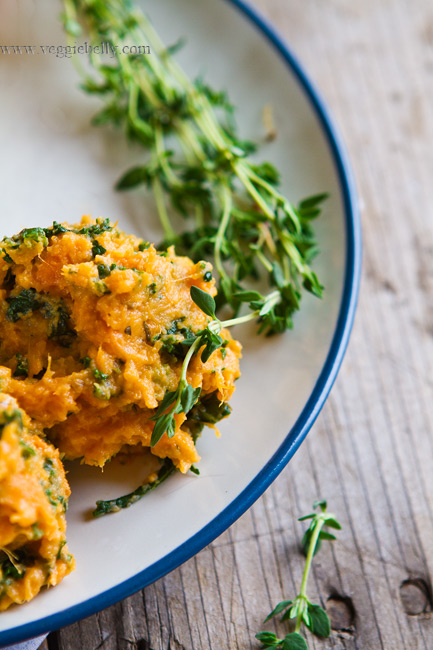
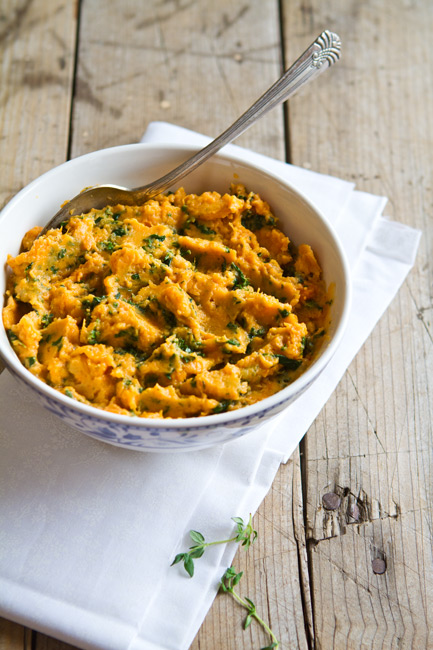
Like me, if you are  sick of serving your guests regular old mashed potatoes, you will love this recipe. This kale and goat cheese mashed sweet potatoes will be the perfect side dish for thanksgiving. And you can easily make it ahead and reheat it in the microwave.

I make this recipe using a variety of greens – spinach, swiss chard, arugula…but kale is my favorite for this recipe. I used a log of herb encrusted chevre cheese because I like the flavor of the herbs. But any kind of good goat cheese will do.

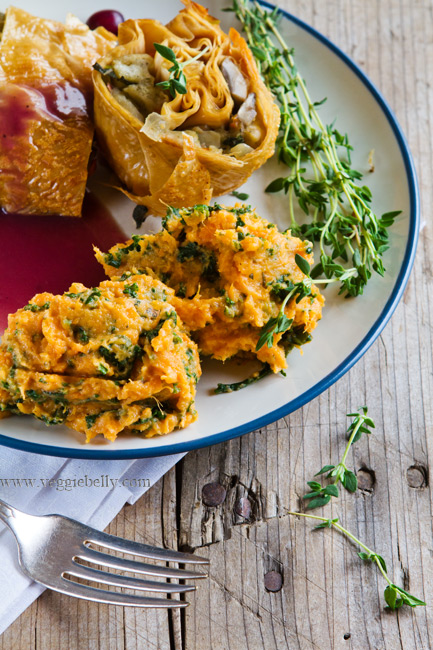
If you like your mashed sweet potatoes to be sweet, add 2 tablespoons brown sugar or maple syrup to this recipe. Serve kale and goats cheese mashed sweet potato with my thanksgiving tofu skin roulade and sage mushroom stuffing.

Kale and Goat Cheese Mashed Sweet Potato Recipe

serves about 4

Ingredients

2 lb (about 2 large) sweet potatoes or garnet yams
4 cups shredded kale
4 oz goat cheese
1 cup milk
Salt, freshly cracked black pepper

Method
Peel the sweet potato or yams. Cut into even sized 1 inch cubes. Place the sweet potatoes in a large pot filled with water. Boil uncovered for 15 minutes or till they are very soft.

Drain the sweet potatoes well and leave them in the colander.

In the same pot, add the kale, goats cheese and milk and bring to a boil. Reduce heat, and simmer till the kale has just wilted. Add salt and pepper. Turn off heat.

Add the cooked sweet potatoes to the hot kale and milk. Mash well. If the mashed sweet potato is too thick, add more milk to thin it out to your liking.

Idli Chaat Recipe & an Indian Cooking Kit Giveaway from Veena’s Market


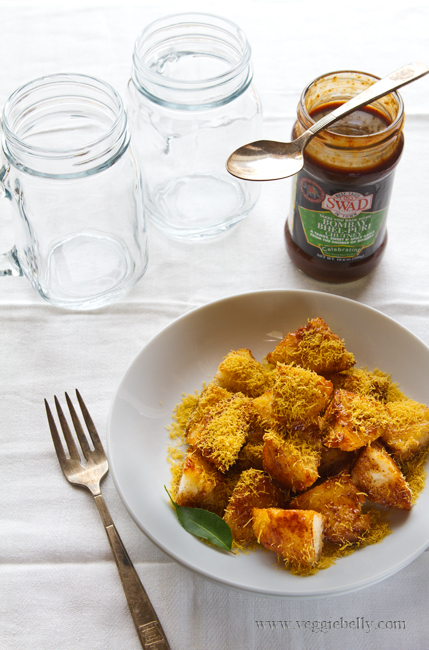
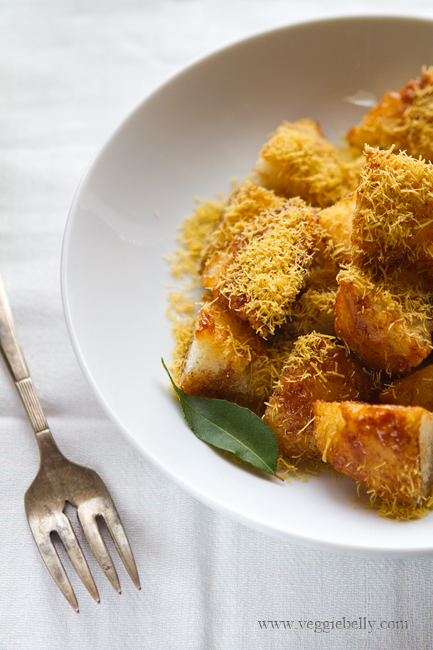
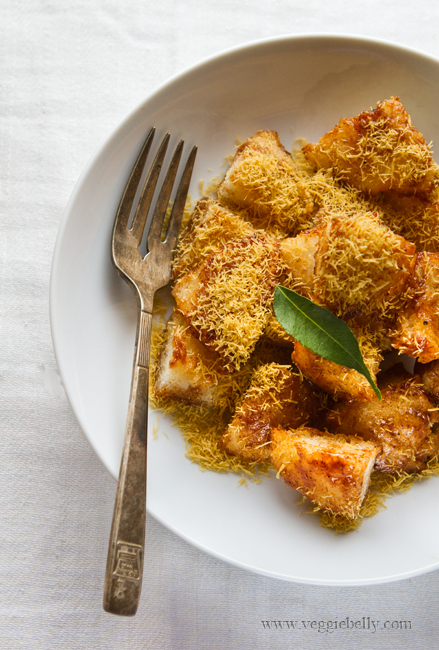
I don’t fry foods very often. But when I do, I make sure its damn good – like this Indian street food inspired idli chaat. This Idli chaat recipe turns fried idlis into a crispy on the outside, fluffy on the inside, sweet and tangy snack.

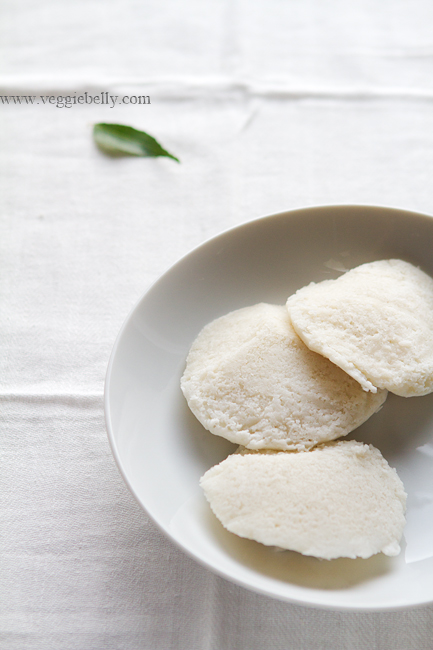
An idli is a fluffy, steamed rice cake from India. It is a common breakfast item in South India. Chaat is the umbrella name for Indian street food.

This idli chaat recipe is best made with left over idlis. Don’t use fresh idlis, they will get too oily. If you must use freshly made idlis, leave them out for a few hours so that they are thoroughly cool and dry before using.

It is important to use medium-high heat when frying idlis. If your oil is not hot enough, the idlis will absorb too much oil and get soggy. So use medium-high heat and fry the idlis till they are lightly golden.

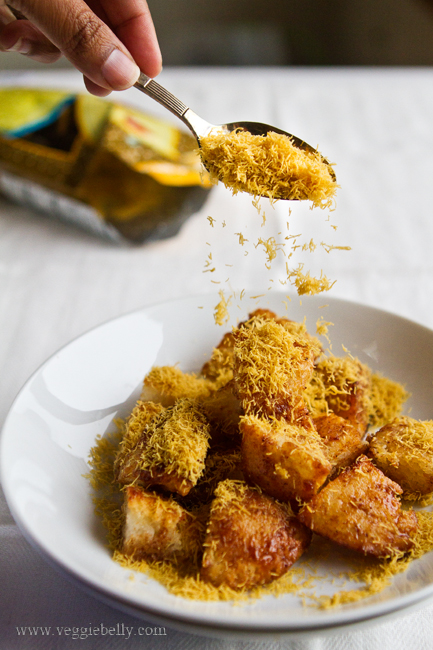
I’m giving you the bare bones version of this recipe – fried idlis tossed with tamarind (imli) chutney and sprinkled with sev (fried chickpea flour noodles). You can vary this recipe however you like by adding your favorite chaat garnishes. See the recipe below for suggestions.

For a variation on this recipe try using cooked polenta. The kind that comes pre-cooked in a tube shaped package is best. Just cut it into discs, and shallow fry.

Idli Chaat Recipe

serves about 2

Ingredients
5 regular sized idlis*
vegetable oil for frying
Salt
2 tablespoons tamarind date chutney or tamarind sauce for chaat, available at Indian stores
2 tablespoons sev, available at Indian stores

*Left over idlis are best. Dont use freshly made idlis, they will get soggy. If you must use fresh idlis, cool them thoroughly before using. Idlis are available frozen in Indian stores.

Method
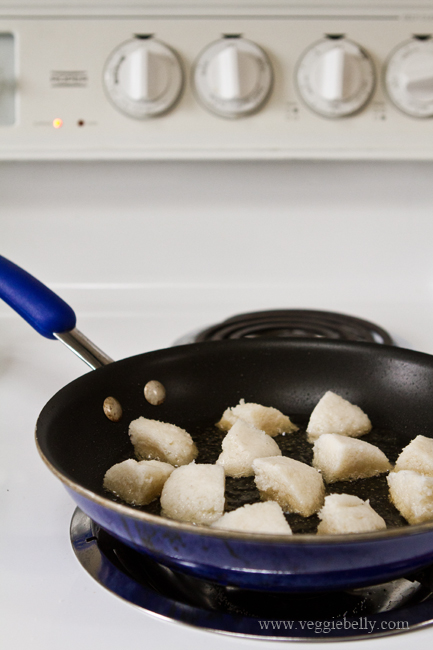
Quarter the idlis.

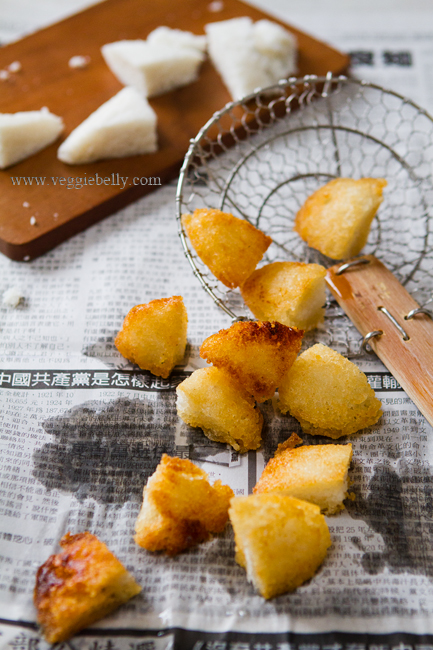
Pour enough oil in a heavy bottom or non stick skillet to coat the bottom. Shallow fry the idlis on medium high heat till one side is lightly golden. Gently flip the idli pieces and cook till the other sides is golden.

Make sure the oil is hot enough. When you put the idlis in the oil, they must immediately sizzle. If they dont, your oil is not hot enough and the idlis will become too oily. The trick to frying idlis so that they are crisp and golden on the outside, but fluffy on the inside is to use hot oil and fry them quickly.

Drain idlis on several layers of paper towels. Dab the fried idlis gently to take out the oil.

Sprinkle salt over the hot idlis.

Place them in a bowl, add the tamarind chutney and toss gently.

Arrange the idli chat on a serving dish and sprinkle sev on top. If you wish, also use a few of the below garnishes.

Optional garnishes
A sprinkle of chaat masala
Chopped cilantro
Chopped mint
Pomegranate seeds
Chopped tomatoes
Chopped red onion
Chopped cucumber
Roasted peanuts

************************************************************************************* 

A chance to win THREE complete Indian Recipe Kits from Veena’s Market!

Kits include all the spices, rice, and recipe instructions. Veena’s Market starts with the best quality spices, organic where available, and hand crafts each blend. The rice is certified Basmati rice from the foothills of the Himalayas.

The kits include the whole and blended spices, rice and a tested recipe. Since you get all the difficult-to-find ingredients, all you have to buy from your neighborhood grocery store or farmer’s market are the vegetables and other easy-to-find ingredients.

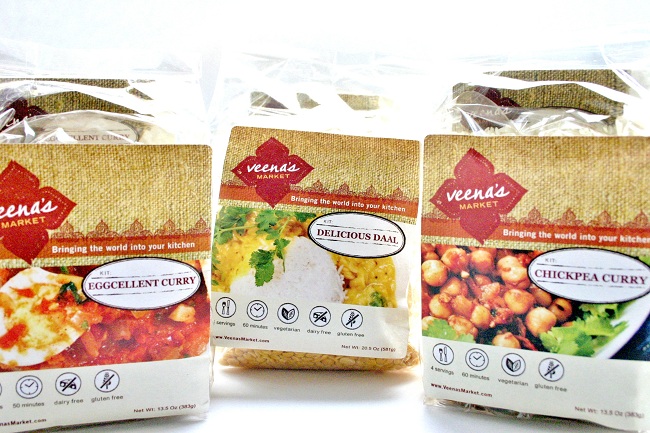
One randomly picked lucky winner will receive three Indian recipe kits from Veena’s Market - Eggcellent Curry, Delicious Daal and Chickpea Curry.

How to enter the giveaway

‘Like’ Veggie Belly on Facebook
Follow me on Twitter
Subscribe to my RSS feed

Do one or more of the above. Then come back here, post a comment and let me know that you have.

If you are already following me through facebook, twitter or RSS feed, just leave a comment telling me so and you are entered in the giveaway!

Giveaway ends Monday, November 21st 2011, 9pm PST.  One random winner will be picked. US residents only.


Thenga Manga Pattani Sundal Recipe

A Guest Post for Shulie of Food Wanderings

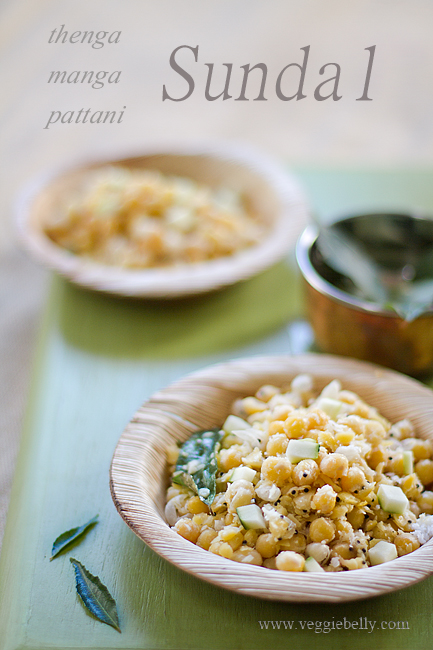
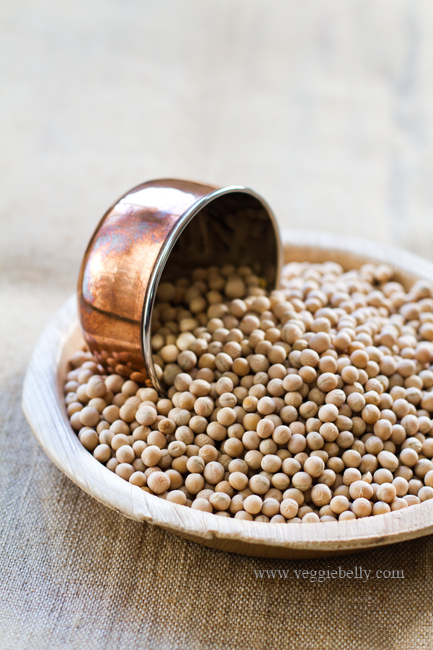
Like me, if you are from the state of Tamil Nadu in India, you know the famous thenga manga pattani sundal you get on the beach in Madras. I see the city growing every time I visit – the buildings get taller, and the cars get fancier. But one thing remains the same – the thenga (coconut) manga (mango) pattani (peas) sundal on the beach. Young boys sell these from huge stainless steel buckets. I hope the tradition of beach goers buying a newspaper bundle of thenga manga pattani sundal on Marina beach never goes away.

For a recipe for this easy sundal, head over to my friend Shulie’s blog, read my guest post there and follow her on twitter.

Red Moong and Butternut Squash Eriserry Recipe – a Guest Post by Rose of Magpies Recipes

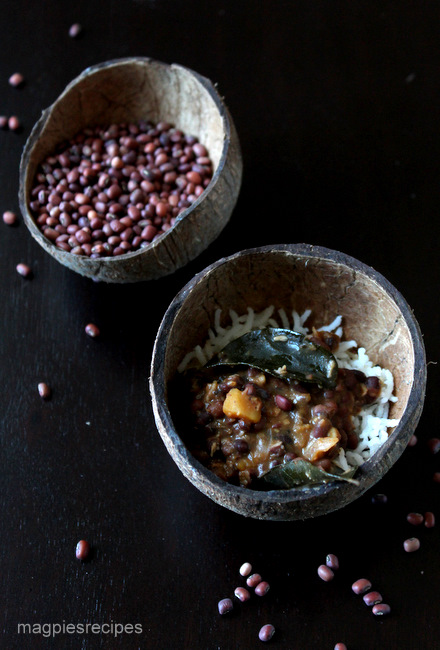
Greetings from the windy city! I am on a cross country road trip right now (posts and pictures coming soon!) and have stopped in Chicago for a day. I have enlisted some of my favorite bloggers to bring you their recipes, while I’m driving 3,000 miles cross country! The first post in my guest post series comes from Rose of Magpies Recipes. Rose is from the state of Kerala, and her blog is full of Kerala recipes cooked with love. I am a huge fan of malayali cooking, and this red moong and butternut squash eriserry (a curry with coconut) is one of my favorites. Take it away Rose!


I am a huge fan of Sala’s gorgeous photographs and wonderful writing as much as I am her warm wonderful personality. When I heard that she was going on a cross country road trip and was wanting guest posts for her awesome blog Veggie Belly,  I sent off a mail to her saying I would love to guest post for her lovely blog, although I have only a few days of packing left to do to head off to India myself! Yes am so excited and just cannot wait to be  home. Am especially longing to introduce my little monkey to my grandmother who is just waiting to meet her first great-grand son!

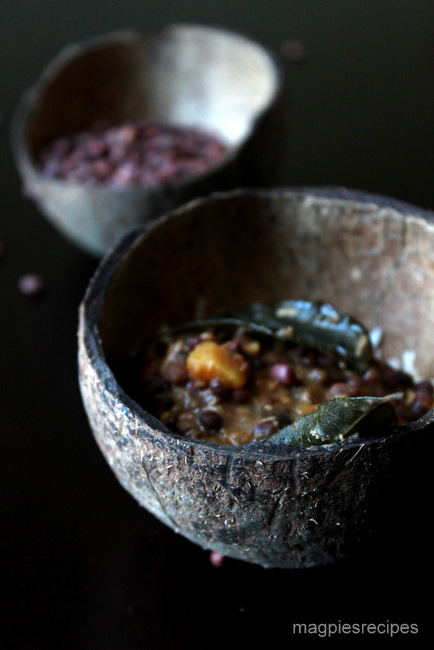
I was thrilled when Sala very kindly said she would love if I did. Thank you Sala! I hope you are enjoying your trip. Since Sala loves Kerala food, I am sharing one of my favourite everyday Kerala dishes, Red Moong and Butternut Squash in Coconut curry (Van Payar Mathanga Eriserry). It is a simple yet comforting and delicious. And perfect for the transition to the fall season, although here in California we still have a few weeks of intense summer left!

While I come from a Syrian Christian family of big meat eaters I also love my veggies and lentils and am married to a lentil lover as well. T can go for weeks on just cherupayar or dal and for everyday eating we are most happy with such simple fare.

Eriserry is a typical Kerala lentil dish and is often part of the Onam Sadhya or harvest festival that happens in the month of September. In Kerala it is usually made with a variety of pumpkin available there, although here I make it with squash or even sweet potatoes. Traditionally fresh coconut is ground into a paste but I use the convenient frozen shredded coconut that is easily available in most Indian grocery stores here. Of course there is a difference in taste but this makes it a very easy dish to make.

Red Moong and Butternut Squash Eriserry Recipe (Van Payar Mathanga Eriserry)

serves 4-6

Ingredients
1 cup dry red moong beans or cow peas  (van payar)
2 cups butternut quash peeled and chopped (you can also use sweet potatoes. But mathanga or Indian pumpkin is traditional)
1-2 tablespoons coconut oil or canola oil
1/2 teaspoon mustard seeds
1/2 teaspoon cumin seeds
1/4 teaspoon turmeric powder
1 teaspoon dried chilli flakes or 3/4 tsp chilli powder-3/4
4-5 curry leaves
1 medium onion, chopped
2-4 cloves garlic, sliced thin (optional)
1 cup coconut Milk
1/4 cup shredded coconut. Do not substitute desiccated coconut 
Salt to taste

Method
Wash the red moong beans or cow peas and leave to soak in water while you prepare the rest of the ingredients. You can also soak them overnight so that they cook faster.

Pressure cook the beans with 2.5 cups of water and salt until they start to become soft ( about 1 whistle and 7 mins on simmer). Once the pressure has released, open the pressure cooker and add the squash and cook for about 2 more whistles until the beans are soft and the squash is fork tender.

If you don’t have a pressure cooker, you can just cook beans and squash in a deep pot instead, but this will take longer.

Meanwhile in a seperate pan or skillet heat the oil and add the mustard seeds and cumin seeds and let them splutter
Now add the turmeric powder, chilli flakes and curry leaves and the chopped onion and garlic if using and stir occasionally until the onions are translucent and starting to turn brown.

Add the shredded coconut and saute until the coconut turns lightly golden.

Add this to the cooked beans and stir well to combine. Heat and let it come to a boil for about 5 mins. Reduce the heat to low and add the coconut milk and let it simmer for about 5 mins. Taste to check the salt and add more if required. Do not let it come to a boil after adding the coconut milk as the coconut milk will curdle.

Serve hot with rice, fried pappadam and pickle. For extra points, serve some sweet payasam for dessert!

Sweet Potato Samosa Pops

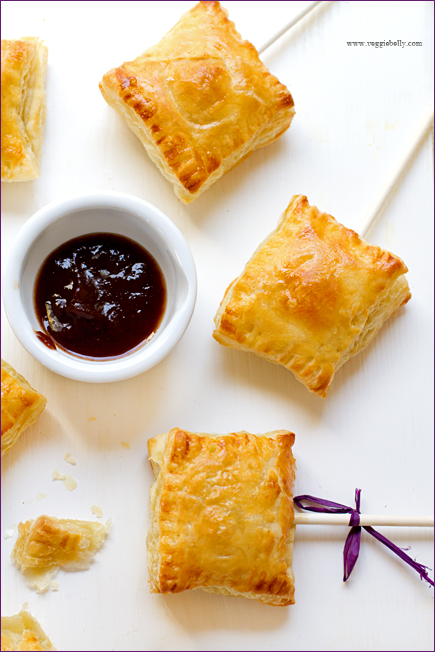
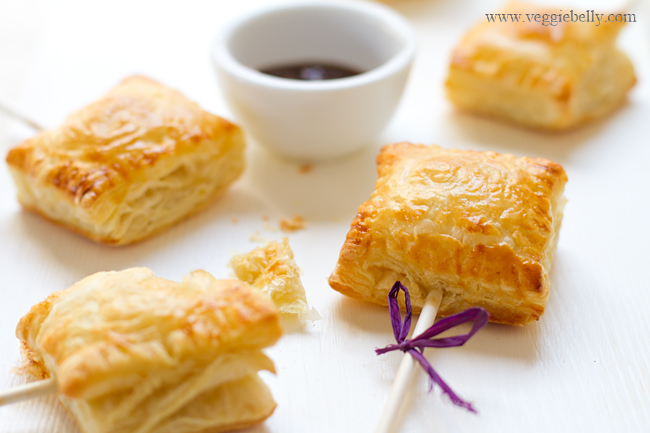
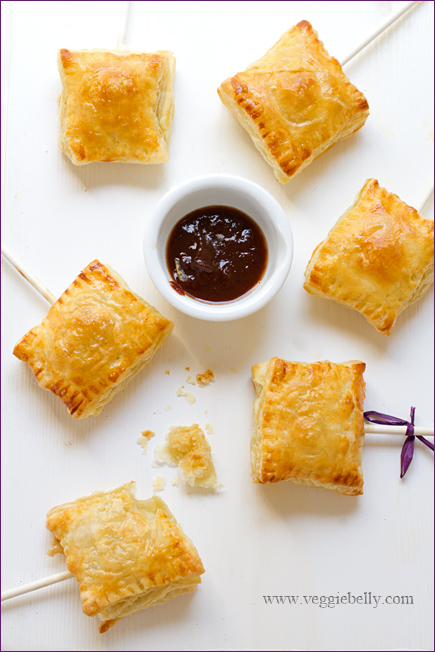
It seems like pops (food on sticks) are every where. Starbucks recently came out with cake pops. And the amazingly talented Bakerella has made cake pops into an art form . I’m jumping on the pop band wagon with this savory sweet potato samosa pops recipe! Yay! for samosa on a stick!

Im modernizing the Indian samosa by using sweet potato, making it mini sized, and putting on a lollipop stick.

You could also use this recipe for making regular potato samosas, green pea samosa, or pumpkin samosa. Whatever samosa filling you use, make sure you dont over stuff the puff pastry. Also make sure your lollipop sticks are oven-safe before baking! 

I use puff pastry because it’s so delicious and easy (and its vegan). You could ofcourse use your favorite samosa shell recipe if you have one.

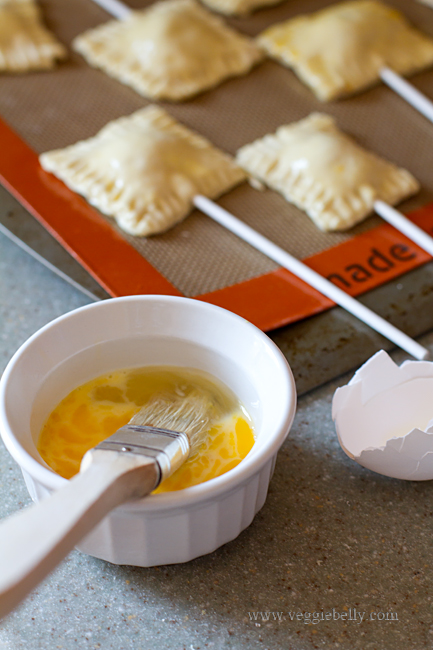
An egg wash will make the surface of the samosa pops beautifully golden. Vegans can leave out this step and still get great tasting samosas.

I serve samosa pops with the same sauces one would use for regular samosas – tamarind chutney and mint chutney. This recipe goes to the Chez Cayenne’s House Favorites: Vegan event.

Sweet Potato Samosa Pops Recipe

Makes 20 pops

1 large Sweet potato (substitute with regular potato or ¾ cup peeled, cooked butternut squash or pumpkin)
1 tablespoon vegetable oil
¼ teaspoon cumin seeds
1 small onion, finely chopped
1/2 tablespoon minced garlic
½ tablespoon minced ginger
¼ teaspoon turmeric powder
¼ teaspoon, or to taste red chile powder
¼ teaspoon coriander powder
¼ teaspoon garam masala
1/8 teaspoon aam choor or mango powder (substitute with 1/2 teaspoon lime juice)
1 tablespoon chopped cilantro
Salt
2 sheets of puff pastry, thawed for about 30 minutes.
1 egg (vegans leave this out)
1 tablespoon milk (vegans leave this out)

20 six inch lollipop sticks (I used ‘Candymaker’ brand; it is oven-safe)

Pre heat oven to 400f

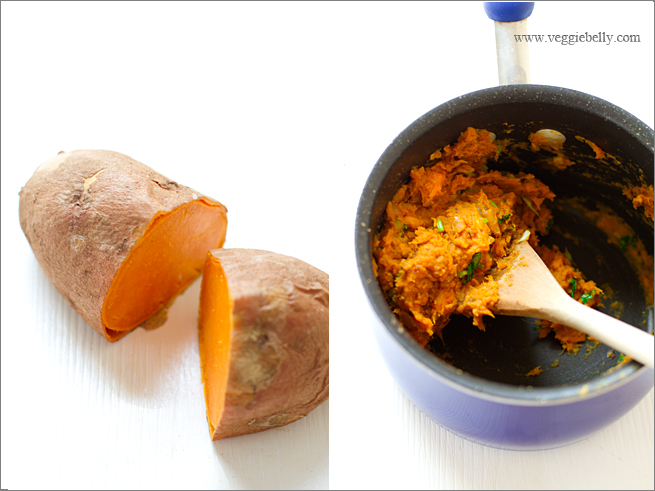
Wrap the sweet potato in a paper towel and microwave on high for about 4 minutes or till the sweet potato is cooked through. When it is cool enough to handle, peel the skin and lightly mash.This is the easiest way to cook and prepare a sweet potato for this recipe. Alternatively, you could peel, cube, and boil the sweet potato in water till tender. You need about 3/4th cup of cooked and peeled sweet potato.

While the sweet potato is cooking, heat the oil in a medium sauce pan. Add cumin seeds. When they start to sizzle, add the chooped onion and cook on medium heat till onions are lightly browned. Then add the ginger and garlic and cook for about a minute. Add turmeric, chilli, coriander powders, garam masala, and aam choor. Stir for about 30 seconds, taking care not to burn the spice powders. Turn off heat. Add the mashed sweet potato, cilantro and salt. Mix well. Taste and adjust salt and seasonings.

Lay out the thawed puff pastry on a clean work top. Measure out 2 inch squares. Using a sharp knife, cut the puff pastry sheets into 2 inch squares. You should have about 40 squares.

(If you have any odd sized bits of puff pastry left over after cutting, simply bake the scraps without filling, along with the rest of the samosas. You can snack on these!)

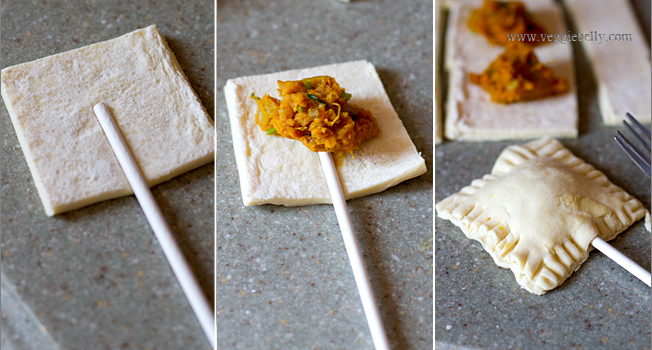
Press a lollipop stick onto the center of 20 of the squares. Mound 1 teaspoon of the sweet potato filling on top of the squares with the lollipop sticks. Don’t over fill.

Cover these with the other 20 squares of puff pastry. Gently stretch them a little so they fit over the filling mound. Using the tines of a small fork, press down and seal all the edges. Make sure they are sealed well. (Look at photos above).

(If you wish to freeze the samosa pops, you can do so at this point. Lay out the samosa pops on a single layer and place in the freezer. Once they are frozen hard, remove the samosa pops and put them in a zip lock bag, and return to the freezer for future use.)

Lay the samosa pops on a baking sheet lined with parchment paper or a silicone baking mat. Whisk together the egg and milk in a small bowl. Brush this egg wash over the samosas.

Bake in a 400f oven, for 15 minutes or till puff pastry is golden.

Serve with store bought tamarind chutney.

Related Posts with Thumbnails