Cauliflower Hummus

cauliflower tahini hummus dip
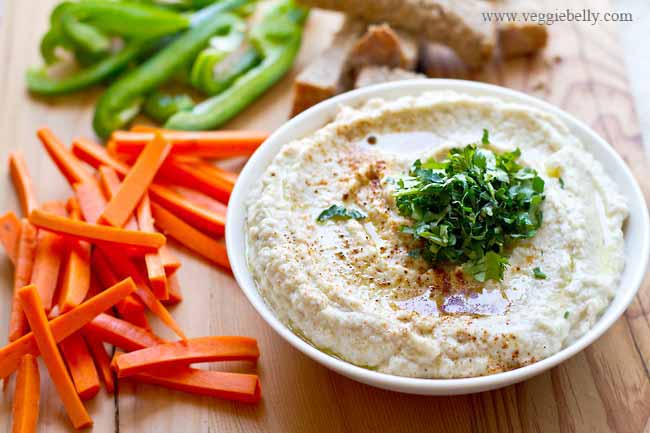
This creamy, yet light cauliflower tahini dip is like a hummus, except it uses cauliflower instead of chickpeas! I spice the dip with some ground cumin, coriander and lemon juice and then garnish it with a big sprinkling of chopped cilantro. This is a great, healthy dip to enjoy with vegetables and some bread or crackers.
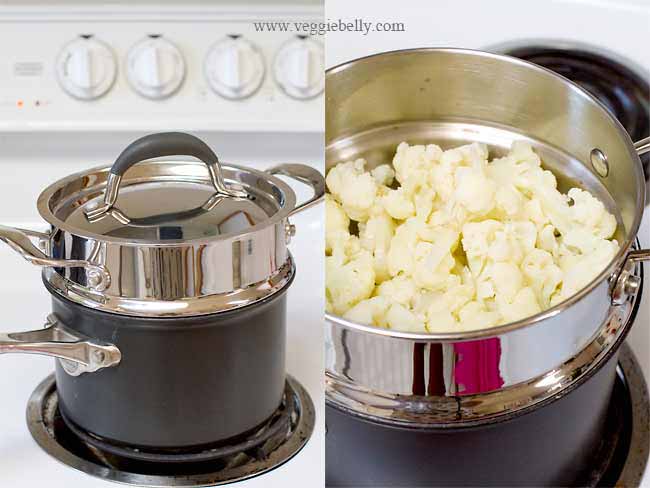
steamed cauliflower for dip
I like to steam the cauliflower, but you can also toss it in olive oil and roast the cauliflower before making this dip. Serve this hummus-style healthy cauliflower dip with vegetable crudités (carrot, celery, bell peppers etc) and warmed pita bread or crackers.

I use who coriander and cumin seeds, that I gently roast on a skillet and then powder in a spice grinder. There is nothing like freshly ground spices to make a hummus (or anything other dish) flavorful! But if you want a short cut, simple use ground coriander and ground cumin instead.
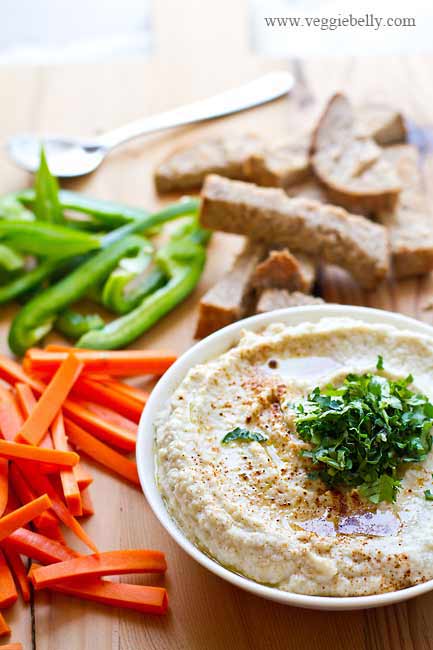
cauliflower tahini hummus dip

Cauliflower Hummus with Tahini Recipe

Serves 6 as a dip

Ingredients
1 lb cauliflower florets (about 1 small head of cauliflower)
1 tablespoon lemon juice
1 teaspoon coriander seeds. Substitute with ground coriander.
1 teaspoon cumin seeds. Substitute with ground cumin.
1/4 cup tahini
1-2 cloves of garlic, peeled
2 tablespoons olive oil
salt
2 tablespoon finely chopped cilantro or parsley

Method
1.Place the cauliflower florets in a steamer apparatus, cover and steam until the florets are very soft, about 15 minutes.
If you don’t have a steamer, place the cauliflower florets, along with 1/2 cup water in a saucepan. Bring to a boil. Then reduce heat to low, cover and simmer the cauliflower until it is very soft, about 10 minutes. If all the water evaporates before the cauliflower is soft, add 1/4 cup water at a time. If there is any water remaining in the pan at the end, remove the lid, crank up the heat to medium-high and let it boil away. Make sure the cauliflower is not water logged or too wet before proceeding

2.While the cauliflower is steaming, work on the spices. Place the coriander and cumin seeds in a small skillet. Toast on medium-low heat, shaking often until the spices are lightly golden and fragrant, about 5 minutes. Let the spices cool a little, then powder them in a food processor or mortar and pestle. If you are using ground coriander and cumin, skip this step and go to step 3.

3. Place the steamed, cooled cauliflower, and all other ingredients except the cilantro or parsley in a food processor, and blend into a smooth puree. If the dip is too thick, add water a few tablespoons at a time until your desired consistency is reached. If you want the hummus more creamy add more tahini at this point. Garnish with chopped cilantro or parsley.

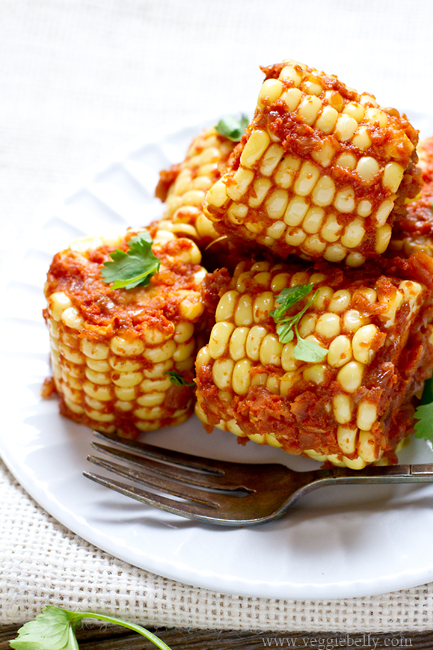
Masala Coated Corn Cobs

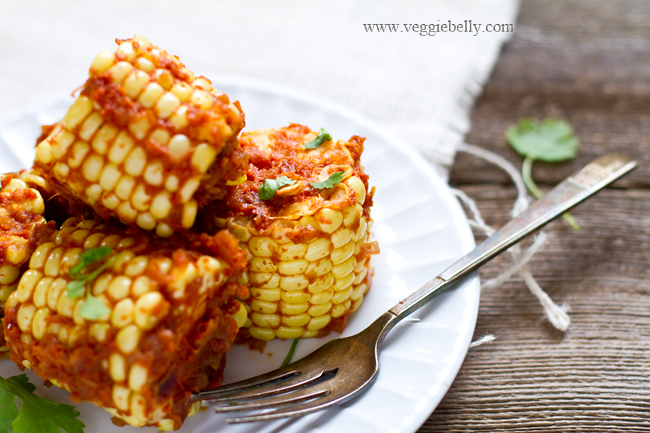
masala coated corn cobs
I look forward to the fresh, sweet corn cobs in the summer. I usually roast them on a grill and slather them with butter and chili powder or with miso butter. But this time, I wanted something different – like a corn cob curry. So I decided to make a masala paste with browned onions, tomato, cumin, coriander and chili powder and then toss the corn cobs in it. This recipe will be a perfect summer accompaniment to an Indian meal.
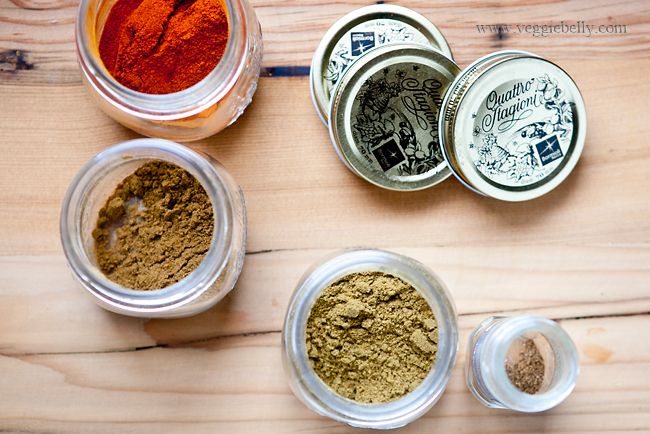
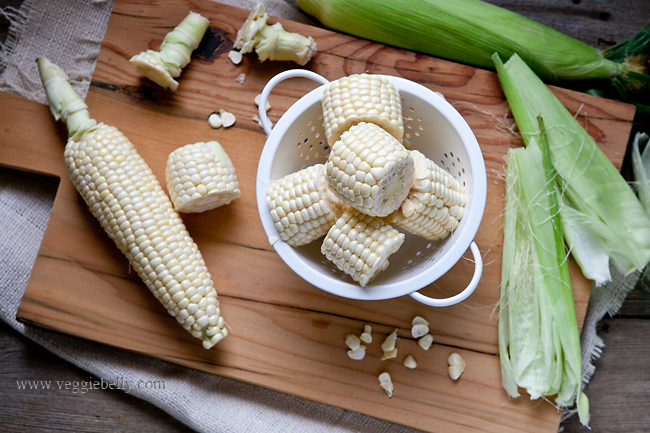
spices for corn cob masala corn cobs for corn cob masala Use a sharp knife to cut the corn cobs into chunks, and be very careful that the corn cob doesn’t slip when you are cutting it. I like to cut it into large chunks. But if you prefer smaller corn cob chunks, go ahead and cut it smaller. But however you cut it, this corn cob masala is best eaten with your hands!
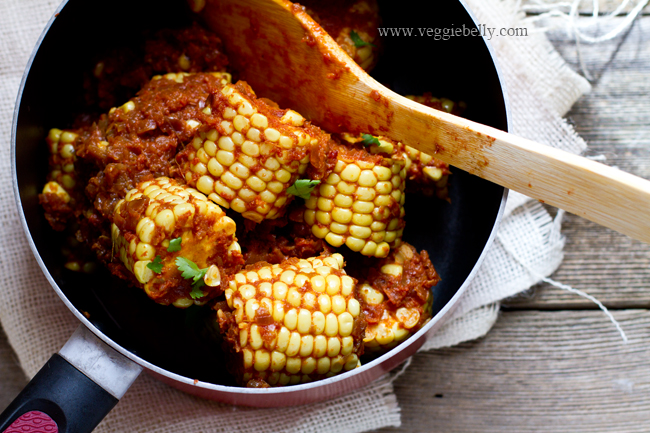
corn cob masala in a pot Serve this masala corn cob as an accompaniment to an Indian meal.
I suggest rice or roti, dal and raita.
masala coated corn cobs

Masala Coated Corn Cobs

Serves 4-6 as an accompaniment

Ingredients
4 roma tomatoes
4 tablespoons oil
1 small red onion, minced
3/4 tablespoon ginger paste, or grated ginger
3/4 tablespoon garlic paste, or grated garlic
1/4 of a cinnamon stick, optional
1 small bay leaf, optional
1 teaspoon garam masala
2 teaspoons ground coriander
1 teaspoon chili powder or according to taste
3 corn cobs

Method
1. Core the tomatoes and puree them along with 1/2 cup water. Set aside.
2. Heat the oil in a large sauce pan. Add the minced onion and cook on medium heat until golden brown, about 15 minutes. Now add the ginger and garlic pastes, and cook until fragrant, about 2 minutes.
3.Add the cinnamon stick, and bay leaf if using and cook for another minute.
4. Now sprinkle the garam masala, coriander powder and chili powder. Stir for 10 seconds. Pour in the pureed tomatoes and simmer for 5 minutes.
5. Remove the husk and silk from the corn cobs. Trim off the top and bottom ends. Using a sharp knife, carefully cut each corn cob into 3 or 4 chunks.
6. Add the cut corn cobs, salt and 1/2 cup water into the sauce pan. Stir well. Let the corn cobs cook, stirring occasionally, until all the water boils away and the masala paste coats the corn cobs. Fish out the bay leaf and cinnamon stick. Pinch off a corn kernel and test it for doneness. If it isn’t fully cooked, add a little more water and continue cooking until the corn kernel are cooke through.
Serve hot with rice or rotis.

8 Ingredient Tofu Mushroom Lettuce Wraps

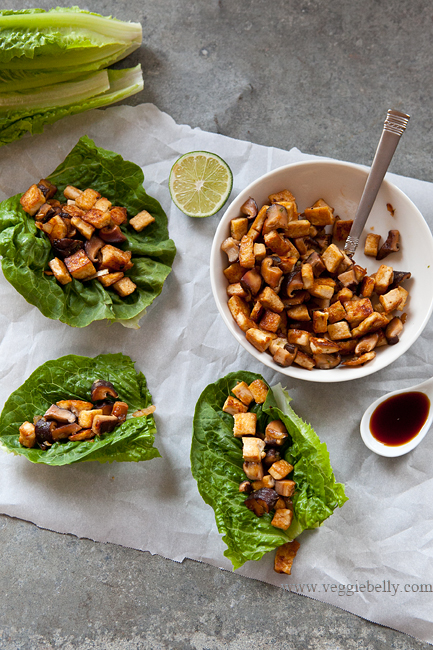
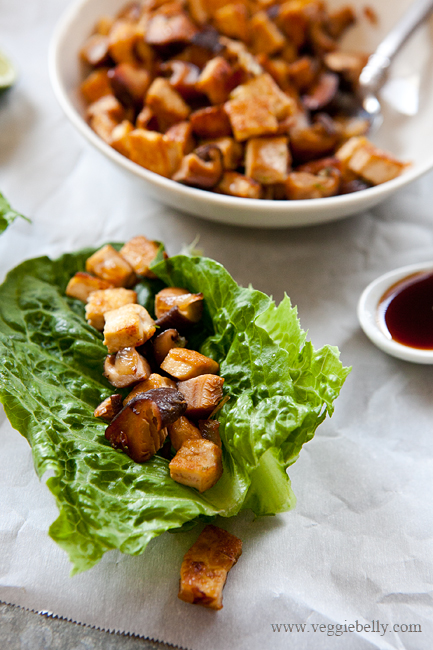
tofu mushroom lettuce wrap I can’t believe I haven’t blogged a vegetarian lettuce wrap recipe up until now! Its one of my go to quick and easy dishes. And now that the weather is getting warmer, I crave these light, crisp lettuce “boats” filled with a zesty tofu mushroom filling. And did I mention this is just an 8 ingredient recipe? Thats right, only 8 ingredients (not counting the oil, because everyone already has oil, right?)! And you probably already have all the ingredients for these lettuce wraps in your pantry!
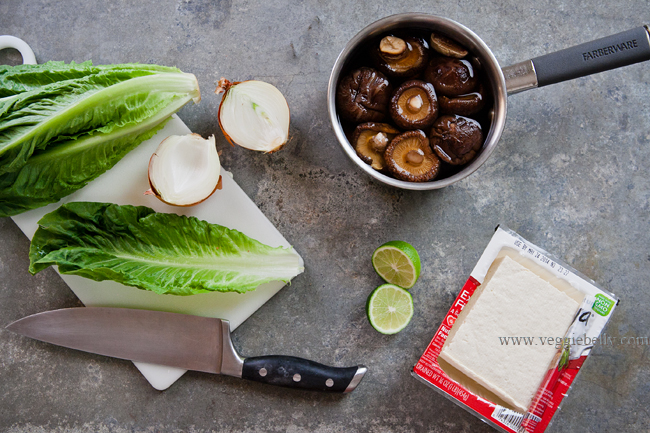
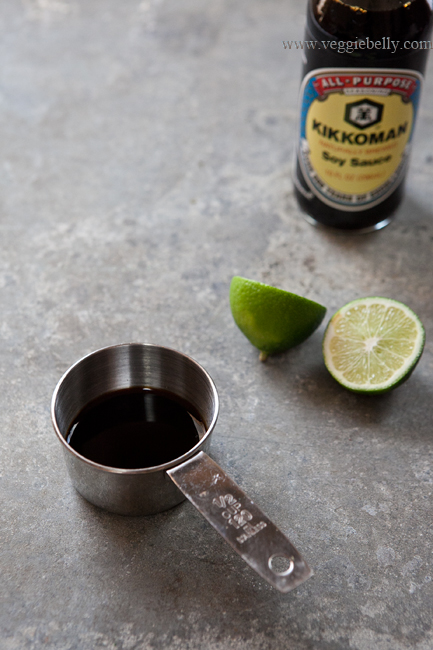
ingredients for vegetarian lettuce wrap cubed tofu soy sauce suteed tofu for lettuce wrap

The dipping sauce for this recipe is simple. If you want it spicier add some sriracha or wasabi. For a creamier dipping sauce add a spoon or two of peanut butter to the recipe below.

You can easily make the tofu mushroom filling ahead of time and re-heat it when you are ready to eat. Cut the tofu and the mushrooms the same size so it looks pretty!

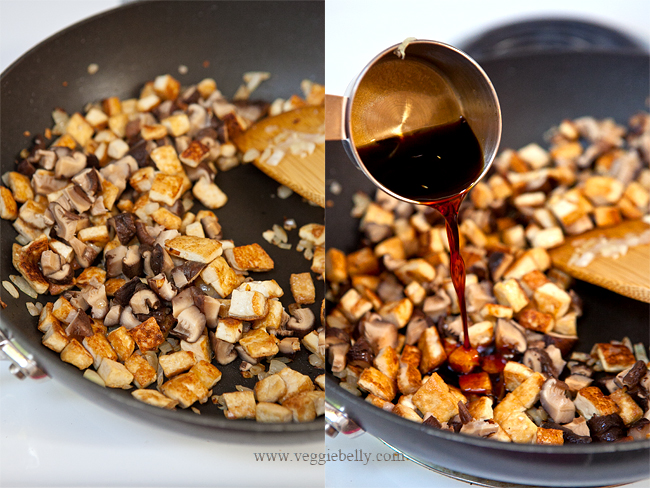
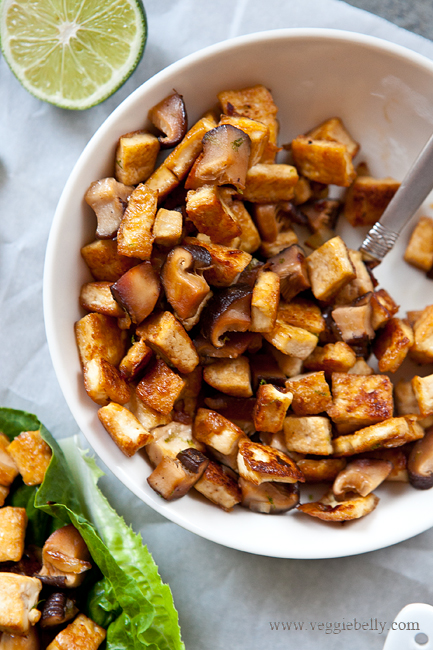
sauteed tofu and mushrooms for lettuce wrap Tips
- Make sure you get the freshest romaine lettuce hearts you can find. (A romaine heart is the entire lettuce, with the leaves attached to the core). Keep in mind, the inner leaves are usually more fresh and crisp compared to the outer ones. If your romaine heart is looking a little limp on the outside, peel away the outer leaves and chances are, you will find the inner leaves are still fresh.
- I like using dried, rehydrated shiitake mushrooms for this recipe. If you don’t have dried shiitakes, use button mushrooms instead. But they will tend to release liquid while cooking. If button mushrooms release liquid while cooking, increase heat to high and let the liquid evaporate.
- If you are using shiitakes, you can soak and squeeze them ahead of time and store the rehydrated mushrooms in the fridge.
- I like thin, light dipping sauces for lettuce wraps. But if you like yours thicker or richer, add 1-2 tablespoons of peanut butter to my dipping sauce recipe below.

8 Ingredient Tofu Mushroom Lettuce Wraps

serves 3-4 as an appetizer
Ingredients
8 dried Shiitake mushrooms. Substitute with 12 button mushrooms
1 lb drained extra firm tofu
3 tablespoons oil
1/2 medium onion, diced
3 tablespoons Soy sauce
1/2 tablespoon Sugar
1/2 tablespoon lime juice or vinegar
1/2 tablespoon Sriracha, or according to taste
zest of half a lime, optional
12 crisp Romaine leaves

For the dipping sauce
4 tablespoon soy sauce
2 tablespoon lime juice or vinegar
2 tablespoon water
1 1/2 tablespoon sugar

Method
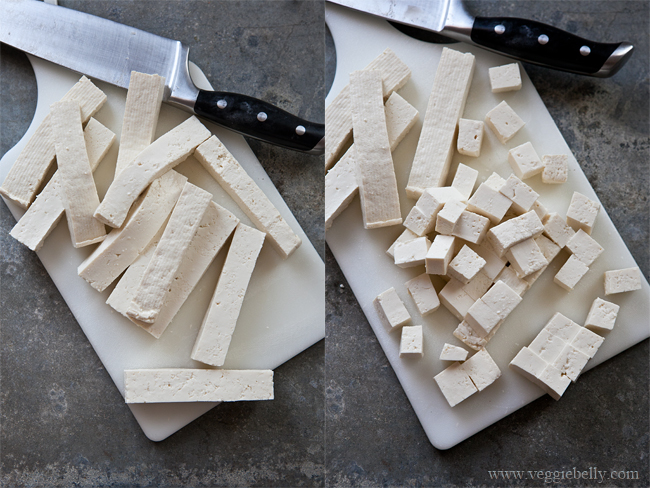
1. Drain the tofu and pat it dry. Cut the tofu length wise into 4. Then carefully turn the block over on its side and cut into 4 again. You will now have 16 strips. Cut the strips into 1/4th inch cubes.

2. If using dried mushrooms, rehydrate them according to package directions. When the mushrooms are soft, drain them (save the liquid for soups!), squeeze the excess liquid, and chop them about the same size as the tofu cubes. If using button mushrooms, chop them the same size as the tofu cubes.

3. In a cup, whisk together the soy sauce, sugar, sriracha and lime juice or vinegar. Set aside.

3. Heat oil in a large wok or large skillet. Throw in the tofu cubes. Try to keep them in a single layer. If all the tofu doesn’t fit in a single layer, cook them in batches. If the tofu cubes are too crowded they will stew instead of browning.

4. Cook the tofu undisturbed on medium-high heat till the bottom side is golden brown. Carefully flip the tofu cubes over using a spatula, and cook undisturbed till the other side is golden brown.

5. When all the tofu is browned, add the onion and mushrooms to the skillet. Saute on high heat till the onion is translucent, about 2 minutes. If you are using button mushrooms and they let out liquid, just keep cooking on high heat till all the liquid evaporates.

6. Pour in the soy sauce mixture. Cook till all the liquid has been absorbed, about 30 seconds. Sprinkle lime zest, if using, on top.

8. To make the dipping sauce, whisk all ingredients together till the sugar dissolves.

9. To serve, cut each romaine leaf into half. Place one half on top of the other to form a cup. Repeat with all lettuce leaves. Serve the tofu mushroom saute in a bowl, along with the dipping sauce.

Tomato Coconut Stew. Remembering my grandmother through her favorite recipes.

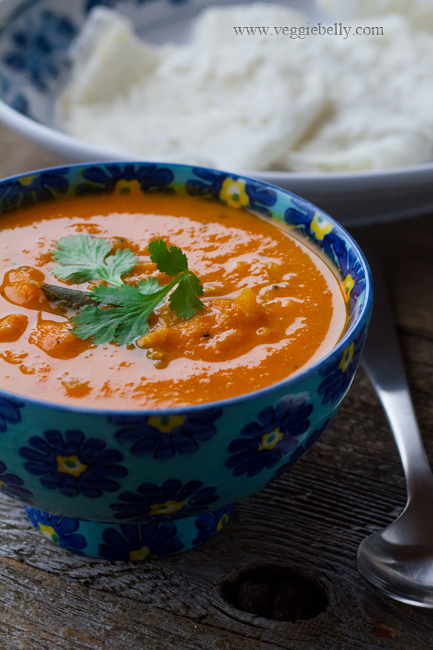
My paternal grandmother passed away a year ago this month. My grandmother raised me, and taught me a great deal. In her memory, I will be posting a series of her favorite recipes. The first in the series is this tomato stew with coconut milk. My grandmother relished this dish, often eating it with steaming hot idlis for dinner.

I’ve already written a little about my grandmother and what an accomplished woman she was in this post. In this series, I will share more memories of her through her favorite recipes. My grandmother was far ahead of her times. She pursued higher education, a career and a public life – something very few Indian women did during her time. She was a PhD in philosophy and literature, a public speaker, author of many books and an educationalist. And she spent a life time championing womens’ education in India.

Not only was she a career woman, she also enjoyed hosting and entertaining guests in her home..

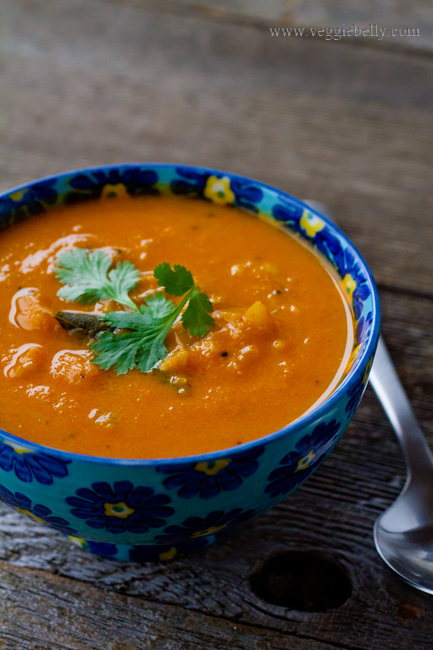
Tomato stew with coconut milk - one of my grandmother's favorites.

My grandmother playing with my iPhone on Pongal day 2013. This was the last picture taken of her.

Diwali, 2002

Getting ready for bedtime, 1982

My grandmother’s dinner parties were legendary and her hospitality impeccable. Although she never took an interest in cooking, she had a keen palate and a great love of hosting and feeding people. She would give her cook, Mariappan detailed instructions before the dinner parties. She would have the coconut trees in her lawn decorated with strings of light bulbs. She took care of every detail – the decoration, neatly folded napkins, extra large sized silver plates, polished cutlery, and a lovingly curated menu.

A typical menu made by the talented cook Mariappan would include tomato rasam and rice wafers for dipping, green pea rice scented with cumin, plump vegetable cutlets coated with golden bread crumbs, fried puris, fragrant garlicky cauliflower masala and delicate sweet polis made with lentils, cardamom and drenched in ghee. As a child, I looked forward to those balmy evenings when my grandmother would regale her guests, laughing, quoting poetry, and coaxing them to eat more. Nobody ever went home hungry after visiting my grandmothers house!

Even in her passing she found an opportunity to entertain people. Let me explain. Where I come from in India, it is customary to host a lunch in the honor of the deceased a few days after the funeral. My grandmother must have known intuitively that her death was near. So one week before her passing she wrote out the menu for the post funeral lunch, along with detailed instructions on how it should be served. Thats right, my grandmother made the menu and gave instructions for her own funeral lunch!

As per my grandmother’s wishes, my family organized a multi course lunch, with four desserts (she had quite the sweet tooth!) served on the largest, freshest banana leaves on the very same lawn where she had regally presided over dinner parties for fifty years. It was the best send off we could have given to a woman who was so passionate about food, people and life.

It is an honor to have been raised by a woman who was so intelligent, beautiful and exuberant. Her life was grand and her love was abundant. This post is the first in a series of recipes I will be posting as a tribute to my grandmother. These recipes have all been tried and tested over decades. Every single recipe I will be posting was a favorite of my grandmother’s. Each one brings back a flood of memories.

In creating these posts, I am filled with tremendous pride to have been part of this incredible woman’s life, and at the same time I am filled with great grief that she is no more.


Tomato Coconut Stew

serves about 4 as an accompaniment/curry

Ingredients
1 lb ripe tomatoes
1 tablespoon oil
1/4th teaspoon mustard seeds
1/4th teaspoon urad dal
1 small onion, minced
5 cloves garlic, chopped
6 curry leaves
1/2 teaspoon tumeric
1 teaspoon chili powder
1 cup coconut milk
1 tablespoon chopped cilantro

Method
1. Bring plenty of water to boil in a saucepan. Drop the tomatoes into the water. Let them boil till their skins blister, about 2 minutes. Then drain.
2. When tomatoes are cool enough to handle, peel and discard the skins. Then puree the tomatoes without any water. Set aside.
3. Heat oil in a medium saucepan. Add the urad dal, and mustard seeds.
4. When the mustard seeds pop, add the onion, garlic, curry leaves and cook for about 2 minutes.
5. Pour in the tomato puree, chili and turmeric powders, salt, and 1 cup water. Bring to a boil.
6. Then reduce heat, and cook on medium-low heat, uncovered, till the sauce becomes thick. About 15 minutes.
7. Add the coconut milk, stir, and turn off heat.
8. Garnish with cilantro. Serve with roti, idlis, dosa, or neer dosa.

My Go-To Vegetarian Gravy Recipe

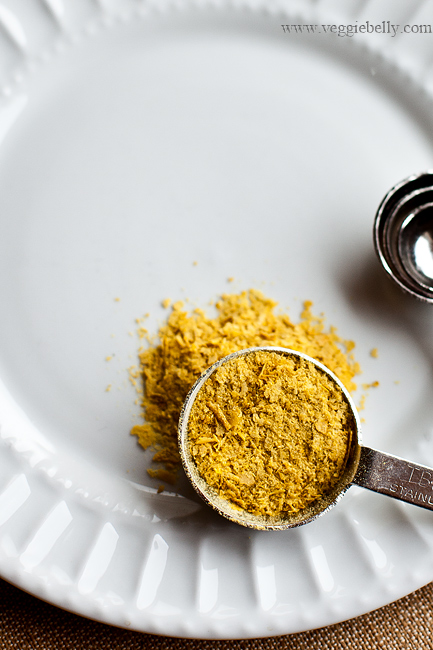
Nutritional yeast is the secret ingredient to this fast and easy vegetarian gravy recipe. Nutritional yeast is a dried and deactivated yeast that comes in flake and powder form. It has a deep umami taste and is a perfect flavor enhancer for vegetarian dishes. You can sprinkle it on popcorn, use it in soups, or in a vegetarian gravy like I have done today. You can buy nutritional yeast from the bulk section of the grocery store.

My other secret ingredient in this vegetarian gravy recipe is curry powder! I use my all time favorite S&B curry powder for my gravy. Its available in Asian markets and online.

Nutritional yeast flakes

Here are some recipes that you can make, to serve the vegetarian gravy with-
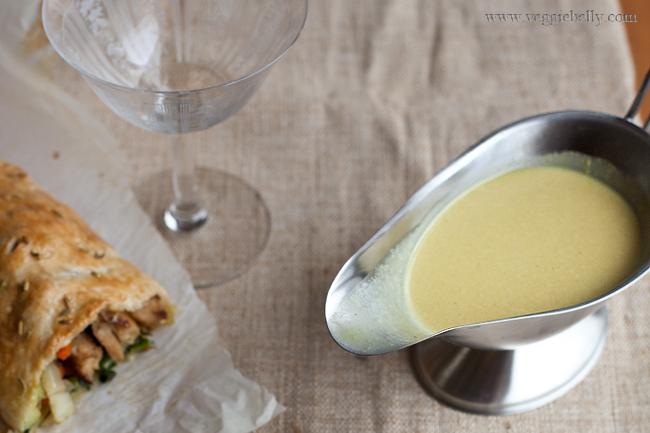
Thanksgiving Vegetarian Wellington
Baked Tofu Steaks
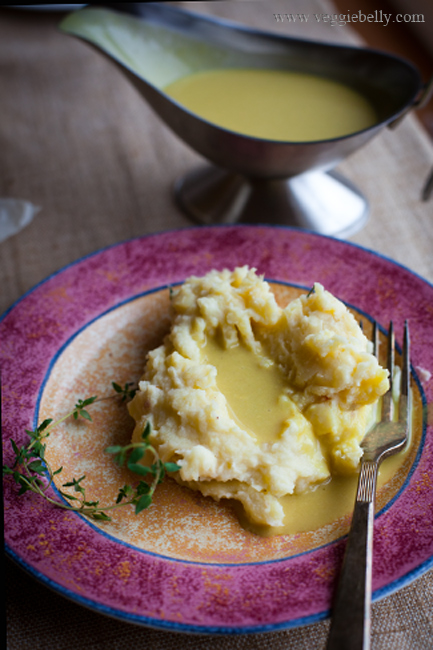
Kale and Goat Cheese Mashed Sweet Potatoes

Vegetarian Gravy Recipe

makes about 2 cups

Ingredients
1 tablespoon butter or olive oil
2 tablespoons flour
3 tablespoons nutritional yeast flakes
2 cups vegetable stock
1 teaspoon Dijon mustard
1/2 teaspoon or more curry powder. I recommend S&B curry powder
1/2 teaspoon soy sauce

Method
1. The heat the butter or oil in a small saucepan. Add the flour and nutritional yeast, and stir on medium-low heat for about a minute.
2. Then add all other ingredients and whisk constantly. Bring the gravy to a boil, while whisking and continue boiling for about a minute. Taste the gravy, and if needed add more curry powder for spice or more soy sauce for saltiness.
3. If the gravy gets lumpy, simply push it through a strainer or blend it in a blender. The gravy might thicken as it cools. If it gets too thick, thin it out with water or stock while re-heating.

Bread Upma Recipe

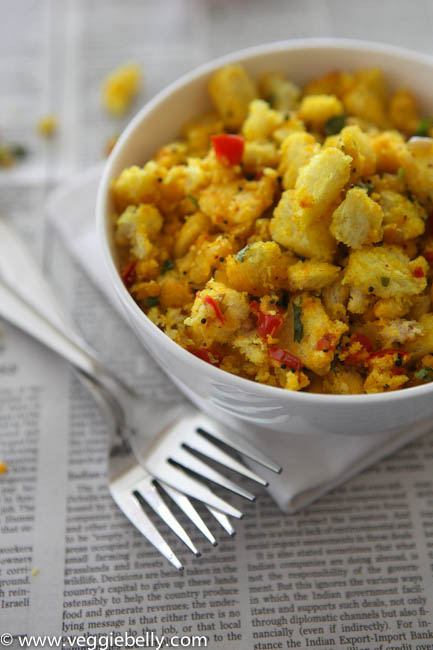
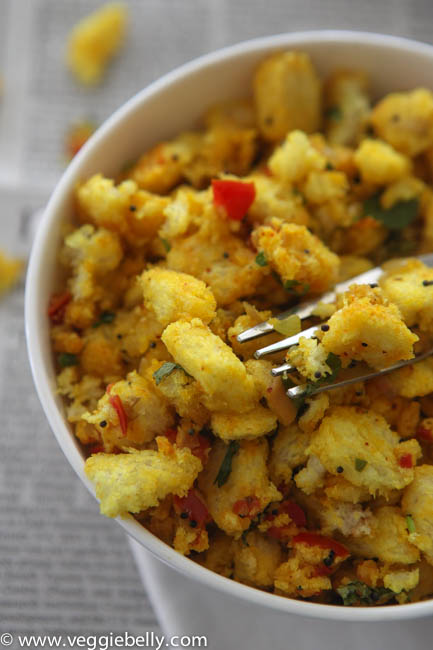
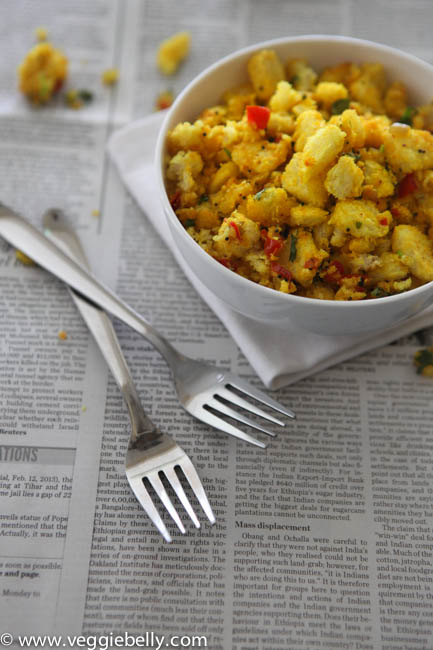
I’m very bad. I get midnight cravings for bread upma – a spiced, stir fried bread dish. Its very easy to make and there is always bread lying around that needs to be used up. So I can tip toe into the kitchen at midnight and quickly whip up this snack without waking up the husband (because I dont want to share my bread upma!).

Use white or brown bread. And if its slightly stale, thats fine too. This recipe is a great way to use up left over bread. If you find the upma is too dry (older breads will be drier), just sprinkle some water and toss to soften it.

Bread Upma Recipe

serves about 4 as a snack 

Ingredients
10 slices of bread, white or brown
4 tablespoons oil
1/4 teaspoon black mustard seeds
1/2 cup minced onion (1 small onion)
1/2 teaspoon minced ginger, optional
1 green chili, minced
1/2 teaspoon turmeric powder
1/2 teaspoon, or according to taste red chili powder
1 tomato deseeded and chopped
1 teaspoon lime juice
2 tablespoons chopped cilantro for garnish

Method
1. Cut off the crust of the bread. Discard the crust or save for making bread crumbs. This is optional, you can leave the crust on if you like. Cut the bread into cubes.

2. Heat oil in a large wok. Add the mustard seeds. When they pop, add the onion, ginger and green chili. Saute on medium heat till the onion is translucent.

3. Then add the turmeric and red chili powders. Stir for a few seconds.

4. Add in the bread cubes, tomato, lime juice and salt.

5. Stir gently till everything is evenly combined and the bread has absorbed all the spices and turned yellow. About 4 minutes,

6. Garnish with chopped cilantro.

Pumpkin Kootu Recipe

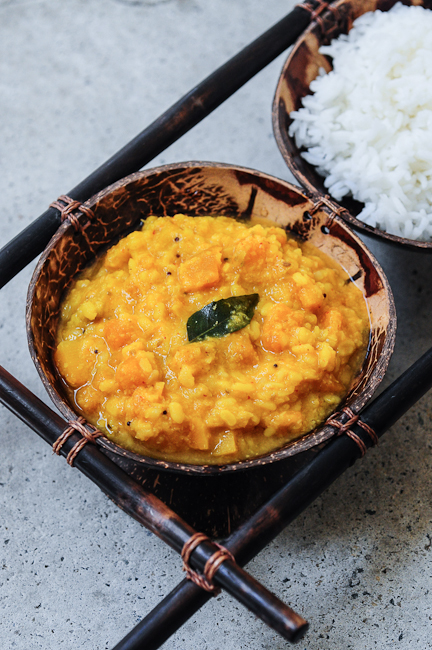
The very talented Nags of Edible Garden blog brings us this easy pumpkin kootu recipe today. A kootu is a side dish of vegetables cooked with lentils. And I cant think of anyone better than Nags to guest post about this traditional South Indian recipe. Her blog is full of everyday, fuss-free Indian recipes. Take it away Nags!

Hello everyone, I am Nags, the writer, cook, and photographer behind Edible Garden. I’ve been blogging for almost 6 years now but haven’t done very many guest posts (this is my 2nd, actually) so please raise a glass with me to Sala’s courage and trust!

It’s been over 7 years since I moved away from home and started cooking to feed myself, but I have only cooked with pumpkin about 2-3 times in this entire period. I can’t quite figure out why this is because pumpkin is a gorgeous vegetable by all means. It’s a lovely orange-yellow, cooks quickly, lends a mild sweetness to the dish, and is generally well-behaved and easy-going. Well, I can only hope I can make up for my rudeness by cooking with it more, so here’s a simple pumpkin kootu recipe to kickstart what I hope is a great relationship between me and the lovely pumpkin.

But before I go into the recipe, I must say what an honour it is to take up a small part of Veggie Belly. I’ve been in awe of Sala’s recipes and pictures since the day I set my eyes on this website. She has a lovely eye for details, props, colours and food photography. She’s also so very generous. I won a cookbook in a contest in Veggie Belly once but Sala sent me this entire package filled with goodies all the way from the US to Singapore.

Pumpkin Kootu Recipe

Serves 4

Ingredients
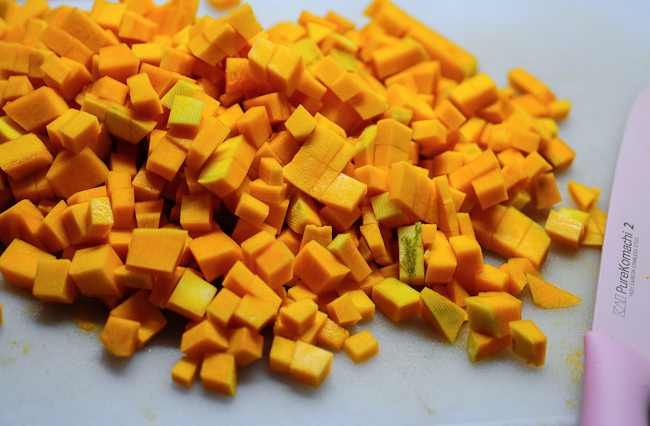
3 cups pumpkin (or kabocha or butternut squash), cut into small cubes.
1 cup yellow moong dal
¼ tsp turmeric powder
Salt
Curry leaves
Grind Together to a Paste
½ cup grated coconut
½ tsp red chilli powder
1 tsp cumin seeds
1 clove of garlic
2 shallots, optional
For Tempering
2 tsp oil
¼ tsp black mustard seeds
¼ tsp hing, optional

Method

  1. Add the pumpkin, dal, turmeric powder, salt and 4 cups water to a sauce pan and cook on low heat, covered, until the dal is soft and the pumpkin is very soft.
  2. Add the ground paste to the dal and stir well. If the mixture is too thick, add a bit more water but not too much. I usually wash the blender jar and add that water in which should be sufficient. Throw in the curry leaves. Cook the kootu for about 3 mins. Remove from heat.
  3. Heat oil for tempering in a skillet. Add the mustard seeds. When they pop, add the hing, if using. Add this to the prepared kootu. Adjust salt if required
  4. Serve with steamed white rice and any dry vegetable curry
  5. A variation of this kootu is to use channa dal instead of moong dal and green chillies instead of red chilli powder. Check out this Chow Chow Kootu, for instance.


Butter Roasted Masala Potatoes – My Guest Post for Indian Simmer

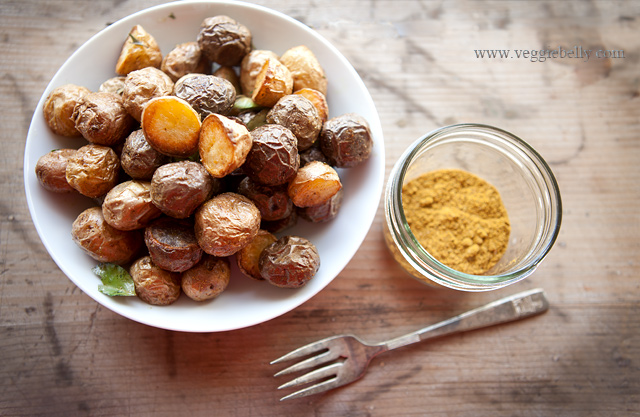
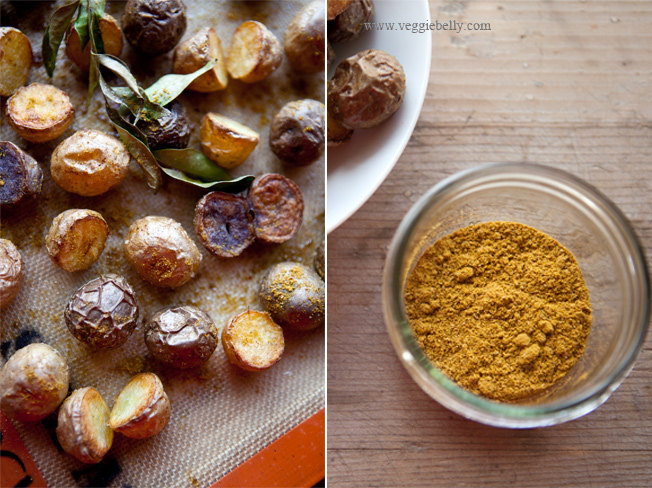
Baby potatoes + butter + curry powder = YUM, right?! Heres whats even better – this recipe is my guest post for the incredibly talented Prerna of Indian Simmer blog! Go over to her blog to see my recipe for these butter roasted masala potatoes. And make sure you hang around there and check out her mouth watering Indian recipes and gorgeous photography.

Prerna is a good friend, and I can tell you from first hand experience that her food is drool worthy! I still think of the rajma and paneer she fed me several months ago! For even more delicousness from Prerna, check out her brand new book, The Everything Indian Slow Cooker Cookbook

Related Posts with Thumbnails