An Amtrak Foodie Adventure and a Portobello French Dip Recipe

I’ve lived in America 11 years and up until a few months ago I hadn’t taken a train journey in this country. I’ve been on an amazing coast to coast road trip, I’ve visited about 25 states of this great country, but I’d never been on a train.

And then Amtrak called. They wanted to send me on a foodie adventure where I’d travel on Amtrak, and dine at the best restaurants at my destination. I said yes right away. And that’s how my first American train trip happened!

Read on for an account of my Amtrak adventure, and an amazing lunch at my destination, and a killer recipe from that restaurant!

Portland to Seattle on Amtrak

Amtrak said I could pretty much travel to any destination I wanted. The decision was easy. I picked Seattle. Seattle is an easy 4 hour train ride from Portland. Perfect for a quick weekend trip. Besides, I love the food scene in Seattle, which made it the perfect choice for my little foodie train adventure.

Now, we cant visit a city as vibrant and picturesque as Seattle without some special camera equipment, can we?! I’d always wanted to try out Lens Baby lenses (a company  based right here in my wonderful hometown of Portland, OR). So I rented a few from Pro Photo Supply in Portland to take on my trip to Seattle. I got the Sweet 35, Edge 80, and Fish eye. I loved the Sweet 35 and Edge 80 and used them a lot on the trip. Really fun effects, as you can see below.


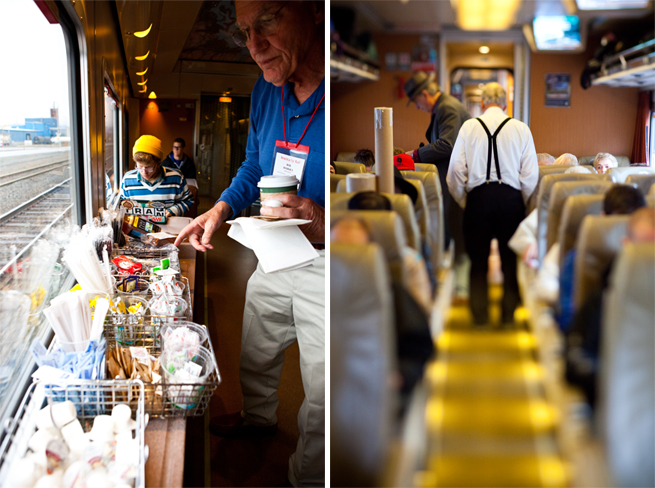


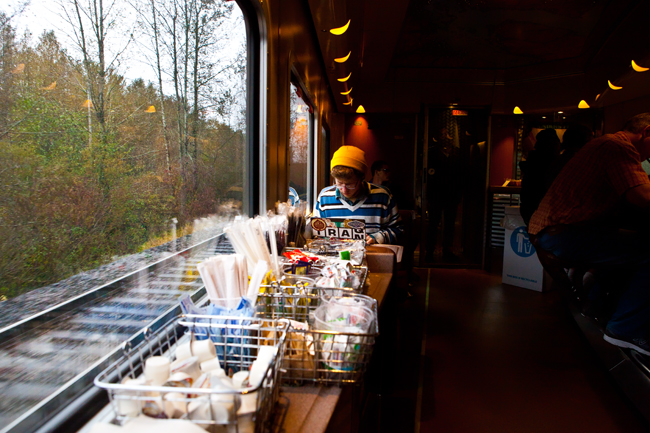
I loved my train ride. For a good part of my trip, I just sank back into my seat and watched the beautiful Pacific Northwest pass by. Then I walked around taking photos, chatting with fellow passengers and hanging out at the cafe car.

Walking around Seattle and Lunch at Cafe Flora

As I didn’t have much time in Seattle, my only agenda for the day was eat, walk around, take photos. I was up early and meandered into Biscuit Bitch at Pike Place for coffee. Their name intrigued me, and I walked in to take a look. Their biscuits and menu looked interesting, and they even had veggie sausage patties, but I didn’t eat anything there. I was saving up for my much awaited lunch.

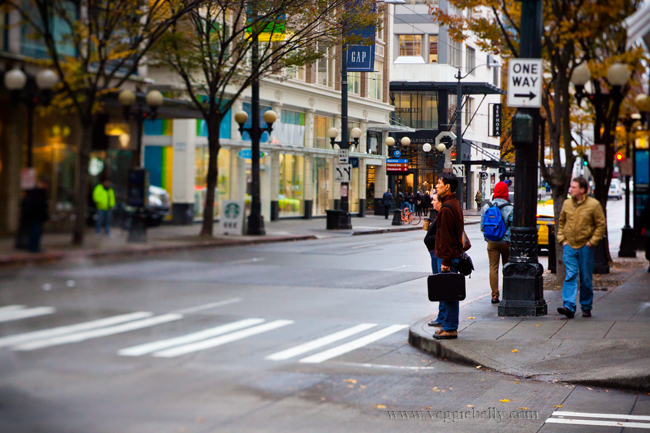
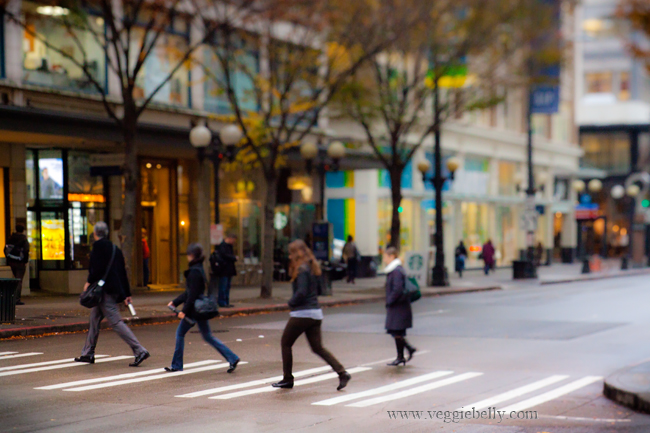
I asked my readers on Facebook and Twitter for vegetarian friendly restaurant recommendations in Seattle. The suggestion poured in. People recommended Cafe Flora repeatedly. So I decided I’ll go there. And I’m so glad I did – the food and atmosphere were lovely. My friend and I were seated in the beautiful, airy atrium. Cafe Flora is an all vegetarian restaurant, so there was plenty of choice for us! Here’s what we had..

 Masala apple fizz
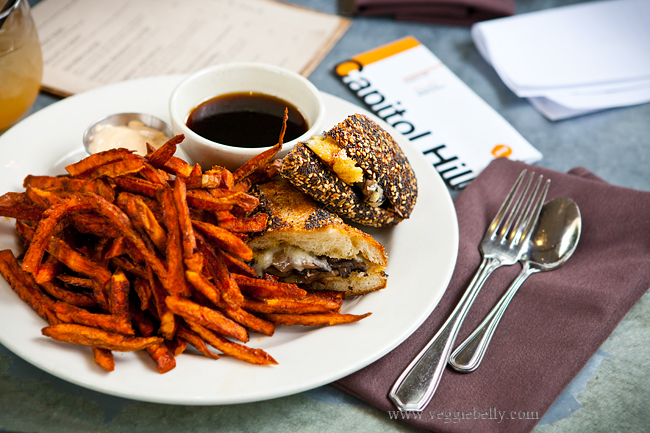
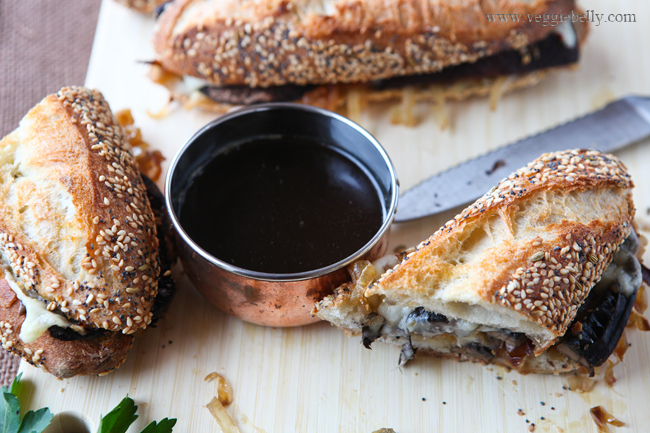
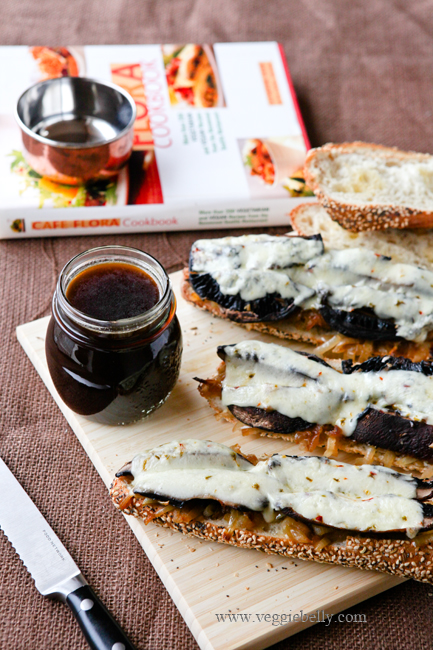
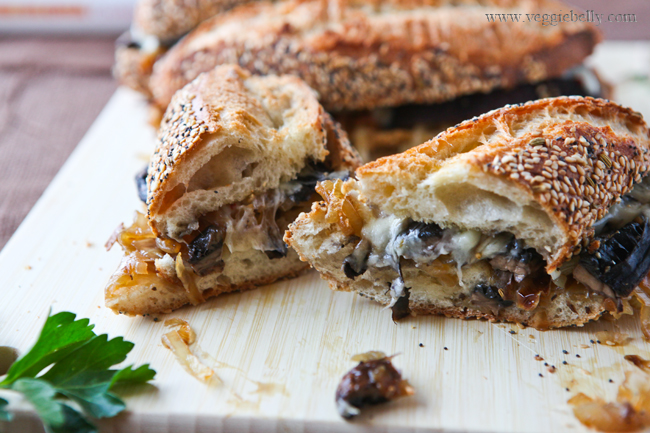
Vegetarian French dip – portobello mushrooms, caramelized onions, Swiss cheese, on a seeded baguette with mushroom garlic au jus. Served with seasoned yam fries. See Cafe Flora’s recipe below.
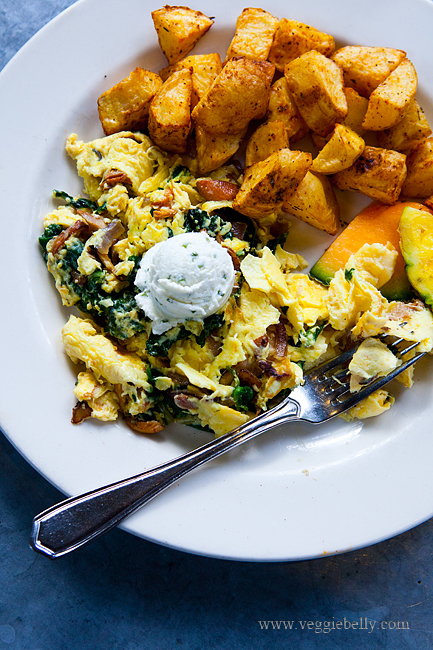
Spinach mushroom scrambled eggs with roast potatoes
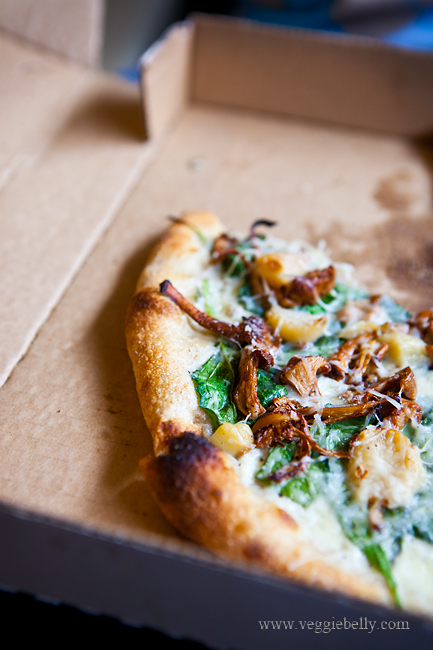
Truffle pizza

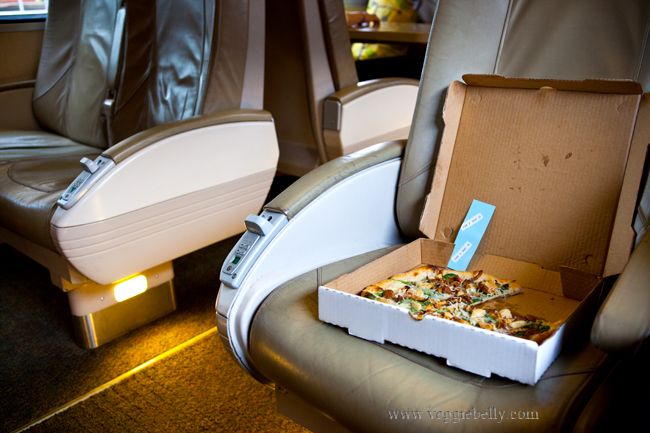
We enjoyed our lunch so much at cafe Flora, that we decided to get a pizza to go so we could snack on the train later! And the truffle pizza we ordered got its own seat on the train ride back to Portland! The other passengers were jealous, I could tell ;)


Cafe Flora’s Portobello French Dip Recipe

Adapted from Cafe Flora Cookbook

I loved the vegetarian French dip at Cafe Flora so much that I’m sharing the recipe with you. Its from the Cafe Flora Cook Book. The original recipe involves several steps; here I have simplified it a bit.

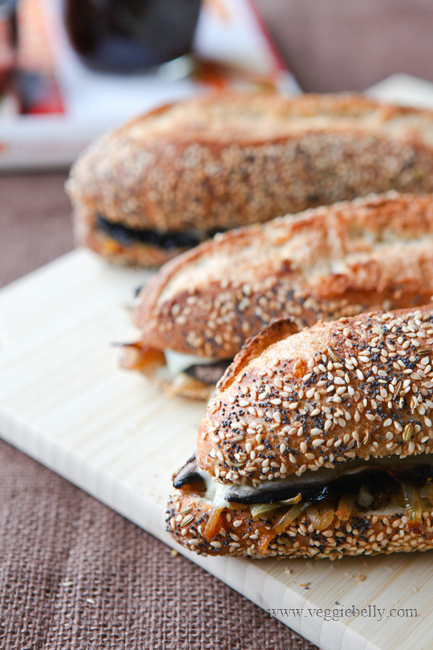
This recipe is truly brilliant – a sandwich made with buttered, griddled  rustic baguette,  roasted portobello mushrooms, sweet caramelized onions, gooey melted cheese, all served with the most amazing mushroom garlic essence or au jus for dipping. Its the best vegetarian sandwich ever.
Serves 4
Ingredients

3 tablespoons olive oil
2 teaspoons minced garlic
3 portobello mushrooms
Salt and freshly ground pepper
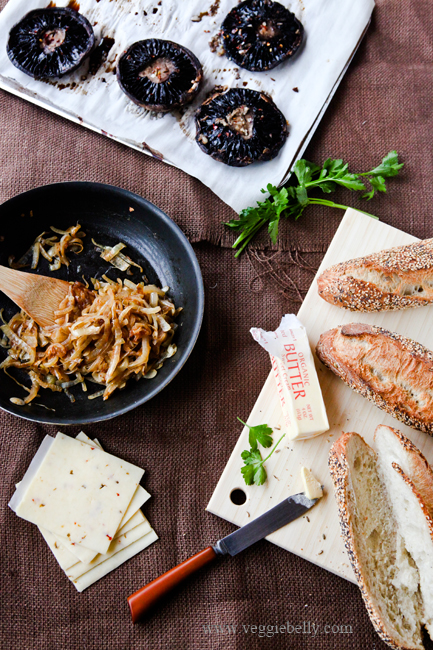
1 large yellow onion, halved and sliced thin
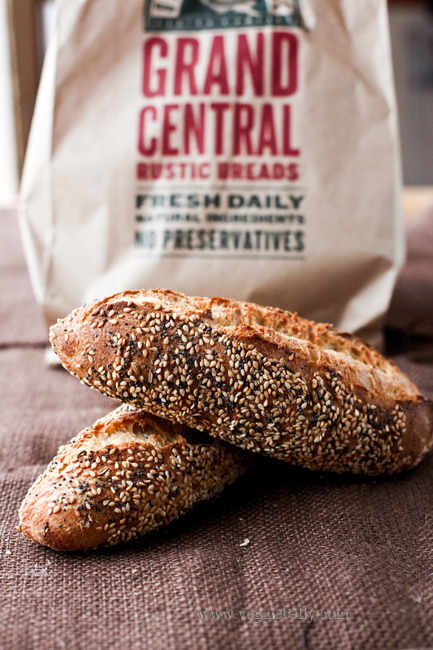
1 rustic baguette (I used 3 demi baguettes instead)
1/2 stick butter
4 slices Swiss, mozzarella or provolone cheese
1 1/3 cups mushroom essence (recipe below)

Method
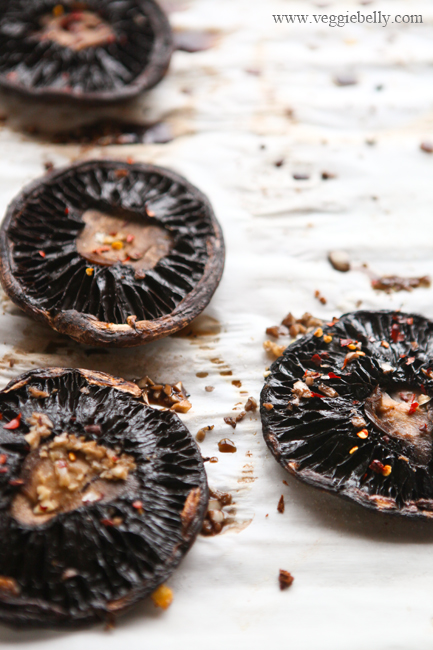
1. Pre-heat oven to 350f. Mix together 2 tablespoons of olive oil and the garlic in a bowl. Remove the stems from the portobello mushrooms (save them for making the mushroom essence). Brush both sides of the portobello mushroom caps with the garlic oil mixture. Sprinkle salt and pepper.

2. Place the porobellos, gill side down, on a baking sheet and bake for about 25 minutes.

3. When the mushrooms are done, let them cool a little so you can handle them. Then cut each mushroom cap into about 8 slices. Set aside.

4. While the mushrooms are baking, work on the onions. Heat 1 tablespoon olive oil in a skillet over medium heat. Add the sliced onion and cook for about 5 minutes. Turn heat down to low, and continue cooking, stirring occasionally till the onions are soft, brown and sweet. About 15 minutes. If the onions stick or burn while cooking, sprinkle a little water on them.

5. Cut the baguette into 4 equal portions. Slice each portion lengthwise in half, so you can make a sandwich. No you’ll have 8 pieces. Spread butter on all baguette slices.

6. Heat a large skillet, and place the baguette slices, buttered and cut side facing down. Griddle the bread till the buttered sides turn golden.

7. Now take 4 of the griddled bread slices, and place them on a baking tray, cut side facing up. Top each slice with one fourths of the portobello mushrooms, one fourths of the caramelized onions, and one slice cheese. Repeat for remaining 3 baguette slices. Bake in a 350f oven till the cheese melts. Top with the remaining 4 baguette slices. Bake for another 2 minutes.

8. Serve the sandwich with warm mushroom essence for dipping (recipe below)

Mushroom Essence Recipe

Ingredients

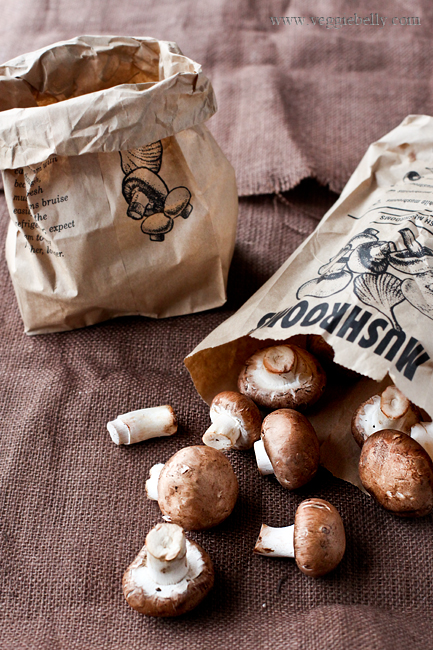
1/2 pound whole crimini mushrooms, stems on
6 cloves garlic, lightly crushed
2 tablespoons tamari

Method
1. Place the mushrooms and garlic, along with 6 cups of water in a medium saucepan. Bring to a boil. Then lower heat and cook on a low boil, till the liquid has reduced to about 2 cups. This will take about 45 minutes.

2. Strain the liquid, and add the tamari. Can be refrigerated or frozen.

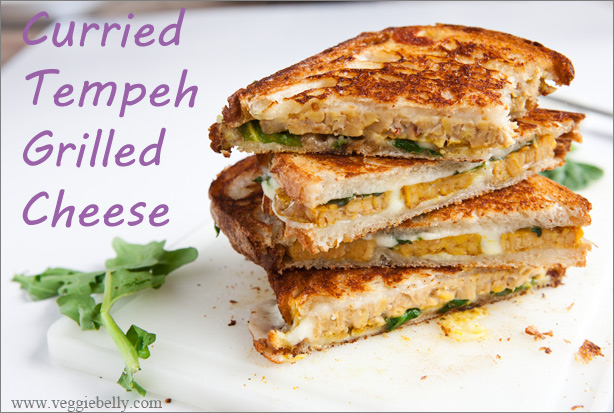
Curried Tempeh Grilled Cheese Sandwich with Mango Chutney

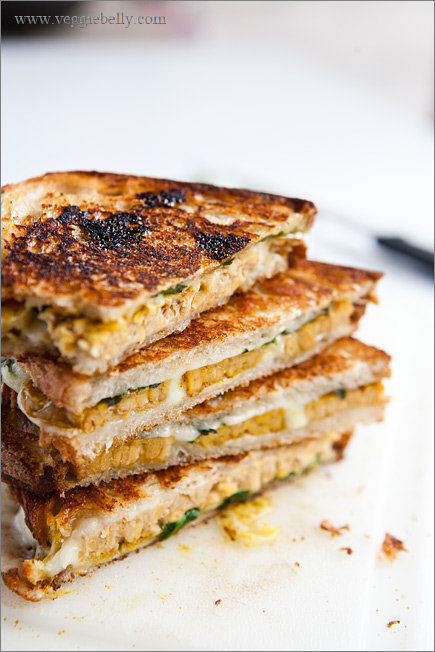
This is more an idea than a recipe. Once you learn how to marinate and cook the curried tempeh, you can vary this grilled cheese sandwich however you like.  If you are in hurry, see the shortcut method in the recipe below. Serve with a salad and my Indian spiced potato chips, and this is an easy, tasty meal any time of the day!

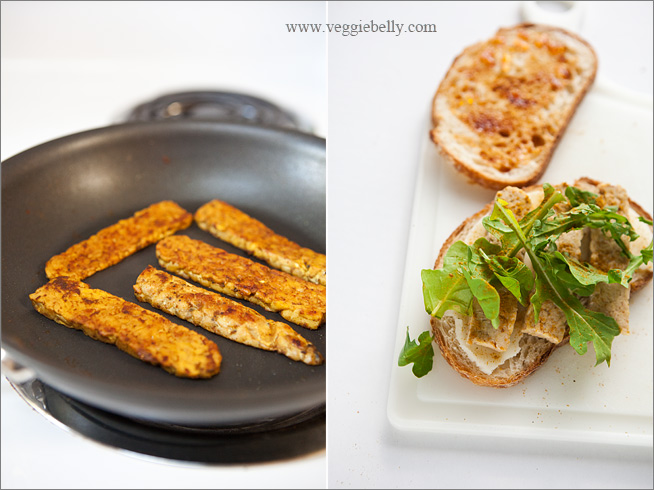
You can marinate and saute the tempeh for extra flavor like on the left. Or if you are in a rush, just toss the tempeh in soy sauce and curry powder and make the sandwich like the picture on the right.

I like to marinate the tempeh in soy sauce and curry powder, so that the tempeh soaks up some of the flavors. I used Frontier Indian curry powder. It contains turmeric, coriander, cumin, lemon peel, black pepper, lemon powder, cardamom, cinnamon, garlic and cayenne. Its mild, the lemon peel gives it a fresh pop, and it works well for the curried tempeh.

Remember, curry powders vary vastly in taste depending on the brand. So use my recipe as a guideline. Make a single grilled cheese sandwich, taste it, and adjust the curry powder accordingly.

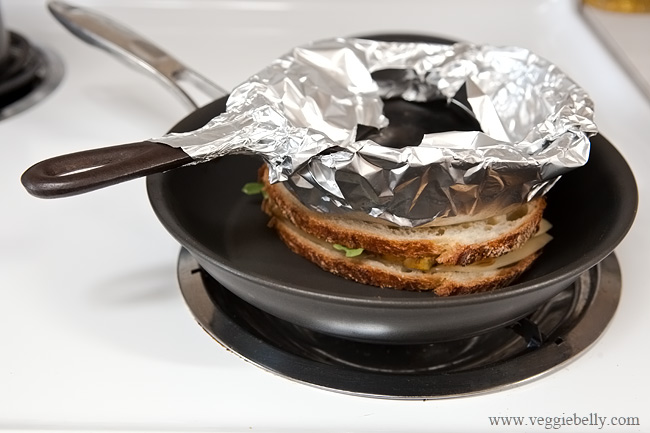
A weight on top of the grilled cheese (panini style)- like a garden brick or cast iron skillet covered with foil – will ensure even cooking, and melt the cheese quickly. Use medium heat and a weight on top of the sandwich and you will have perfectly golden grilled cheeses every time! 

Love grilled cheese and paninis? Check out my friend Kathy’s fun panini blog!

Curried Tempeh Grilled Cheese with Mango Chutney Recipe

Makes 2 sandwiches

Ingredients
For curried tempeh
Half an 8 oz package of tempeh
¼-½ teaspoon curry powder*
1 teaspoon soy sauce
2 tablespoons water
1/2 teaspoon oil

For the sandwich
4 slices of sourdough bread
1 tablespoon or to taste sweet mango chutney. Substitute with apricot preserves
4 slices of provolone or mozzarella cheese
Handful of fresh arugula or baby spinach leaves or kale leaves, torn
1 teaspoon butter
*curry powders vary greatly in their poteny and spiciness. So I really cant give you an exact amount.

Method
For the curried tempeh
1.Slice the tempeh lengthwise into ¼ inch thin pieces. You will need 6-8 slices, about 4 oz
2.Whisk together the curry powder, soy sauce and water in a bowl. Add tempeh to the bowl and gently toss so the marinade is coated well on the tempeh.
3.Cover and marinate the tempeh in the fridge for 30 minutes and up to 2 days.
4. Heat oil in a medium skillet and add the marinated tempeh. Also add any remaining marinating liquid. Cook on medium heat, flipping the tempeh occasionally, till all the liquid has boiled away and the tempeh is brown on both sides.
Now proceed with making the grilled cheese.

Shortcut curried tempeh: If you are in a hurry, skip the marinating and cooking of the tempeh. Leave out the water and oil. Simply toss tempeh in soy sauce and curry powder and continue with the recipe below.

For the grilled cheese
1.Use a small cast iron skillet or a garden brick as the weight for the grilled cheese. Cover the cast iron skillet or bricks with aluminum foil
2. Take 2 slices of bread and slather about 1/2 teaspoon (or more) mango chutney on both the bread slices
3. Place one slice of cheese on top of the mango chutney. Top it with 3-4 slices of curried tempeh and 6-8 leaves of arugula or baby spinach or kale
4. Cover with another slice of cheese, and the other slice of bread, chutney side down
5. Heat ¼ teaspoon butter in a non stick skillet on medium heat. Place the sandwich on the skillet
6. Put the foil covered weight (cast iron skillet or brick) on top of the sandwich. Make sure it is balanced sitting on the sandwich. Let the sandwich with the weight on top cook on medium heat  till the bottom side is golden, about 2 minutes
7. Then remove the grilled cheese sandwich using a wide spatula, add 1/4th teaspoon more butter to the pan. Flip the sandwich over and cook the other side, with the weight on top, till it is golden.

Serve immediately with a salad and Indian spiced potato chips.

Cucumber Cream Cheese and Cilantro-Mint Chutney Sandwich Recipe

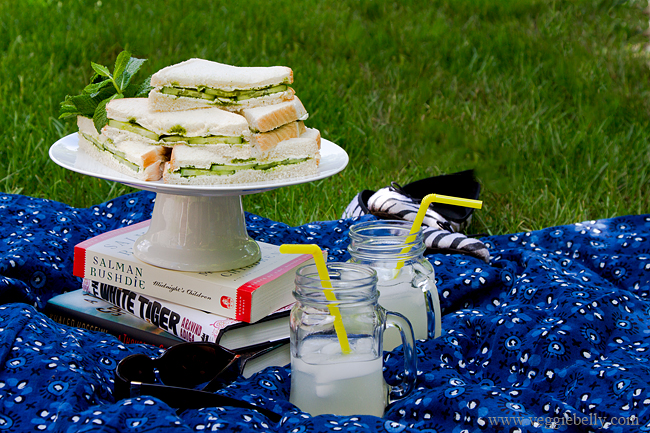
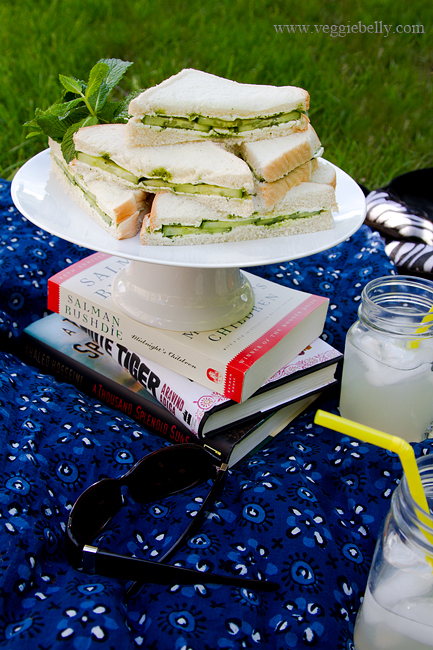
When the weather is nice, we will pack ourselves some sandwiches and lemonade and have a little picnic in our back yard. These cucumber, cream cheese, cilantro-mint chutney sandwiches are our favorite. I’ve made these for several picnics and I really dont know anyone who doesnt like them.

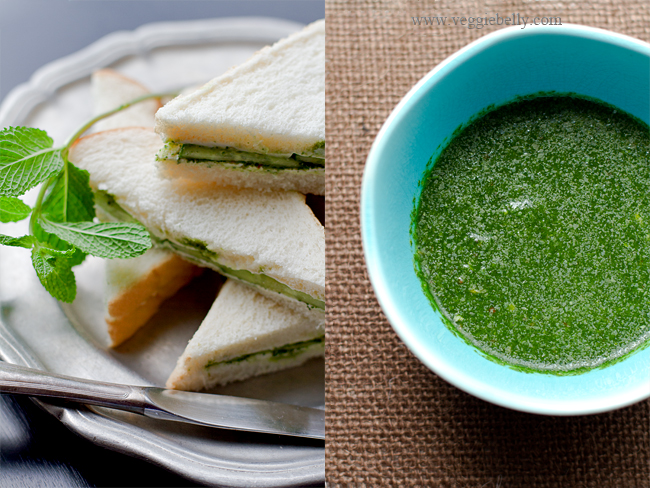
We used to get these sandwiches in India – white bread spread with a little butter, cilantro mint green chutney, and cucumber slices. It is India’s version of English tea sandwiches. I like to use cream cheese in this sandwich recipe; it goes great with the cucumbers and chutney.

Cucumber Cream Cheese and Cilantro-Mint Chutney

Sandwich Recipe

Makes 4 whole or 8 half sandwiches

½ an English seedless cucumber (the one with the plastic wrap)
8 slices of white or soft wheat bread
8 tablespoons cream cheese at room temperature, I used the low fat kind.
½ cup cilantro mint chutney. Recipe below.
Salt

Cut the cucumber into thin rounds.

Take 2 slices of bread. Spread 1 tablespoon cream cheese on one slice. Spread 1 teaspoon (or more if you like) chutney over the cream cheese. Arrange 4-5 slices of cucumber on top. Sprinkle a tiny pinch of salt over the cucumbers.

Spread one tablespoon cream cheese and then one teaspoon cilantro mint chutney on the other slice of bread. Place this on top of the cucumbers, to make a sandwich. Repeat for all bread slices.

Spreading the cream cheese first, and then the chutney will prevent the chutney from soaking through the bread. Serve immediately.

Cilantro Mint Chutney Recipe
Makes about 1/2 cup, enough for 4-6 sandwiches

1 cup cilantro leaves, tightly packed
1/2 cup mint leaves, tightly packed
1/2 fresh green chili or Thai hot pepper, chopped*
1/8 teaspoon cumin seeds
1 garlic cloves, peeled
1/2 tablespoon lemon juice
Salt
2 tablespoons water

*This makes a spicy hot chutney. Use less chili or leave it out if you don’t want it spicy.

Place all ingredients in a food processor and process into a smooth sauce, scraping down the sides of the food processor now and then.

If you are using a blender, you may need to use a little more water. Store the chutney in an air tight container in the fridge.

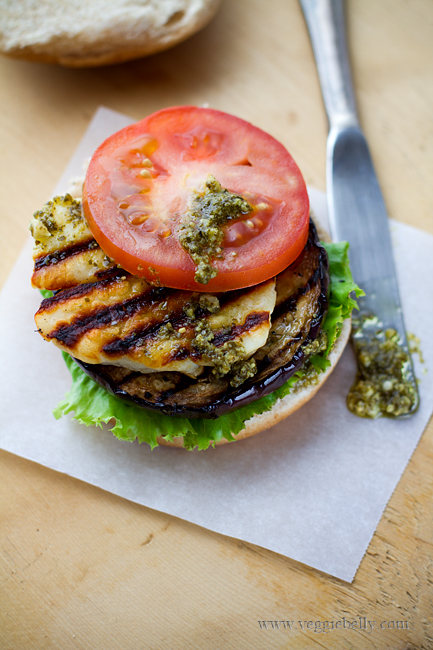
Grilled Eggplant, Halloumi and Pesto Burgers

Here is a vegetarian grilled eggplant, halloumi and pesto burgers recipe that even meat lovers will go crazy for. This is perfect for weekend and holiday grilling.

Halloumi is one of my favorite cheeses. This salty, dense cheese is from Cyprus and is great for grilling. You can substitute halloumi with mozzarella, feta or paneer, but it just wont be the same :(

But if you do use any of the substitutions, remember that you don’t have to grill the mozzarella or feta. If using paneer, sprinkle it with salt after grilling.

The eggplant and halloumi won’t stick if your grill is hot and well-seasoned. If you are doubtful, spray some nonstick spray on the grill grates before starting it up.

Grilled Eggplant, Halloumi and Pesto Burgers Recipe

Makes 4 burgers

1 medium eggplant, weighing about 1 lb.
3/4 tablespoon olive oil
3/4 tablespoon balsamic vinegar
1/4th teaspoon dry Italian seasoning
Salt and pepper
4 oz halloumi cheese

To assemble the grilled eggplant, halloumi and pesto burgers
4 medium sized burger buns
4 teaspoons pesto
Mayonnaise, according to taste. Optional.
2 leaves of lettuce, cut in half
1 large tomato, cut into 4 slices

Cut the eggplant into ½ inch thick rounds, at its widest part. Save the remaining eggplant for another dish. Place the sliced eggplant in a shallow dish.

Whisk the olive oil, balsamic vinegar, Italian seasoning salt and pepper together. When adding salt, keep in mind that the halloumi is an already salty cheese. Pour the whisked ingredients over the eggplant rounds, and toss well to coat.

Slice the halloumi into ½ inch thick slices.

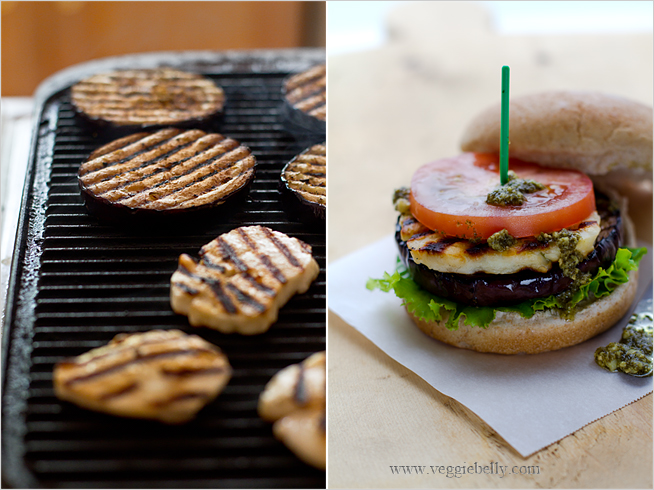
Heat a grill on medium-high heat. You can use an outdoor grill or a cast iron stove top grill like I did.

When the grill is hot, arrange the eggplant slices on the grill, and cook for about 6 minutes on each side or till the eggplant is cooked.

Then grill the halloumi slices on both sides till golden grill marks appear, about 2 minutes per side.

If you don’t have a grill, you can cook the eggplant and halloumi in batches on a large skillet.

You are now ready to assemble the burgers.

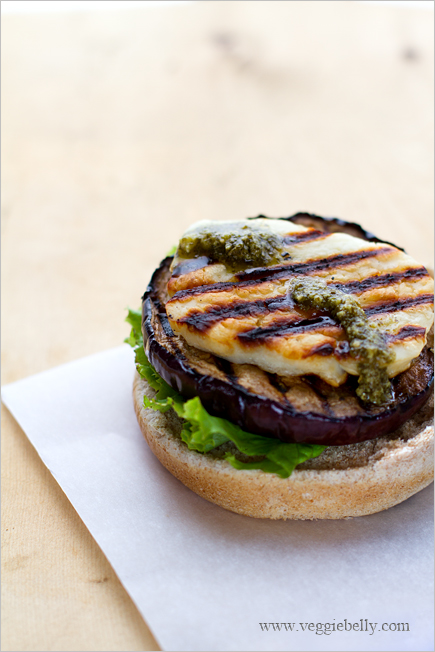
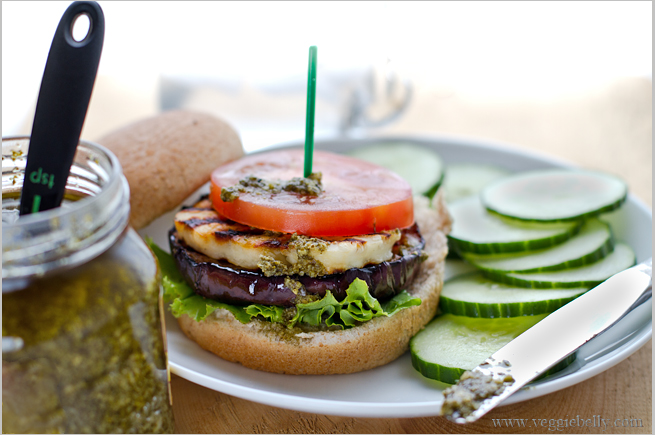
Spread some mayonnaise, if using, on 2 halves of a burger bun. Take one half of a bun, and stack the grilled eggplant, halloumi and spread 1 teaspoon of pesto. Top it with tomato and lettuce. Place the other half of the burger bun on top.

Serve with fries or a chilled cucumber salad tossed with a little olive oil, balsamic vinegar, salt and pepper.

These burgers will go great with my blueberry lemonade or jalapeno lemonade.

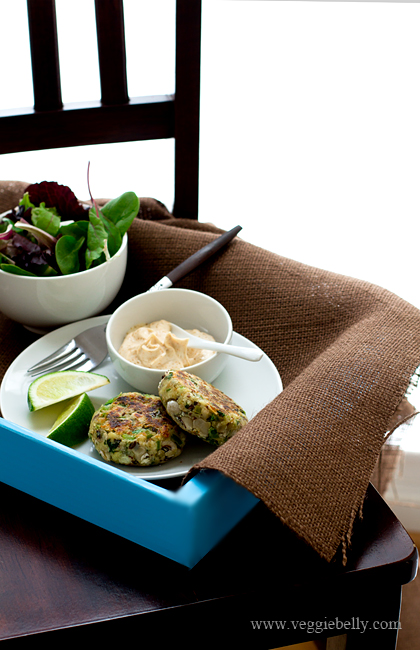
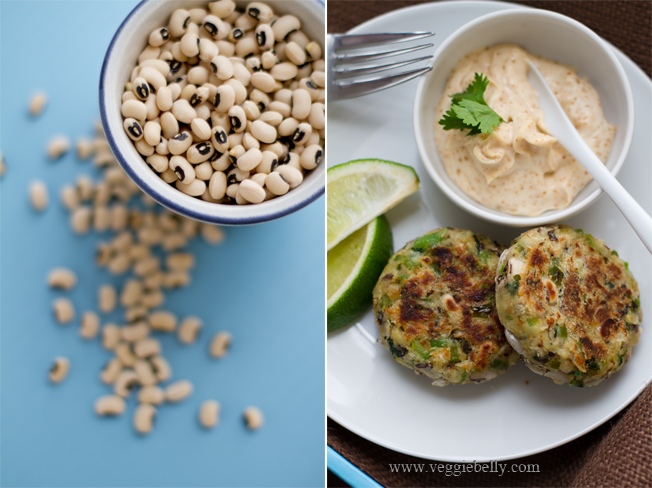
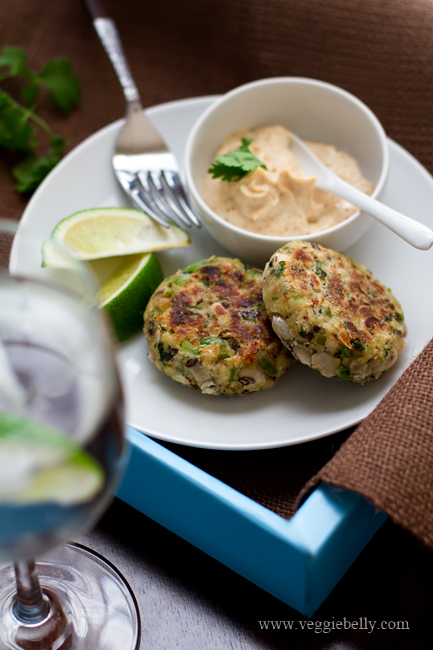
Black-Eyed Pea Cakes with Chipotle Mayonnaise

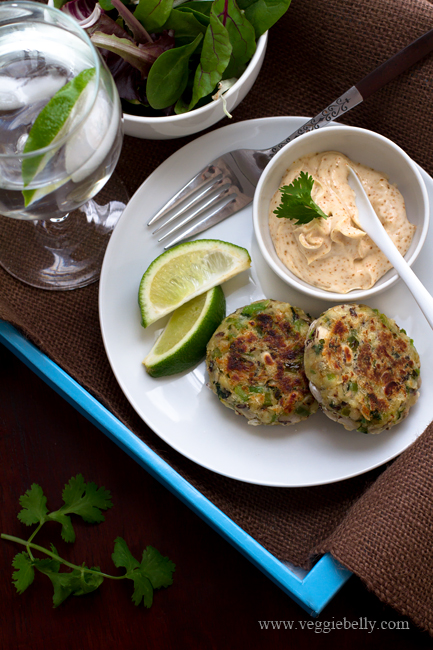
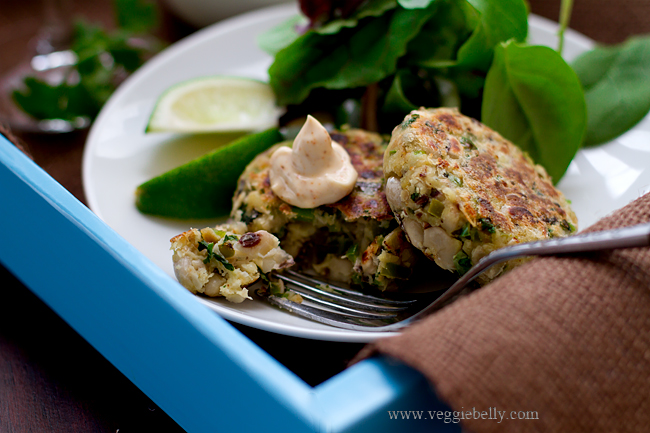
I had these wonderful black eyed pea cakes at Spotted Dog, a vegetarian friendly restaurant in Carrboro, NC. Their vegetarian black eyed pea patties had jalapenos, red pepper, celery, lime, and cilantro. I think my recipe comes pretty close to Spotted Dog’s! Served with a green salad, this makes a satisfying lunch.

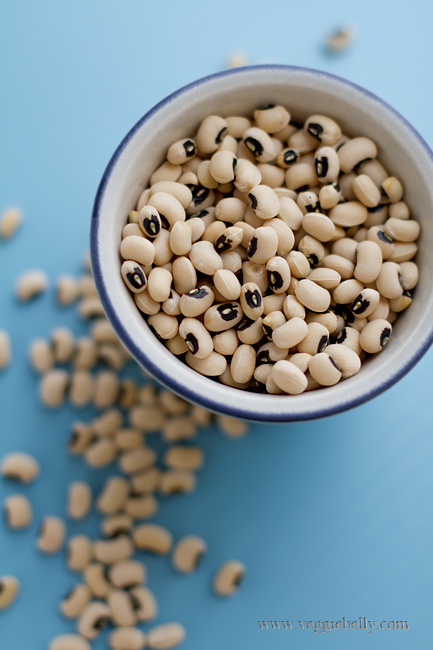
You can used canned black eyed peas as a short cut, but I prefer the texture of freshy cooked dry black eyed peas in this recipe.

You could dip these cakes in butter milk, roll them in bread crumbs and shallow fry them. But this can get messy, and I didn’t want to use too much oil. So to kept things on the simpler and lighter side. I just dusted the patties with a tiny bit of corn starch, and pan cooked them with just a little olive oil.

More black eyed pea cake recipes..

Black eyed pea cakes recipe with liquid smoke on Fat free Vegan

Black eyed pea cakes recipe with cumin, on Soup Spoon

Martha Hall Foose’s Black-eyed pea cakes recipe on Ezra Pound cake


Tips for forming the patties

If the mixture is too wet, the patties will be difficult to form. So make sure your black eyed peas are drained very well drained.
Add more bread to a wet mixture, to make it more firm.
If the mixture is too dry, either mash the black eyed peas more, or sprinkle a little water
Using a wide spatula will make it easier to flip the cakes while cooking them

If you don’t want to pan fry them, you could brush the black eyed pea cakes with oil, and broil them till the tops are browned and crusty. Carefully flip them over, brush more oil and broil the other side.

Black-eyed pea Cakes Recipe with Chipotle Mayonnaise

makes 4 cakes

½ cup dry black eyed peas*
1 teaspoon + 1 teaspoon olive oil
½ teaspoon or to taste, finely chopped jalapenos, optional
1 garlic clove, minced
½ a medium green pepper, diced small
½ cup slightly stale bread, torn into small pieces. I used left over challa bread.
Zest of ½ small lime
1 tablespoon lime juice
1-2 tablespoons chopped cilantro
¼ teaspoon or to taste Seasoned salt (I like Lawry’s and McCormick’s)
1 tablespoon Corn starch

Soak the dry black eyed peas overnight in water. Drain. Then boil plenty of fresh water in a medium pot. Salt it generously. Add soaked peas, and boil till cooked, about 20 minutes.

Drain the peas well. If they are watery, the cakes won’t hold together.

*I prefer dried black eyed peas that have been freshly cooked. But if you don’t want to use dry beans, use canned black eyed peas instead. Rinse and drain them well. Then measure out 1 1/4 cups for this recipe. You may need to use more bread, because canned beans can be wetter than cooked dried beans.

Heat a medium sauce pan with 1 teaspoon oil. Add jalapeno, garlic and green pepper and sauté on medium heat till pepper is soft, about 2 minutes. Add the bread, lime zest, lime juice, cilantro, seasoned salt, and mix well. Turn off heat.

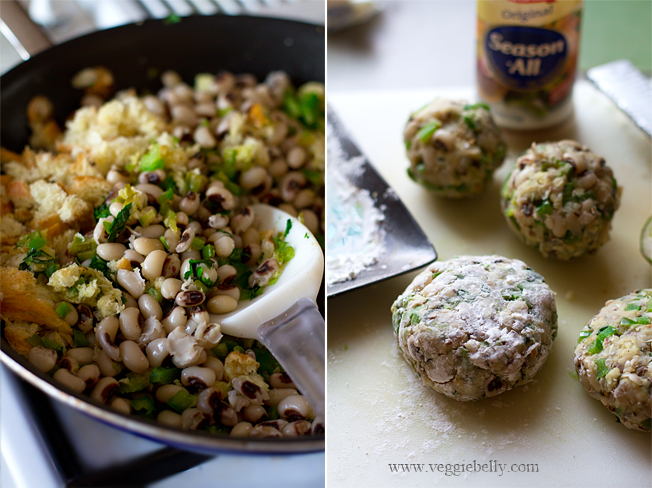
Add the cooked drained black eyed peas. Mix well. Using a potato masher, or the back of a wooden spoon, mash the black eyes peas. The mixture doesn’t have to be completely mashed, some whole black eyes peas (about 30%) will give the cakes a nice texture. Taste and adjust seasoning.

When the mashed peas mixture is cool enough to handle, divide it into 4. Roll each section into a ball. Place the 4 balls on a plate.

Sprinkle corn starch on another small plate. Dust your hands with the corn starch. Using both your corn starch coated hands, pick up a black eyed pea ball and gently flatten it to form a disc like patty. Dust your hands again, and repeat with the other balls.

Heat a medium non-stick skillet with ½ teaspoon oil, add 2 patties, and cook on medium-high heat till the patties are golden on one side. Carefully flip them and brown the other side. Remove to a plate.

Add another 1/ 2 teaspoon oil to the pan, and cook the other 2 patties.

Serve like a burger with chipotle mayonnaise burger buns, tomato slices, lettuce, pickle etc. Or serve over salad greens with chipotle mayonnaise.

Chipotle Mayonnaise Recipe

¼ cup mayonnaise (vegenaise, silken tofu or tahini for vegans)
¼ to ½ teaspoon chipotle powder. Substitute with smoked or regular paprika
½ teaspoon lime juice

Whisk everything together in a small bowl. Keep chilled.

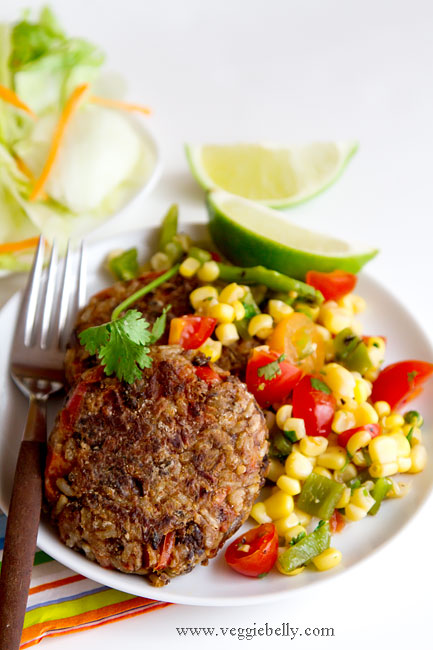
Southwestern Black Bean and Brown Rice Burgers with Roasted Poblano Sweet Corn Salsa

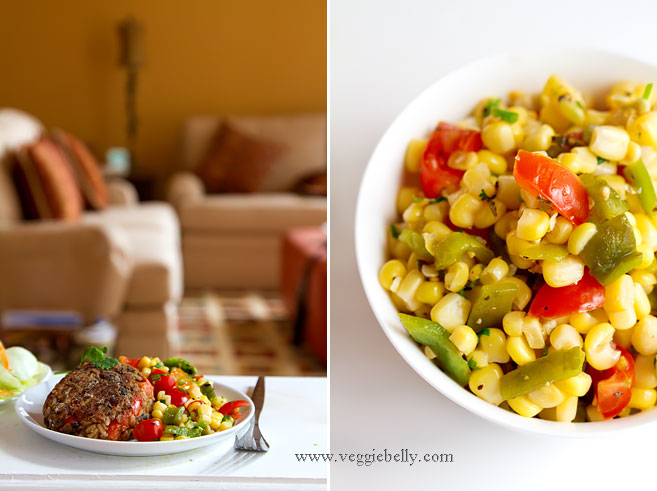
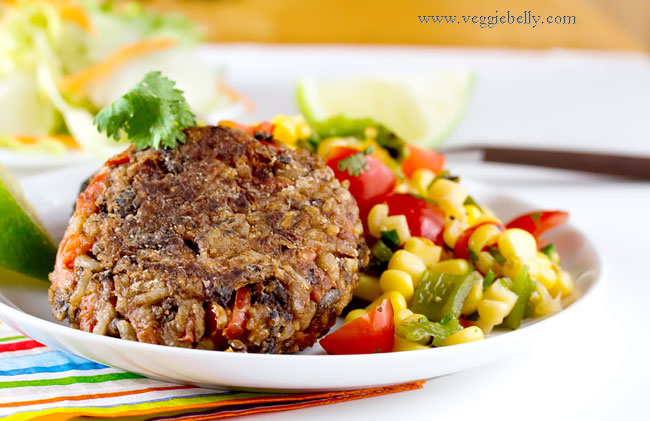
Please make this recipe, its incredibly delicious. Thats all I can say. I was going to make this recipe and freeze half of it, but we’ve eaten it all. The brown rice in this burger is filling and adds great, chewy texture. The black beans are luscious and creamy. And taco seasoning in the patties takes this to a whole new level of yumminess. Pair the burgers with my chilled sweet corn and roasted poblano salsa and you will be in heaven. Make this NOW!!

Also check out Alanna’s black bean burger recipe, and this southwestern brown rice and black bean burger recipe on feed the moose.

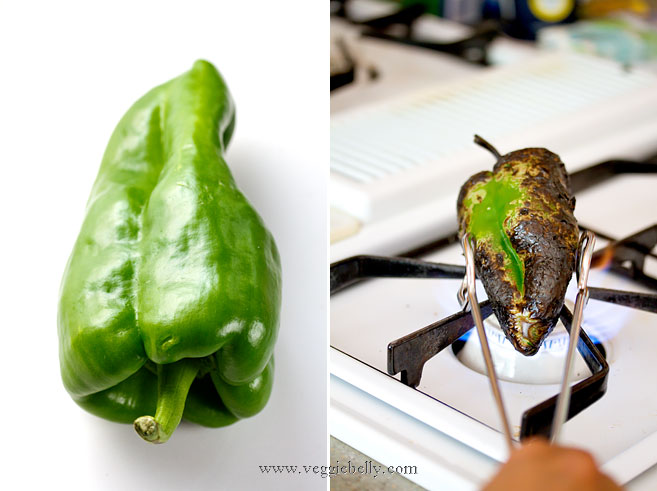
To roast poblanos, place them over an open flame. Keep turning till they are charred all over.

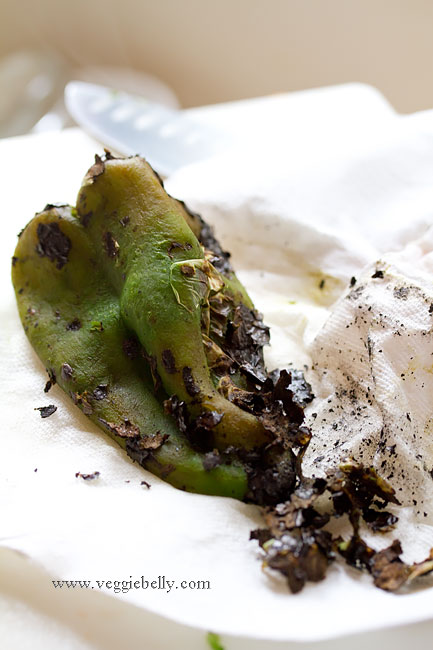
Keep roasted poblano wrapped in foil for about 5 minutes. Then using a paper towel, wipe off the charred skin. Roasting poblanos gives them great flavor which is wonderful in this roasted poblano sweet corn salsa.

Serving suggestions for vegan southwestern black bean and brown rice burger patties:

Serve with your choice of chipotle mayonnaise, avocado slices, sour cream, ketchup, barbeque sauce, tomato slices, red onion, pickled jalapeno, lettuce, lime wedges, roasted poblano and sweet corn salsa ( recipe below)

- as a southwestern veggie burger with toasted burger buns

 - as a sandwich with bread slices
- as a tortilla wrap
- in pita bread pockets
- my favorite – in a salad with shredded lettuce, carrots, roasted poblano and sweet corn salsa (recipe below) and my cumin vinaigrette recipe
- lettuce wraps- serve burger patties and salsa with large, un-cut pieces of iceburg lettuce

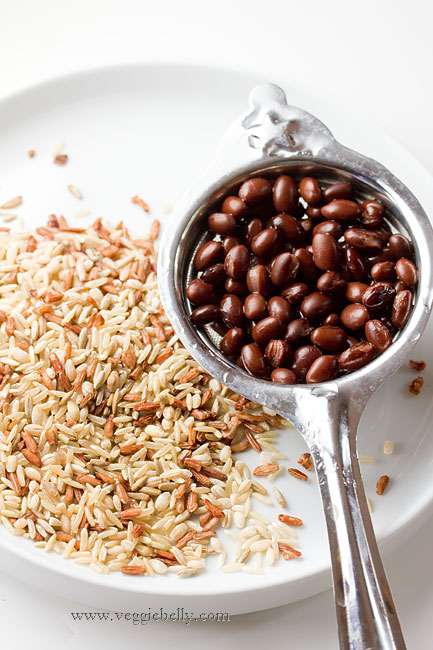
I like RiceSelect brand’s Royal Blend brown and red rice for this recipe. Its nutty, chewy, and just perfect.

Vegan Southwestern Black Bean and Brown Rice Veggie Burger Patties Recipe

makes 8 patties

1/2 cup brown rice, uncooked. I recommend RiceSelect Royal Blend brown & red rice
One 15 oz can black beans

sauté
1/2 tablespoon olive oil
1 small onion, diced
1 small red (or green) bell pepper, diced
2 cloves garlic, minced
1 tablespoon store bought taco seasoning (substitute with 1/2 tablespoon cumin powder + 1/2 tablespoon paprika or red chile powder)
salt

to cook the patties
1 tablespoon corn starch
6 tablespoons olive oil

In a large pot, bring plenty of water to boil. Generously salt the water. Add brown rice and cook uncovered till the rice is done, about 20 minutes. Rice should be cooked through, but still chewy and not mushy. When done, drain the rice, run some cold water over it to stop the cooking. Make sure the rice is drained very well before using. Spread it on a kitchen towel to absorb moisture if needed.

Drain the canned black beans. Again, make sure it is drained very well.

While the brown rice is cooking, work on the satueeting. Heat a large non-stick skillet with the oil. Add onion and red pepper. Cook till onions are soft. Add garlic, stir for about 30 seconds. Add taco seasoning and drained black beans. Stir on high heat for about a minute. Turn off heat. Add salt (remember store bought taco seasoning already has some salt).

Using a potato masher or fork, mash the black bean mixture. Mash roughly, so that some black bean pieces remain. Add cooked, drained brown rice. Using a spatula, mix everything together. Taste and adjust salt and taco seasoning.

When the black bean brown rice mixture is cool enough to handle, divide it into 8 equal portions. Dust your hands with corn starch and make 8 balls. Flatten the balls down to shape into burgers. Dust a little corn starch on the patties; not too much, just a sprinkle. (You can freeze the patties at this point in a single layer in air tight containers).

Heat about 1 tablespoon oil in a non-stick skillet.  Place 2 burger patties on the skillet. Cook for 1-2 minutes on medium-high heat on each side. Remove when a crispy golden crust forms on both sides. Add more oil to the skillet and fry up 2 more patties at a time. Repeat till all patties are cooked.

Roasted Poblano and Sweet Corn Salsa Recipe

 enough to serve with about 4 burgers

1 poblano pepper (substitute with bottled roasted red pepper or sauteed jalapenos or canned New Mexican green chile)
1 can drained sweet corn
1 cup chopped tomatoes
zest of 1/2 a lime, optional
2 tablespoons lime juice (juice of about 1 large lime)
1-2 tablespoon chopped cilantro
salt and pepper

Roast the poblano pepper over an open flame either on your stove or an out door grill. Char the pepper on all sides. Then wrap it in foil and let it sit for about 5 minutes. When the pepper is cool enough to handle, open the foil and peel off the charred poblano skin. Wipe off any remaining charred skin with a paper towel. Remove the seeds inside. Dice the roasted poblano.

Mix together the roasted poblano and all other ingredients. Refrigerate till ready to serve.

Grilled Portobello Mushroom, Roasted Red Pepper and Mozzarella Sandwich or Burger

I received the below facebook message one day from my friend, Aditya. Being the great mushroom aficionado that I am, how could I have posted all  but one portobello recipe on this site?!  Ive featured other mushrooms on Veggie Belly, like the shitake mushroom soup, morel mushrooms over polenta, beech mushroom flat bread, and my recent morel mushroom pasta with fiddleheads. But the mighty, meaty portobello has been in all but one recipe on veggie belly. I defenitely had to remedy that!

Aditya, this one is for you  ♥ 

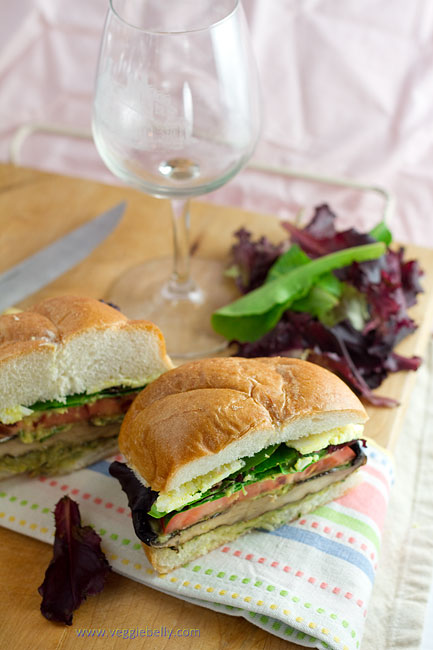
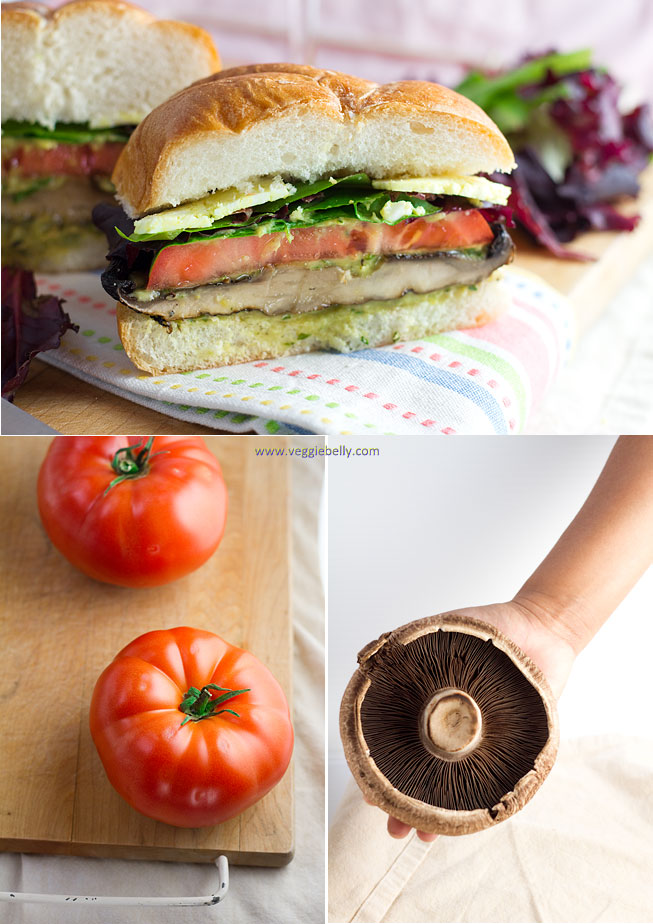
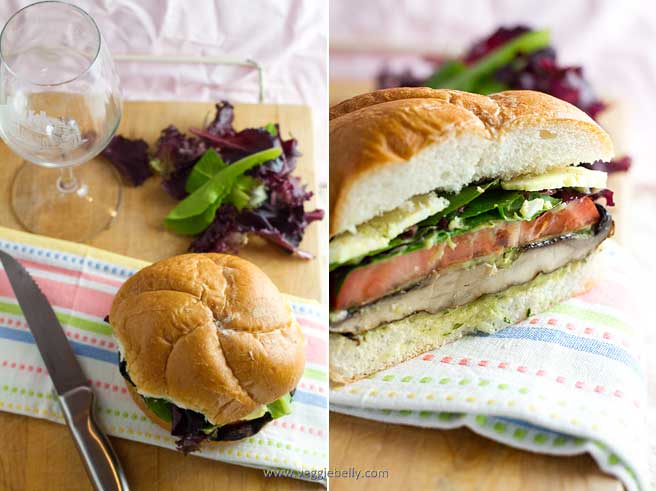
These portobellos were larger than the palm of my hand! But they turned out to be the perfect size for these sandwiches/burgers; they shrunk just enough while cooking on the grill, to fit in the kaiser roll. Portobello or portabella mushrooms are delicious in burger style sandwiches because they are meaty in taste and texture. They are often called the ‘steak of all mushrooms’! They also take to grilling very well. I used beefsteak tomatoes in this sandwich, again, for their meaty texture. But any tomato will do.

Grilled Portobello Roasted Red Pepper and Mozzarella Sandwich/Burger Recipe

makes 4 sandwiches

4 large portobello mushrooms
2 tablespoons olive oil
1-2 tablespoon balsamic vinegar
1/2 teaspoon italian seasoning
salt & pepper
4 kaiser rolls or burger buns or 8 slices of any other loaf bread
2-4 tablespoons mayonnaise or my white bean asparagus hummus
2 tablespoons chopped fresh basil
4 slices beefsteak tomato
4 slices fresh mozzarella (or whatever cheese you like)
4 large pieces of store bought, jarred roasted red pepper
1 cup salad leaves or lettuce of your choice

Heat an outdoor grill to 400f.

Wipe the mushrooms clean. Using a spoon, scrape off the gills from the mushrooms. Whisk together olive oil, vinegar, italian seasoning, salt and pepper. Brush the olive oil and vinegar mixture all over the mushrooms.

Place the mushroom caps on the grill and grill about 2-3 minutes on one side. Flip the mushroom caps, and grill another 2-3 minutes. (If you like your cheese melted, place cheese slices on portobello caps (gill side) after you have flipped them). Remove grilled mushrooms to a plate, and cover to keep warm. If you are not using an outdoor grill, broil the mushrooms in the oven; about 3-4 minutes (or till browned a little) per side.

Cut the bread roll in half. Spread some mayonnaise or my white bean asparagus hummus  on both halves. Sprinkle some basil on top. On the bottom half of the bread roll, arrange the grilled portobello mushroom, tomato slice, mozzarella slice, and roasted red pepper. Top with lettuce or salad greens. Place the other bread slice on top. Secure sandwich with a toothpick. Serve with a side of soup or salad and fries or chips.

Double Layer Summer Vegetable Sandwich with Hummus and Pesto

  double-layer-summer-vegetable-sandwich-with-hummus-and-pesto

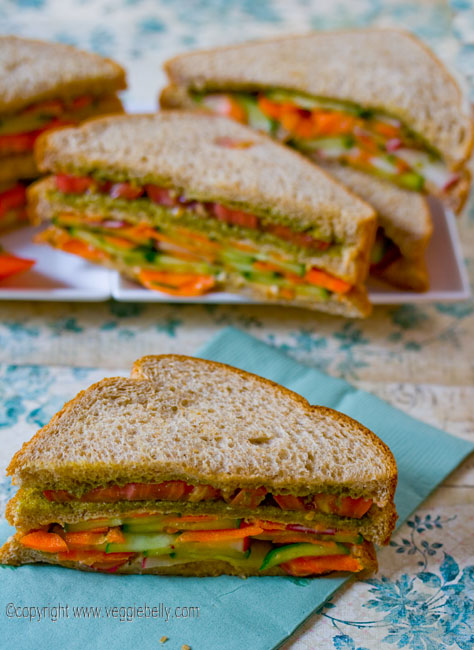
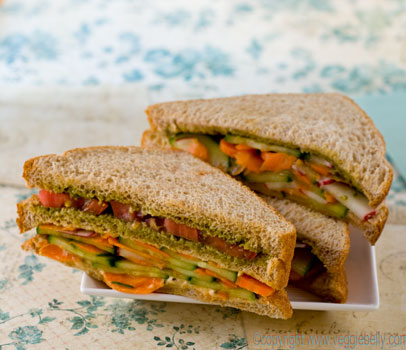
 This is an easy sandwich for a sweltering hot day, when you don’t feel like turning on your stove. With all the raw summer vegetables and brown bread, this sandwich is healthy too. Its a double layered sandwich, so its quite filling. I love the combination of creamy hummus and the basil pesto in this sandwich.

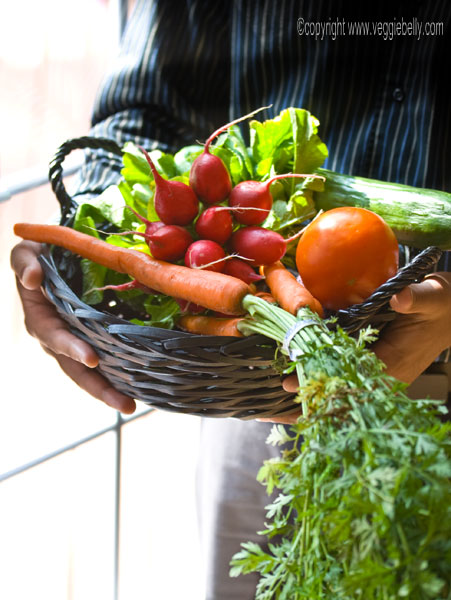
basket-of-garden-vegetables

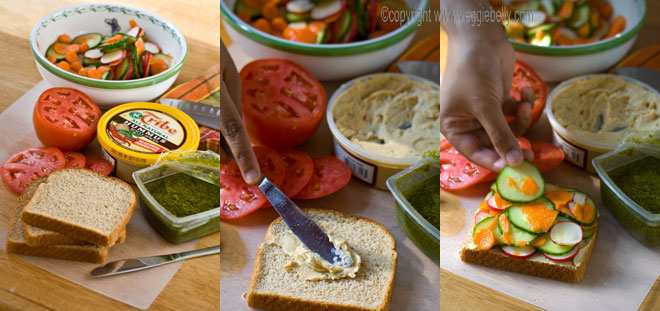
 You’ll need a carrot, some baby radish, cucumber and tomatoes. All you have to do with the vegetables is slice them thin and toss them in olive oil, lemon juice, salt and pepper. Store bought hummus (I used Tribe 40 spice hummus) and pesto act as sandwich spreads. Use whatever bread you like. I prefer soft brown bread slices or pita pockets for this.

See my new flexible chopping mat  from Bed Bath and Beyond in the pictures below? I recently bought two of these and  I love them! They’re great if you are cutting a small amount of stuff. They’re flexible, take up no space at all and the best part is, you can throw them in the dish washer! 

hummus-and-veggies-on-sandwich

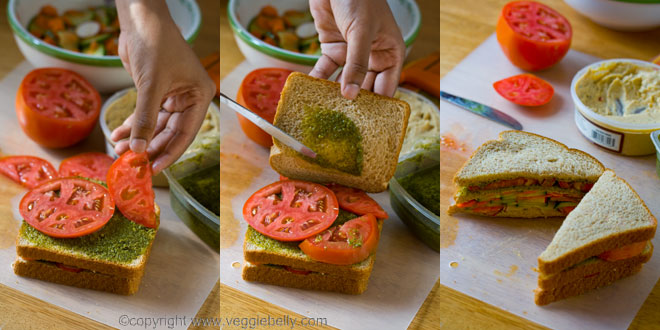
 You’ll need 3 slices instead of the usual 2 slices of bread. Start with the first slice. Spread some hummus on it. Then pile on the chopped carrots, cucumber and radish. I like to load the sandwich with lots of veggies!

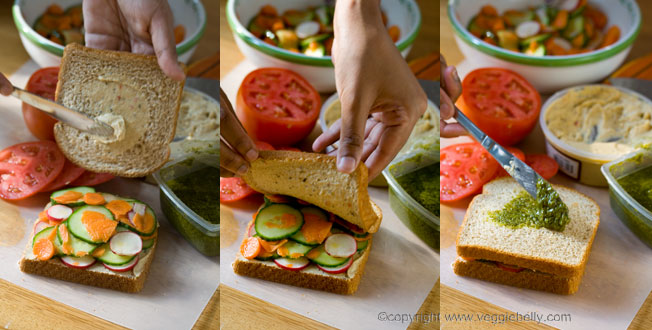
place-second-slice-of-bread-on-top

 Put a little more hummus on the second slice of bread and place it over the veggies, hummus side down. Then spread some pesto on top of the second bread slice. See where I’m going with this?!

assemble-tomatoes-and-third-bread-slice

 Now come the tomatoes. Place them on top of the sandwich. Spread more pesto on the third slice of bread and top the tomatoes with it. I like to put the tomatoes on the top layer of the sandwich and spread pesto on the top slice of bread. The science behind that is that tomatoes taste great with pesto. Just like how I think the vegetables taste great with hummus. So each sandwich layer is assigned its own vegetable-spread pairing!

double-layer-summer-vegetable-sandwich

 Press down on the sandwich gently to compact everything. Then cut it in half. This sandwich will get soggy on you if you let it sitting around. So serve it immediately.

summer-vegetable-sandwich1

Double Layer Summer Vegetable Sandwich with Hummus and Pesto Recipe
makes 3 sandwiches (or 6 if you slice each in half)

9 slices of bread
1 small carrot
4 baby radishes
1/2 an English cucumber
1 small tomato
1 1/2 tbsp olive oil
1 1/2 tbsp lemon juice
about 5 tbsp store bought Hummus or enough to spread on the bread slices
about 4 tbsp store bought Pesto or enough to spread on the bread slices
Salt and Pepper
Slice the carrot, radishes, and cucumber into thin slices. You should have about 2 cups (loosely packed) of chopped vegetables in total; chop less if you want fewer veggies in your sandwich. Combine the chopped vegetables with olive oil, lemon juice, salt and pepper and set aside. Slice the tomato into rounds.

Place one slice of bread on a work surface. Spread about 1 tbsp hummus on it. Arrange the vegetable slices on top. Spread a little more (about 1/2 tbsp) hummus on the second slice of bread and place it hummus side down on the vegetables. Spread about 3/4 tbsp pesto on the second slice of bread. Place tomato slices on top. Spread a little more pesto on a third slice of bread and place it pesto side down on top of the tomatoes.

Related Posts with Thumbnails