Temples, Monks and a Thai Raw Mango Salad with Tofu. Thailand Part 2.

I love Thailand for its sensuous food, elegant people and spectacular sights. Out of the 30 or so countries I’ve visited, Thailand is easily on the very top of my favorites list. Here, I share with you some pictures of Bangkok – a city that is a beautiful mélange of ancient culture and modern lifestyle. You will find serene Buddhist temples along the Chao Phraya river. And a hop away, you will find racy go go bars in Nana plaza. It is incredible that these cultural extremes co-exist. With its night life, beautiful Wats (temples) and amazing food, Bangkok is a truly exciting place. If only Bangkok was cooler, Id move there in a heartbeat!

Above: Wat Pho in Bangkok;  the gigantic reclining Buddha with mother of pearl in His feet

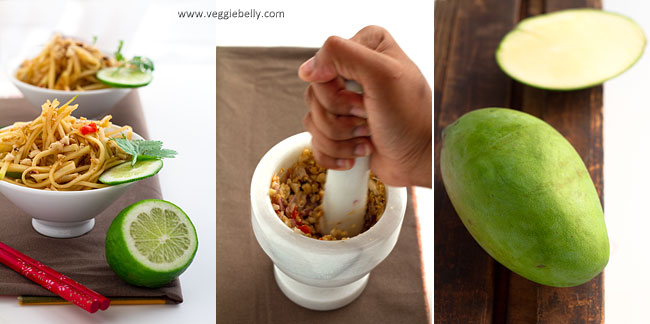
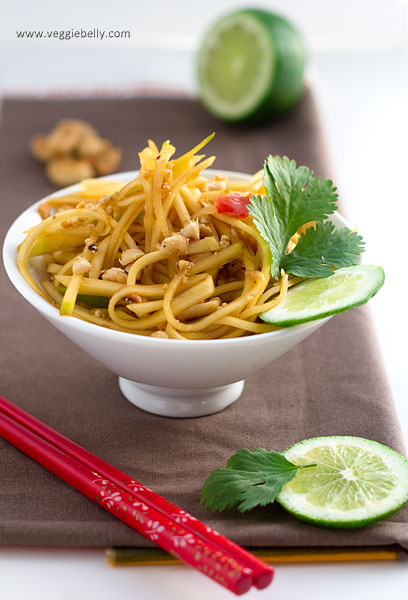
The most memorable part of my trip to Thailand is of course, the food. Thai cooking is seductive; and I cant think of a better recipe to showcase the beauty of Thai food like this one. Salty soy sauce, rich, sweet brown sugar, fresh zesty lime, crunchy, nutty peanuts, hot chillies, and crisp, sour mangoes. Every flavor in the world is packed into this mango salad.

Traditional Thai mango salad doesn’t have tofu in it. I added tofu to make this salad more filling.

Some tips:

Make this salad a day ahead and store it in the fridge. The flavors get so much better the next day
Only use raw, green mangoes (not the ripe yellow ones)
Leave out the chili if you prefer a milder salad
Add strips of pan-fried tofu to make this salad heartier
If you dont have a mortar and pestle, use a food processor to crush the peanuts

Thai Raw (Green) Mango Salad with Tofu Recipe

serves about 4

2 large green, raw mangoes
3/4 cup roasted peanuts
2 shallots, peeled
1 thai red chili (use more or omit according to taste)
3 tablespoons soy sauce
3 tablespoons dark brown sugar
1 tablespoon lime juice
a few sprigs cilantro
6 oz firm tofu, drained (optional)
Salt

Peel the mangoes and cut around the pit. Discard the pit. Grate the peeled mango using a box grater. Alternatively, slice the peeled mango into very thin strips.

Place the roasted peanuts, peeled shallots and red chili in a mortar and pound to a rough paste. Add this crushed peanut mixture to the shredded mango.

In a small bowl, whisk together the soy sauce, brown sugar and lime juice. Add this to the shredded mango and peanuts. Toss well. Taste and add salt if needed. Garnish with cilantro. Serve chilled.

To add tofu to this salad: Drain tofu and pat dry. Cut it into thin strips. Pan fry the tofu strips in a little oil till golden. Toss the tofu with the mango salad.

Sev Puri (Chaat) – Memories of an Indian Summer. My Guest Post for The Kitchn

This is my recent guest article on The Kitchn..

Chaat always brings back memories of carefree childhood weekends spent at my parents’ beach house in India. I’d walk over to the beach in the afternoon when the tide is low enough to pick sea shells. I’d return home with my pail full and stomach empty. A gorgeous bowl of chaat would be waiting for me  – crunchy, sweet, tangy, spicy, filling all at the same time. I’d sit on the verandah eating chaat, listening to the waves crashing near by and watching the kites sail over me.

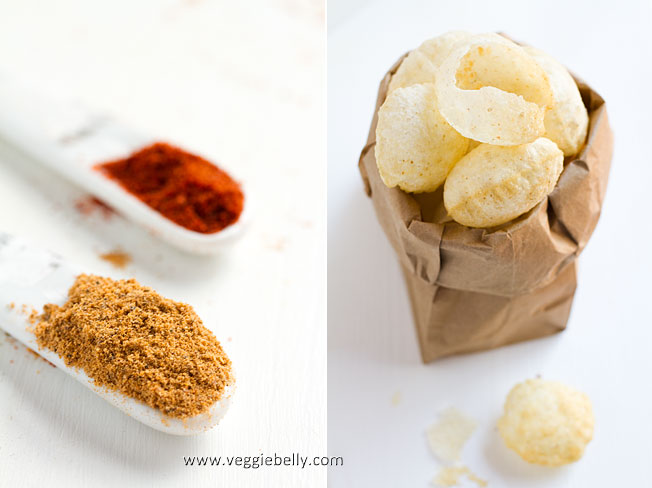
Chaat on weekends still transports me back to those balmy evenings in India. Sev puri is my favorite kind of chaat (‘chaat’ is a general name for this Indian street food; there are several variations). Sev puri are little puffed, fried rounds of dough (puri) stuffed with  crispy noodles (sev), potatoes, onion, yogurt, tamarind chutney and mint chutney. The whole thing is then finished with a sprinkling of amazingly zestful chaat masala – a blend of salt, red chilli, coriander, cinnamon, ginger, anise, pepper, cumin, cardamom, clove, mace, carom and dried mango.

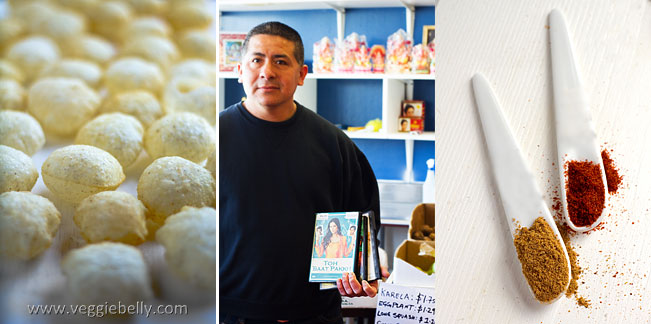
Above: Armando, the man who works at the local Indian store. He is El Salvadorian and his kowledge of Indian ingredients is encyclopedic. He watches all the bollywood movies and gets offended if they dont offer spanish subititles! Gotta love DC/VA!

You will need to make a trip to the Indian store for this recipe. You could attempt to make all the ingredients at home, but that would be time consuming. Why bother when you can buy the same thing at a store!

This is a basic recipe for sev puri; I encourage you to  be creative with it..you are limited only by your imagination. When pomegranates are in season, I like to sprinkle some on top for a colorful, refreshing sweetness. A little chunk of pineapple tucked into the sev puri is divine (toss the pineapple chunks in chaat masala for a delightful sweet-savory flavor).  To make these sev puris vegan, simply leave out the yogurt and use hummus, tahini or cashew butter instead. If you don’t have pani puris, try making this with tortilla chips instead; Scoops! will be perfect for this.
Finally, there is only one way to eat a sev puri – put the whole thing in your mouth! Don’t try to bite into it, just pop the whole thing in your mouth!

Sev Puri (Chaat) Recipe
Serves about 6

1 medium potato, boiled, peeled and diced
½ cup canned chickpeas, drained
3-4 tablespoons finely chopped red onion
40 pani puris* (fried rounds of dough)
½ cup yogurt
½ cup sev* (crispy noodles)
¼ cup date-tamarind chutney*
¼ cup mint chutney*
1 tablespoon Chaat Masala*
1/4 tablespoon red chilli powder or cayenne or paprika
A few sprigs of cilantro

*easily available at any Indian store

Mix together the boiled diced potato, chickpeas, red onion, ¼ teaspoon chaat masala and salt. Set aside. Gently poke a hole on one side of a pani puri. Make it large enough so you can stuff it with the potato mixture. Place some potato mixture inside the pani puri cavity. Top with about ½ tablespoon of yogurt. Sprinkle some sev on top of the yogurt. Then add date-tamarind and mint chutneys. Finish by sprinkling a little chaat masala and chili powder over the top.  Repeat with all pani puris. Serve immediately.

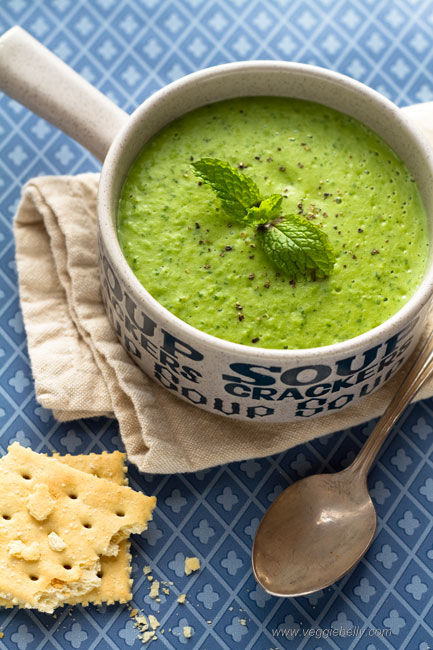
Fresh Pea and Mint Soup


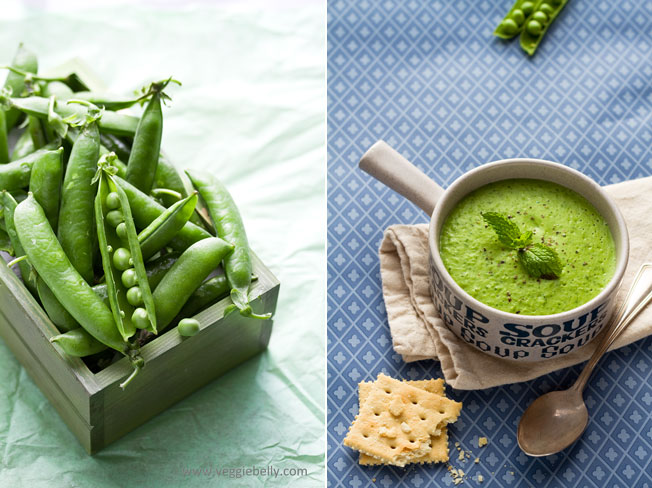
Whenever I buy fresh spring peas in their pods, I always think of what peas and pods signify. Peas in their pods are beautiful things - six or seven tender little peas, all snuggled up safely inside the comfort of their pod. An expectant mother carrying a child, close friends, a couple living together – all peas in a pod, enjoying their togetherness.
My husband, when he is in a romantic mood will calls us  ‘two peas in a pod’. How appropriate. Two of us, living together and going through the journey of life together. Just like peas in a pod.

If you have never tried fresh peas, now is the time. Fresh green peas are in season during the spring. They are really easy to shell and cook. Fresh shelled peas are so tender, you don’t need to cook them more than 4 minutes max. In a pinch, frozen peas will be good substitute.

Fresh Pea and Mint Soup Recipe

serves about 2

1 tablespoon olive oil
1 small onion, chopped
2 cloves garlic, peeled
2 cups fresh, shelled peas (substitute with frozen peas)
1 1/2 cups whole milk (more for thinner soup)
salt
1 cup fresh mint leaves
freshly cracked black pepper

Heat oil in a pan and add onion. Cook on medium heat for about 2 minutes or till the onions are  transluscent. Add the garlic pods and cook 1 more minutes. Add peas and saute for about 2 minutes. Add milk and salt. Simmer for 3-4 minutes or till the peas are cooked. Pour the milk and peas mixture into a blender. Add mint leaves to the blender. Blend soup as chunky or smooth as you like. (Be careful when putting hot liquids in a blender – always vent the blender lid). Serve soup with freshly cracked black pepper.

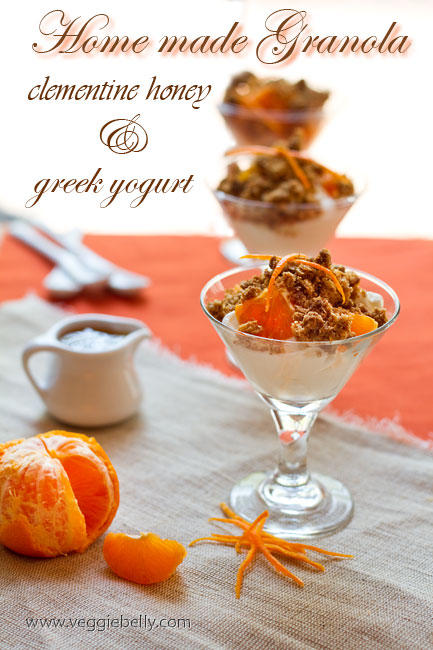
Homemade Almond and Oat Granola Parfaits with Clementine Honey and Greek Yogurt

I was suddenly gripped by an intense and urgent desire to make granola at home. Didn’t want to make dinner that night. Didn’t want to go to the store to buy granola ingredients. But I just had to make granola. Right that minute. (I’m weird like that). I suspect this granola craving rubbed off from my sister who was visiting me. She is a total granola junkie and can go through a whole box in a day. So M, this one is for you ♥ 

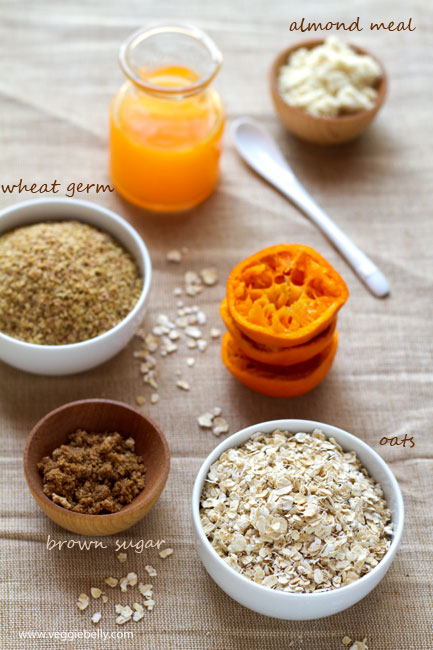
Like I said, I hardly had any of the ingredients needed to make granola. So I just used what I had on hand – instant oats, wheatgerm and almond meal.  This is by no means a ‘proper’ granola recipe, but it certainly tastes good. Take a look at some of the other granola recipes on the web:

Addictive granola on Tastes Like Home
Four grain granola bars on Whats For Lunch Honey
Savory granola trifle on Jugalbandi
Low fat citrust granola on Inn Cuisine
Granola cookies on Dandy Sugar

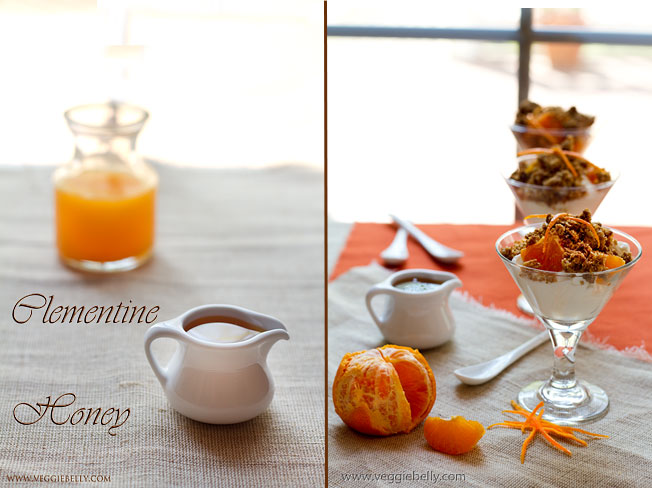
Clementines are a type of mandarin orange. They have cute little sweet segments with lots of juice. You could also use a tangerine for this recipe, but it probably wont be as sweet as a clementine. You could of course, substitute with good old orange.

Simple (Improvisational) Oat and Almond Granola Recipe
makes about 2 1/2 cups

1 cup rolled oats (I used instant oats because thats all I had, but rolled oats will make better granola)
1/4 cup wheatgerm
1/2 cup slivered almonds (I used almond meal because thats all I had)
1/2 cup dark brown sugar
1/4 cup vegetable oil
1/4 teaspoon vanilla extract
1/8 teaspoon salt

Pre heat oven to 300f

Place oats, wheatgerm, almonds and brown sugar in a bowl. In a smaller bowl, whisk together oil, vanilla, salt and 2 tablespoons of water. Add this liquid mixture to the dry ingredients. Mix well until clumps form. Spread out on a baking sheet and bake 30-40 minutes or till the granola is crunchy. Stir the granola every 15 minutes while it is baking. Once completely cooled, store granola in an airtight container.

Clementine Honey Recipe
makes about 1/4 cup

1/2 cup fresh clementine juice (substitute with tangerine or orange)
1 tablespoon brown sugar
2 tablespoons honey
1/4 teaspoon tangerine zest

Place clementine juice and brown sugar in a small pan and bring to a boil. Continue boiling till the mixture reduces in half and becomes like a syrup. (Be careful sugar burns easily!). Turn off heat. Stir in honey and zest. Clementine honey will thicken once cool.

To make granola parfaits

Layer granola, Greek yogurt and tangerine honey in serving glasses.

A Vegetarian Thai Cooking Class and Trip to a Produce Market in Chiang Mai. Thailand part 1.

When I visited Thailand, I was intoxicated by the sites, sounds, smells and tastes. The sensory explosion was just incredible. And the food…oh man the food..where do I even start?! Thailand has a huge street food culture; so this only means one thing – tasty, fast, cheap food. Batter fried bananas, sticky rice steamed inside hollow bamboo sticks, street-side penang curry, morning glory (a spinach like green vegetable) with garlic..the list is endless!

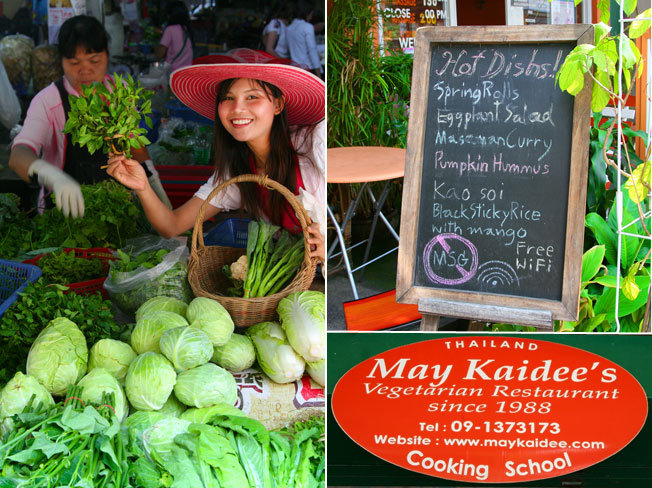
I had no problem being a vegetarian traveling in Thailand and finding vegetarian food. I asked for my dishes without meat and with vegetables only and most often got what I wanted. They all probably had fish sauce in them, but I was ok with that. Also, I was very excited to learn how to make vegetarian thai food without fish sauce and shrimp paste! That was the highlight of my trip – a vegetarian cooking class I took at May Kaidee’s restaurant in Chiang Mai. May Kaidee’s is a vegetarian restaurant run by two sisters. May runs the Bangkok restaurant and Duan runs the Chiang Mai one.

Above, Duan is all set to go to the produce market next to her restaurant.

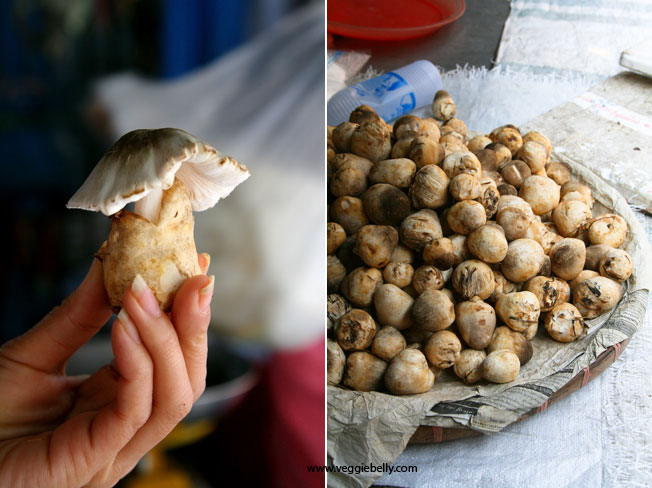
I didnt know which to admire more, the delicious straw mushrooms at the market or Duan’s beautiful fingers! Dear Duan, you will always have a back up career as a hand model for Veggie Belly.

Duan holds up some essentials for Thai cooking – kaffir lime leaf, lemongrass, galangal (ginger-like rhizome), turmeric, cilantro, red chillies.

At the market: noodle lady and beans and rice man.

Fresh tofu! Colored a brilliant yellow using turmeric. Wood ear mushrooms really felt like ear cartilage.

Back at the restaurant, Duan gave me some tips:

-          Fry tofu in vegetable oil, keep the tofu in the oil till you are ready to use it. Use the same tofu flavored oil while cooking your dish.
-          Look for the “Jay” symbol on Thai sauce bottles, this means they are vegetarian


Look what Duan found at the market! Gorgeous Thai basil.

Here are excerpts from a chat with Duan:

On an average day, what do you and your family eat for breakfast, lunch, dinner, snacks? 
We usually eat traditional items such as curry with rice , fried egg with rice etc. We almost always have papaya salad and sticky rice for lunch. Dinner may be noodle soup or rice soup. We dont really snack much, maybe a fruit shake or ice tea with milk.
 
Thai food has a lot of fish sauce and shrimp paste, how can a vegetarian cook make thai food without these ingredients?
That is the thai way..lots of fish sauce and shrimp paste. They add saltiness to dishes. You can use salt, soy sauce, mushroom flavored soy sauce or thick mushroom sauce instead.
Sala’s note: Healthy Boy brand mushroom flavored soy sauce is really good! Available in Asian stores.
 
What items do you use instead of meat?
In my restaurant  I use soy protien, tofu and sometimes vegetarian sausage or seitan.
 
Tell me about the food Thais eat during the Kin-Jay vegetarian festival
You can see fried yellow noodles with shitake mushrooms as the main dish everywhere during the festival.  Yellow is for goodness and prosperity in our culture.
 
What are the basic thai ingredients a thai vegetarian cook needs?
Chilli, garlic , onion, lemon grass, galangal, kaffir leaves — these are used in the paste for curry and in everyday dishes like stir fry and soup.
  
What is the most important element to thai vegetarian cooking?
The balance of spicy, sour, salty and sweet. Also important are fresh produce and freshly prepared pastes and ingredients. 
 
Are fake meats (seitan) popular in Thailand? Do you use them?
Yes. There are some dishes like a vegetarian ‘fish’ wrapped in seaweed.
 
What are some of your favorite ingredients to cook with? why?
I like to cook noodles because I love to eat pad thai and pad see ew. Noodles are also really easy to cook.
 
What are your favorite dishes?
I love Pad Thai.  And my mother’s pumpkin cashew hummus is really good.

If you want to learn more about May Kaidee’s:

Restaurant website: http://www.maykaidee.com/
Cook book: http://www.maykaidee.com/site/cookbook/ebook

I’m not affiliated with May Kaidee in any way; I just think they are awesome!

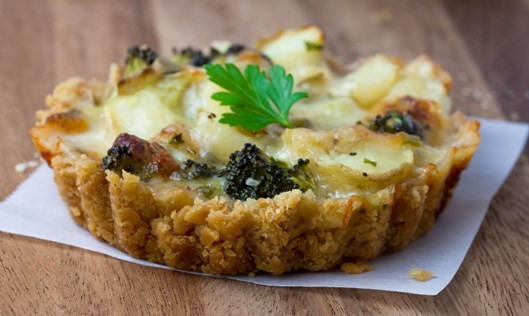
Broccoli, Baby Potato and Comte (Gruyere) Cheese Tarts in Saltine Cracker Crust


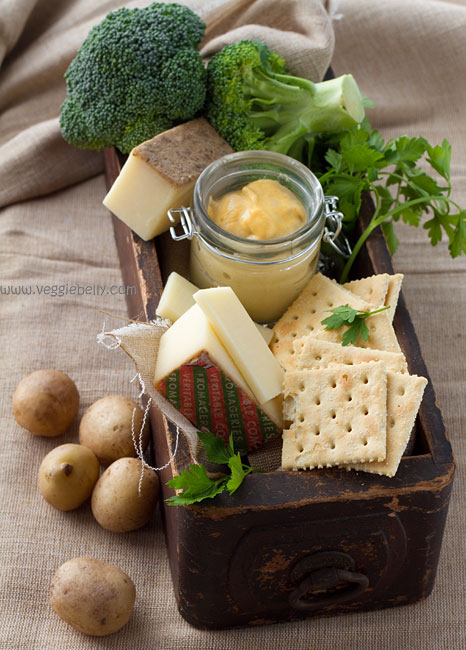
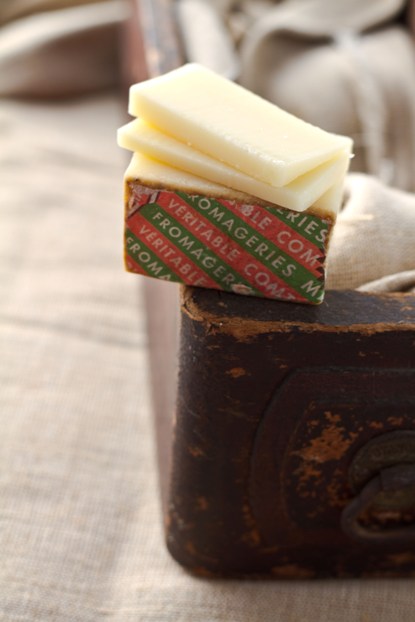
I’d been dealing with a cranky client all week and was exhausted. I wanted a nice gourmet meal, but at the same time I didnt want to leave the house (ever felt that way?). So I used what I had on hand to make this gourmet tasting, gourmet looking, cheesy tart…just what I needed after a stressful day! The gorgeous wedge of french comte cheese Sanjeev picked up a few days ago was simply spectacular in this savory tart.

Comte is a Gruyere type French cheese made from cows milk. Comte is made only with spring and summer milk. I absolutely love this cheese. Actually, I love all cheeses, but I have extra love for Comte. Its slightly sweet, somewhat soft, and melts beautifully.

If you dont like or cant find Comte cheese..

Substitutes for Comte cheese: use Gruyere or fontina instead of Comte. Or if you want to spend less, try a mix of mozzarella and parmesan.

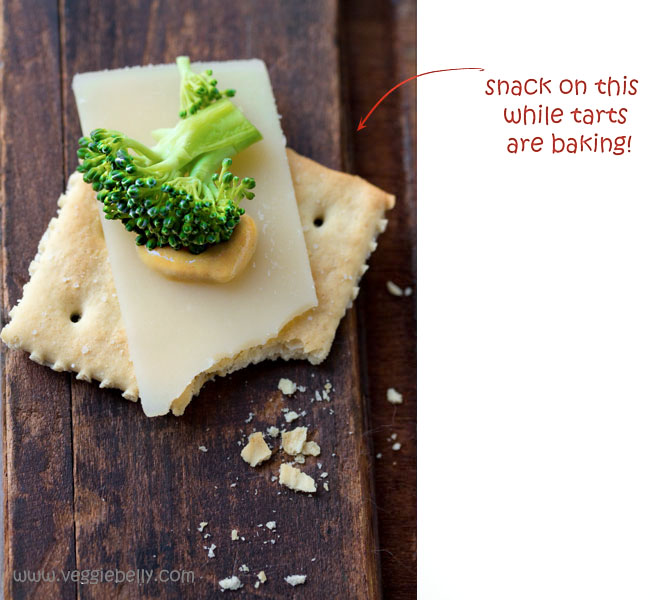
The tarts smelled sooo good in the oven, we were getting hungry quickly! We snacked on the ingredients while waiting for the tarts to bake.

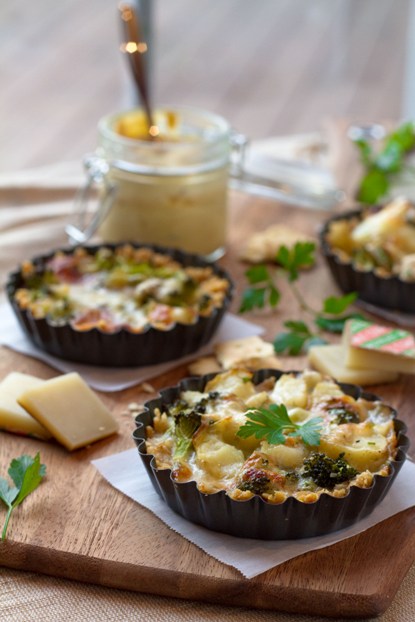
This is a rather heavy, cheesy tart, so I made it in individual mini tart/pie pans. A mini tart along with a salad was a good portion size. If you dont have mini tart/pie tins, you can make this as one large tart and cut it into wedges.

We absolutely loved the saltine cracker crust – it was easy, smelled heavenly, and very yummy!

Broccoli, Baby Potato and Comte (Gruyere) Cheese Tarts in Saltine Cracker Crust: Recipe

makes 6 mini tarts

4oz or 5 small baby potatoes (or use a medium baking potato instead)
1/2 cup low fat milk
1 teaspoon flour
1 teaspoon dijon mustard
3/4 cup comte or gruyere cheese, cut into tiny cubes
1 cup broccoli florets, chopped
2 tablespoons parsley
salt and pepper (keep in mind the cheese, mustard, saltines are all already salty!)

for saltine cracker crust

4oz or 1 sleeve of saltine crackers
4 tablespoons butter, melted
1/2-3/4 cup hot water

Pre-heat oven to 375f.

Wrap the potatoes in a paper towel and micrrowave for 2 minutes or till half cooked. Set aside.

In a bowl, whisk together the milk, flour, and dijon mustard. Then add the cheese, broccoli florets, potatoes, parsley, salt and freshly cracked black pepper and mix well.

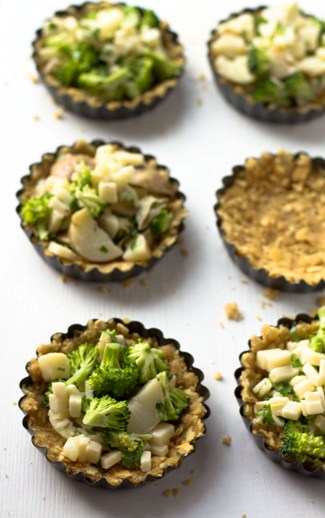
To make the saltine cracker crust, place the saltine crackers in a food processor and crush them to a powder. You should get about 1 1/2 cups of crushed saltines. Place this in a bowl, add melted butter and hot water and stir till it comes together like a dough. Now press the saltine cracker crust dough into a non-stick pie or tart pan. Press down on the crust to compact it and also push it up the edges of the pan.

Pour the cheese, broccoli and potato mixture into the tart/pie pan with the saltine crust. Place the pan on a foil lined baking sheet and bake on 375 degrees for about 20 minutes or just till the top of the tart starts to turn golden. Cool tarts a little, then gently lift them off the mould using a knife. Serve tart warm with a salad of your choice.

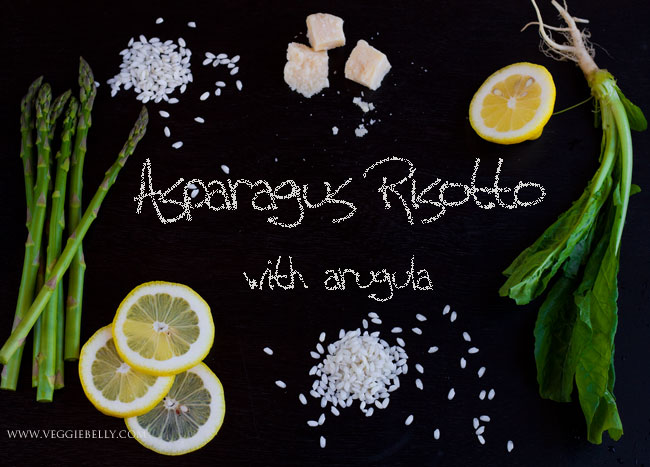
Asparagus and Lemon Risotto with Arugula

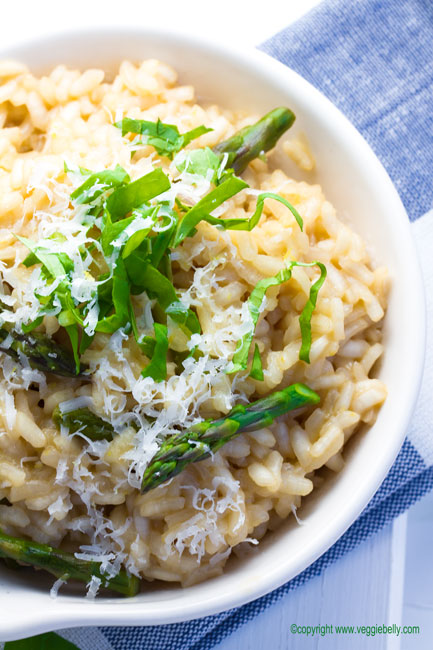
I wanted to make a comforting, hot dish for those chilly, rainy evenings we’ve had recently. I used a beautiful bundle of asparagus (which is is season now) to make some risotto. Fresh peas would also be great in this dish. You can pretty much use any vegetable you like in this risotto, but my favorites are asparagus, peas or wild mushrooms. I also like to stir in some arugula to my risottos. The fresh, peppery arugula is a nice contrast to the creamy arborio rice.

I used a crisp, dry, Gavi white wine in the risotto. I then served the same wine with the risotto.

Below: check out the cute dishes I picked up at the local thrift store! They were perfect for serving risotto. I’m not sure what the spout is meant for, but it works well as a spoon rest. Next time, I think I’ll use these dishes for baked eggs.

Perfect Risotto Tips

- use a short grain risotto rice like arborio, carnaroli or violone
- take care not to brown the rice while cooking it in butter
- always use simmering hot stock, not cold stock
- make sure you only add one ladle full (about 1/2 cup) of stock at a time
- use a good quality dry white wine. I used a Gavi; a crisp, dry white wine from Italy.
- the wine must be at room temperature. Don’t add cold wine to risotto!
- don’t stir the risotto too much while its cooking (but do stir occasionaly!)
- risotto is done when it looks creamy, but the rice is still slightly al-dente
- for a creamier risotto stir in a little butter or cream at the end

Note: I dont like soupy risotto, so I cooked mine very aldente as you can see in the photo above. But the recipe below will give you a creamier, more moist risotto, which is how traditional risotto should be.

Asparagus and Lemon Risotto with Arugula Recipe
serves about 4

10 cups vegetable stock
1 1/2 cups chopped asparagus
4 tablespoons butter
2 cups arborio or carnaroli or vialone rice
1/2 cup dry white wine
1/2 cup arugula leaves, shredded
1/4 cup or more grated Parmesan
2 teaspoons lemon juice
1/4 teaspoon lemon zest
salt

Place vegetable stock on a large pot and bring to a gentle boil. Place the chopped asparagus in the stock and blanch for about a minute. Asparagus should be bright green and still crisp. Using a slotted spoon, remove the asparagus from the stock and keep aside. Reduce heat and keep the stock on simmer.

In a skillet, heat the butter and add arborio rice. Stir the rice on medium heat for about 2 minutes, or till it is fragrant (but don’t let the rice brown). Add wine to the rice and let is bubble away. When most the wine has evaporated, add one ladle of the simmering stock to the rice. Cook on medium-high heat. When the rice has absorbed most the stock, add another ladle full of stock. Repeat this process till the rice has cooked through (you may not use up all the stock).  Check the rice for doneness as you go. When the rice is done, stir in arugula, parmesan, lemon juice, zest and salt.

Twice Cooked Tomato Chutney

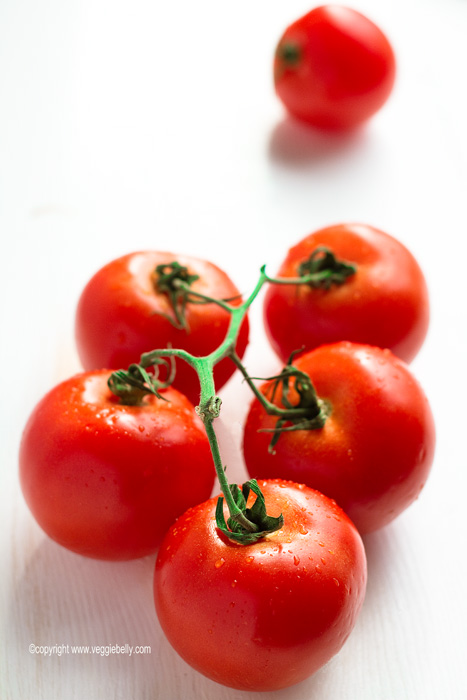
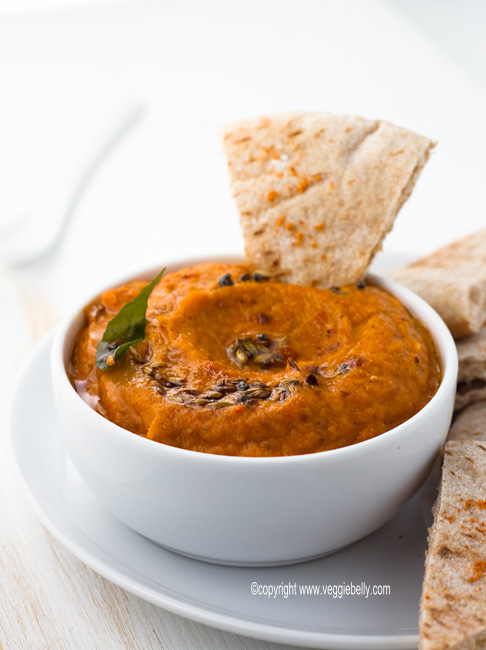
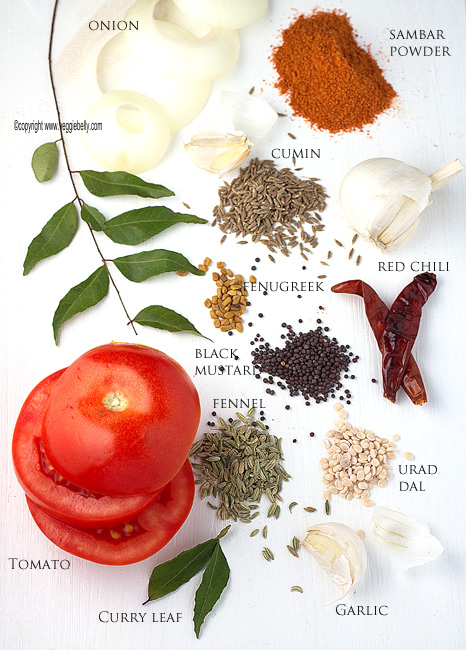
This takes a little longer to make than your average chutney, but well worth the effort. Double cooking  the chutney (once before pureeing, and once after) makes the onion, garlic and tomatoes extra flavorful. I like to add sambar powder to my tomato chutney. Sambar powder is a roasted, powdered blend of spices from south India containing red chilies, coriander seeds, turmeric, lentils and fenugreek. You could leave out the sambar powder if you wish or use only turmeric and chili powder instead.

The recipe below is my ‘special’ version. For a simpler, ’everyday’ version of this tomato chutney, I simply saute the onions, garlic and tomatoes, blend in a blender, temper some black mustard and cumin, add the pureed chutney and cook again. No matter which version I am making, I always twice cook the chutney.

This chutney will freeze well, so if you have a bumper crop of tomatoes this summer, and dont know what to do with them, this is a great option for you. I put the chutney into ice cube trays and place in the freezer. Once they are frozen, I remove the cubes from the tray, put them in a zip lock bag and return to the freezer. This way, you can defrost even tiny quantities of chutney.

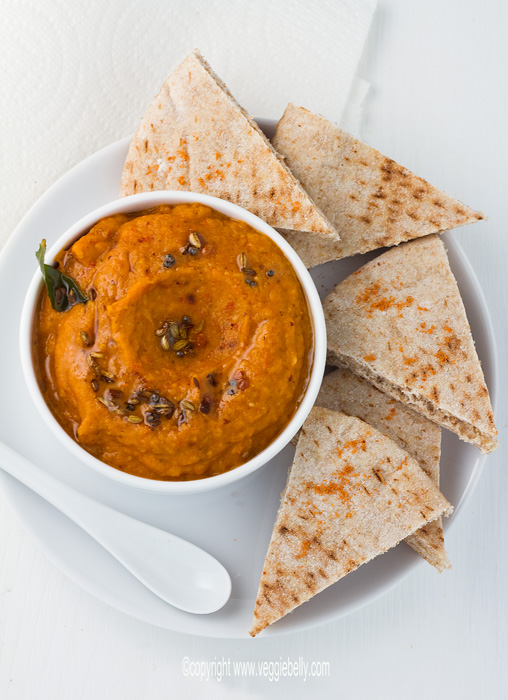
Serving tomato chutney with idlis or dosas is traditional. Here, I serve the chutney with pita bread.

Twice Cooked Tomato Chutney with Cumin and Fennel: Recipe

makes about 2 cups

3 tablespoons vegetable oil
1/4 teaspoon each cumin seeds, fennel seeds, black mustard seeds, urad dal (black gram)
1/8 teaspoon fenugreek seeds
1 dried red chili, optional
1/2 cup curry leaves loosely packed
1 large onion (about 2 cups when diced)
8 pods garlic, peeled
6-8 (about 1 lb) ripe tomatoes, diced
1 teaspoon sambar powder

for tempering:
1/2 tablespoon vegetable oil
1/8 teaspoon each cumin seeds, fennel seeds, black mustard seeds, urad dal
a few curry leaves

Heat oil in a large wok. Add cumin, fennel, black mustard and urad dal. When the mustard seeds begin to pop, add fenugreek seeds, red chili if using, and curry leaves. Cook for about 30 seconds. Then add chopped onion and garlic. Cook on medium heat for 2 minutes. Add chopped tomatoes and cook on medium for about 15 minutes or till the tomatoes are completely soft.

Cool the chutney a little and then puree in a blender, along with sambar powder and 1/2 cup water till smooth. (Make sure to vent the blender lid slightly when blending hot stuff).

Wipe the wok, and heat oil for tempering. Add all tempering ingredients. When the mustard seeds splutter, reduce heat and carefully pour the blended chutney into the wok. Be very careful, the chutney may bubble and splatter. Add salt. Cover the wok and cook the chutney on medium-low for about 15 minutes, stirring occasionally. Serve with idli, dosa or pita bread.

Related Posts with Thumbnails