My Grandmother’s Multicolored Mixed Vegetable Raita


My two grandmother’s could not be more different.  One has a PhD, was a career woman and takes pride in the fact that she ‘cant boil a kettle of water’. She is a connoisseur of fine food, but never enters the kitchen herself. My other grandmother works miracles in the kitchen. She can effortlessly turn out simmering pot after pot of the most delectable sambars, kuzhambus, rasams, poriyals, and kootus. She instilled in me a love for cooking; and not a week goes by when I’m not on the phone with my grandmother asking for recipes, techniques or clarifications. As different as they are from each other, both my grandmothers are remarkable women, and I continue to learn so much from them.

 My grandmother (the non-cooking one!), grandfather,  father and aunt. Late 1950s


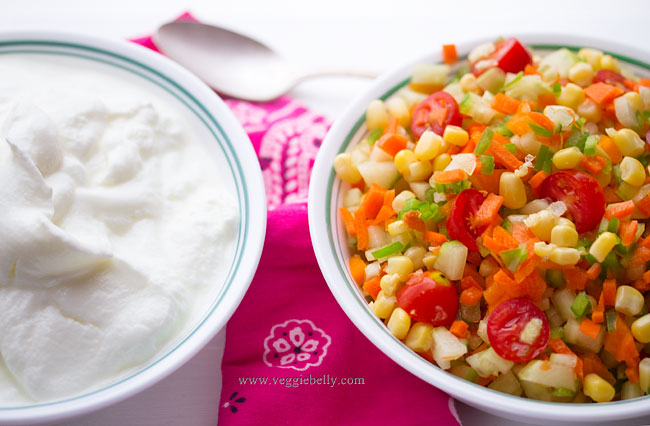
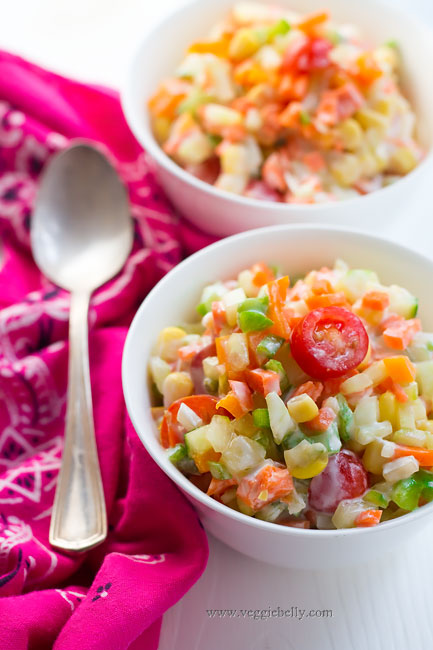
 When its too hot to cook, I always turn to this mixed vegetable raita. Its cool, refershing and there is no cooking involved. I am happy just eating a huge bowl of this for dinner. But this colorful raita will be a great accompaniment to and Indian dinner of rice, roti and curry.

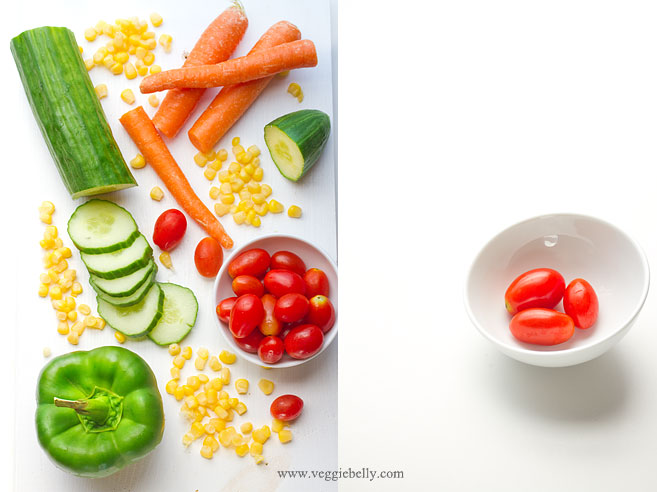
Its easy to remember this recipe – just remember the 6 Cs- cucumber, capsicum, corn, carrot, curd, cherry tomato. Then add pomegranates. Thats it! I didnt use pomegranate seeds in this recipe because I couldnt find any; but I highly recommend you use them!

My grandmother adds salt to the raita only just before serving. If you add salt any sooner, it will draw out the moisture from the vegetables and make your raita watery. And make sure you let the raita sit in the fridge overnight, it tastes much better than eating it right away.

My Grandmother’s Multicolored Mixed Vegetable Raita Recipe

serves about 10 as a side dish

1 large seedless cucumber, the kind with the plastic wrap or 4 small cucumbers (about 3 cups when chopped)
3 medium carrots (about 1 1/2 cups when chopped)
1 small green pepper (about 1/2 cup when chopped)
1 small orange pepper (about 1/2 cup when chopped)
1 cup cherry tomatoes
2 cups drained canned sweet corn
1/2 cup pomegranate seeds (I didnt use, because I couldnt find them)
3 cups yogurt
salt

Peel the cucumber and carrots, and chop into very small pieces. Chop the peppers into tiny pieces as well. Cut each cherry tomato into 2 or 3 pieces.  Mix all ingredients together in a large bowl, except salt. Place the raita in the fridge. Raita tastes better if it sits over night. Add salt just before serving and stir well. Serve chilled.

Grilled Corn with Miso Butter


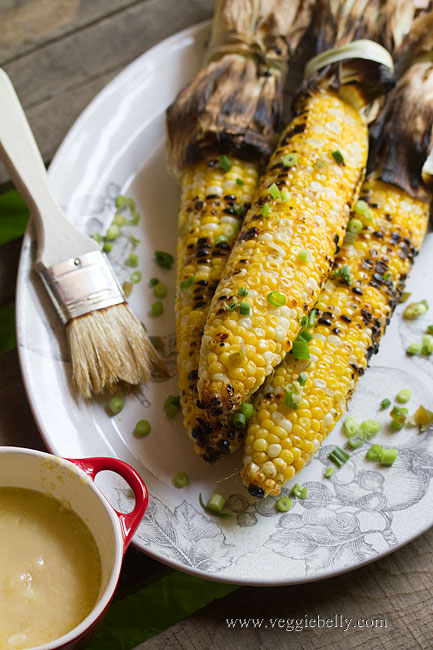
We didnt grill anything over July 4th weekend because I was away in Atlanta for a dear friend’s wedding reception. But I will share a lot of vegetarian and vegan grilling recipes with you in the next few weeks.  To start off, here is an easy grilled corn recipe with miso butter.

I used Miso butter to add a special touch to plain old grilled corn on the cob. I love the depth and umami flavor of miso; and it goes really well with the sweetness of grilled corn. If you dont have or dont like miso, use soy sauce as a substitute.

How to use miso butter
toss with popcorn
slather the miso butter on grilled tofu
top baked potatoes
use it was a dipping sauce for steamed vegetables
toss with pasta

Grilled Corn on the Cob with Miso Butter Recipe

serves about 4

for miso butter
1 tablespoons miso paste (substitute with soy sauce)
4 tablespoons unsalted butter, at room temperature
1/2 tablespoon lime juice
salt

for grilled corn
4 corns on the cob, husk and silk removed

for garnish
chopped green onion
chopped pickled jalapenos

Mix all ingredients for miso butter together and set aside.

Heat an outdoor grill to about 400f. Place corn on grill and turn the corn occassionally so that all sides are grilled evenly. Corn will be cooked in about 12 minutes. When done, remove the corn from the grill using tongs.

Brush miso butter over the corn and serve immediately. Garnish with chopped green onion and jalapenos.

Summer Triple Berry Sangria with a hint of Ginger. A Red Lobster Copycat Recipe

Lets kick off the summer with a sweet, refreshing, berry sangria, shall we? This is a red lobster copy cat recipe — there isnt much vegetarian food at Red Lobster restaurants (not that im expecting any!), but I can eat their buttery biscuits and drink their triple berry sangria all day long.

The berries soak up the vodka and wine, and get all boozy and yummy. But dont let the berries sit in the wine too long, they can discolor. You must serve the sangria as soon as youve made it.


La Grange Winery, VA

Virginia’s wine country is nearby; so our summers are filled with wine tasting, winery hopping, and picnics at the vineyards. We bring home lots of wine when we go on there day trips. But I dont use the good wine for sangria. Whatever wine is on sale at the grocery will do.

We collect wines from around the world, but our local favorite is Narmada Winery, VA  which has an Indian touch

 If you prefer, you can use white wine in this sangria recipe. Also, change up the ingredients as you like – orange juice instead of blueberry juice, triple sec or brandy instead of vodka, club soda instead of ginger ale..the possibilities are endless.

Summer Triple Berry Sangria with a hint of Ginger Recipe

makes 1 large pitcher

1 cup strawberries hulled
1 cup blueberries
1 cup raspberries
1 teaspoon sized knob of fresh ginger, peeled and lightly crushed
1 1/2 cups berry flavored vodka (I used Absolut raspberry)
1 1/2 cups berry flavored juice (I used Ocean spray blueberry juice)
1/2 cup sugar or to taste
one 750 ml bottle of red wine (I used Barefoot Merlot)
1-2 cups gingerale
ice cubes
mint sprigs for garnish

In a large pitcher, place the strawberries, blueberries, raspberries, ginger, vodka, fruit juice, and sugar. Mix well. Cover the pitcher and let the berries macerate in the fridge for about 30 minutes. Fish out and discard the ginger piece. Just before serving, stir in the wine, gingerale and ice cubes.

Crispy Breaded Artichoke Hearts with Garlic Mashed Marrow Beans


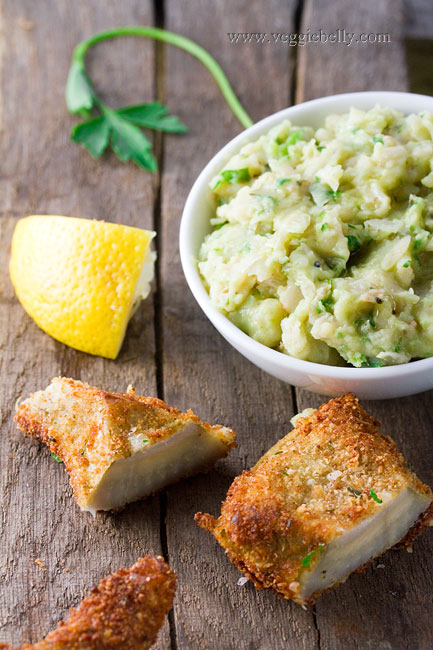
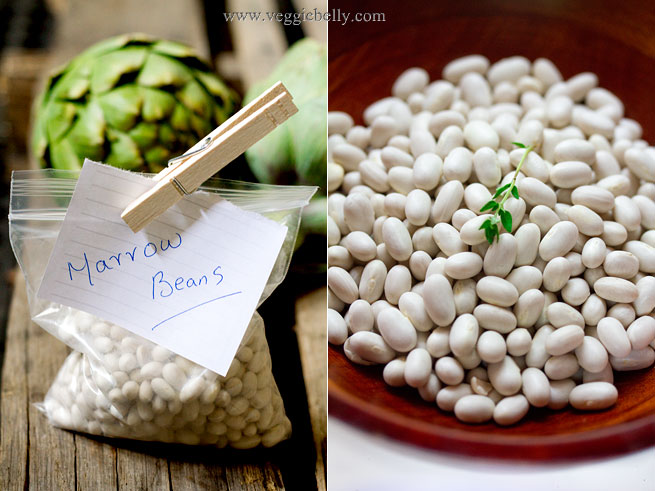
When Marx Foods sent me a packet of Marrow beans to sample, I was eager to use them along with crispy fried artichokes. This recipe is inspired by Yotam Ottolenghi’s recipe for fried artichoke hearts with fava beans (broad beans). If you havent read Ottolenghi’s new vegetarian cookbook, Plenty, you absolutely must buy it. Its my new favorite vegetarian cook book.

Lets talk about Marrow beans. Theyre also called Marrowfat beans. They are earthy, creamy beans that are great when mashed or pureed. They have a meaty flavor somewhat like pork/bacon. These heirloom beans are used in the Mediterranean and were popular in America in the 1800s. You need to soak these beans over night, then change the water and boil them till tender. Marrow beans will also be great in bean dips, stews or soups.

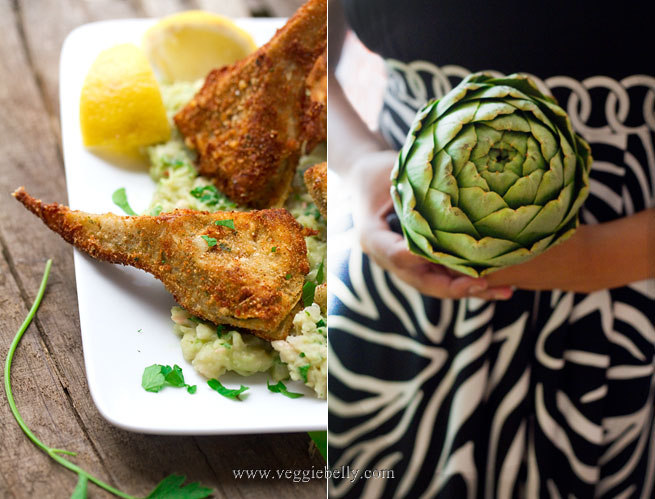
Ottolenghi’s recipe is based on the Roman Jewish style of cooking artichokes – deep frying them in olive oil. Ottolenghi uses panko bread crumbs; I used Italian flavored bread crumbs because thats what I had on hand. He then serves the fried artichokes with crushed fava beans or broad beans. I serve mine with mashed marrow beans. I think mashed chickpeas or cannellini beans will also be nice. If you dont care for the mashed beans part of this dish, you can serve up these fried artichokes just with some garlic mayonnaise.

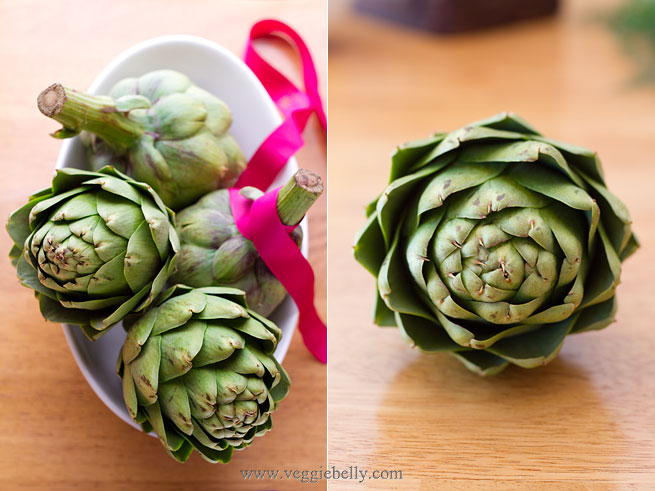
For a step-by-step tutorial on how to clean an artichoke heart, see this post.

Crispy Fried Artichoke Hearts with Garlic Mashed Marrow Beans

adapted from this recipe by Yotam Ottolenghi
serves 3-4 as an appetizer

for mashed marrow beans
1/2 cup marrow beans, soaked overnight in plenty of water
2 sprigs fresh thyme
1 clove garlic, finely chopped
2 tablespoon lemon juice
2 tablespoon olive oil
3 tablespoons finely chopped fresh parsley or basil (Ottolenghi uses mint and dill)
salt and pepper

for fried artichokes
2 jumbo or 4 regular sized artichokes
1 egg
1/2 cup italian flavored bread crumbs or panko bread crumbs
2 tablespoons grated pecorino romano cheese (or parmesan or grana padano)
extra virgin olive oil for shallow frying
salt

Drain and rinse the marrow beans that have been soaking over night. Place beans and thyme sprigs in a large pot with plenty of water. Bring to a boil. Then reduce to a simmer, place a lid on the pot and let the beans simmer till they are cooked through, about 45 minutes. Drain when done.

While beans are cooking, work on the artichokes. Trim and prepare the artichokes hearts; see this post for a tutorial. Place fresh artichoke hearts in a pot full of boiling water, turn down to a simmer and cook artichoke hearts till they are fork tender, about 7 minutes. Make sure artichokes are not mushy; they must be cooked but still firm. Removed to a kitchen towel and pat dry. If using canned or frozen artichoke hearts, skip the boiling; but pat them dry.

Whisk the egg in a bowl. In a plate, combine the breadcrumbs and pecorino romano. Heat a small skillet with olive oil, about half way up.

Dip artichoke hearts in the egg and coat well.  Then dredge them in the breadcrumb mixture, pressing the breadcrumbs to the artichoke hearts. Shallow fry the artichokes, a few at a time, till they are golden on all sides. Make sure oil is very hot. Remove fried artichokes to a paper towel and sprinkle some salt over them. When you salt the artichokes, keep in mind that the breadcrumbs and cheese are already salty.

Once the beans are cooked, drain them, remove and discard the thyme sprigs and place the hot beans back in the pot. Add all other ingredients for the beans. Mash using a potato masher.

To serve, spread some mashed beans on a platter and arrange fried artichokes on top. Serve with lemon wedges.

How to trim and clean an Artichoke Heart

Frozen or canned artichoke hearts are fine if you are in a hurry; but I like to use fresh ones when they are in season and when I have the time to cut, trim and prepare artichoke hearts.

What you will need
steady cutting board
sharp paring knife and a larger knife
small spoon
bowl filled with water
a lemon
fresh artichokes


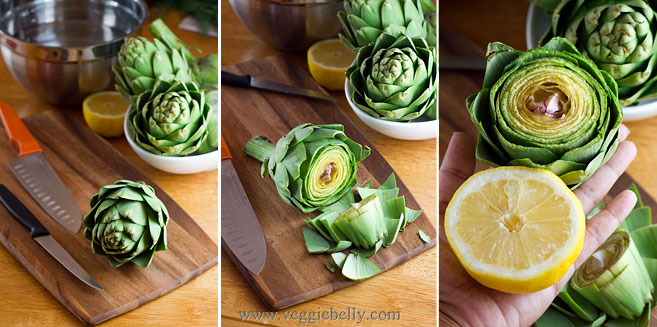
Cut the lemon in half. Squeeze one half of the lemon into the bowl of water. Place the squeezed lemon in the water as well. Keep the bowl of water near by. Using a large chef’s knife, cut off and discard the top 2/3rds of the artichoke. Rub the cut end of the artichoke with lemon, to keep it from discoloring.

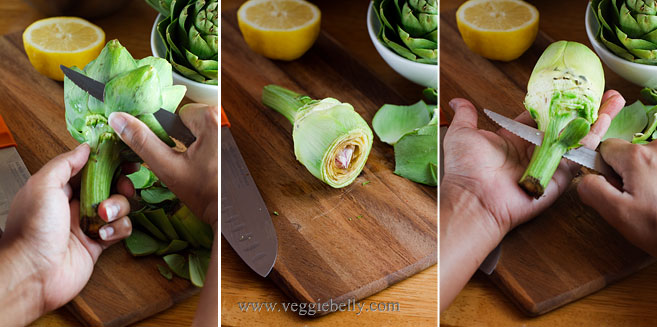
Using a sharp paring knife, trim the outer leaves. Keep removing the tough leaves till you get to the paler, softer leaves on the inside. Tip: save the outer leavesyouve just cut (in another bowl of lemon water). You can boil them and dip them in mayonnaiseor garlic aioli for a nice snack.

When there are about 5-6 layers of leaves left, stop trimming. Then trim the outer, tough, green stuff around the base of the artichoke and around the stem. When you got to the white part, stop trimming. Rub the lemon everywhere youve cut.

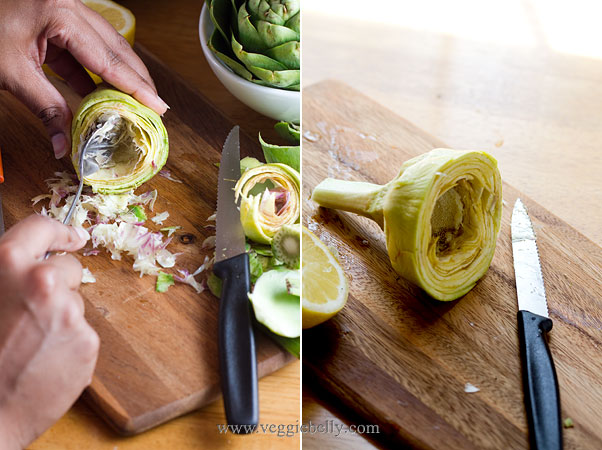
Now comes the important part. Using a spoon, gently but firmly scoop out the fuzzy choke from the center of the artichoke. Make sure you get in there and remove all of the choke, because this part of the artichoke is inedible. The artichoke heart is now clean, and ready for cooking. Immediately place the artichoke heart in the bowl of water and lemon juice.

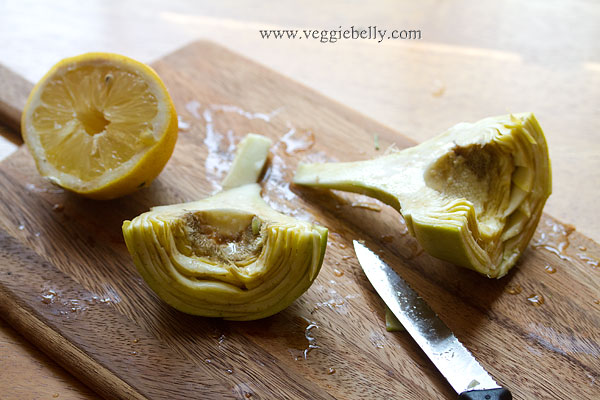
Depending on the recipe, either cut the artichoke hearts in half or quarter them. Also, depending on the recipe, remove or keep the stem.

Notes
- Be careful when handling an artichoke, the tips of its leaves have sharp spikes
- Make sure you remove all of the fuzzy choke from the center
- Always rub cut surfaces of an artichoke with lemon, to keep them from discoloring
- Place trimmed and cleaned artichoke hearts in a bowl of water with lemon juice

Thai-Burmese Curry Noodles (Khao Soi). Thailand part 3.

Before I tell you about this amazing noodle dish I learned to make in northern Thailand, here are more pictures from my recent trip. (And in case you missed my previous Thailand posts, they are here and here).

A Thai Market Outside Bangkok

I visited several markets in Bangkok and Chiang Mai. The format seems to be pretty much the same everywhere – vegetable section, fruit section, then there are some bug vendors (yes, insects), rice vendors, fresh noodle vendors, dessert section and prepared foods section. Every single market I went to was extremely clean and organized.

This one was outside Bangkok, in the suburbs where I was staying with my uncle. So this market wasnt touristy, which is always a bonus.

Left: Sapodilla vendor. Right: My uncles wife Da, on her phone & buying guavas. Da showed me around here and so patiently explained everything and translated for me so I could communicate with the vendors 
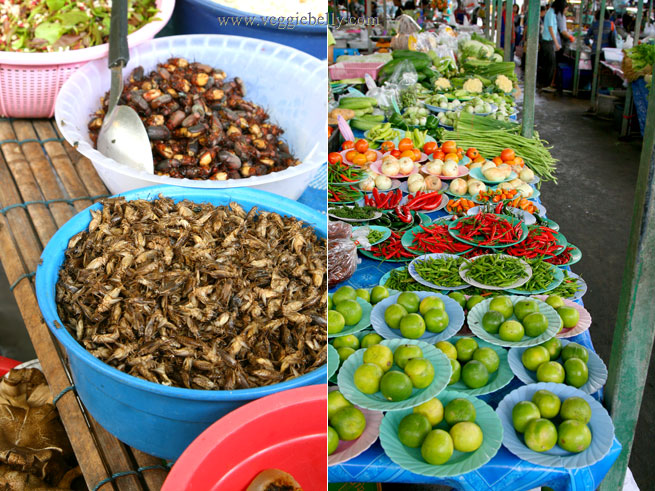
Left: bugs and insects; I was feeling very Andrew Zimmern-ish.  Right: lime, red and green chillies
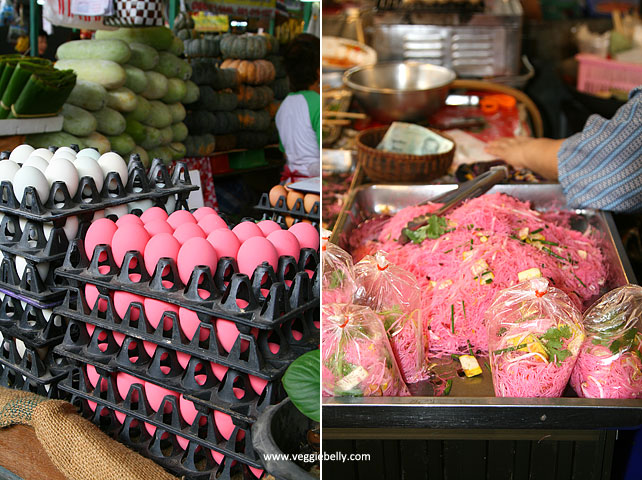
 

Pink preserved eggs (Chinese thousand year old eggs or century eggs) and pink noodles

Khao Soi Curry Noodles from Chiang Mai (Kow Swear or Khauk Swear in Burma)

Now lets travel up north to the cool mountains of Chiang Mai, Thailand. Chinese Muslim traders have greatly influenced this region’s cuisine. Their delicious, spicy noodle dish, influenced by Burmese cuisine, called Khao Soi was everywhere in this city. My favorite vegetarian Khao Soi is from Aum Vegetarian Restaurant. in Chiang Mai.

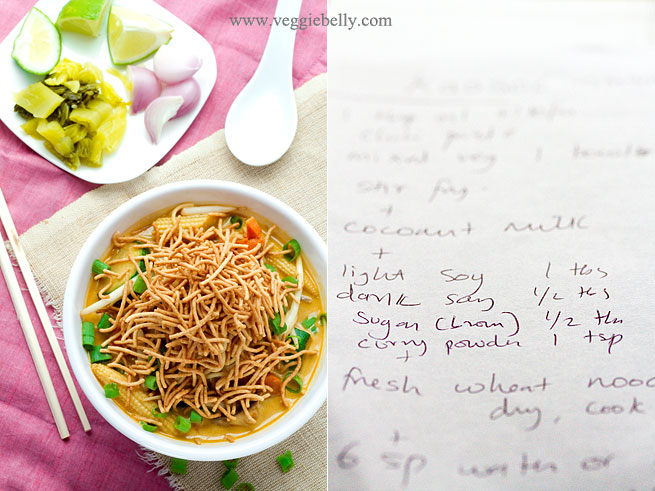
Left: Chiang Mai Aum restaurant’s Khao Soi topped with coconut cream. In the background, chilli paste, lemon iced tea, and British kid.    

Right: My home made version

When I took a Thai Vegetarian cooking class at May Kaidee’s, Duan the owner and instructor was kind enough to show me how to make Khao Soi, even though it wasnt on the class schedule. See this post  for more on Duan and the cooking class.

Khao Soi, also spelled Khao Suey or Khao Soy, is also eaten in Myanmar or Burma and Laos. The Burmese version of Khao Soi is called Kow Swear or Khauk Swear. From what I understand, the Burmese curry noodles, are also in a coconut milk broth, but use more Indian influenced spices like coriander and do not have the crispy noodle topping. Since both the the Thai and Burmese versions are quite similar, I’m sending this post off to AWED Burma, hosted by Kitchen Swathi 
Other Khao Soi recipes:

Khao Soi by the amazing Chez Pim
A Khao Soi battle between an American guy in Bangkok and a Thai girl in Iowa
A Khao Soi recipe from Rosas Yummy Yums
And then there is this whole blog dedicated to the quest for the perfect Khao Soi in New York city!
A recipe for the Burmese version – Kow Swear on We Are Never Full blog

The version I learned to make at the cooking class had shredded chinese cabbage, cauliflower, and tofu. Ive used shiitake mushrooms, baby corn, carrot, zucchini and beansprouts. But I highly recommend adding some pan fried or deep fried firm tofu to this.
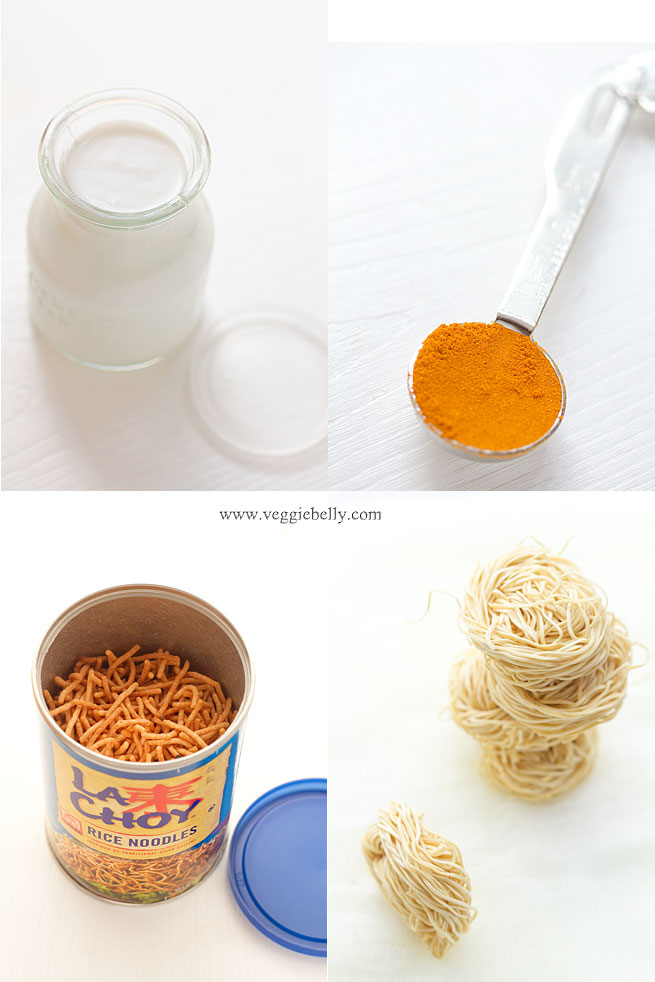
If there is an Asian store where you live, that is best place to buy the specialty ingredients for this recipe. But you may be able to find fresh chinese noodles (not the dry stuff) at the regular grocery store. For the pickled mustard greens, you may have to make a trip to the Asian store (if you want to make your own, here is a good recipe).

All the amazing Khao Sois I had in Chiangmai were topped with crispy fried noodles – the best part! I didnt feel like deep frying, so I used store bought La Choy brand crispy Asian noodles.
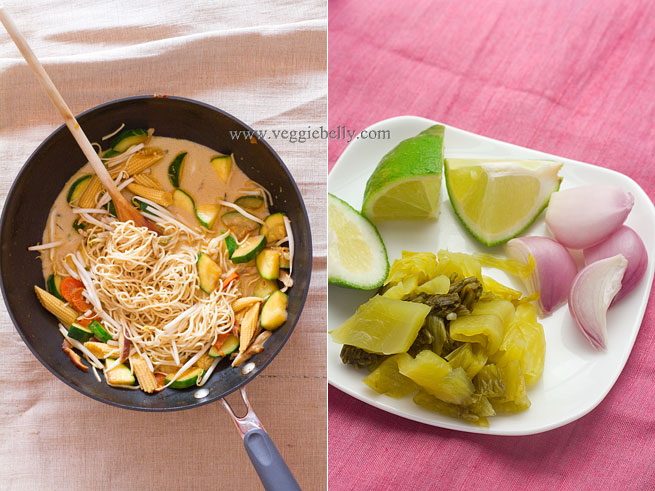
Curry Noodles in Coconut Milk Broth or Khao Soi or Khao Soy Recipe

serves 2-3

1 tablespoon oil
1 cup chopped shiitake mushroom
1 medium zucchini, chopped
1 small carrot, chopped
1/2 cup chopped baby corn
1 tablespoon red curry paste
1 teaspoon curry powder or according to taste
1 tablespoon light soy sauce
1 teaspoon dark soy sauce
1 teaspoon brown sugar
1 cup coconut milk
1 cup water
2 cups fresh Chinese wheat based noodles or about 3 oz dried thin wheat based noodles
1 cup bean sprouts

Toppings and garnishes
1 cup store bought crispy noodles (I used La Choy brand)
2 shallots, chopped
1/4 cup chopped pickled mustard greens (available at Asian stores)
3-4 lime wedges
Chopped cilantro
Chopped green onion

Heat a large wok with oil. Add shitake mushroom, zucchini, baby corn and carrot and cook on high for about 2 minutes. Then add curry paste and curry powder. Toss to coat the vegetables. Add light soy sauce and cook about 30 seconds so the vegetables absorb the liquid. Then add dark soy sauce, brown sugar, and coconut milk. Let the curry simmer for about 2 minutes.

Then pour in water and bring back to a simmer. Taste curry and adjust soy sauce, and sugar to taste. 

Bring a large pot full of water to boil noodles. If using dried noodles, cook in boiling water till noodles are very al dente. If using fresh noodles, boil for about 1 minute. No matter what noodles you use, make sure not to over cook them. Drain well.

Add cooked noodles and bean sprouts to the curry broth. 

Serve Khao Soi in individual bowls, topped with crispy noodles. If you dont have store bought crispy noodles, increase the fresh or dry wheat noodles quantity in this recipe by 1/2 cup. If using dried noodles — deep fry this extra half cup of boiled, drained noodles in oil, till golden. If using fresh noodles, deep fry them as is. Then top Khao Soi with the fried noodles.

Serve with chopped shallots, pickled mustard greens, lime wedges and cilantro on the side.

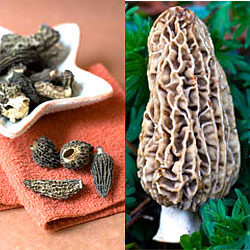
Win 2 pounds of Fresh Morel Mushrooms!

This giveaway has ended, winner announced here

 Marx Foods  is offering a great opportunity for Veggie Belly readers to win 2 lbs of FRESH morel mushrooms!

This years Morel season has been fantastic! And one of YOU can win a huge load of these amazing mushrooms. Morel season is very short, so dont miss this chance!

All you have to do to enter is one or more of the following:

- ‘Like’ Veggie Belly on Facebook, then leave a comment here saying you did

- Follow Veggie Bely on Twitter, then leave a comment here saying you did 

- Leave a comment here saying what you will make with the morel mushrooms if you won them!

 
Do all 3 and you will have 3 chances to win!
If you are already following Veggie Belly on Twitter and/or Facebook, just say so in your comment!
If you dont have a blog through which I can contact you if you are the winner, make sure to leave an email address!

Deadline: 9pm EST Saturday, June 26th 2010
US readers only
One random winner will be picked on Saturday, June 26th 2010

I’m a huge fan of morel mushrooms. Check out my recipes for

fiddlehead fern and morel mushroom pasta

or

crispy polenta with morel mushroom and broccoli

Also check out the sponsors of this giveaway, Marx Foods, on facebook or twitter

Related Posts with Thumbnails