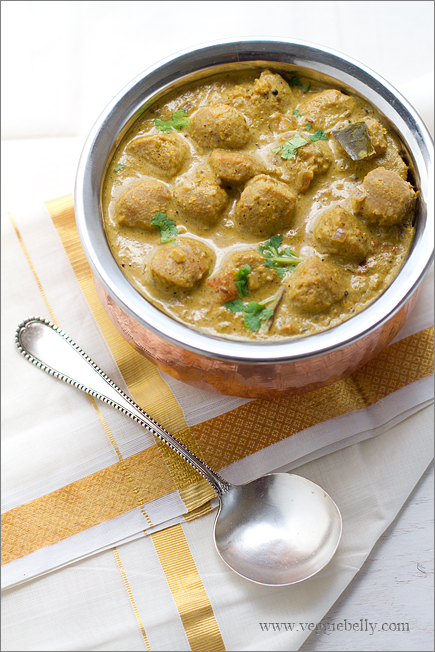
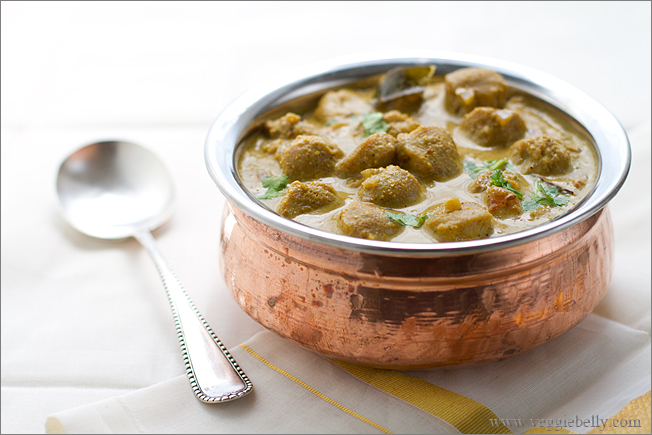
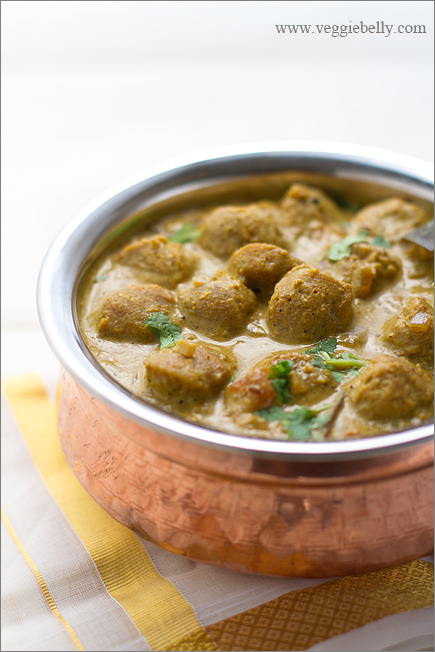
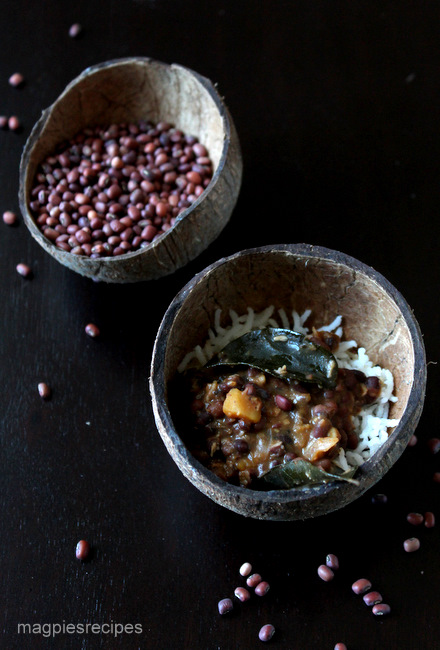
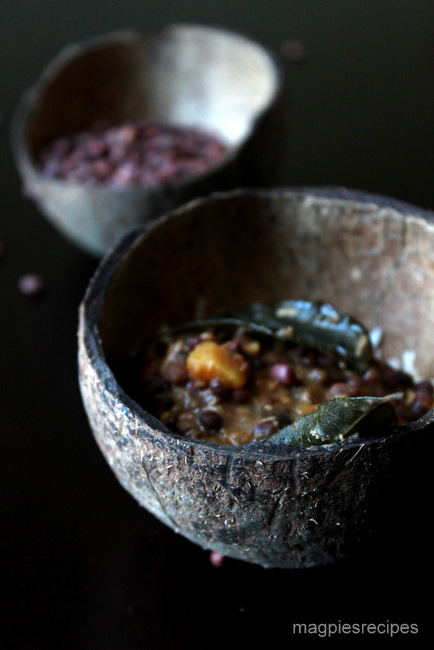
Red Moong and Butternut Squash Eriserry Recipe – a Guest Post by Rose of Magpies Recipes

Greetings from the windy city! I am on a cross country road trip right now (posts and pictures coming soon!) and have stopped in Chicago for a day. I have enlisted some of my favorite bloggers to bring you their recipes, while I’m driving 3,000 miles cross country! The first post in my guest post series comes from Rose of Magpies Recipes. Rose is from the state of Kerala, and her blog is full of Kerala recipes cooked with love. I am a huge fan of malayali cooking, and this red moong and butternut squash eriserry (a curry with coconut) is one of my favorites. Take it away Rose!

I am a huge fan of Sala’s gorgeous photographs and wonderful writing as much as I am her warm wonderful personality. When I heard that she was going on a cross country road trip and was wanting guest posts for her awesome blog Veggie Belly,  I sent off a mail to her saying I would love to guest post for her lovely blog, although I have only a few days of packing left to do to head off to India myself! Yes am so excited and just cannot wait to be  home. Am especially longing to introduce my little monkey to my grandmother who is just waiting to meet her first great-grand son!

I was thrilled when Sala very kindly said she would love if I did. Thank you Sala! I hope you are enjoying your trip. Since Sala loves Kerala food, I am sharing one of my favourite everyday Kerala dishes, Red Moong and Butternut Squash in Coconut curry (Van Payar Mathanga Eriserry). It is a simple yet comforting and delicious. And perfect for the transition to the fall season, although here in California we still have a few weeks of intense summer left!

While I come from a Syrian Christian family of big meat eaters I also love my veggies and lentils and am married to a lentil lover as well. T can go for weeks on just cherupayar or dal and for everyday eating we are most happy with such simple fare.

Eriserry is a typical Kerala lentil dish and is often part of the Onam Sadhya or harvest festival that happens in the month of September. In Kerala it is usually made with a variety of pumpkin available there, although here I make it with squash or even sweet potatoes. Traditionally fresh coconut is ground into a paste but I use the convenient frozen shredded coconut that is easily available in most Indian grocery stores here. Of course there is a difference in taste but this makes it a very easy dish to make.

Red Moong and Butternut Squash Eriserry Recipe (Van Payar Mathanga Eriserry)

serves 4-6

Ingredients
1 cup dry red moong beans or cow peas  (van payar)
2 cups butternut quash peeled and chopped (you can also use sweet potatoes. But mathanga or Indian pumpkin is traditional)
1-2 tablespoons coconut oil or canola oil
1/2 teaspoon mustard seeds
1/2 teaspoon cumin seeds
1/4 teaspoon turmeric powder
1 teaspoon dried chilli flakes or 3/4 tsp chilli powder-3/4
4-5 curry leaves
1 medium onion, chopped
2-4 cloves garlic, sliced thin (optional)
1 cup coconut Milk
1/4 cup shredded coconut. Do not substitute desiccated coconut 
Salt to taste

Method
Wash the red moong beans or cow peas and leave to soak in water while you prepare the rest of the ingredients. You can also soak them overnight so that they cook faster.

Pressure cook the beans with 2.5 cups of water and salt until they start to become soft ( about 1 whistle and 7 mins on simmer). Once the pressure has released, open the pressure cooker and add the squash and cook for about 2 more whistles until the beans are soft and the squash is fork tender.

If you don’t have a pressure cooker, you can just cook beans and squash in a deep pot instead, but this will take longer.

Meanwhile in a seperate pan or skillet heat the oil and add the mustard seeds and cumin seeds and let them splutter
Now add the turmeric powder, chilli flakes and curry leaves and the chopped onion and garlic if using and stir occasionally until the onions are translucent and starting to turn brown.

Add the shredded coconut and saute until the coconut turns lightly golden.

Add this to the cooked beans and stir well to combine. Heat and let it come to a boil for about 5 mins. Reduce the heat to low and add the coconut milk and let it simmer for about 5 mins. Taste to check the salt and add more if required. Do not let it come to a boil after adding the coconut milk as the coconut milk will curdle.

Serve hot with rice, fried pappadam and pickle. For extra points, serve some sweet payasam for dessert!

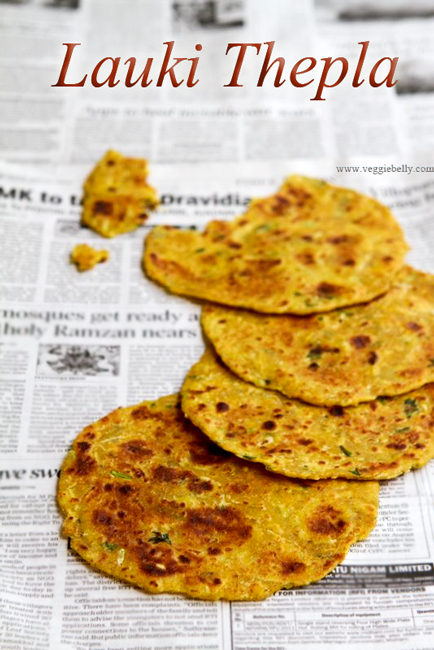
Lauki Thepla – Spiced Indian Flat Bread Recipe


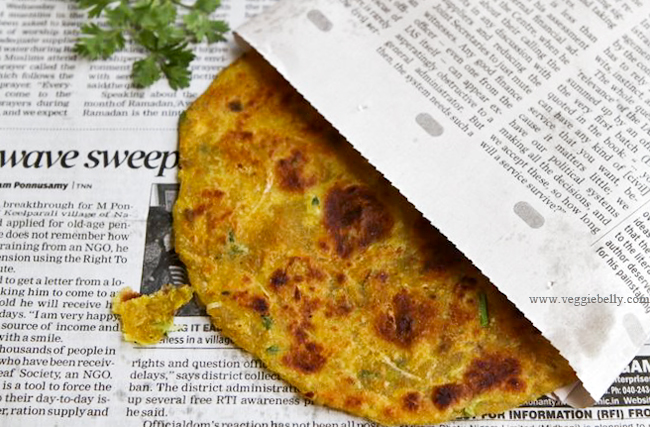
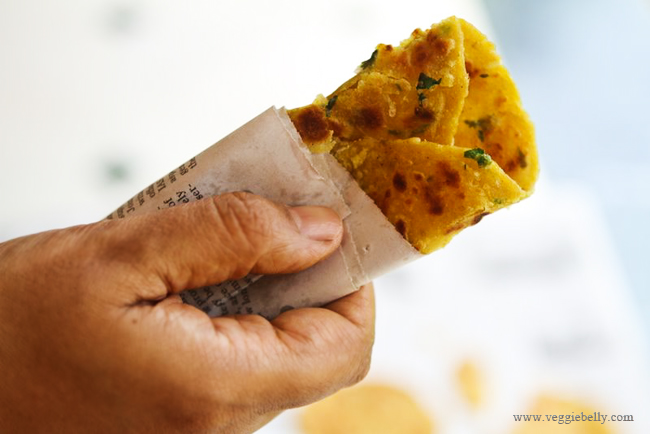
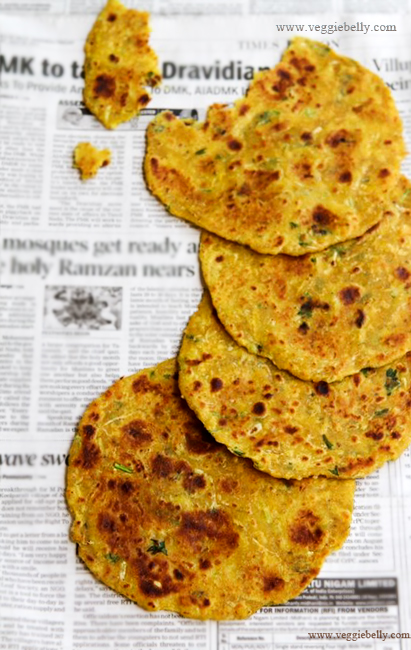
Theplas remind me of long train journeys in India. Because this spiced Indian flat bread keeps so well, it is perfect to take along for a trip. We wrap them in thin cloth towels and munch on them on our train as we watch the country side go by. Theplas are also ideal for picnics because they dont need refrigeration.

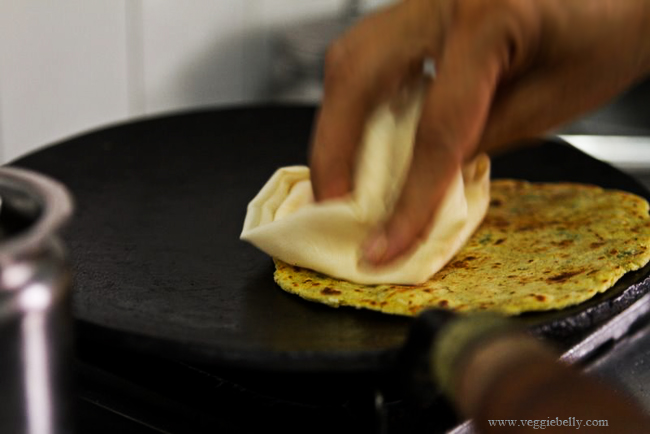
You can make theplas with or without oil. But the oil less ones wont keep as long. If you want to make theplas without oil, just put one on your skillet, and then press a bundle of cloth on it, dabbing it everywhere (see picture below). This will distribute the heat and cook the theplas evenly.

If youve never made thepla before, it might take a bit of practise to get the dough right. You will need to vary the amount of water you use depending on how much water content your lauki has. But in general you need very little water for this recipe – just a few sprinkling. The lauki will release enough water when kneading to make a nice, soft dough.

For a great variation on this lauki thepla recipe, add grated radish or fresh methi leaves to the dough. You will need to use a little more water when kneading if you use grated radish or fresh methi leaves.

Lauki Thepla – Spiced Indian Flat Bread Recipe

makes 20 theplas

Ingredients
3 cups wheat flour (atta)
2 tablespoons vegetable oil
3/4 teaspoon or according to taste, salt
1/2 teaspoon turmeric powder
1/2 teaspoon ajwain (carom) seeds
1 teaspoon white sesame seeds
6 green chilis, or according to taste, ground into a paste
1/2 teaspoon ginger paste
1/2 teaspoon garlic paste
1 cup grated lauki (bottle gourd). Substitute with grated radish or fresh methi leaves
3 tablespoons yogurt
1/4 cup or more, chopped cilantro
a small bowl of water

Method
Place all ingredients except the water in a large bowl. Knead for about 1 minute. Sprinkle a little (about 1 tablespoon) water and knead 10 times. Sprinkle a little more water and knead again. Continue kneading and sprinkling water when needed till the dough is no longer sticky and has formed a soft ball. It should take approximately 5 minutes of kneading for the dough to reach this stage.

Remember: You may need to use a little more or less water depending on how ‘watery’ your lauki or bottle gourd is.

Roll out the thepla dough into a long log. Cut the log into 20 even pieces. Form each piece into a ball.

Place a ball of dough on a flat surface. Using a rolling pin, roll it out like you would a chapati. Sprinkle flour on the thepla as when needed so it doesn’t stick.

Heat a heavy skillet, griddle or tava. Place the rolled out thepla on it. Cook till brown spots appear, about 45 seconds. Turn the thepla over, pour 1/4 teaspoon oil around it and let it cook till golden on both sides.

Repeat for all the dough.

Store Lauki Thepla in an air tight container for upto 1 week. It will also freeze well.

Chettinad Meal Maker Curry Recipe

Chettinad is a region in South India where many of my ancestors come from. It is a dry, arid land inhabited by a devout and enterprising people. And the food is simply sensational. There is no greater pleasure than eating at a chettinad wedding! Chettinad cuisine uses an abundance of spices like cumin, fennel, fenugreek, star anise, poppy seeds, chillies, tamarind, shallots, coconut and curry leaf. This chettinad meal maker curry is inspired by my heritage.

Nemam Koil, our clan temple in Chettinad

Chettinad is famous for its palatial ancestral homes. This house in Kothamangalam is now Saratha Vilas hotel.

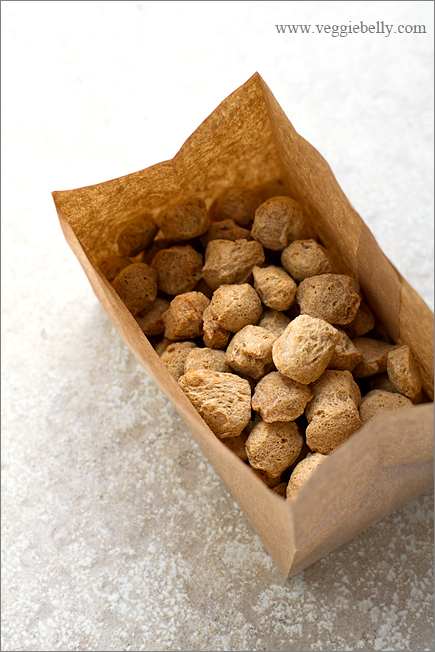
Chettinad homes are generally famed for their non vegetarian food. But you can easily enjoy the flavors of this region with this vegetarian, vegan recipe. Meal maker or Nutrella are Indian brands of soy protein that are quite meaty in texture. I used Indian meal maker in this recipe. Feel free to use any kind of dried soy chunk or granule product. TVP, TSP, soy chunks, soy granules, or even seitan will work.

This chettinad meal maker curry recipe is easily adaptable to different tastes, use only vegetables (cauliflower is nice) or adjust coconut milk however you like. You can use more or less chillies according to your preference.

Chettinad Meal Maker Curry Recipe

(A Spicy Curry using TVP, TSP, Meal Maker, Nutrella or Soy Chunks)
Serves about 4

Ingredients
1 cup dry soy chunks/Meal Maker/Nutrella/TVP/TSP*
1 tablespoon oil
½ teaspoon black mustard seeds
¼ teaspoon cumin seeds
6 curry leaves
1-3 green chillies, slit. optional
½ medium onion, chopped
3 garlic cloves, cut into slivers
2 small tomatoes, chopped
1 recipe masala powder, see recipe below
½ teaspoon ground turmeric
1 cup coconut milk
Salt

*Soy chunks like Meal Maker and Nutrella are easily available at Indian stores. TVP/TSP granules are available at the regular grocery store.

Method
Rehydrate the soy chunks (meal maker) or granules according to package instructions. This usually involves boiling a small pot of water with a little salt, boiling the soy chunks in it, then letting them soak in the boiling water (10 minutes for soy chunks, less for granules – read the box instructions). Drain the soy chunks or TVP granules, and squeeze out as much water as you can. Set the re-hydrated soy chunks or TVP granules aside, and proceed with the recipe.

Heat the oil in a medium saucepan. Add black mustard seeds and let them sizzle. Then add cumin and stir for 30 seconds. Add curry leaves and chillies, stir again. Then add onions, and sauté on medium-low heat for 3 minutes, or till the onions have softened. Now add the garlic and tomatoes. Continue to cook on medium-low heat till the tomatoes are very soft, about 6 minutes.

Add the ground masala powder (recipe below), turmeric, and salt, stir for a minute.

Add re-hydrated, squeezed soy chunks/meal maker/nutrella/TVP/TSP and pour in 2 cups water. Bring to boil. Continue boiling for about 5 minutes.

Pour in coconut milk and cook stirring for about 2 minutes. Taste the curry, if it is too spicy for you, add more coconut milk.

Garnish with chopped cilantro. Serve hot with rotis, chappatis, tortillas, or steamed rice.

For the masala powder
Ingredients
1 tablespoons coriander seeds
1/2 tablespoon cumin seeds
1/2 tablespoon fennel seeds
1 small dried red chili, optional

Method
In a small, heavy skillet on low heat, toast each of the ingredients one at a time. Roast each spice for about a minute, or till it lightly turns color and gets fragrant. Let the toasted spices cool a little. Then place in a coffee grinder and grind into a fine powder. Make sure there are no unground pieces.

Pineapple Semolina Pudding (Pineapple Kesari) Recipe

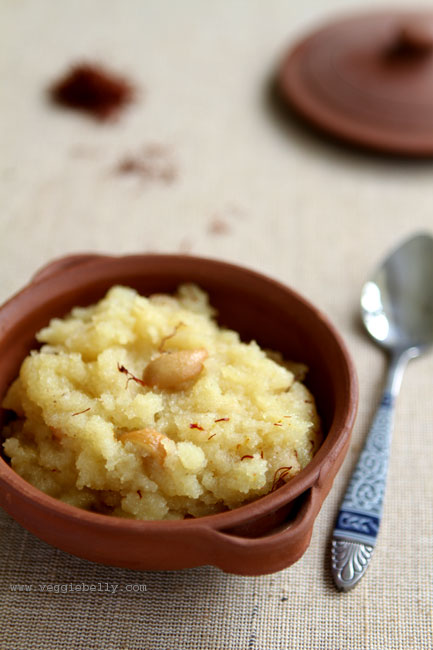
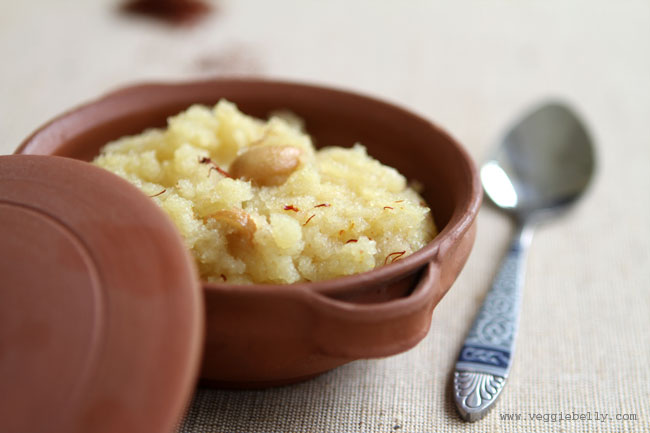
When I need a quick fix dessert recipe, I always resort to kesari – a semolina pudding with ghee, cashewnuts, and saffron. The ghee, nuts and saffron make this dessert exotic and special; but nobody will know you only spent 15 minutes making it!
I am delighted with this variation on regular kesari (also called sooji halwa). Pineapple juice adds a hint of fruity flavor to kesari, making it unique. Be sure you read my note on sugar** before you make this recipe.

Pineapple Semolina Pudding or Pineapple Kesari Recipe

serves about 8

Ingredients

4 cups fresh or canned pineapple juice*
1/4 cup + 2 tablespoons ghee
1/2 cup cashewnuts
1 cup semolina (rava or sooji)
1 cup sugar**
a pinch of saffron threads

* To make juice from fresh pineapple, blend 2 cups chopped fresh pineapple, with about 3 cups water to make a puree. Strain the juice, and measure out 4 cups.

**This will make a not-too-sweet dessert. If you want it sweeter, feel free to use more sugar, but keep in mind that how much sugar you need will vary slightly depending on how sweet your pineapple is. You may need to use less sugar if you are using canned pineapple juice.

Method

Heat a heavy bottomed wok or saucepan with 1/4 cup ghee. Add cashewnuts and fry on low heat till the nuts are golden. Using a slotted spoon, remove the the cashews from the ghee and place in a bowl.

Add semolina to the ghee. Stir on medium-low heat for about 3 minutes or till the semolina is toasted. Remove the semolina into a bowl. Wipe the pan clean.

Pour in pineapple juice and sugar. Bring to a boil. Boil for 1 minute. Reduce heat to low, and add the toasted semolina. Cook, stirring constantly on medium heat, till the pudding thickens – about 5 minutes. Cooking time will vary depending on how coarse your semolina is.

When the pudding starts to thicken, add 2 tablespoons ghee and stir. Remove from heat. Stir in fried cashew nuts.

Sprinkle saffron on top.

Vegetable, Paneer and Pasta Bake Recipe

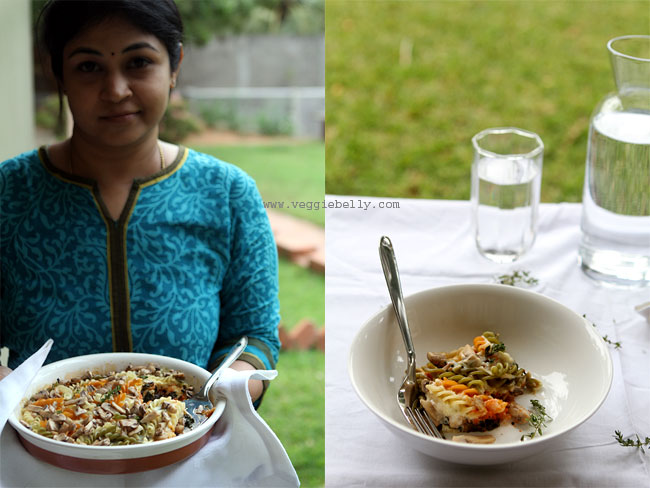
I always enjoy the time I spend with my cousin Meena. She is such a pleasant and genuine person, and the time we spend together is always special. When we met last week (after more than a year!), we spent lazy afternoons gossipping, playing pallankuzhi, and cooking.

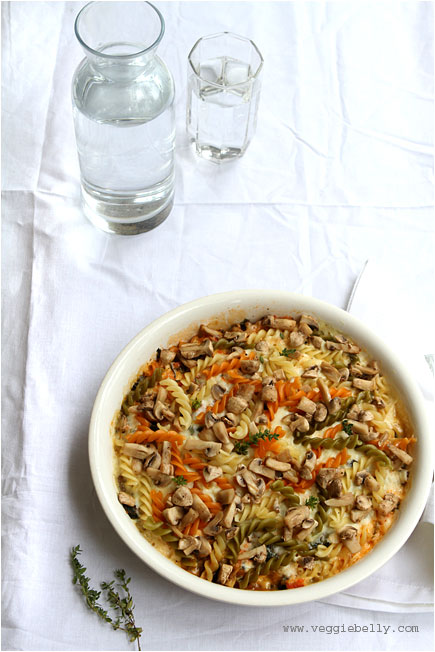
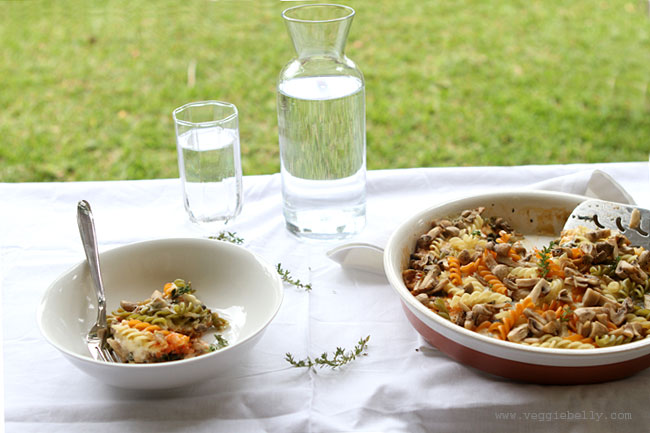
 This delicious vegetable, pasta and paneer bake recipe comes from Meena. She makes this vegetarian bake recipe for her post-swim meal. It is filling, and delicious without being heavy.

Meena didnt use cheese in this recipe, to keep it on the lighter side. But you can add some cheese on the top before baking. Vegans can use soy milk and tofu cubes instead of paneer (althought, I havent tried making the vegan version of this bake).

Meena microwaves the bake, which makes things very quick and easy. You can bake it as well, see instructions below. Remember, all the ingredients here already cooked – you only want to bake or microwave this dish just till the sauces bubble and the mushrooms cook.

Thanks meena, for your precious friendship, and for this delicious recipe that I know I will be making again and again.

There are multiple steps in this recipe, but dont let that put you off. Its well worth the effort. And you can make a big batch of this vegetable, paneer and pasta bake and freeze it.

Watch a step-by-step on how to make vegetable paneer and pasta bake

Vegetable Paneer and Pasta Bake Recipe

serves 3-4
Ingredients for the vegetables & paneer
6 oz paneer (substitute with drained, pressed, firm tofu)

3 cups fresh spinach, tightly packed
3.5 oz white button mushrooms (about 15 medium sized mushrooms)

Method
Cube the paneer and set aside.

Wash the spinach, and chop it. Place the washed, chopped spinach on a small wok. Cover it with a lid. Heat the wok on low heat, just untill the spinach wilts. Then remove from heat and sprinkle a little salt. Set aside.

Wipe the mushrooms clean with a paper towel. If the mushrooms have too much dirt, wash them in water, and drain well.

If the mushrooms are large, cut them in 4, if they are small, cut them in half. Set aside.

Ingredients for the pasta
1 1/2 cups cooked pasta*, such as elbow macaroni, shells, fusili, or penne
*Make sure the pasta is cooked al dente – it should not be over cooked or mushy.

Ingredients for the tomato sauce
4 small tomatoes
1 small onion (1/4th cup when chopped)
4 garlic cloves
1 tablespoon olive oil
1/4 teaspoon dried Italian seasoning
Salt & cracked pepper

Method
Core the tomato, chop it roughly and puree it in a blender.

Peel and chop the onion and garlic finely.

Heat olive oil in a small skillet. Add the chopped onion and garlic. Saute on medium heat till the onion gets translucent, about 2 minutes.

Add the pureed tomatoes and 1/4 cup water to the skillet. Bring to a boil. Now add Italian seasoning, salt and pepper. Let the sauce gently boil, till it thickens a little, about 3 minutes.

Ingredients for the white sauce
1 1/2 tablespoons olive oil or melted butter
1 1/2 tablespoons all purpose flour (maida) or wheat flour
1 cup room temperature or cold milk, preferably whole milk
1/4 teaspoon or to taste, dried Italian seasoning
Salt and cracked pepper

Method
Place the oil or butter in a non stick sauce pan (without heat). Sprinkle the flour over the oil or melted butter. Using a whisk, stir the flour into the oil or butter to incorporate. Place the pan on a stove over low heat. Immediately, pour in milk. Whisk again till the flour dissolves.

Increase heat to medium. Cook the sauce, whisking constantly, till the sauce thickens, about 2 minutes. Now add Italian seasoning, salt, and pepper. Turn off heat.

To assemble and cook the vegetable paneer and pasta bake

Take a medium baking dish, about 8 inches in diameter. Line the bottom with the paneer cubes. Layer the wilted spinach on top of the paneer. Pour the tomato sauce all over. Next, pour the white sauce. Arrange the mushrooms and pasta on top of the white sauce.

Optional step: sprinkle 1/2 cup grated cheddar or mozzarella cheese on top. Meena didnt use cheese in this recipe.

Place the bake in a 400 f oven and bake for 15 minutes or till the sauce is bubbling. If you are baking this in the oven without cheese, you need to pour the white sauce on top of the pasta, so that the pasta doesnt dry out in the oven.

Alternatively, microwave the bake on full power for 5-8 minutes or till the sauce bubbles. Microwave ovens vary.

Serve warm with a green salad.

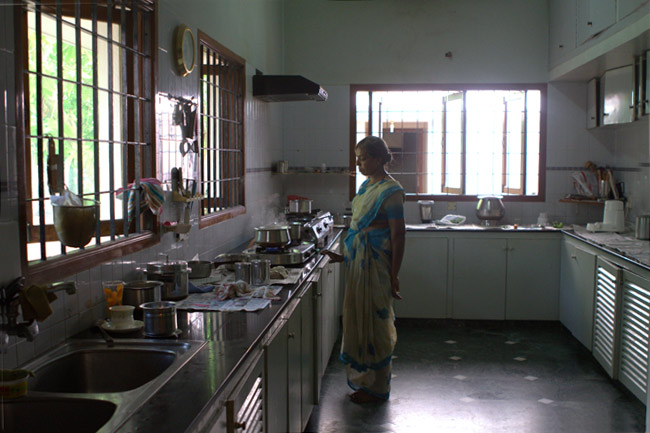
My Parents’ Indian Kitchen: a Peek

This is the house I grew up in. This is the kitchen that shaped my interest in food and cooking. When we were children, my sister, brother and I would come running in here requesting a cold, freshly squeezed lemonade, a quick snack of spiced, stir fried bread, or a deep fried treat.

Even now, when I smell curry leaves and chilies being tempered in oil, I am transported back to this very kitchen. I’ve already shared with you some our family recipes. Now I invite you to take a peek into my parents’ kitchen in India..

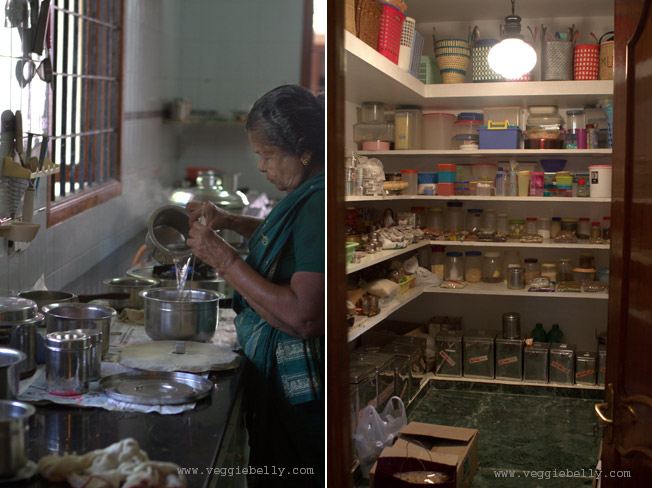
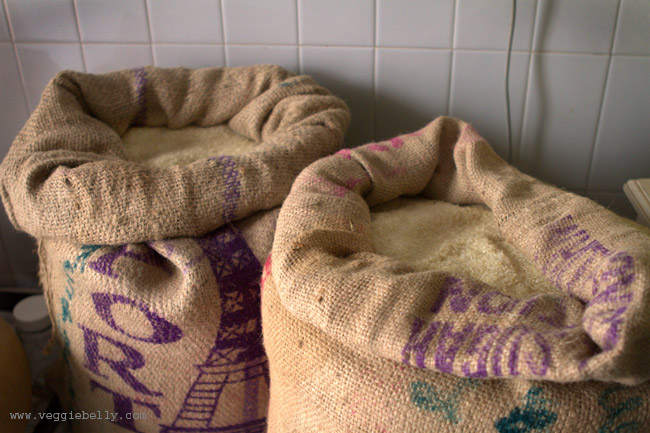
Kamalamma the cook, gets ready to make idiappam or string hoppers made from rice flour. The pantry or store room is stocked with different kinds of rice, lentils, spices and kitchen supplies.

Sacks of short grain rice arrive once or twice a year. The rice is used for boiling, making idlis and dosas, and is also roasted and ground into rice flour.

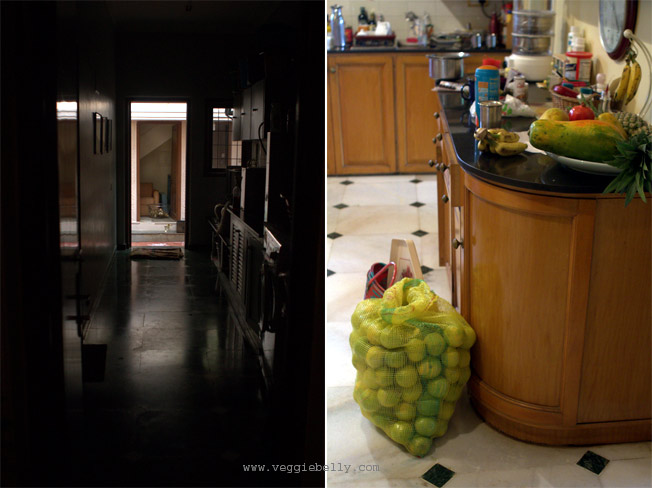
In parts of India, it is common for the household staff to live with the family. This corridor leads to the back of the house and to the live in maid’s quarters.

My parents always keep a lot of fruit on hand. A huge sack of sweet lime or sathukkudi has just arrived from the market.

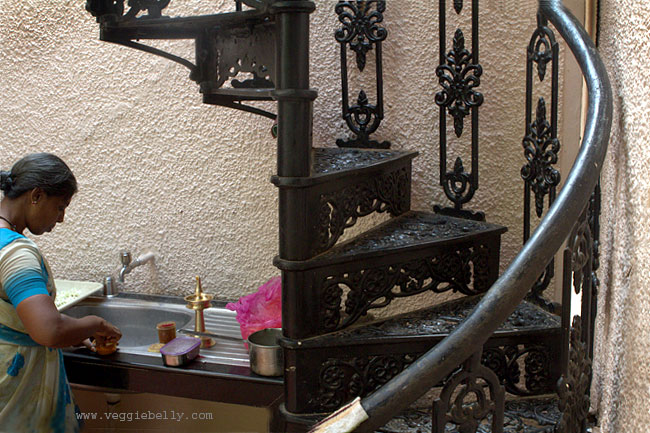
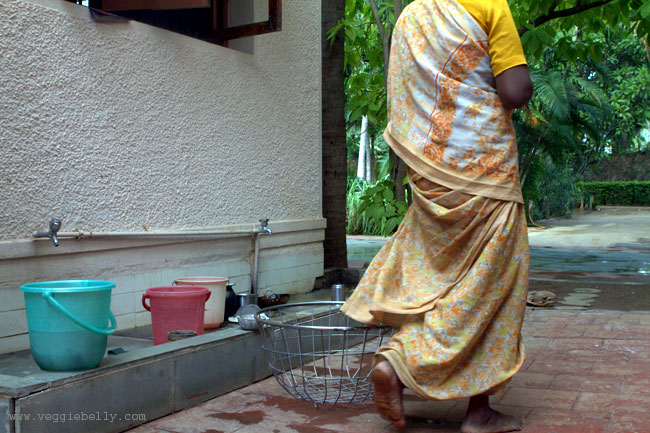
This is the back of the house, where all the prep-work, and cleaning happens outdoors.

Outdoor dish washing area – dishes are hand washed and either towel dried or left out in the sun.

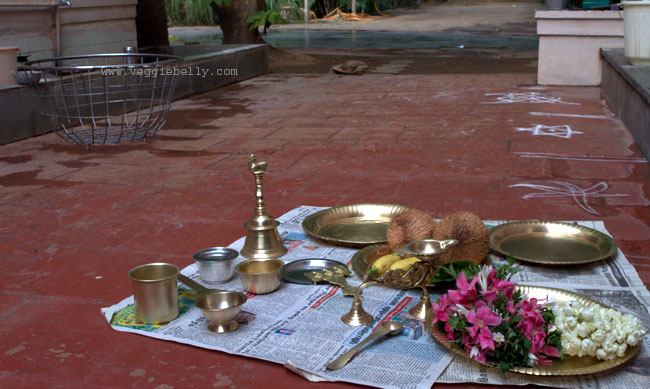
Pooja (prayer) items are washed an ready for my brother’s evening prayers. The coconuts, banana, flowers and cup with water are offerings to God. The brass bell is rung to ward off evil spirits.

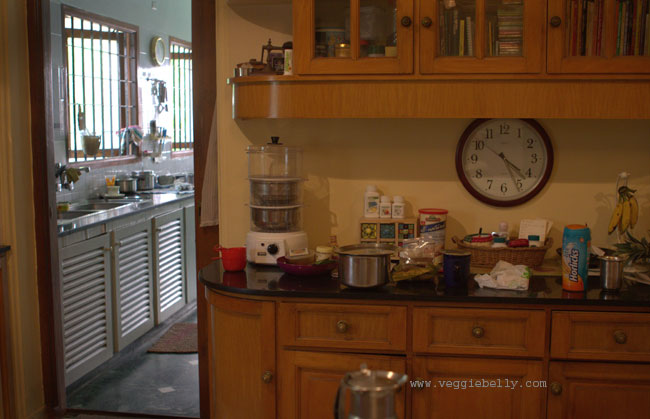
Part of the dining room, and entrance to the kitchen.

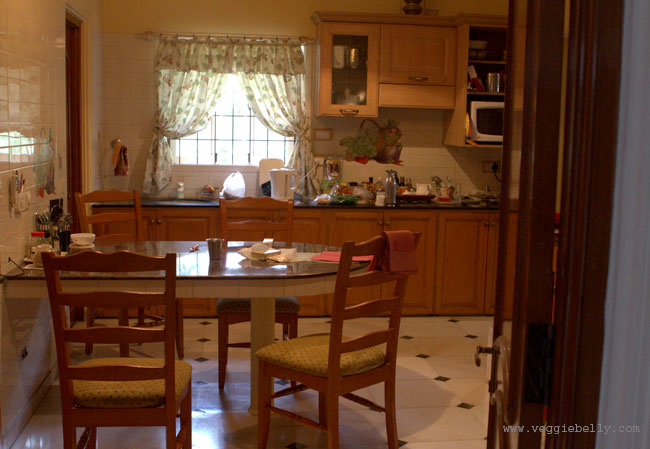
This is the everyday dining room. We have a larger dining area for entertaining guests.

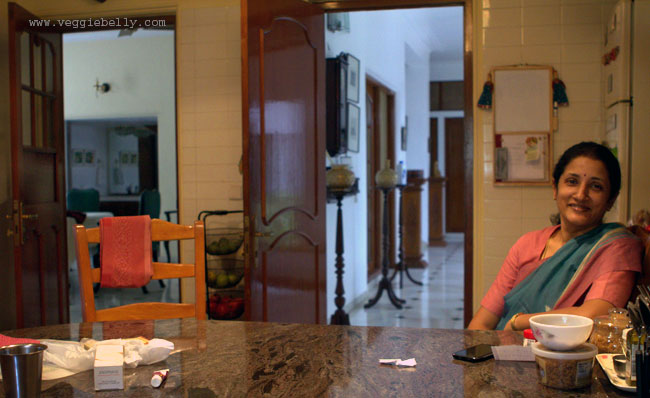
My mother is a near permanent fixture in the dining room..

Now that you’ve seen my parents’ kitchen in India, head over to this post and see my kitchen in the US!
Paneer Paratha Recipe – a step by step

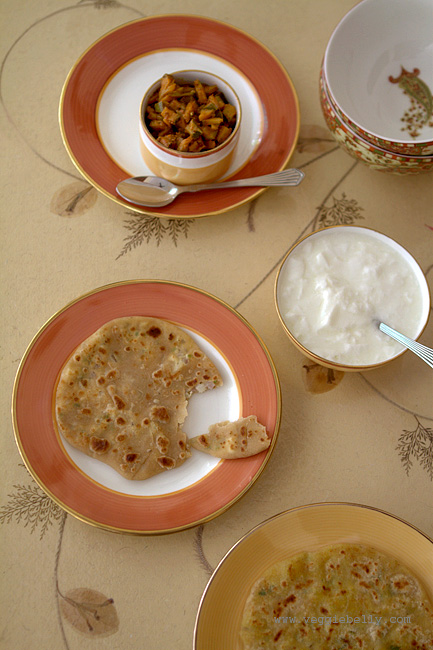
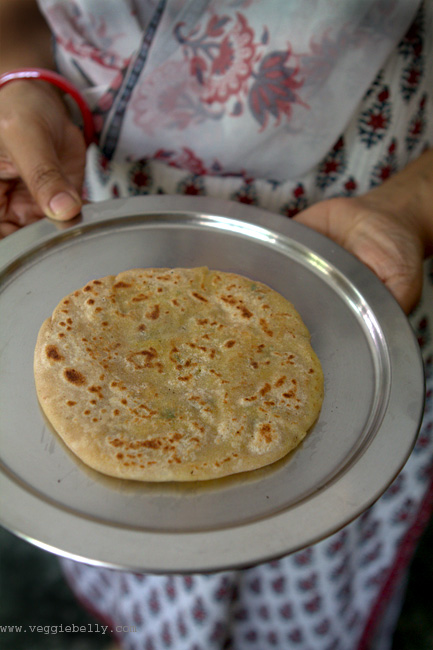
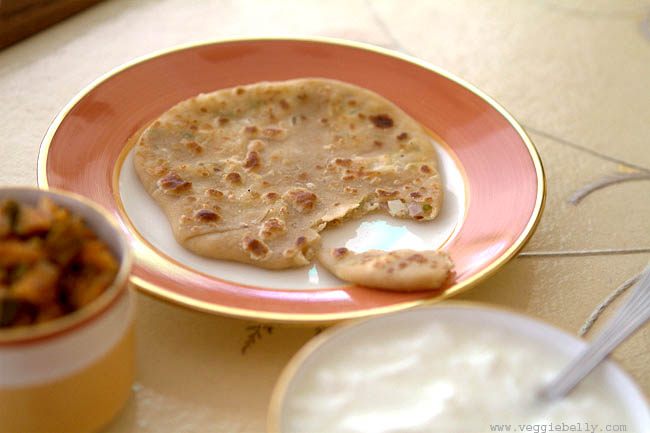
I am vacationing in India right now and enjoying some fabulous home cooked food. Every time I visit India, I ask my mother’s friend Veena aunty to teach me her amazing recipes. Veena aunty has such a love for cooking, you can taste the passion in her food. This time she showed me how to make her paneer paratha recipe. Paneer parathas are Indian flat bread stuffed with cottage cheese. You wont be disappointed with this paneer paratha recipe!

Paneer Paratha Recipe (Cottage Cheese Stuffed Flat bread)

makes 6-8 parathas

for the paratha dough

Ingredients
1 cup whole wheat flour (atta)
1/3 cup all purpose flour (maida)
1/2 teaspoon salt or to taste
1 teaspoon vegetable oil
1 cup water (you may not need all of it)

Method

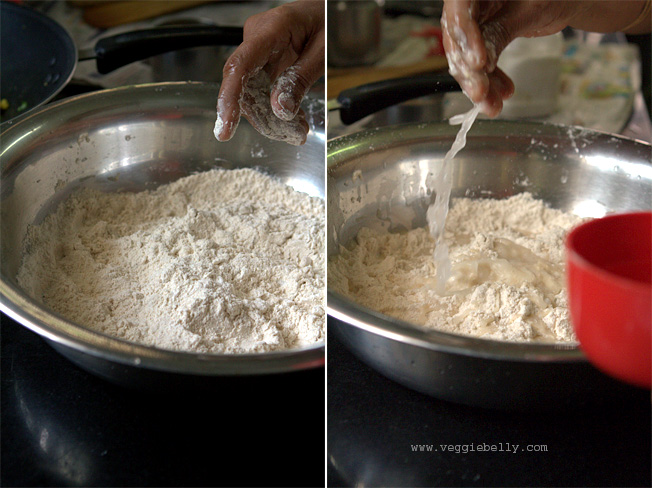
1. Combine the wheat flour, all purpose flour, salt and oil in a large bowl

2. Sprinkle a little water at a time till the dough binds together

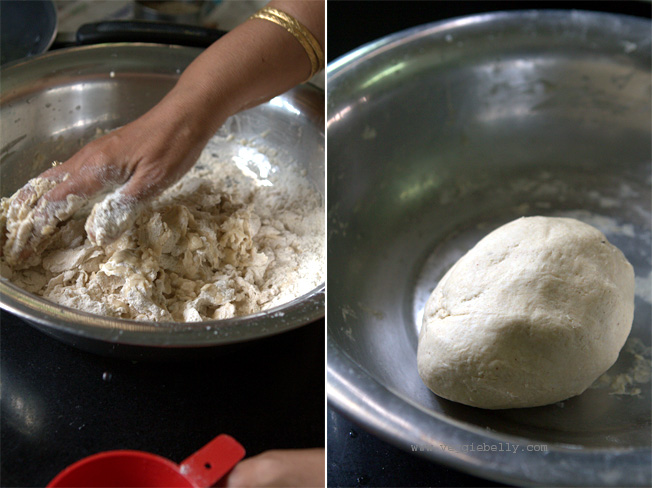
3. Knead the dough, sprinkling water, until it forms a soft, elastic ball

4. Make sure the dough isn’t too wet. If it gets too wet or sticky, add more flour

5. Knead the dough till it is smooth and elastic (think pizza dough)

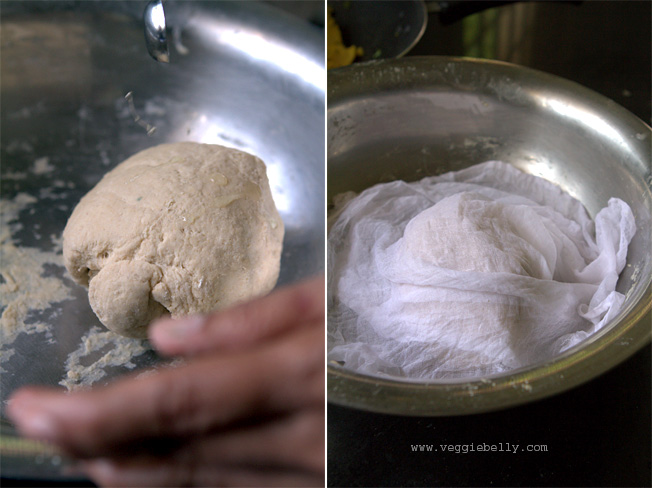
6. Drizzle a few drops of oil over the dough ball, and spread it all over the surface

7. Cover the dough with a damp towel

8. Let it rest for 15 minutes. In the meanwhile, make the paneer filling

for the paneer filling

Ingredients
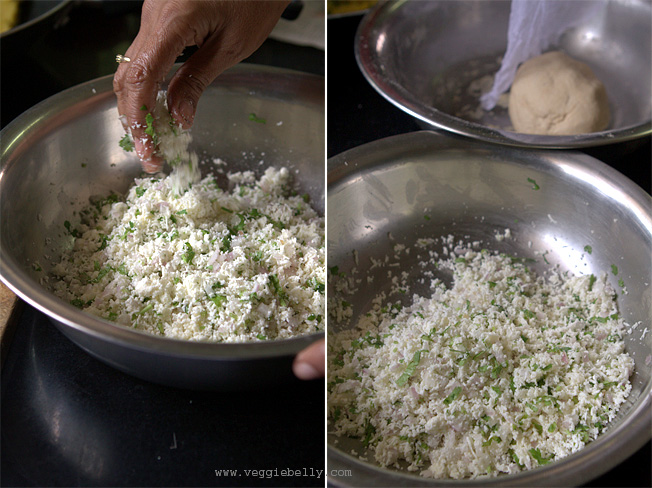
7 oz paneer, finely grated (about 1 1/2 cups when grated)
1 small onion, minced
3 tablespoons finely chopped cilantro
1/2 teaspoon garam masala
1/4 teaspoon turmeric powder, optional
1 green chili finely chopped or according to taste
salt

Method

1. Combine all paneer filling ingredients in a bowl

2. Taste the filling and adjust salt and seasonings if needed. If you like it spicier, you can add more minced chilis or garam masala at this point

Make the paneer parathas

1. Keep a small bowl of wheat flour near you

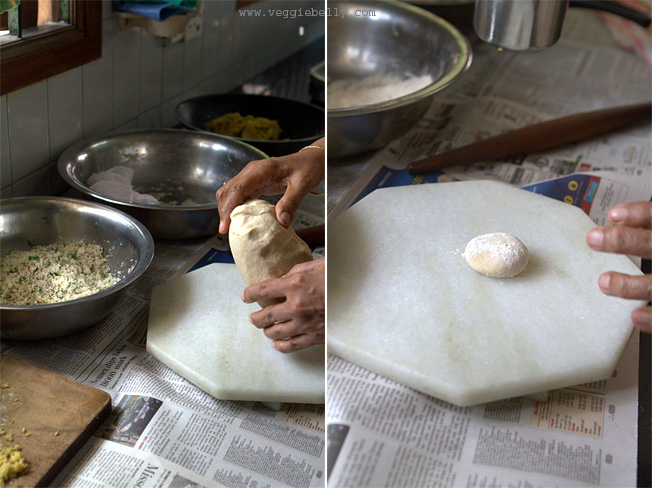
2. Remove the dough from the bowl, and knead it a few times

3. Divide the dough into 6 equal parts. If you don’t have much experience making parathas, divide the dough into 8 parts, so each paratha is smaller, and therefore easier to make.

4. Take one piece of the divided dough and form it into a ball

5. Dip the dough ball in wheat flour

6. Place it on a clean, flat surface for rolling

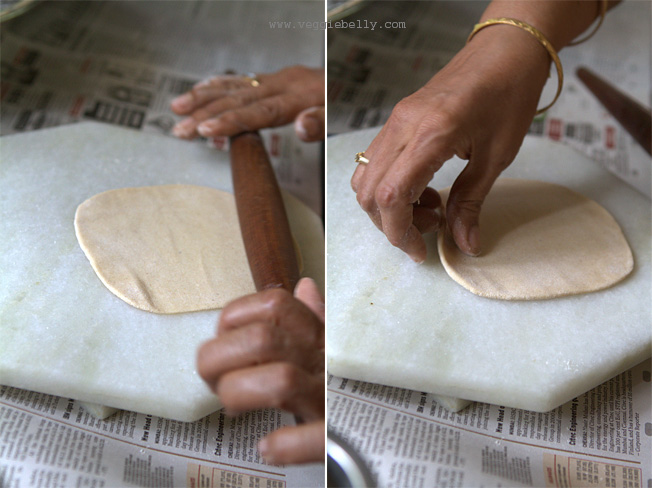
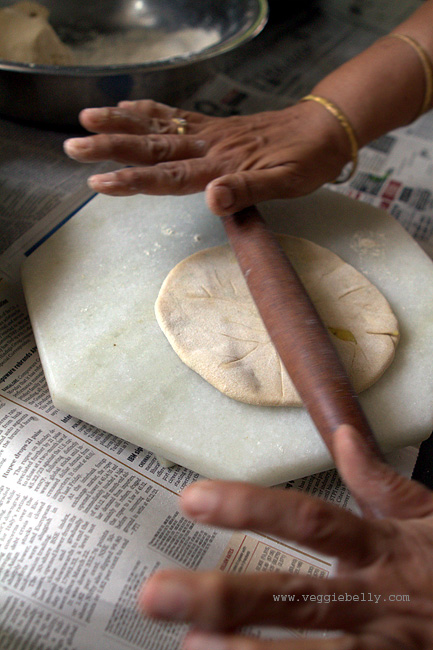
7. Using a rolling pin, roll out the dough into a round using a light touch

8. Turn the paratha 1/4ths of a turn each time you roll it. This will keep it round.

9. Sprinkle a little flour as and when needed.

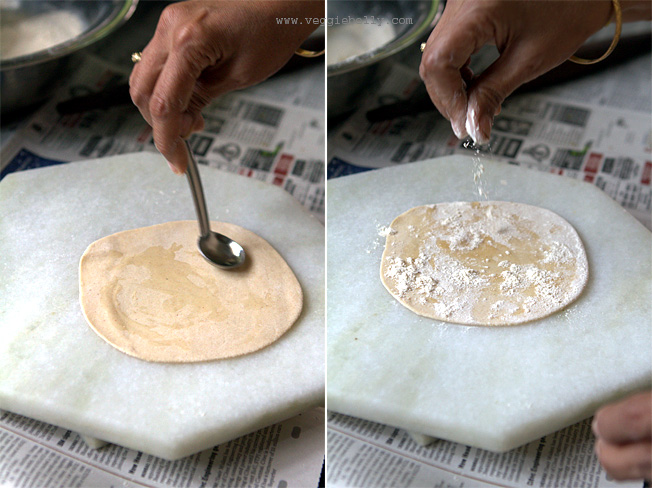
10. When the paratha is thin and even (see picture above), stop rolling, and spread 6 drops of oil

11. Sprinkle a little flour on the oiled side, dust off the excess flour

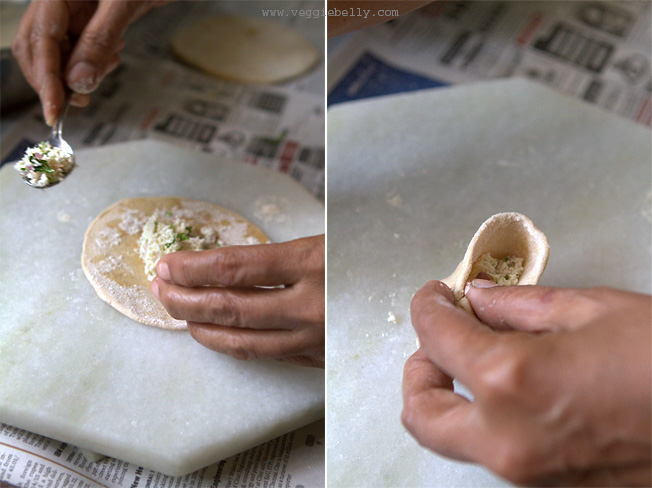
12. Place 2 tablespoons of the paneer filling in the center

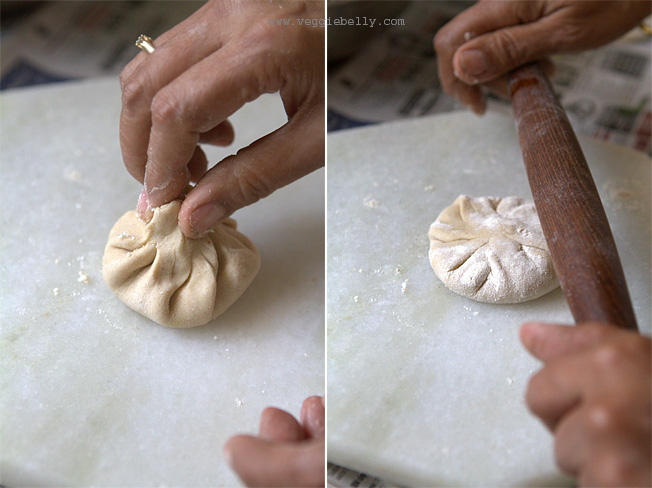
13. Gather the edges of the paratha and bring them up, and pleat them over the filling, to form a parcel. If you feel the parcel can hold more paneer filling, add a little more now

14. Pinch the top to seal the paratha

15. Dip it in flour, flatten it a little, and gently roll it using a rolling pin

16. Roll gently till the paratha is about 1/4 inch thick

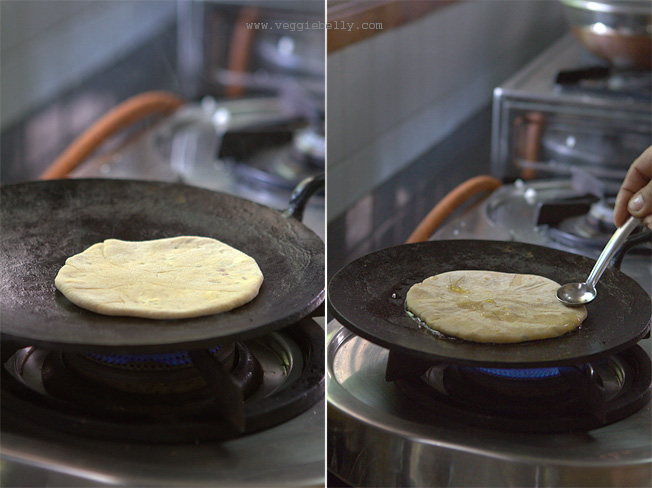
17. Heat a tava, or cast iron skillet on medium heat

18. Place the paratha on the skillet. Cook on medium heat till pale brown spots appear on the under side

19. Then flip the paratha and let pale brown spots appear on the other side

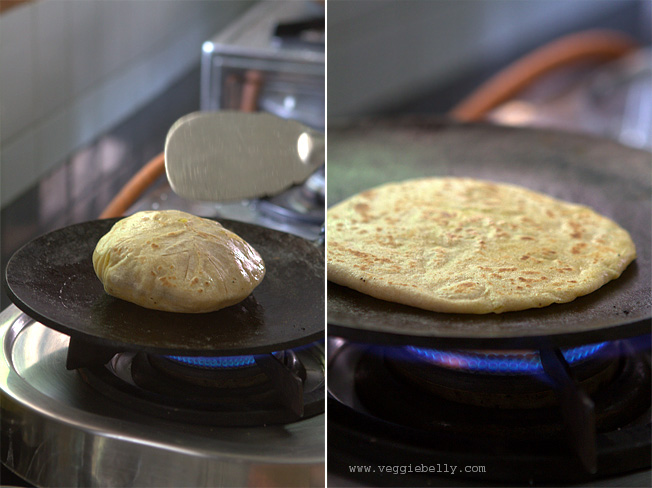
20. Then increase heat to medium-high and drizzle about 1/4th teaspoon of vegetable oil (you can use less oil or oil spray)

21. Cook paratha on both sides till the dough is cooked and lightly browned (but not too dark)

Serve paneer parathas with yogurt or my grandmother’s multi colored raita and my apple pickle.

Paratha making tips

- add enough water to the dough so that it is soft (but not sticky)

- sprinkle wateron the flour a little at a time, this way you are more in control of the final result

- a hard dough will make your parathas stiff

- when kneading, aim for a soft, smooth, elastic dough that is not sticky

- it important to cover and rest the paratha dough for atleast 15 minutes before rolling

- when rolling parathas use a gentle touch

- make sure you chop the filling ingredients very fine. For paneer parathas, the paneer must be grated finely, and the onions and cilantro must be minced. For aloo parathas, the potato must be mashed with no lumps. If you leave large pieces in your filling, it will tear the dough when you are rolling out the parathas.

- when stuffing parathas, you need to use about equal amounts of dough and filling. So if you are using a lime size ball of dough, use about a lime sized mound of filling. However, if you are new to paratha making, lesser amounts of filling may be easier to deal with it, but you will compromise on taste.

- the more you practice making parathas, the better you will get!

Dahi ke Aloo (Potato and Yogurt Soup) from Prerna of Indian Simmer

I dont know many other people who are as passionate about Indian cooking as Prerna is. Today, I am delighted to introduce her to you, via her guest post and this delicious recipe for dahi ke aloo (potato and yogurt soup). Her gorgeous blog, Indian Simmer is full of mouthwatering recipes and some of the best photography I’ve seen in the blogosphere. Take it away Prerna..

Like countless others I have always drooled over Sala’s flawless photography and her fabulous recipes. They always make you come back and look for some more, don’t they? So doing a guest post for her and cooking something for her readers was truly an honor. Thanks so much Sala for letting me do this!

I am here today with something very simple and as my husband says something very carby. Ok, raise your hands if you don’t like potatoes … everyone loves potatoes! At least I do, or maybe I like it a little more than I should but I don’t regret it. As a child I was the pickiest eater and potato was the only vegetable I could eat (does that count as a true vegetable?). But now that I am past that phase, potatoes still remain a favorite because you can do so much with them. Especially in Indian cooking when you can make something as royal as a Mughlai Aloo Dum or a simple stir fry, potatoes will always shine. The recipe I am sharing today is one such recipe.

Dahi  is hindi for yogurt and Aloo means potatoes. When potatoes are cooked in tangy and creamy yogurt with some few simple spices they become Dahi Ke Aloo. I call it potato and yogurt soup. My mom serves it with hot and crisp fresh out of the griddle rotis, I serve them with some fresh baguettes. Whatever you call them or whichever way you serve them they still remain classic comfort food and an easy quick fix dish.

Dahi Ke Aloo or Potato & Yogurt Soup Recipe

serves about 4

Ingredients
4 medium size potatoes (boiled, peeled)
2 cups yogurt (room temperature)
2 cups water
1 tablespoon olive oil (extra to drizzle on top of your soup)
1 teaspoon cumin seeds
1 teaspoon red pepper flakes (a little extra if you want to garnish)
1 teaspoon turmeric powder
1 ½ teaspoon coriander powder
Salt to taste

Method
Mash the potatoes. Thoroughly mash one and mash the others to bite size pieces. Set aside.

In a bowl whisk together yogurt and water leaving no lumps.

Heat oil in a medium size pot. Add cumin seeds. Once they start to pop, add turmeric and coriander powder. Mix the spices together and add potatoes immediately. Mix spices well with the potatoes.

Stir in the thinned yogurt. Mix it well together with the potatoes. Wait till the soup comes to a nice rolling boil and then add salt.

You can serve it hot. I like mine lukewarm with some extra virgin olive oil drizzled and some red pepper flakes sprinkled on top.

Related Posts with Thumbnails