Indian Coconut Rice. A Guest Post for 6Bittersweets

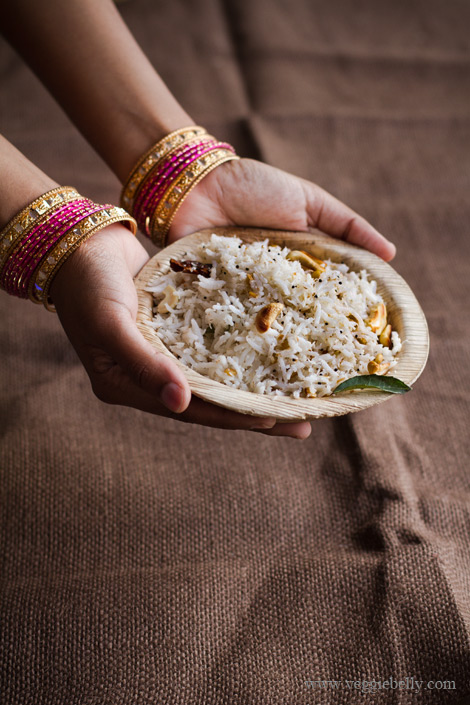
I’m at the airport, about to board my plane to India (and then I’m going to Jordan, Dubai and Israel). I wanted to quickly tell you about my coconut rice guest post over at my lovely friend Xiaolu’s blog 6bittersweets. While I was busy packing and finishing up work before I leave for my trip, I was resorting to easy, filling recipes like this one. This coconut rice is fragrant, easy to make and very flavorful.

Head over to 6bittersweets blog to read my post on this Indian coconut rice recipe !

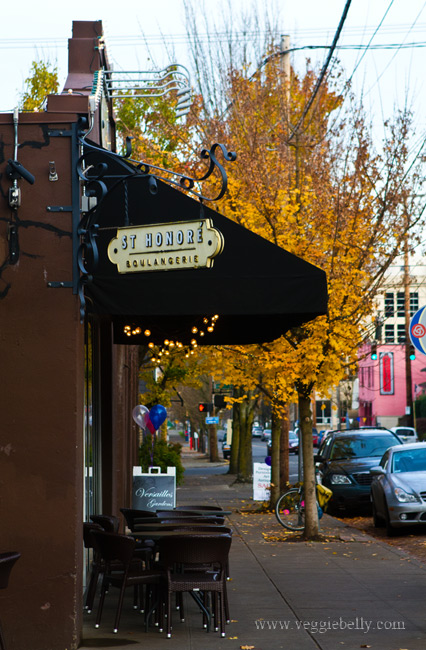
Scenes From Around My Portland Neighborhood

These photos are from my neighborhood in north west Portland, where I live. I’ve never lived in an American city before. For the 9 years I’ve been in this country, I’ve always lived in the suburbs (MD, DC/VA). I love living in Portland – it’s a small, quirky, friendly city, its very walkable and the public transport is great.

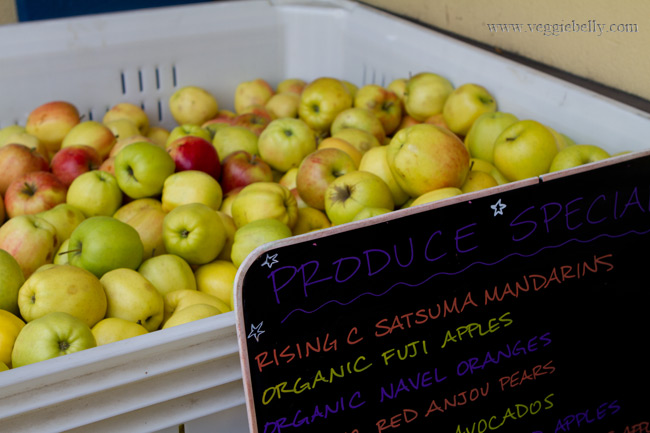
Let’s get one thing out of the way – yes, it rains a lot in Portland.( I’ve been told you get used to it). But all this rain means the fruits and vegetables here are the freshest and most gorgeous I’ve ever seen. That combined with the superb vegetarian food scene here makes me a very happy girl.

Portlanders are so laid back and friendly. And the local movement here means tons of charming little individual, non-chain stores. Mom and pop restaurants, food co-ops, family owned small businesses, and individual stores are everywhere. Everything is small, green and local.

My local grocery store is the Food Front Co-op. It carries great organic fruits and vegetables, and has a nice little deli. A little more expensive than what I’m used to, but I enjoy browsing the aisles and discovering new ‘west coast things’.

I’m off to pack for my upcoming India, Jordan, Israel, Dubai trip. (I’ll post photos and recipes from there!). I leave you with photos from my neighborhood..

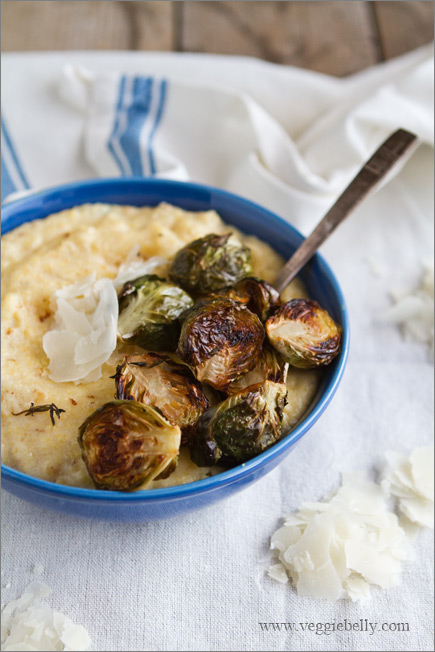
Creamy Polenta with Balsamic Roasted Brussels Sprouts Recipe

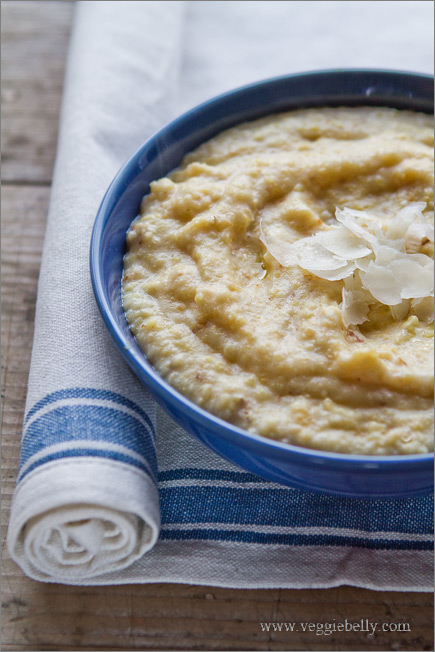
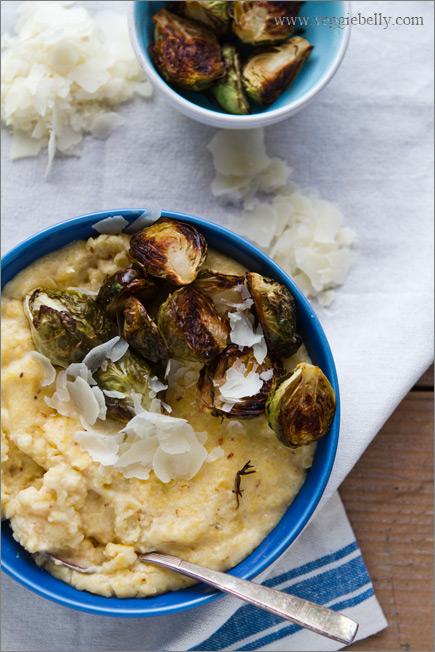
This creamy polenta with balsamic roasted brussels sprouts recipe is the ultimate comfort food. I love curling up on the sofa with a hot bowl full for dinner. The left overs are great for lunch the next day.

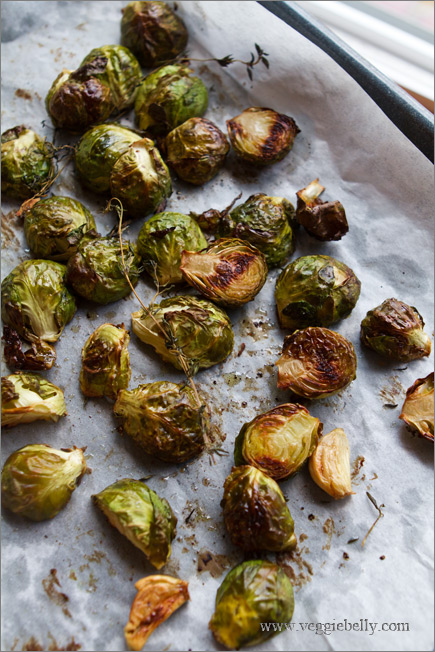
Roasting brussels sprouts in the oven till they are caramelized is my favorite way of preparing them. If you are not  fan of brussles sprouts, simply replace  them with broccoli florets or mushroom caps. Yum!

I like my polenta extra creamy, so I add half milk, half water as my cooking liquid. Make sure you use a large pan to accommodate the boiling and spluttering from the polenta.

Bob’s Red Mill is my favorite polenta. The flavor and texture are just wonderful. Polenta is nothing but ground cornmeal. It comes in fine, medium or coarse grinds. I like the texture of medium and coarse grinds for this recipe. Cooking times may vary depending on what grind you use.

Creamy Polenta with Balsamic Roasted Brussels Sprouts Recipe

serves 3-4

Ingredients for Creamy Polenta
1 1/2 cups water or vegetable stock
1 1/2 cups milk, any fat% you like
1 cup polenta (not the quick cooking type). I like Bob’s Red Mill polenta
salt
1 tablespoon butter
1/4 cup grated parmesan cheese

Method
In a large pot, bring the milk and water or vegetable stock and some salt to a boil. As soon as it begins to boil, pour the poelnta/corn meal in a steady stream, while whisking. Continue to whisk till it is incorporated.

Let the polenta cook on medium heat for about 30 minutes or till the polenta is cooked and no longer gritty. Stir the polenta every 10 minutes so it doesnt burn in the bottom. Be cautious, the polenta can bubbles and splutter as it cooks.

When polenta is done, butter and parmesan. Serve immediately with roasted brussels sprouts (recipe below).

Polenta will tighten up as it cools. To reheat, add a little water to it.

Ingredients for Balsamic Roasted Brussels Sprouts
12 brussels sprouts. Substitute with 12 broccoli florets or 18 white button mushrooms
3/4 tablespoon olive oil
1/2 tablespoon  balsamic vinegar
1 clove garlic, peeled. Optional
3 thyme sprigs. Optional
Salt
Cracked black pepper

Method
While the polenta is cooking, work on th roasted brussles sprouts.

Pre heat oven to 375f

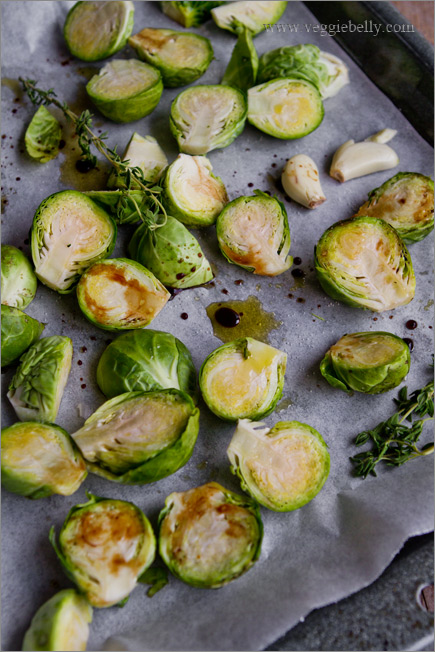
Cut and discard the brussles sprouts stems. Peel away any yellow leaves. Cut each brussels sprout in half lengthwise.

Place brussles sprouts in a bowl with all other ingredients and toss well.

Spread out on a baking sheet lined with parchment paper. Make sure the brussels sprouts are in a single layer.

Bake in a 375f for about 20 minutes or till the brussels sprouts are browned. Half way through, toss the brussels sprouts and return to the oven, so they brown evenly on all sides.

If using broccoli or mushrooms follow the same method, but roast them in a 425f oven for about 20 minutes or till browned.

Serve hot with creamy polenta.

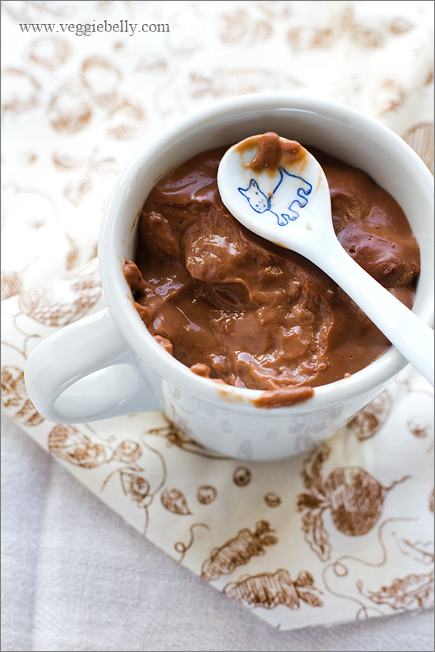
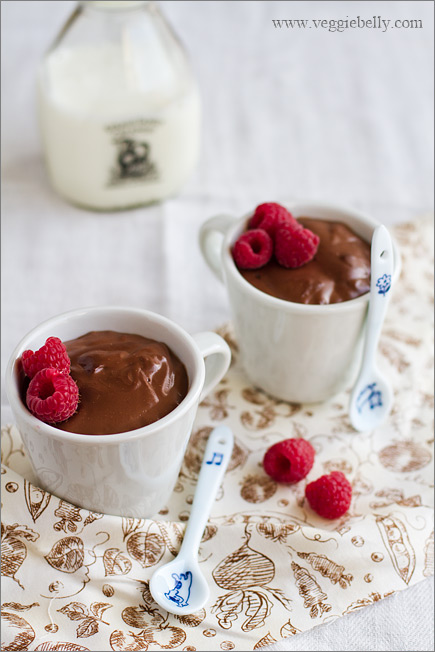
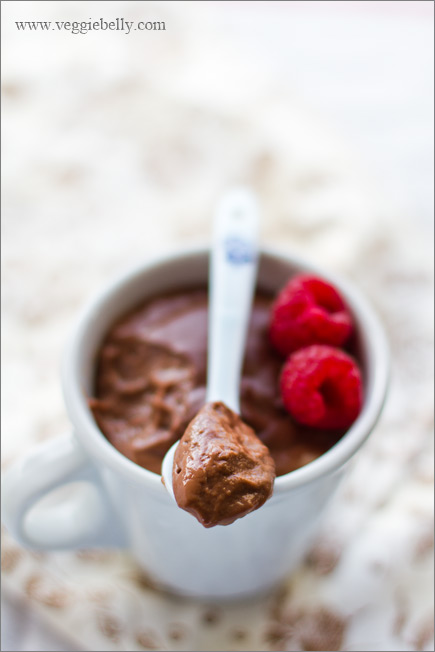
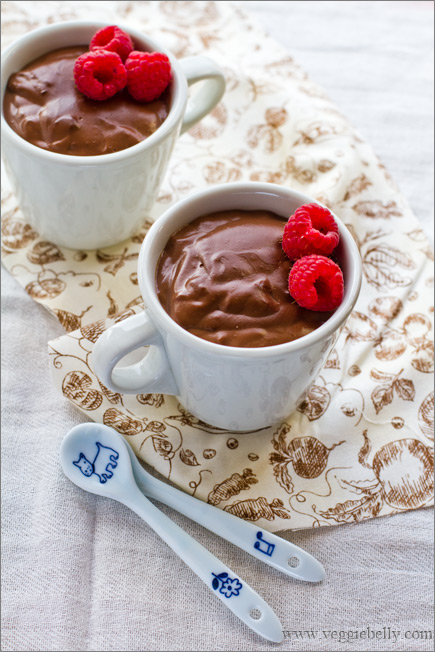
Easy Eggless Chocolate Pudding Recipe. Only 5 ingredients, 10 minutes!


I learned this recipe from Veena aunty, my mother’s friend in India. She is such a fantastic cook, and always so eager to teach others her recipes. I always learn new recipes from Veena aunty when I’m in India. I’ve adapted and simplified the original recipe I learned.

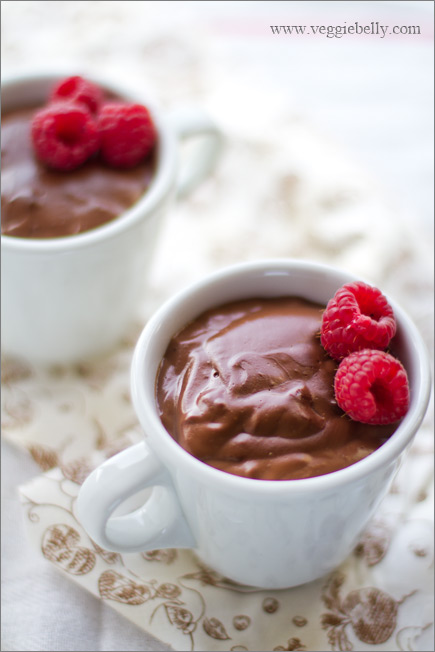
After you try this easy eggless chocolate pudding recipe, you won’t be buying that boxed stuff anymore! The great thing about this recipe is that you can use anything from 2% milk to whole milk. And you can vary the sugar to your liking.

Tips for a fool proof eggless chocolate pudding

-          Cornstarch as well as cocoa powder will form lumps easy. To avoid this make sure the milk is at room temperature

-          If there is a big temperature difference between the cornstarch mixture and whatever it is going into, it will form lumps

-          Despite taking precautions, if your cornstarch mixture does form lumps, you can easily rectify it by passing the mixture through a strainer and breaking up the lumps using the back of a wooden spoon

-          Make sure you use standardized tablespoon and cup measures for this recipe

-          The pudding will form a thin skin as it cools in the fridge. I quite like this pudding skin. But if you don’t, cover the pudding cups with plastic wrap so that the plastic wrap is directly touching the surface of the pudding. Then refrigerate. This will prevent skin formation

-          My recipe calls for unsweetened cocoa powder. If you decide to use sweetened cocoa powder, reduce the sugar in this recipe by half. When the pudding is cooked, taste it, and add more sugar according to taste.

-          Cornstarch brands differ in ‘strength’. So you may get a slighter thinner or thicker pudding than mine. But it will still taste the same.

How to prevent chocolate pudding from sticking to its cup

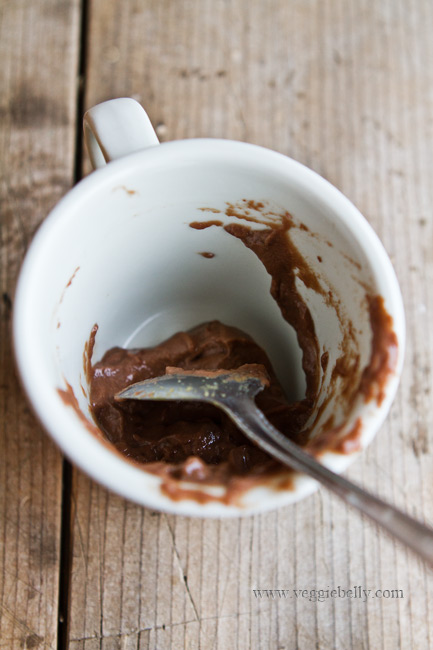
Have you ever had a chocolate pudding and the only way to get all of it was to scrape the sides of the dish? Pudding, because of its consistency has a tendency to stick to the sides of its dish. This can make cleaning up a pain. The solution is simple. I learned this great little tip from Veena aunty, my mother’s friend.

Wet the insides of the pudding serving dish with water. Then pour in the pudding to set. The wet inside surface of the dish will keep the pudding from sticking to the dish, and cleaning it will be a breeze!

Above: see what I mean? The pudding comes away from the inside of the cup easily!

More eggless chocolate puddings..

My friend Radhika’s eggless chocolate pudding recipe on Just Home Made

Smitten Kitchen’s chocolate pudding recipe using melted chocolate

Easy Eggless Chocolate Pudding Recipe 

serves 2-3

Ingredients
2 ¼ cup milk at room temperature, anything from 2% to whole milk is fine
2 tablespoons cornstarch (corn flour)
2 tablespoons unsweetened cocoa powder, I like Ghirardelli
½ cup sugar
½ teaspoon vanilla extract

Make sure the milk is at room temperature. If you are using cold milk, place it in a medium saucepan and heat on low, till it reaches room temperature. Dip your finger into the milk, it should not be too hot or too cold.

Place the corn starch and cocoa powder in a bowl. Pour approximately half the room temperature milk into the bowl. Using a fork or small whisk, whisk well till the corn starch and cocoa powder dissolve into the milk and form a slurry. Try to break up any lumps, but if some lumps are remaining, that’s ok. Set the slurry aside.

Add the sugar and vanilla extract to the other half of the milk. Cook on medium heat till the milk gets hot and steamy, but not yet boiling – about 5 minutes.

Place a strainer over the saucepan with the hot milk. Pour the cornstarch and cocoa slurry through the strainer.

Using a wooden spoon, push the cornstarch cocoa slurry through the strainer. Break up any lumps and push them through. Make sure you scrape up the underside of the strainer so that you get all the slurry.

Using a whisk, whisk the pudding so everything is well blended. Keep whisking till the pudding boils. Let it boil, while whisking, till the pudding thickens and gets glossy, about 1 minute.

Turn off heat and taste the pudding. If you would like it to be sweeter, add more sugar now, and whisk well. Remember that the hot pudding will always taste slightly sweeter than when it is cold.

If you feel the pudding is too thick, you can whisk in a little more room temperature milk at this point. Remember, the pudding will get firmer once it cools.

Take 2 individual serving cups. Fill them with water. Pour out the water. This will wet the insides of the cups and prevent the pudding from sticking to the insides, making washing up easier.

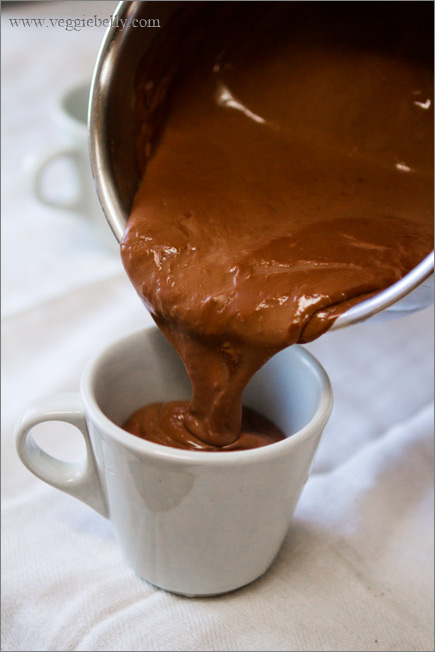
Pour the hot pudding into the 2 wet cups, dividing it equally. Cover with foil and place in the refrigerator to cool. When the pudding is completely cold (about an hour), it is ready to serve.

Top with roasted nuts, shaved chocolate, whipped cream or fresh fruit.

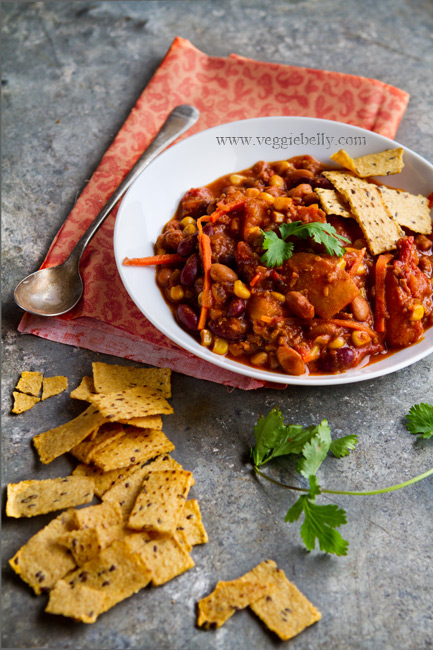
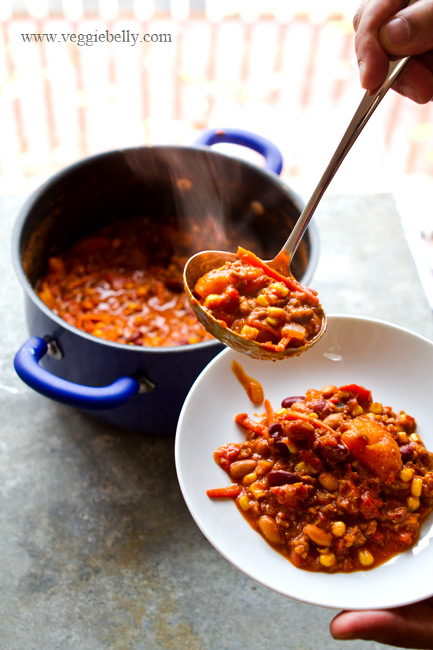
Drunken Pumpkin Chili Cooked in Oregon Beer

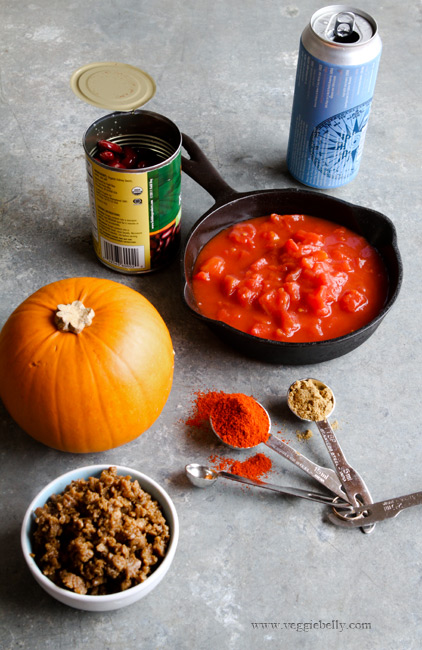
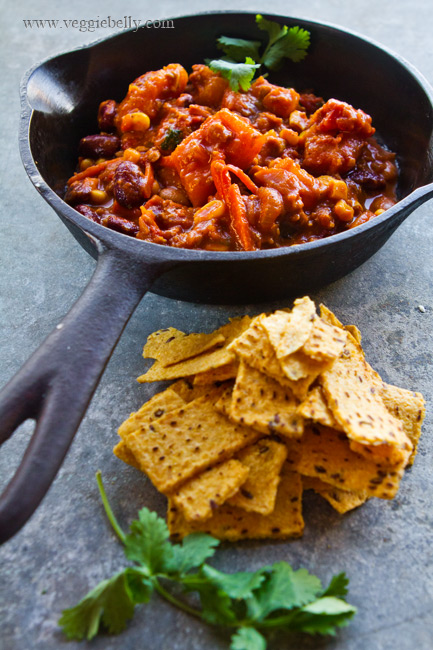
If you know how to open a few cans, you can make this vegetarian drunken pumpkin chili recipe. Its that easy! I kept this recipe seasonal by using some pumpkin. You could easily leave out the pumpkin part of the recipe, and still have a very yummy chili.

In the summerI use zucchini in this recipe instead of the pumpkin. But no matter what season you make this chili, make sure to use a beer you actually like. Dont use a beer that is too bitter, it will make your entire chili bitter. As a tribute to Oregon’s amazing local beers, I used a beer from here. But any pale lager or medium bodied beer will work. Serve the same beer with your meal.

This is a great recipe to make ahead or to feed a crowd. The recipe is also very forgiving, you can adjust the seasonings as you like, leave out the pumpkin, use different beans, cook it too long, too less..it will still taste good! Meat lovers will like this dish too.

Drunken Pumpkin Chili Recipe

Serves about 6

Ingredients
one 1.5 lb pie pumpkin or sugar pumpkin
2 tablespoon olive oil
1 large onion, diced
1 large carrot, cut into matchsticks
2 tablespoons paprika
1 tablespoon chili powder
1 tablespoon ground cumin
one 15 oz can kidney beans, drained
one 15 oz can pinto beans, drained
half a 15 oz can sweet corn, drained
two 14 oz cans of diced tomato
1 tablespoon tomato paste
one 12 oz can of beer (pale or medium lager)
2 cups meatless crumbles like Yves ground round or Morningstar crumbles
1 cup shredded pepper jack cheese

Method
Pre heat oven to 375f

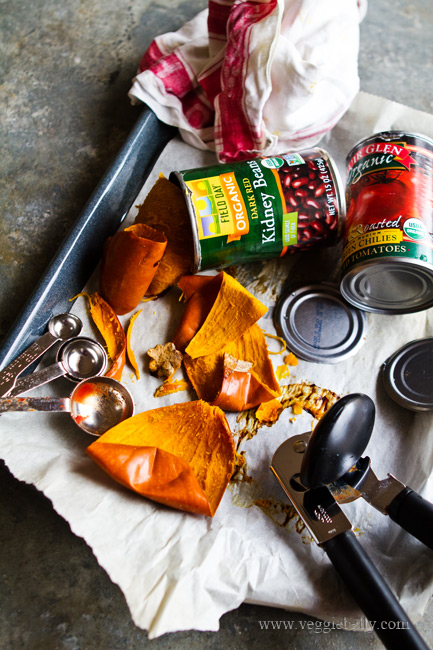
Using a sharp knife, cut the pumpkin in half. Using a spoon, scoop out the seeds and membrane. Place the pumpkin halves on a cookie sheet lined with parchment paper, cut side down. Bake in a 375f oven for 15 minutes or just until the pumpkin is soft enough to peel the skin away. 

When the pumpkin is done, remove from oven. Wait for it to cool enough to handle it. Peel the skin, and discard. Also discard the stem end of the pumpkin. Cut the pumpkin into 1 inch cubes. You should have about 3 cups of cubed pumpkin.

In a large pot, heat the oil and add the diced onion. Cook on medium heat till the onion is soft. Then add the carrots, paprika, chili powder, and cumin. Stir for about 30 seconds.

Add the kidney beans, pinto beans, sweet corn, and tomatoes, tomato paste, beer, the baked and peeled pumpkin, and salt to the pot. Bring to a boil, while stirring. When the chili boils, reduce the heat and simmer for 15 minutes or till the pumpkin is soft.

If the chili gets too thick, add 1-2 cups water.

When the pumpkin is soft, stir in the meatless crumbles and cook just untill the crumbles are heated through. If using frozen crumbles, make sure they get completely heated.

Taste and adjust for salt. At this point if you like, you can add 1 tablespoon of sugar to the chili for some sweetness or 2 tablespoons lime juice for some tang. Both are optional.

Serve drunken pumpkin chili with sprinkled cheese on top and tortilla chips or brown rice.

Kale and Goat Cheese Mashed Sweet Potato. A Vegetarian Thanksgiving Recipe

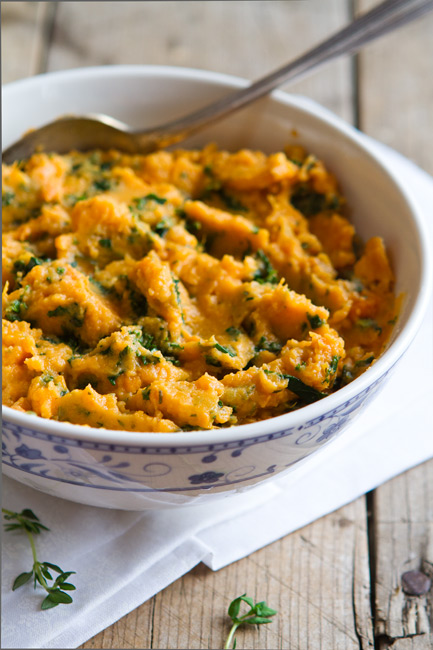
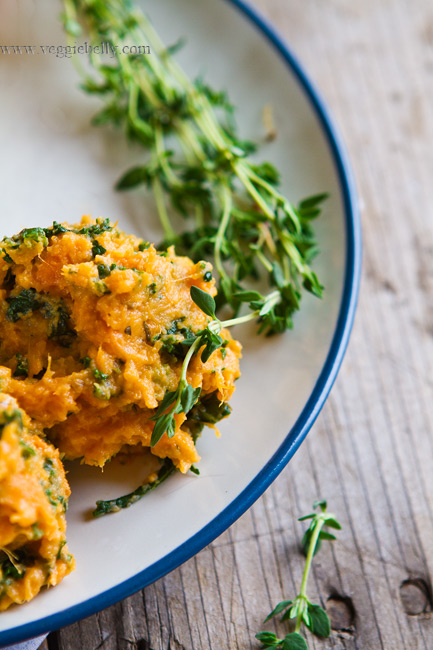
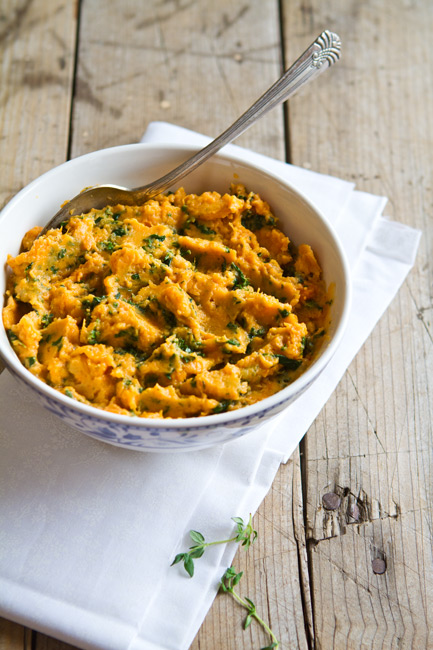
Like me, if you are  sick of serving your guests regular old mashed potatoes, you will love this recipe. This kale and goat cheese mashed sweet potatoes will be the perfect side dish for thanksgiving. And you can easily make it ahead and reheat it in the microwave.

I make this recipe using a variety of greens – spinach, swiss chard, arugula…but kale is my favorite for this recipe. I used a log of herb encrusted chevre cheese because I like the flavor of the herbs. But any kind of good goat cheese will do.

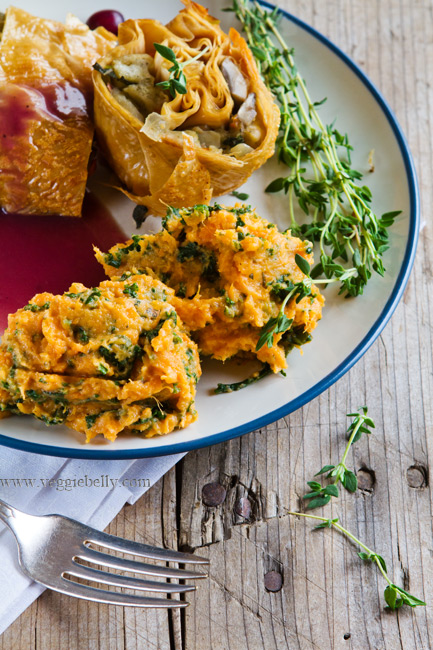
If you like your mashed sweet potatoes to be sweet, add 2 tablespoons brown sugar or maple syrup to this recipe. Serve kale and goats cheese mashed sweet potato with my thanksgiving tofu skin roulade and sage mushroom stuffing.

Kale and Goat Cheese Mashed Sweet Potato Recipe

serves about 4

Ingredients

2 lb (about 2 large) sweet potatoes or garnet yams
4 cups shredded kale
4 oz goat cheese
1 cup milk
Salt, freshly cracked black pepper

Method
Peel the sweet potato or yams. Cut into even sized 1 inch cubes. Place the sweet potatoes in a large pot filled with water. Boil uncovered for 15 minutes or till they are very soft.

Drain the sweet potatoes well and leave them in the colander.

In the same pot, add the kale, goats cheese and milk and bring to a boil. Reduce heat, and simmer till the kale has just wilted. Add salt and pepper. Turn off heat.

Add the cooked sweet potatoes to the hot kale and milk. Mash well. If the mashed sweet potato is too thick, add more milk to thin it out to your liking.

Tofu Skin Roulade with Sage Mushroom Stuffing. A Vegetarian Thanksgiving Recipe

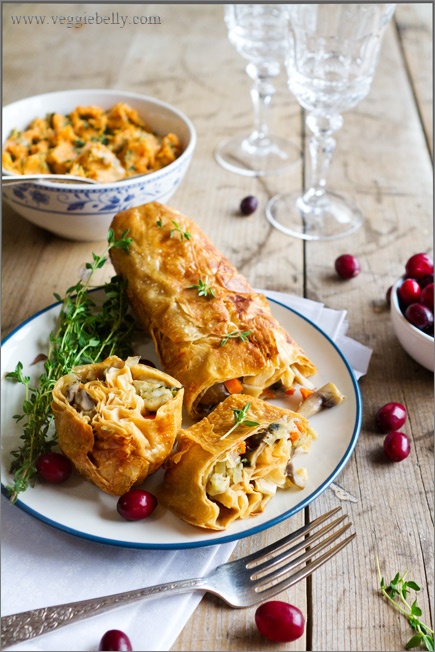
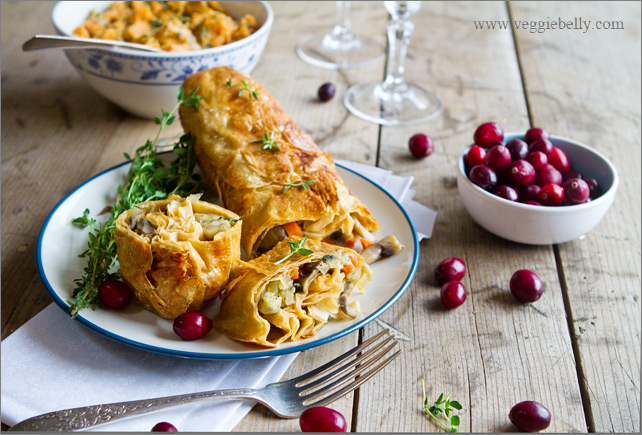
I wanted to come up with a vegetarian thanksgiving recipe this year that can be a beautiful centerpiece on the vegetarian thanksgiving table. Just because you are vegetarian doesnt mean you are doomed to eat a bunch of sides (or tofurky..ugh!) on thanksgiving day. Make this tofu skin roulade with sage mushroom stuffing a day ahead and reheat it by steaming it for 10 minutes or so.
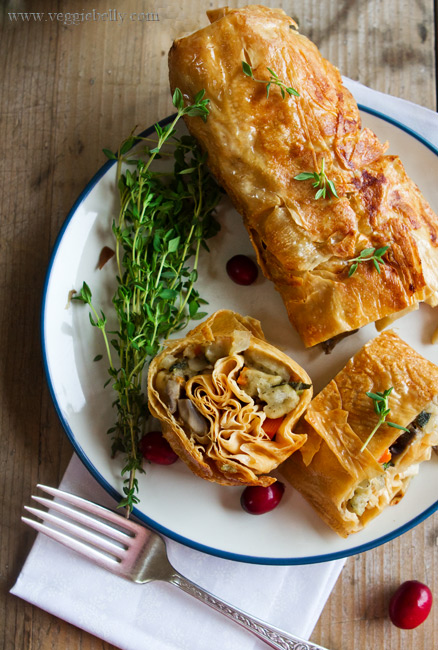
The tofu skin forms a golden exterior with great texture, and the stuffing inside is moist and mushroomy. Your very own, home made vegetarian tofurky for thanksgiving!
You will generally find tofu skin in Chinese restaurants, it is usually braised or stewed in a sauce.
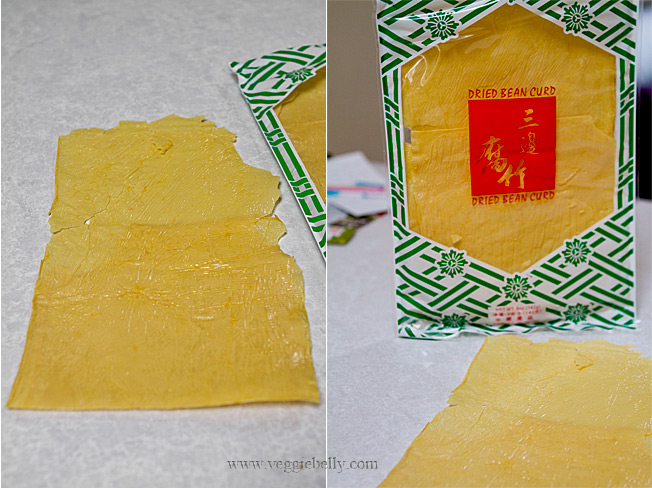
Tofu skin, also called beancurd skin or yuba is the skin that forms when simmering a pot of soy milk. It comes dried or frozen and is available in Asian stores. If using dried tofu skin or yuba, reconstitute it in hot water. If using frozen, simply defrost it for this recipe.
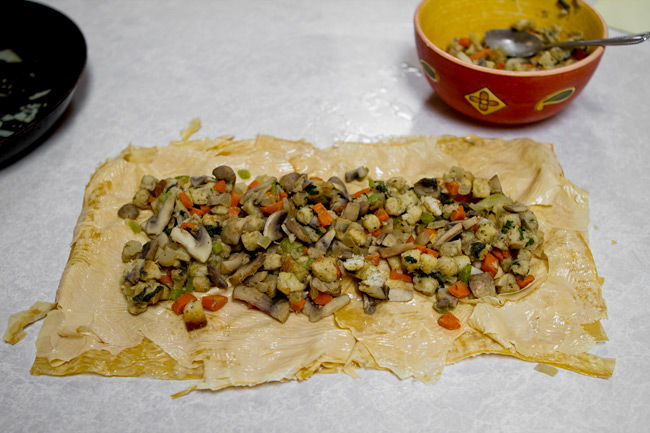
Tofu skin may look delicate, but it actually holds up very well to stuffing, rolling and steaming (which is what this recipe involves). If you cant find tofu skin or yuba, try making this recipe with seitan. See this recipe from the vegetarian times for seitan roulade or this recipe by vegan yumyum
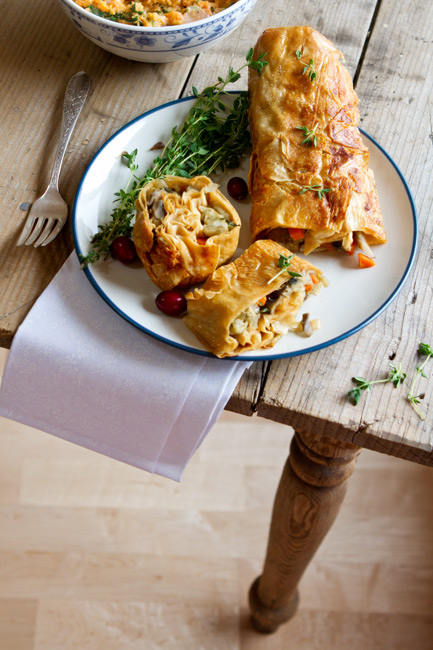
Serve this tofu skin roulade with sage mushroom stuffing, along with my red wine gravy, kale and goats cheese mashed sweet potato (recipe coming up next!), and steamed green beans or brussels sprouts.
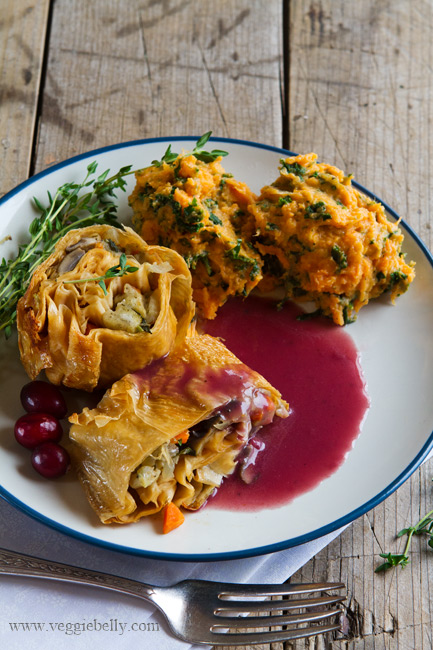
Tofu Skin Roulade with Sage Mushroom Stuffing

serves 2-3, with some left over stuffing to serve on the side.

Ingredients
three 9×12 inch sheets of dried or frozen tofu skin, also called yuba
1 tablespoon butter
1/4 cup diced onion
1/4 cup diced carrots
1/4 cup diced celery
6 large button mushrooms, chopped
1/2 tablespoon chopped fresh sage
2 sprigs of thyme
1/4 cup vegetable stock
1 cup store bought stuffing. I like pepperidge farm.

Method
If using frozen tofu skin or yuba, let it defrost before using. If you are using dried tofu skin or yuba, boil a large pot of water, turn off the heat, and put the tofu skins in the water. Let them soak for 15 minutes. Then gently pull them out of the water, letting all the excess water drip away.

Lightly oil a clean work surface, so that the tofu skins dont stick.

Lay 3 sheets of tofu skin, one on top of the other, so that their longest side is closest to you. If the tofu skins tear a little, dont worry, just patch them up.

Now work on the stuffing.

Heat butter in a skillet, add onion, carrot and celery and cook on medium heat till the onions are soft. Then add mushrooms, saute till the mushrooms are cooked, about 3 minutes. Add the sage and thyme, stir.

Add the stock and bring to a boil. Turn off heat, and stir in stuffing. Toss everything till the stuffing is mixed well, and absorbs all the stock.

Now put the stuffing on the tofu skin layers, leaving a 1/2 inch border (see photo above). You dont have to use all the stuffing if it doesnt fit. Its ok if the stuffing is a little dry, it will moisten up when you steam the roulade.

Gently fold over the right and left sides of the tofu skins. Then pick up the longer side closest to you, and roll away from you. Keep the right and left sides tucked in as you roll away from you. Roll gently but firmly.

Place the roulade on a sheet of aluminum foil. wrap the foil around the roulade to make a log. Twist the ends closed. Repeat this with a second layer of foil.

Now the roulade is ready to steam.

Heat water in a large pot. Place a colander over the pot. Its brim must fit over the pot, but make sure the bottom of the colander doesnt touch the water.

Steaming method 1 – Put the roulade log into the colander, and cover with a lid. Bring the water to a boil, and steam on medium high heat for 1 hour or till the tofu skin is soft. Add more water to the pot as and when necessary.

Steaming method 2 - steam the roulade in a bamboo steamer. Steam till the tofu ski is tender, about 1 hour.

Steaming method 3 – this is what I used. take a skillet large enough to hold the roulade, pour 1/2 to 1 cup water in it. Bring to a boil. Place the roulade in the skillet. Cover it. Reduce heat to medium-high, and let the roulade steam, adding more water as it evaporates. Steam till the tofu skin is tender and no longer rubbery, about 1 hour.

When the roulade has steamed, removed it from the colander, and let it cool a little.

Then removed the foil wrapping.

Heat 1 teaspoon olive oil or butter in a non stick skillet. Carefully place the roulade on the skillet and sear all sides of the roulade till they are lightly golden.

Serve with red wine gravy, and kale and goats cheese mashed sweet potatoes.

Red Wine Gravy

serves about 4

Ingredients
1 cup red wine
1 cup vegetable stock
1 tablespoon flour
1 sprig of thyme, optional
1 tablespoon butter
Salt, pepper

Method
Whisk the wine, stock and flour together. Make sure there are no lumps. Add the thyme sprig. Pour into a sauce pan and simmer till the sauce has reduced to half its original volume. Whisk in the butter, salt and pepper. Strain and serve with tofu skin roulade.

Idli Chaat Recipe & an Indian Cooking Kit Giveaway from Veena’s Market


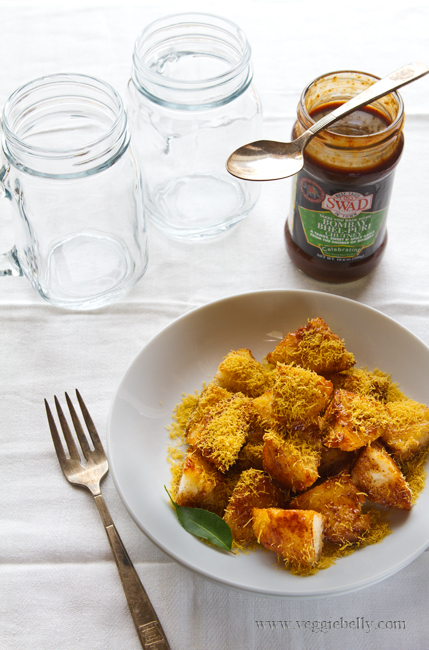
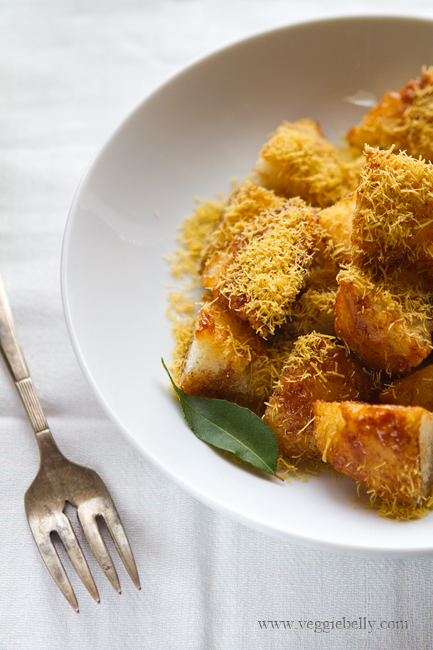
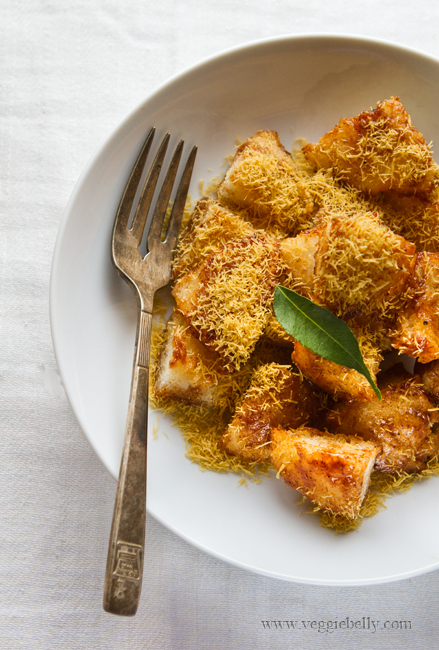
I don’t fry foods very often. But when I do, I make sure its damn good – like this Indian street food inspired idli chaat. This Idli chaat recipe turns fried idlis into a crispy on the outside, fluffy on the inside, sweet and tangy snack.

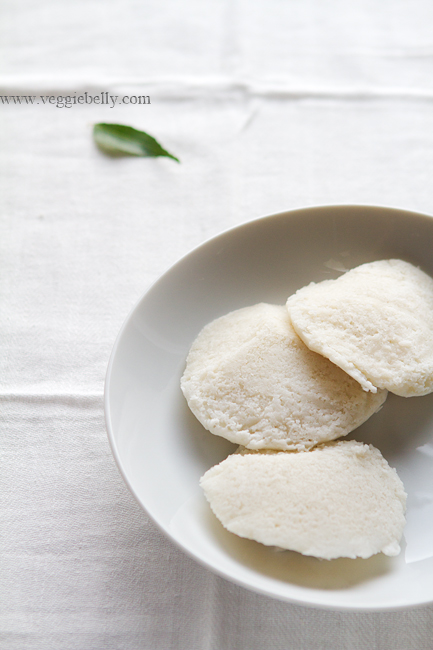
An idli is a fluffy, steamed rice cake from India. It is a common breakfast item in South India. Chaat is the umbrella name for Indian street food.

This idli chaat recipe is best made with left over idlis. Don’t use fresh idlis, they will get too oily. If you must use freshly made idlis, leave them out for a few hours so that they are thoroughly cool and dry before using.

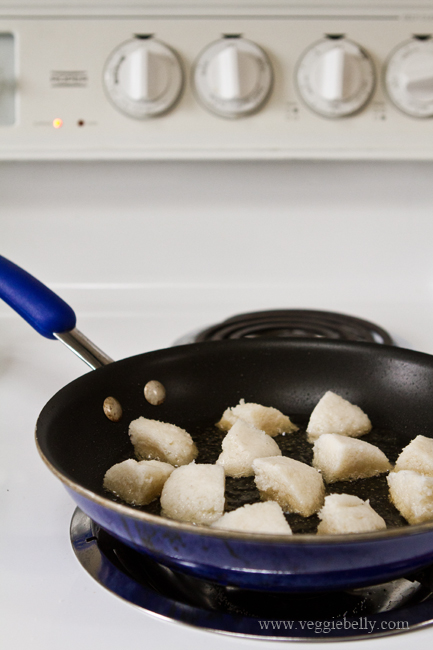
It is important to use medium-high heat when frying idlis. If your oil is not hot enough, the idlis will absorb too much oil and get soggy. So use medium-high heat and fry the idlis till they are lightly golden.

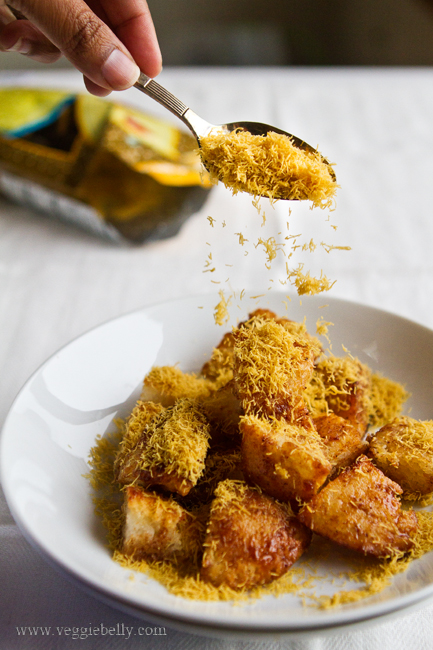
I’m giving you the bare bones version of this recipe – fried idlis tossed with tamarind (imli) chutney and sprinkled with sev (fried chickpea flour noodles). You can vary this recipe however you like by adding your favorite chaat garnishes. See the recipe below for suggestions.

For a variation on this recipe try using cooked polenta. The kind that comes pre-cooked in a tube shaped package is best. Just cut it into discs, and shallow fry.

Idli Chaat Recipe

serves about 2

Ingredients
5 regular sized idlis*
vegetable oil for frying
Salt
2 tablespoons tamarind date chutney or tamarind sauce for chaat, available at Indian stores
2 tablespoons sev, available at Indian stores

*Left over idlis are best. Dont use freshly made idlis, they will get soggy. If you must use fresh idlis, cool them thoroughly before using. Idlis are available frozen in Indian stores.

Method
Quarter the idlis.

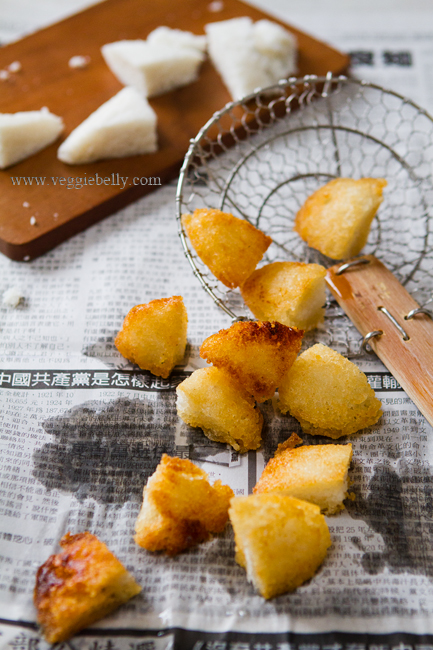
Pour enough oil in a heavy bottom or non stick skillet to coat the bottom. Shallow fry the idlis on medium high heat till one side is lightly golden. Gently flip the idli pieces and cook till the other sides is golden.

Make sure the oil is hot enough. When you put the idlis in the oil, they must immediately sizzle. If they dont, your oil is not hot enough and the idlis will become too oily. The trick to frying idlis so that they are crisp and golden on the outside, but fluffy on the inside is to use hot oil and fry them quickly.

Drain idlis on several layers of paper towels. Dab the fried idlis gently to take out the oil.

Sprinkle salt over the hot idlis.

Place them in a bowl, add the tamarind chutney and toss gently.

Arrange the idli chat on a serving dish and sprinkle sev on top. If you wish, also use a few of the below garnishes.

Optional garnishes
A sprinkle of chaat masala
Chopped cilantro
Chopped mint
Pomegranate seeds
Chopped tomatoes
Chopped red onion
Chopped cucumber
Roasted peanuts

************************************************************************************* 

A chance to win THREE complete Indian Recipe Kits from Veena’s Market!

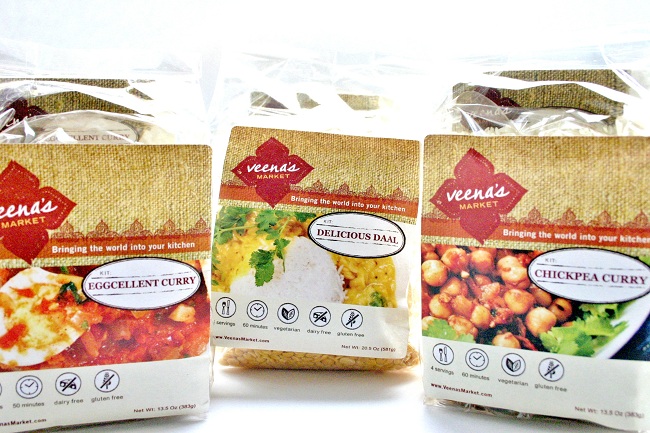
Kits include all the spices, rice, and recipe instructions. Veena’s Market starts with the best quality spices, organic where available, and hand crafts each blend. The rice is certified Basmati rice from the foothills of the Himalayas.

The kits include the whole and blended spices, rice and a tested recipe. Since you get all the difficult-to-find ingredients, all you have to buy from your neighborhood grocery store or farmer’s market are the vegetables and other easy-to-find ingredients.

One randomly picked lucky winner will receive three Indian recipe kits from Veena’s Market - Eggcellent Curry, Delicious Daal and Chickpea Curry.

How to enter the giveaway

‘Like’ Veggie Belly on Facebook
Follow me on Twitter
Subscribe to my RSS feed

Do one or more of the above. Then come back here, post a comment and let me know that you have.

If you are already following me through facebook, twitter or RSS feed, just leave a comment telling me so and you are entered in the giveaway!

Giveaway ends Monday, November 21st 2011, 9pm PST.  One random winner will be picked. US residents only.


Related Posts with Thumbnails