How to Skillet Roast Hatch Chiles (and Freeze for Later).

Hatch chiles ready for skillet roasting
Hatch chiles are a type of green chile from Hatch valley, New Mexico. They are in season now and I picked up several pounds on sale. I’ve home roasted the hatch chiles on a skillet and frozen them, so I can enjoy them year round. Hatch chiles are generally mild, although you may get a hot one every now and then. And they smell heavenly when roasting. My kitchen was filled with their smoky aroma all day. I use roasted hatch chiles for all sort of things – on burgers, in pasta, in stews, in quasadillas, eggs…the possibilities are endless.

Hatch chile season is short. So go buy some now and roast them right away; you wont regret it!
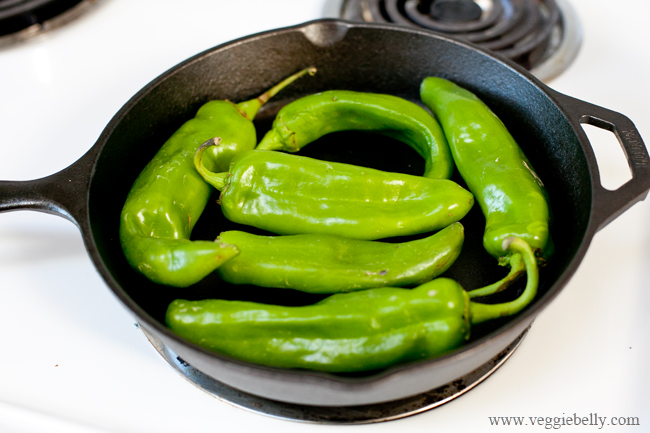
hatch chiles in a skillet I like to use a cast iron skillet for roasting Hatch chiles, because it is heavy and conducts heat evenly. But any heavy skillet will do.
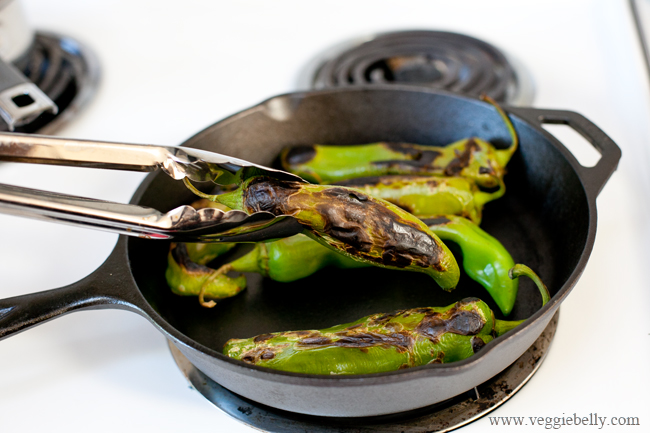
Roast the hatch chiles in a single layer until they are charred on both sides.
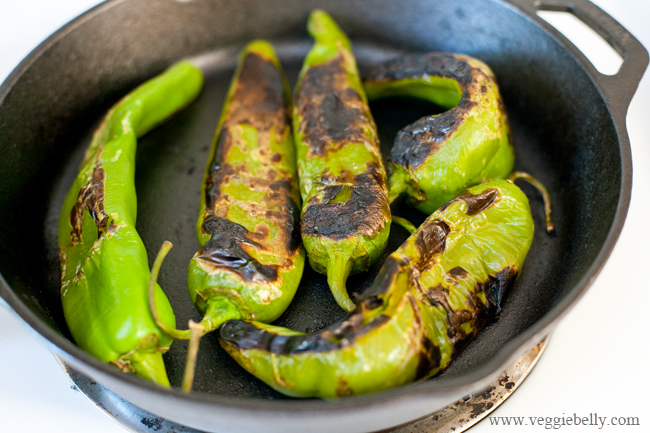
Make sure most the surface is charred.
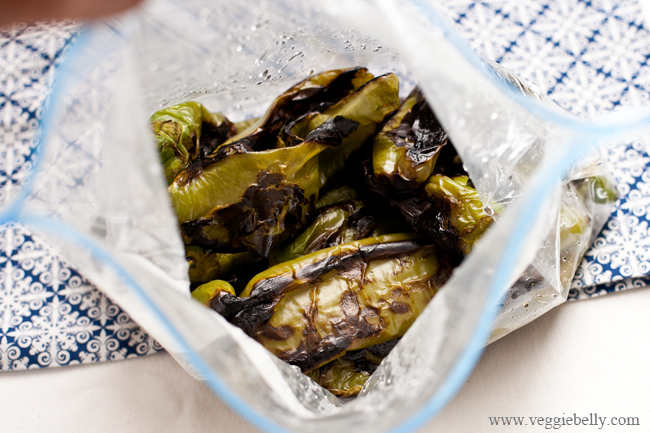
Steam roasted hatch chiles in a bag Put the charred chiles in a ziplock bag. Close the bag. The chiles will steam in the bag. And the steam will loosen their skins, making it easy for you to peel.
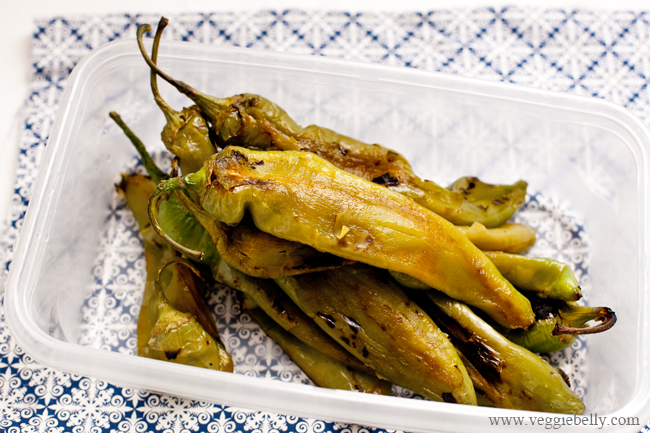
Roasted whole hatch chiles Let the chiles sit in the bag until the skins loosen and they are cool enough to handle. Then peel away and discard the skin. You will now have succulent, home-roasted Hatch chiles.

Should you seed roasted Hatch chiles or keep the seeds? That’s up to you. The seeds contain some heat. So if you want things to be mild, seed the chiles. To do this, cut the chile vertically in half. Scrape away and discard the exposed seeds. Now chop up the chiles.

I love the flavor and heat of hatch chiles seeds, so I keep all the seeds!

Once chopped, spoon the chiles into smaller freezer bags. (Make sure the chiles are completely cool before feezing!). Gently press out the air. Seal the bag well. Date and label the freezer bag, and place it in the freezer.

How to use Hatch chiles

Green Chile Breakfast Quesadillas from New York Times. A comforting, Santa Fe style brunch dish.
Hatch chile apple cobbler from Homesick Texan. Apples, cinnamon and chiles?! Yes please!
Hatch Chile Pesto from AZCentral. Full of fresh herbs and a great spicy twist to regular pesto.
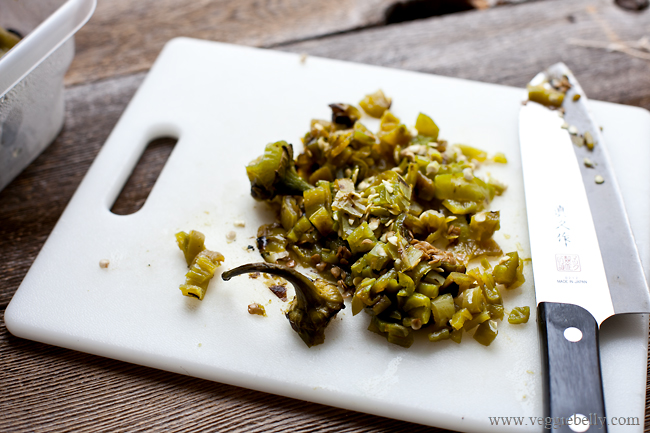
 
Roasted, chopped hatch chile

How to Roast Hatch Chiles in a Skillet

Ingredients
Hatch Chiles

Method
Select fairly straight chiles. The curved and twisted ones will be difficult to evenly char.
1. Heat a heavy bottom skillet on medium-high. Arrange the chiles in a single layer on the skillet. (You may have to do this in batches depending on how many chiles you have).
2. Let the chiles cook on medium-high heat until most their surface is charred and black.
3. At this point, flip the chiles over using tongs and let the other side char as well. If there are any large parts that are still green, use your tongs to gently press that part onto the surface of the skillet so that it gets some char.
4. When the chiles are well charred (its ok if there are little uncharred parts left), place them in a thick zip lock bag and close the bag. This will help steam the chiles and loosen the skin.
5. Keep putting the chiles in the zip lock bag as and when you are done roasting them.
6. Let the chiles steam in the closed Ziploc bag for about 15 minutes, or until the skins get lose and the chiles are cool enough to handle.
7. Now, using your fingers, peel away the charred skin and discard the skins. Place the peeled chiles on a plate or cookie sheet and let them cool completely.
8. Chop the cooled, roasted, peeled chiles. Place them in freezer bags and freeze for later.

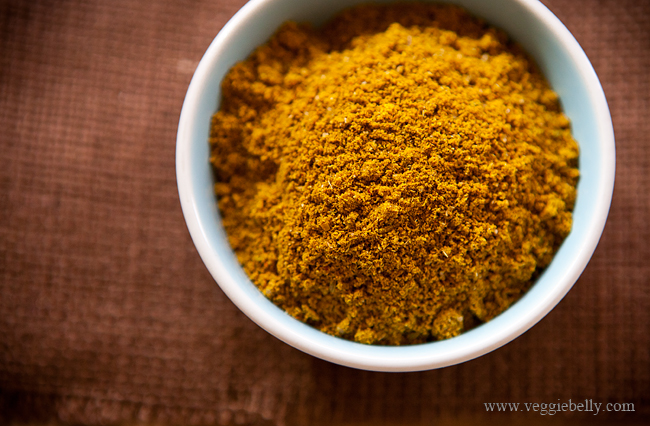
Homemade Curry Powder Recipe

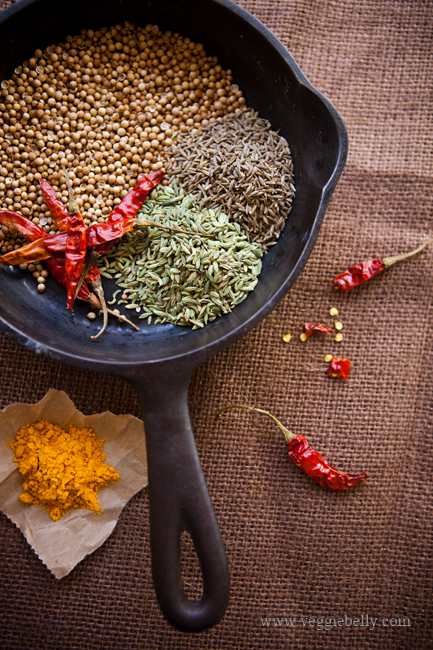
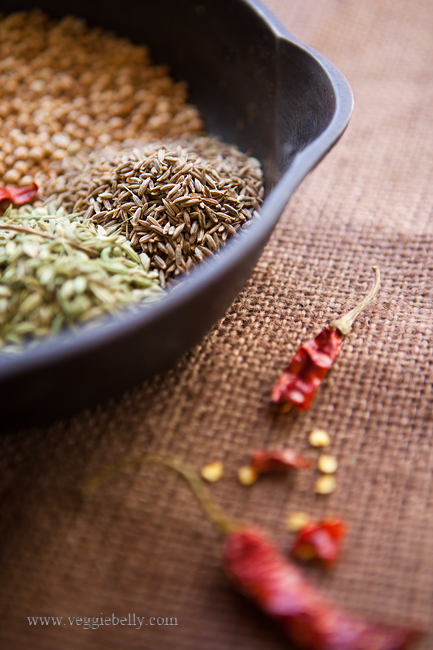
Curry powder doesn’t have to be complicated to make at home. This one has just 5 ingredients and tastes fabulous in coconut milk based curries. Coriander seeds, cumin and fennel are the basic flavors in this curry powder. Dried red chilies add heat and turmeric gives it color. All you do it toast everything in a pan and then grind. Very easy to make at home!

Look at any store bought curry powder, and you’ll see that coriander is one of the main ingredients. It adds an earthiness, and an unmistakable Indian flavor to curry powder. The cumin in this recipe adds a toasty, smokiness. And fennel seeds brighten up the curry powder.

The ratio of coriander:cumin:fennel is 2:1:1. In other words, if you use 2 tablespoons of coriander seeds, you will need 1 tablespoon of cumin seeds and 1 tablespoon of fennel seeds.

Homemade Curry Powder Recipe

Yields about 5 tablespoons

Ingredients
2 tablespoons coriander seeds
1 tablespoon cumin seeds
1 tablespoon fennel seeds
2 or more dried red chilies, broken up into small pieces.
½ teaspoon ground turmeric

Method

  1. Place coriander, cumin, fennel seeds and broken up red chilies (discard stems) in a medium pan. Use a pan large enough so that the spices are spread in a thin layer.
  2. Toast the spices on medium-low  heat, shaking the pan often, till the spices turn color and get fragrant,  about 12 minutes.
  3. Cool the roasted spices. Then using a spice grinder, grind into a fine powder. Add in the turmeric and blend once more till everything is combined.
  4. Store in an airtight container for 2 months

Basic Curry Recipe Using Homemade Curry Powder

Serves about 4

Ingredients
Choose 2-3 of the following: 1 medium onion diced, 4 cloves of garlic minced, 1 large tomato diced, 2 teaspoons minced ginger.
1 recipe curry powder (5 tablespoons), see above for recipe
4-5 cups vegetables (Zucchini, mushrooms, cauliflower, broccoli, carrot, spinach, potato, sweet potato, winter squash etc)
1-2 cups water
1 cup coconut milk

Method
Sauté your choice of onion/garlic/ginger/tomato in oil. Add the curry powder and stir for 30 seconds.

Add vegetables, salt and water and cook till vegetables are tender. (Keep in mind that different vegetables cook in different times, so you will have to add the quicker cooking vegetables later).

Stir in coconut milk, bring back to a boil. Turn off heat as soon as the curry boils.

Serve hot with rice, quinoa, roti or bread.

This is a basic formula; vary the recipe to your liking.

For a pumpkin and spinach curry recipe using this curry powder, see this post.

How to Make Ghee

Ghee is used widely in Indian cooking. Not only is it deeply flavorful, ghee also has a higher smoke point, so its great for sauteing or frying. Indian herbal medicine (Ayurveda) uses ghee as a base for many of its medications. I spent some time at an Ayurvedic retreat in India last summer and my detox concoction was ghee based – I’ve never had a tastier medicine!

Making ghee at home is easier than you think. Here is a step by step recipe and tis for home made ghee.

Should you use salted or unsalted butter for ghee?
I’ve used both salted and unsalted butter successfully but I prefer unsalted.

Salted butter will foam more when boiling. So if you are using salted butter to make ghee, make sure you use a pan that’s large enough to accommodate the foaming, and be very careful when the ghee begins to boil. When it foams, gently stirring it with a wooden spoon will help it subside. If the butter foams and spills over, it can be hazardous, be very careful.

The milk solids from salted butter will be very salty. If you are making any of the ‘by product’ recipes, you wont need to add any extra salt.

How to Make Ghee

Ingredients
2 sticks (1 cup) unsalted butter

Method
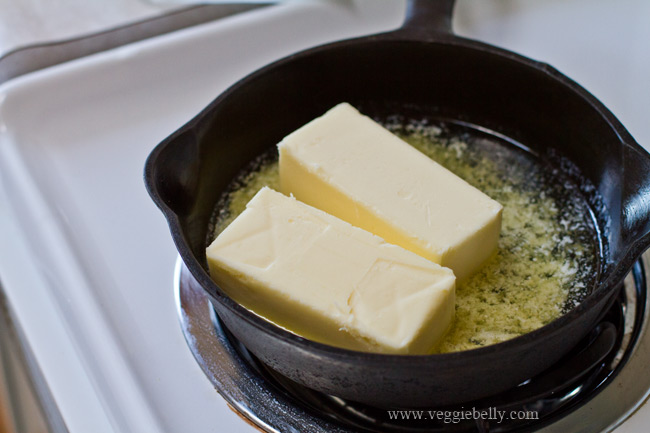
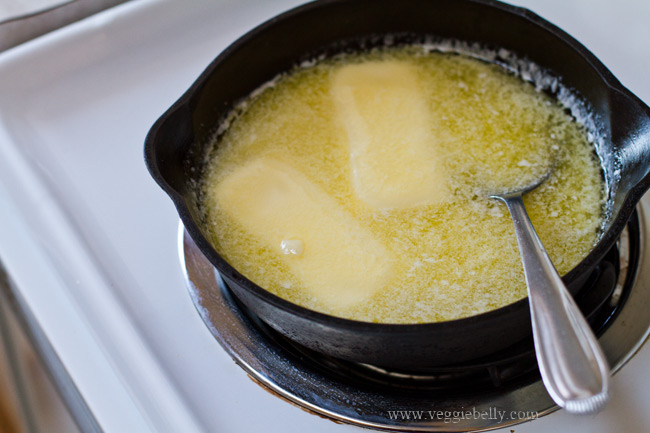
Use a medium sized, heavy bottom sauce pan. Make sure it is dry and clean. Place the butter in the pan, and cook uncovered on medium heat till all the butter melts.

Continue cooking while stirring occasionally till the butter starts to foam and boil. You will hear crackling, this means the butter is boiling.

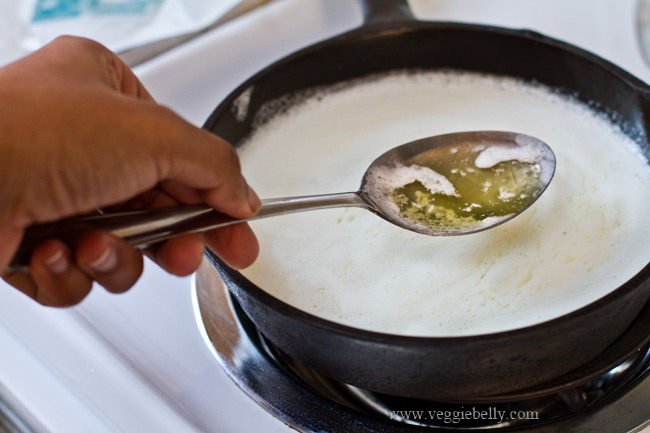
Reduce heat to low, and continue to simmer the butter till it clarifies – when you part the foam on top, you should see the melted butter getting clear.

Continue to simmer the butter till the crackling subsides, about 10 minutes. How soon the ghee is done will vary depending on the quantity of butter you are using. So use the indicators below.

The ghee is done when
-          The crackling subsides. This means most the moisture has been cooked away
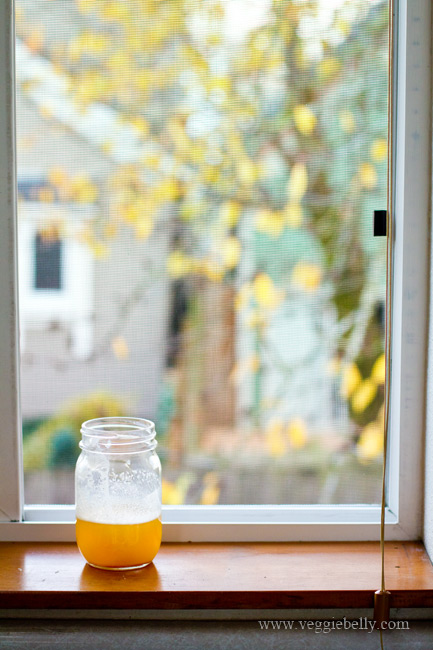
-          The ghee becomes a clear golden yellow liquid (part the foam with a spoon to see the ghee). This means the butter is clarified
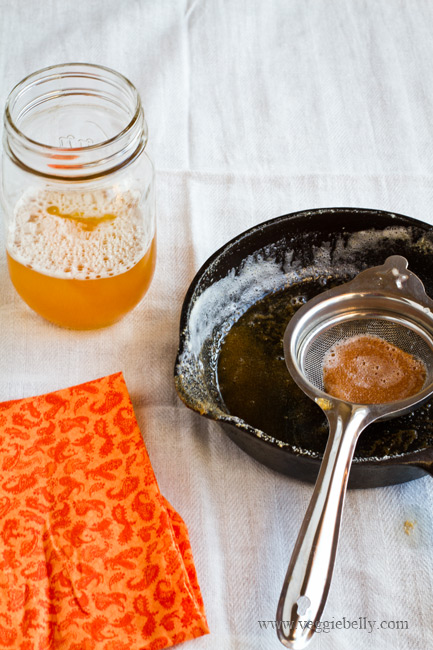
-          The milk solids separate and settle in the bottom of the pan, and are light brown in color

Be careful not to over cook the ghee and burn the solids. If the milk solids are dark brown, or if the liquid ghee turns dark brown, you’ve over cooked it.

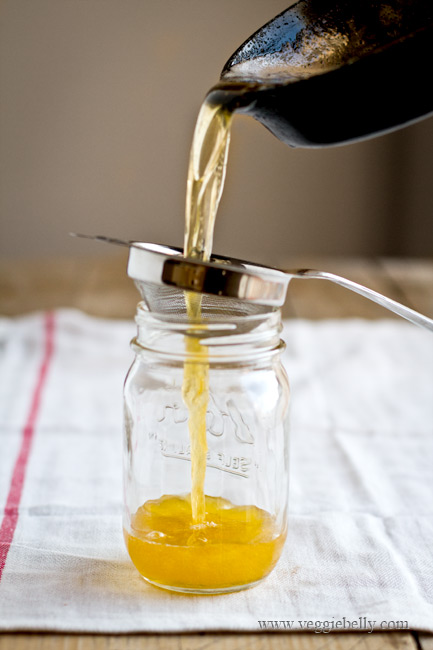
Let the ghee cool for about 20 minutes. Then strain it though a very fine strainer or 2 layers of muslin cloth. Make sure all the milk solids are strained out; strain the ghee twice if needed.

Store ghee is a clean, dry bottle. But don’t put the lid on till the ghee is fully cooled.

Ghee can be kept at room temperature for 2 months. Refrigerating it wont hurt either.

What do to with the milk solids from ghee making

When you clarify butter (by boiling) to make ghee, the milk solids will separate. They will settle in the bottom of the ghee. If the ghee is made properly, the milk solids remaining will be lightly brown, nutty, and very delicious.

Don’t throw away the milk solids. This is delicious stuff. Here are some things you can do with them:

-          Mix 2 tablespoons of milk solids with 1 clove of minced garlic. Heat on low till the garlic sizzles. Add a pinch of salt. Spread this on toasted pita or baguette slices for a rich tasting, yummy snack

-          Heat 2 tablespoons milk solids along with 6 roughly crushed peppercorns. When the peppercorns are fragrant, add 2 cups cooked rice and some salt. Mix well. We call this vennai chatti sadam (butter pot rice) – a recipe specifically created to use up the by product of ghee making.

-          Add sugar and wheat flour to milk solids. Gently cook. Then form the mixture into balls or laddus. See this video at min. 4:40 for ghee laddu recipe

Use ghee for sauteing vegetables or pasta, drizzle over hot rice, in soups, over popcorn, on toast, or in desserts.

How to Press Tofu

Many tofu recipes in cookbooks and online, including several of my own, call for pressed tofu. Pressing tofu takes out the water in it and makes it firm. Pressed tofu becomes wonderfully dense and pleasantly chewy when cooked. Pressed tofu is also a great meat substitute. So how exactly do you press tofu? Read on..

What you need to press tofu
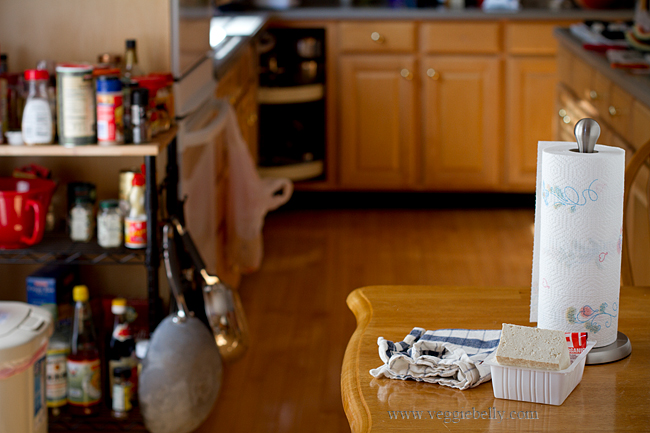
one 15oz package of firm tofu, drained and patted dry
an absorbant kitchen towel
paper towels
a plate
something heavy (weighing about 2 lbs). Choose from:

  • 2-3 cans – canned beans, canned corn, peanut butter jar, pickle jar…whatever you have
  • a book
  • heavy skillet


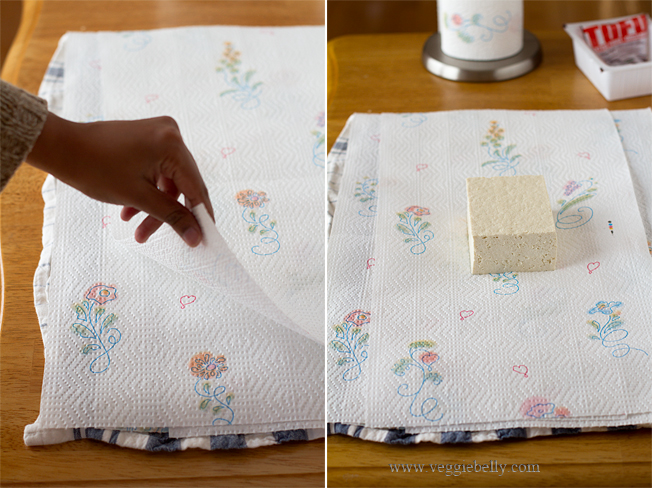
Lay out the kitchen towel on a table. Place 3 layers of paper towels on top so that the paper towels cover the cloth towel. Put the tofu block in the center.

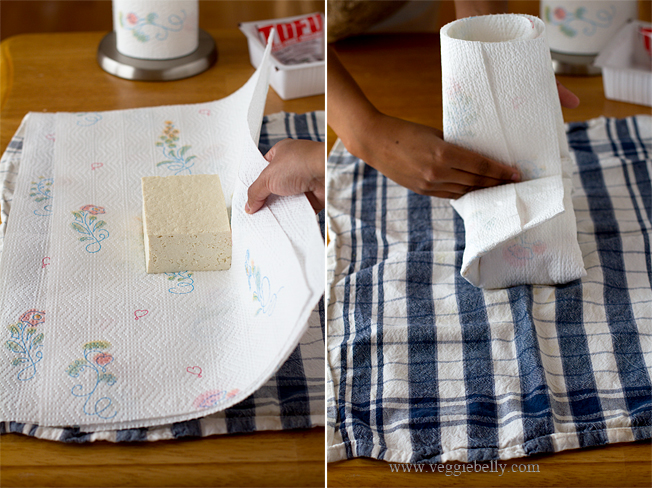
Now wrap the paper towels over the tofu. Bring all four side up and wrap them gently, but firmly over the tofu block.

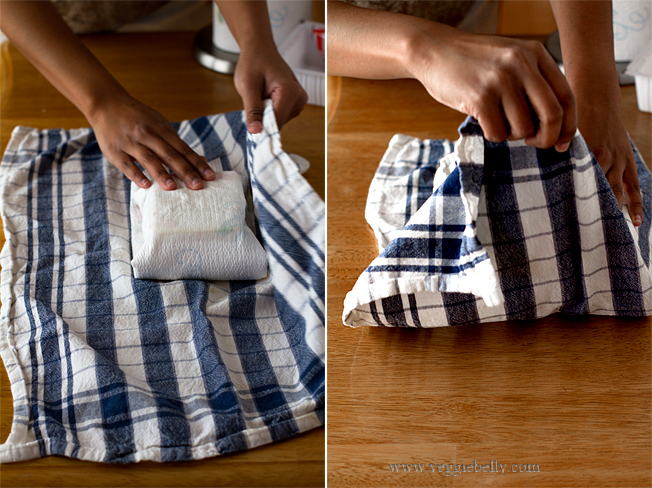
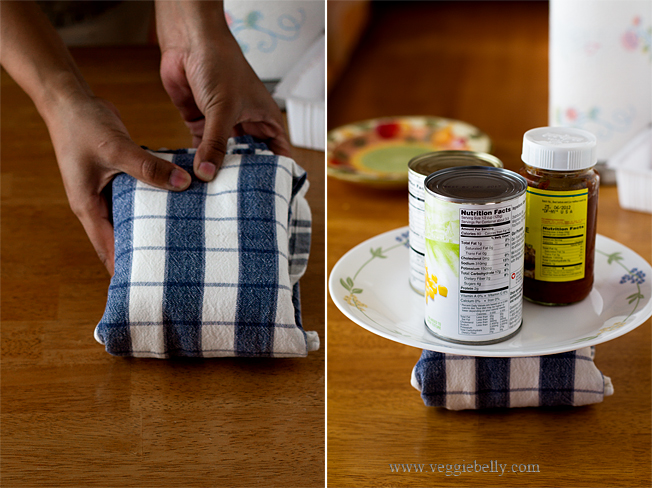
Now do the same with the cloth towel. Bring each side up and wrap firmly.

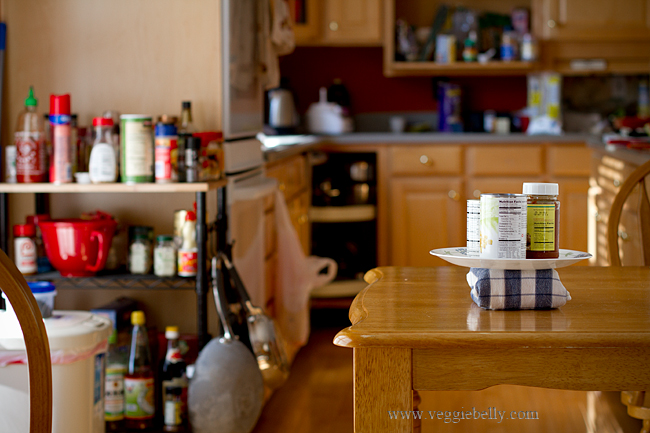
You will now have a tofu parcel. Put a plate over the tofu parcel. Place 2 to 3 cans (or a book, or skillet, or anything heavy – weighing about 2lbs) over the the plate. Adjust their positioning so that the plate is well balanced over the tofu.

Let the tofu with the weights sit for atleast 1 hour, and up to 4 hours.

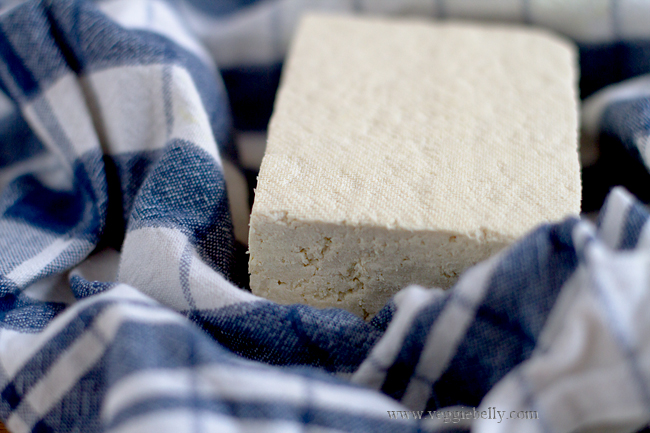
The weights will release all the water in the tofu, and the towels will absorb it.

 How long to press the tofu will depend on its water content and how dense it is. But you should press tofu for atleast an hour, longer wont hurt. Trader Joe’s extra firm tofu is very firm, so I dont need to press it for more than an hour. Other firm tofus arent as dense, so I press them longer.

Use right away or store pressed tofu in a zip lock bag for 2-3 days in the fridge.

Now go check out some of my tofu recipes!

More tofu pressing methods..

How to press tofu in 5 steps in too many combined
A video on how to press tofu using a plate and book
Tips on how to press tofu on Bon Appetite
How to press tofu using a heavy pot on Fit Sugar

How to take food photos with a bright, white, seamless background

I like taking food pictures on a seamless, bright, pure white background so that they look sunny and clean. “How to take food photos on a white background?” is the one question I get asked the most, so here is my set up and how I do it..

 What you’ll need

-         The food you are going to photograph
-         Background - large white foam board, white bed sheet or table cloth or white card board
-         Bounce or reflector – another piece of white foam board, or card board wrapped in aluminum foil
-         A camera with manual mode on a tripod. If you dont have a tripod, try using a higher ISO setting.


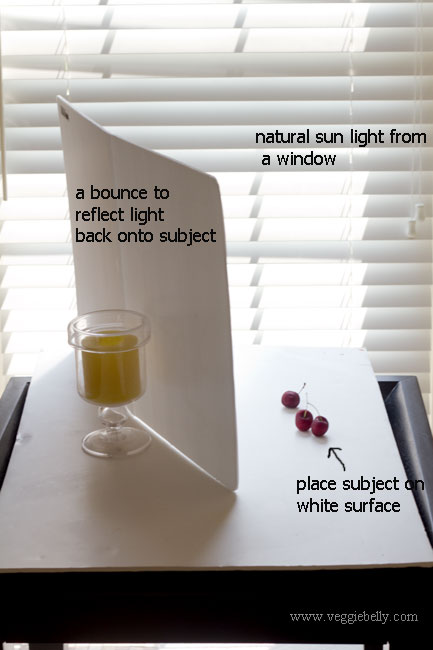
Choose a window with good sun light. This window is in my living room where I get plenty of sun light. I left the blinds closed, because the sun was very sharp, and I got plenty of light for this shot even with the blinds down. Remember, you don’t want direct sunlight falling on your subject.

If you feel the window light is too harsh, drape a white bed sheet over the window to mellow and diffuse the light.

Place a table close to your window. Place a white foam core, white card board or white bed sheet on the table.

My basic food photography set up with natural light

For a seamless white background for you pictures, I use a large white surface. Anything will do – white foam board, or cloth.

A bounce or reflector is just a piece of white material that is used to reflect light back on to the subject. A bounce or reflector will fill any shadows and lighten dark areas on your shot. Use a piece of white foam core or white card board. For a stronger bounce, you could also use a piece of card board that has been wrapped with aluminum foil.

Natural lighting for food photography and light placement

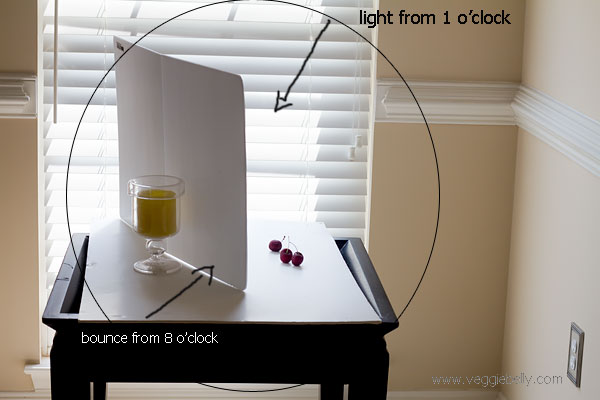
Think of your whole set up as a clock. You are standing with your camera at around 6 o’clock. You want the light coming any where from 9 o ‘clock or 3 o’clock. And the bounce should be on the opposite side of the light. Here, the light source (window) is around 1 o’clock and the bounce is placed at around 8 o’clock.

Now, put your camera in manual mode. Read your camera’s instruction book to learn how to use manual mode; its easier than you think!

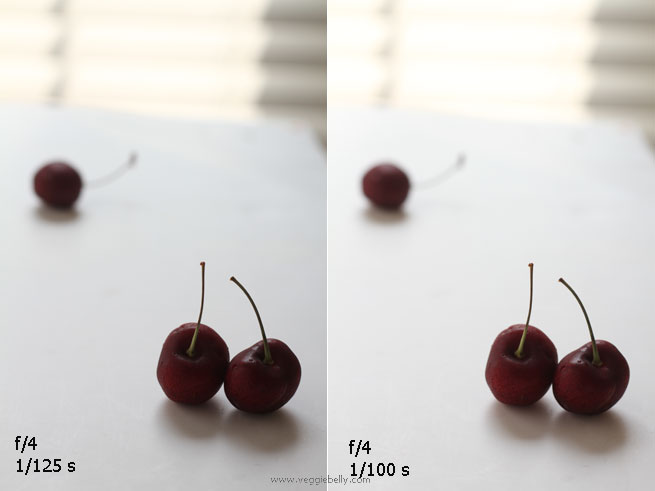
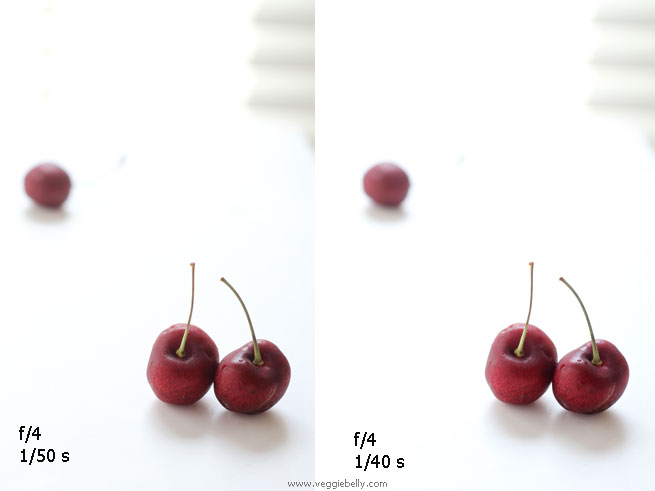
For the cherry shots, I picked an aperture setting of f/4 on my canon 50mm 1.8 lens. An aperture setting of f/4 lets me keep the front two cherries sharp and clear while throwing the cherry in the back out of focus.

Keeping the aperture setting constant at f/4, lets try shooting with different shutter speeds. Read your camera manual to see how you can change aperture and shutter speeds.

Exif info for photos below:
lens: Canon 50mm 1.8
aperture: f/4 for all photos
shutter speed: varying; look at pictures below
ISO: 200 for all photos

Keeping aperture value at f/4, lets start experimenting with shutter speed. At a shutter speed of 1/125 seconds, there isnt enough light. The picture is dark. Lets reduce shutter speed to 1/100 seconds. A little better, but still dark.

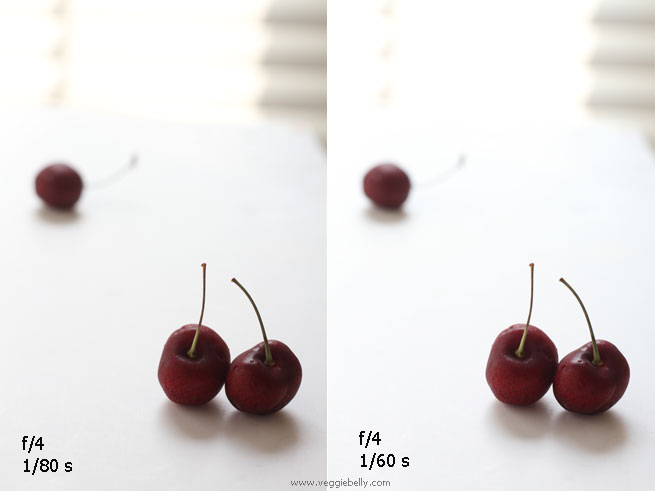
Lets try reducing the shutter speed even more, so that the camera lets more light in. Look at the picture with 1/60 seconds shutter speed. The white background is starting to look nice and bright. But the cherries are still a bit dark.

Notice how things are starting to look crisp and bright at 1/50 or 1/40 seconds shutter speed? This is what you want.

But at sutter speed 1/40 seconds, we are entering camera shake territory. Any lower, and my pictures will be shaky. This is where a tripod is useful, to stabilize the shot.

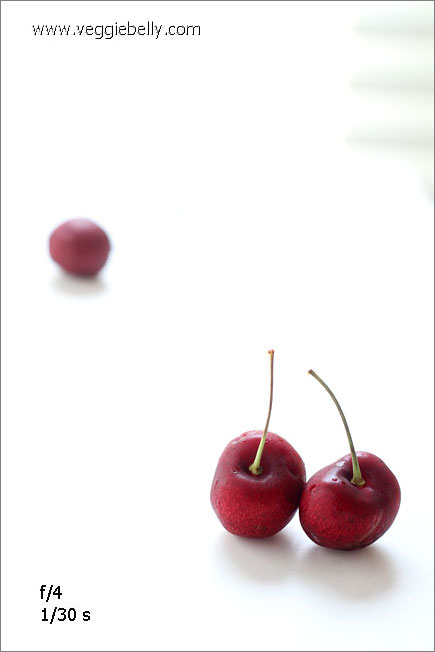
Now you make a creative decision. We have achieved a white enough background. Do you want it even brighter? I did. So I lowered the shutter speed one more increment, to let more light in.

At aperture value f/4 and shutter speed 1/30s I am satisfied with the brightness of the image. How bright or dark you want it is your own creative decision.

More..

- Tips on food photography by Helen of Tartelette
- Learn food photography blog by Neel
- Food photography tutorial series by White on Rice Couple
- Food photography setup on Steamy Kitchen
- Food photography setup series by Wrightfood
- Lara Ferronis ‘still life with’ food photography

Have you tried replicating this shot? If so, share a link to your pictures in the comments section below!

How to trim and clean an Artichoke Heart

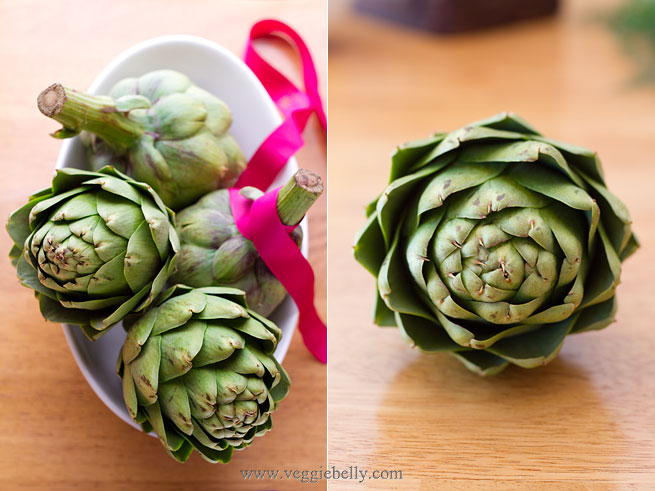
Frozen or canned artichoke hearts are fine if you are in a hurry; but I like to use fresh ones when they are in season and when I have the time to cut, trim and prepare artichoke hearts.

What you will need
steady cutting board
sharp paring knife and a larger knife
small spoon
bowl filled with water
a lemon
fresh artichokes


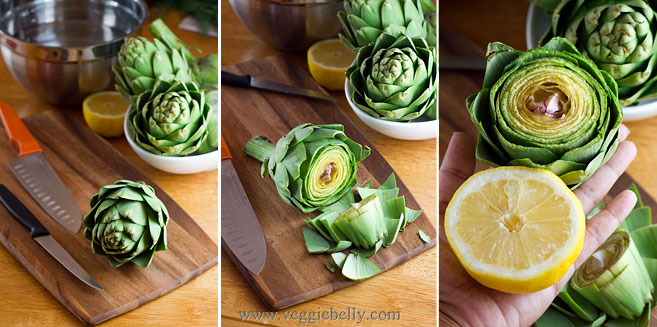
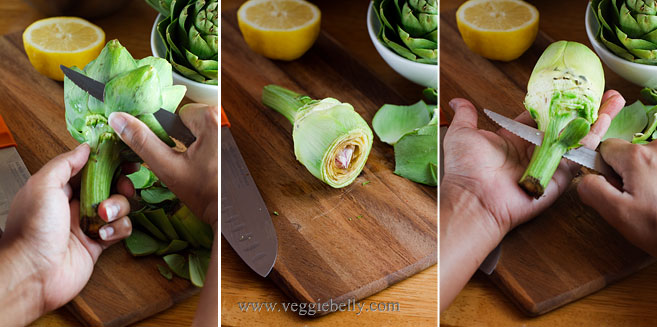
Cut the lemon in half. Squeeze one half of the lemon into the bowl of water. Place the squeezed lemon in the water as well. Keep the bowl of water near by. Using a large chef’s knife, cut off and discard the top 2/3rds of the artichoke. Rub the cut end of the artichoke with lemon, to keep it from discoloring.
Using a sharp paring knife, trim the outer leaves. Keep removing the tough leaves till you get to the paler, softer leaves on the inside. Tip: save the outer leavesyouve just cut (in another bowl of lemon water). You can boil them and dip them in mayonnaiseor garlic aioli for a nice snack.

When there are about 5-6 layers of leaves left, stop trimming. Then trim the outer, tough, green stuff around the base of the artichoke and around the stem. When you got to the white part, stop trimming. Rub the lemon everywhere youve cut.

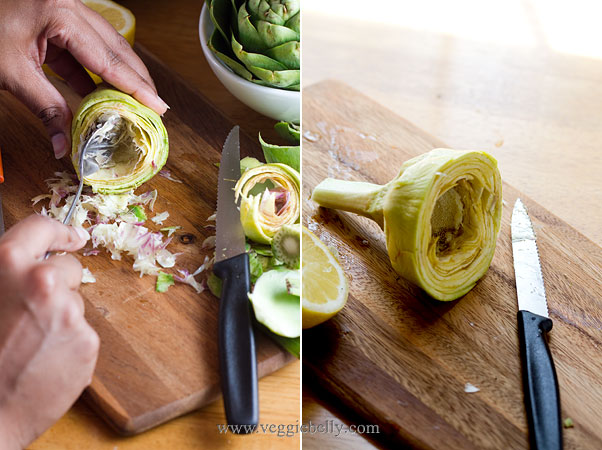
Now comes the important part. Using a spoon, gently but firmly scoop out the fuzzy choke from the center of the artichoke. Make sure you get in there and remove all of the choke, because this part of the artichoke is inedible. The artichoke heart is now clean, and ready for cooking. Immediately place the artichoke heart in the bowl of water and lemon juice.

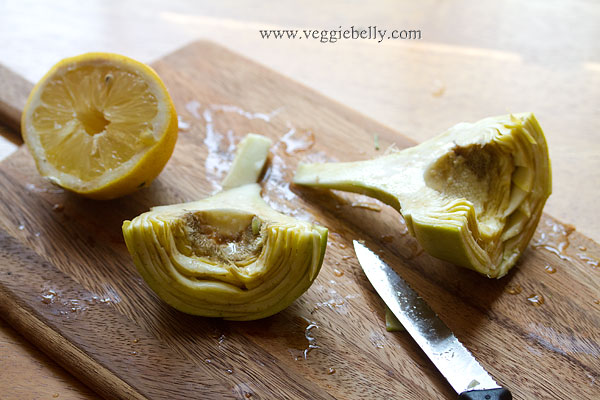
Depending on the recipe, either cut the artichoke hearts in half or quarter them. Also, depending on the recipe, remove or keep the stem.

Notes
- Be careful when handling an artichoke, the tips of its leaves have sharp spikes
- Make sure you remove all of the fuzzy choke from the center
- Always rub cut surfaces of an artichoke with lemon, to keep them from discoloring
- Place trimmed and cleaned artichoke hearts in a bowl of water with lemon juice

How I shot the floating cranberry photo

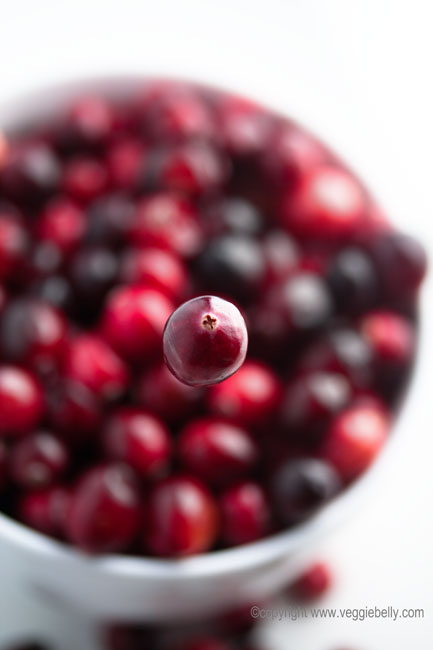
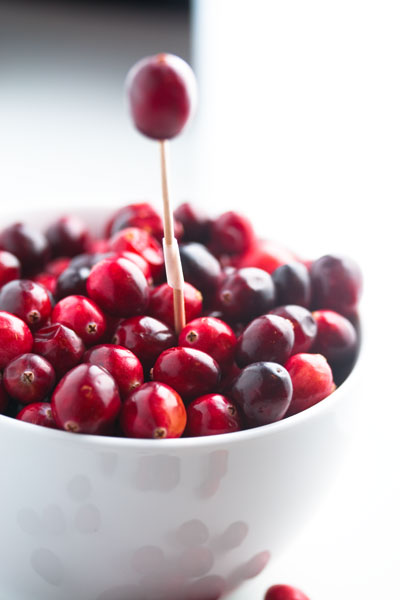
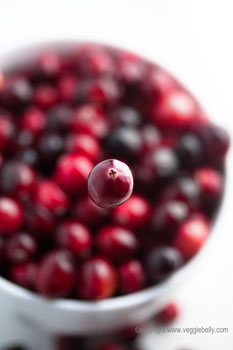
Many of you wrote to me asking how I shot this floating/suspended cranberry photo that appeared in this post.

Did I drop the cranberry into the bowl and shoot while it was falling?

Did I hold the cranberry up using a skewer or something similar and then photoshop the skewer?

Was this two photos that were merged together?

No, no, and no!

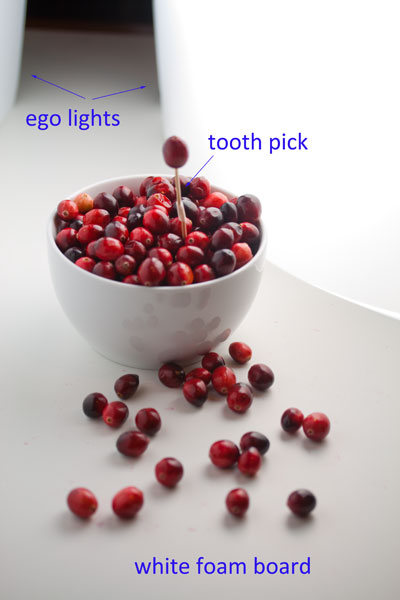
Its really very easy to do. No photoshopping, no fancy camera tricks. You just have to elevate the single cranberry from the rest, using a tooth pick. Take a look..

One tooth pick didn’t elevate the cranberry enough. So I taped two tooth picks together for extra height. Because of the short distance between the elevated cranberry and the rest of the bowl, I decided to use a macro lens.

A Macro lense, along with a wide aperture setting, will give the image a shallow depth of field. This means the background (in this case, the bowl full of cranberries) will be thrown out of focus. More background  blur means the more the floating cranberry will stand out.

The set up is simple..

I placed the bowl with cranberries on a white foam core board. I placed two ego lights on the foam core; one at 2 o’clock and one at about 10 o’clock. (It was a winter night, so I couldn’t make use of natural sunlight, which is my first choice for food photos).

Then I took the shot from top down so that the tooth pick was directly under the floating cranberry. It took a few tries before I could position myself so that the tooth pick was not visible under the cranberry. And voila, the money shot!   

EXIF info

Camera: Canon Rebel XTi

Lens: 60mm macro

Aperture: f/2.8

Shutter speed: 1/125

ISO: 100

Exposure mode: Manual

Lighting: 2 Ego lights

How To Open a Pomegranate Without Making a Mess

Ever made a bloody mess opening a pomegranate? Or do you buy pre-seeded, over priced pomegranates at the grocery store because you dont want to deal with opening a fresh one? If you’ve answered ‘yes’, this post is for you! A completely mess free way to open those lovely, fresh pomegranates that are in season now…

  how-to-open-pomegranate-001

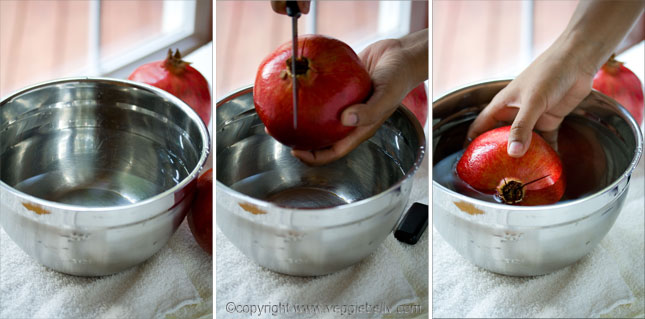
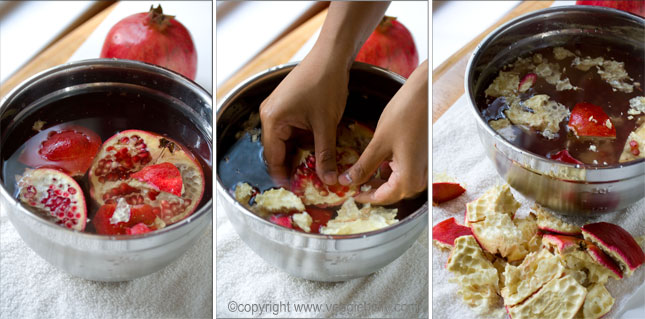
Fill a large bowl with water. Using a sharp knife, make two deep slits on top of the pomegranate in the shape of a ‘x’. Do this on a cutting board for more support. Place the pomegranate in the bowl of water.
how-to-open-pomegranate-002

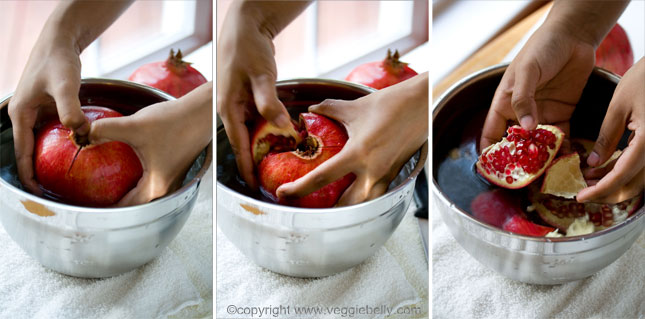
 Put your thumbs where you made the ‘x’ shaped slit, and pry open the pomegranate. Do this underwater so that the red juices don’t splash on you. You should be able to pull the fruit apart in wedges. If the pomegranate is difficult to pull apart, make the slit on top deeper and longer. 
how-to-open-pomegranate-003

 Pull the pomegranate wedges apart into manageable pieces. Gently remove the white membrane, while keeping the fruit under water. Then use your fingers to gently remove the red seeds. The seeds will sink to the bottom and the membrane and skin will float to the top.

how-to-open-pomegranate-005

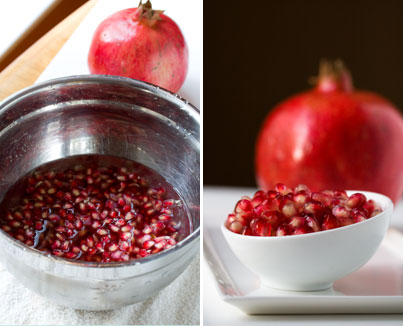
Skim the top of the water to remove all floating white membrane and skin. Then pour out the water, reserving the pomegranate seeds. Pour a little more cold water over the seeds and pour out once again to make sure all the white membrane is gone. Gently pat dry the pomegranate seeds. Serve immediately or store covered in the fridge.

Related Posts with Thumbnails