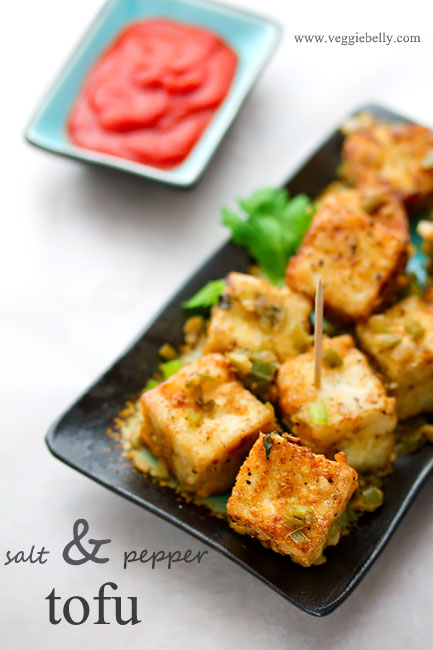
Chinese Salt and Pepper Tofu Restaurant Style


This vegan salt and pepper tofu recipe is a great dish to entertain with. I either serve it as an appetizer with tooth picks, or I serve it as an entree with some brown rice. All the components of this recipe can be made ahead and put together just before serving. This is a truly fancy, delicious, vegan, Chinese dish and it tastes like something you’d get at a restaurant.

To clean leeks, soak sliced leeks in water for a few minutes. The grit will settle to the bottom. Then scoop up the leeks floating on top and rinse under water.

There are a few recipes online for salt and pepper tofu, like this Chinese salt and pepper tofu on the post punk kitchen forum, this salt and pepper tofu with five spice  or this simple salt and pepper tofu  from Rachael Ray magazine.

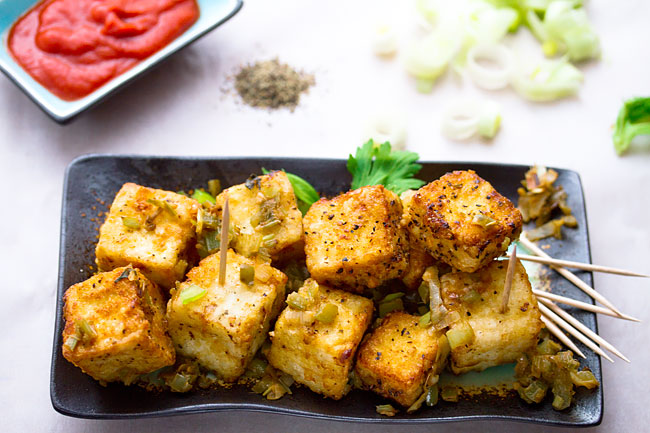
Once you fry the tofu, toss it in sauteed leeks, celery, ginger, garlic and green pepper.

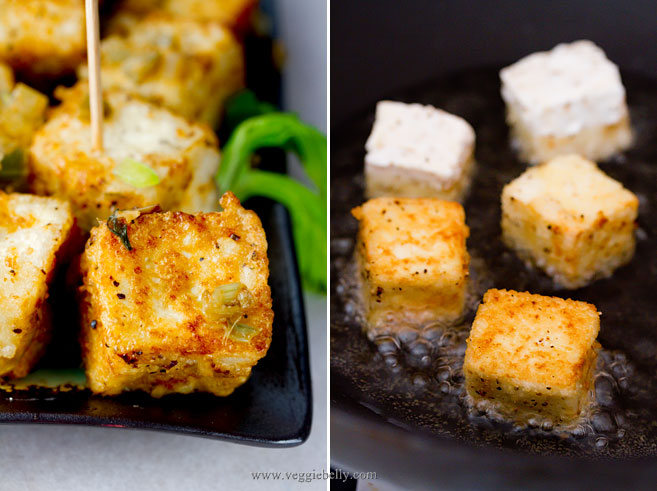
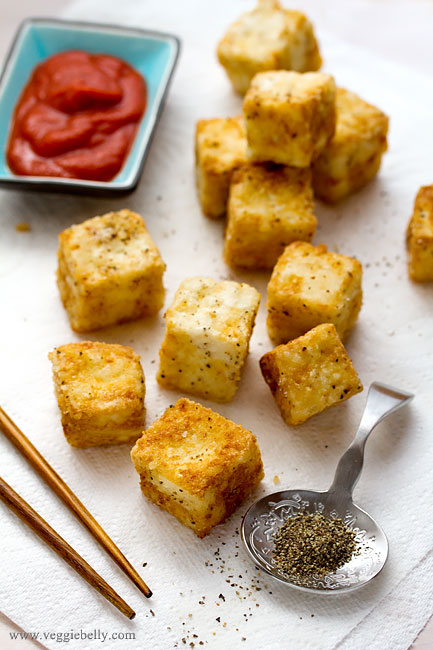
For a quick appetizer, skip the sauteeing just served the fried tofu with chili sauce like below. Toss tofu cubes in corn starch, salt and pepper. Fry till golden.
Notes:

- you can use this same method and recipe with button mushrooms, parboiled cubed potato, baby corn or paneer. The only change you will make is to make a batter out of the cornstarch and dip the vegetables or paneer in the cornstarch batter before frying. Tofu doesn’t need a batter because it has a lot of moisture already, so simply tossing it in cornstarch is enough 

- fry one piece of tofu first and taste it. Adjust the salt the pepper in the batch if needed and then continue frying the rest

- fry only a few pieces of tofu at a time. If you crowd the skillet, tofu wont crisp up

- if the oil temperature is too low, the tofu wont crisp up, instead it will get soggy with oil

- substitute leeks with 1/2 cup chopped onions

- you can make the leek, celery, bell pepper sauté a day ahead

- the tofu can be fried about an hour ahead of time and placed in your oven in the lowest temperature. simply toss the tofu in the sauté in the last minute

Vegan Chinese Salt and Pepper Tofu

serves 2 as an entree or about 4 as an appetizer

for the sauté
1/2 tablespoon oil
2 medium leeks, white part only, washed and grit removed (1 cup when chopped)
1 celery rib (1/2 cup when chopped)
1 small green pepper (1/2 cup when chopped)
1 tablespoon finely minced garlic
1 tablespoon finely minced ginger
1 tablespoon light soy sauce
1/2 teaspoon brown sugar

for the tofu
1 block (14 oz when drained) extra firm tofu
4 tablespoons corn starch
1/2 teaspoon or to taste freshly cracked black pepper
Salt

Vegetable or canola oil for frying

Chop the leeks, celery and green pepper into a fine dice. Heat oil in a wok on medium-high heat. Add chopped leeks, celery, and green pepper. Sauté on high heat for about 2 minutes. Add ginger and garlic. Cook another 1-2 minutes. Add soy sauce and brown sugar and cook 30 seconds. Set this mixture aside.

Pat dry the drained tofu. Cut into 1 inch cubes. Place the tofu cubes in a large bowl. Add corn starch, salt and pepper. Gently toss till the tofu pieces are very well coated.  

In a skillet, pour oil so that it comes up 1/2 inch. Heat the oil.Make sure oil is hot. Add tofu cubes a few at a time. If you fry too many in one go they won’t crisp up. Fry the tofu pieces, flipping them around, so that all sides are golden brown. Drain onto a few layers of paper towels.

Heat up the sautéed leeks, celery and bell pepper. Add the fried tofu cubes to this. Toss well. Serve vegan Chinese salt and pepper tofu with your favorite chili sauce and garnish with celery leaves or green onions.

Vegan Eggplant Rollatini Stuffed with Couscous and Pine Nuts

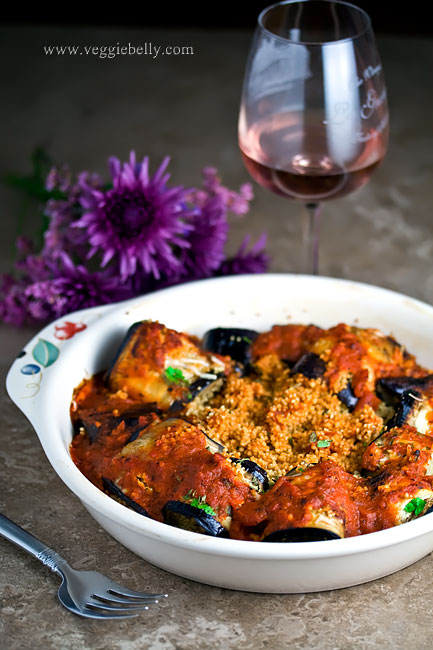
A typical Italian rollatini or rolatini has ricotta, parmesan and other cheeses and sometimes the eggplants are dipped in egg before pan frying. I cut out the dairy and eggs in this recipe to keep this rollatini vegan. Not using cheese also lightens this dish up considerably. Instead of the cheese, I stuffed the rollatini with a delicious toasted pine nut couscous that Near East sent me to sample.

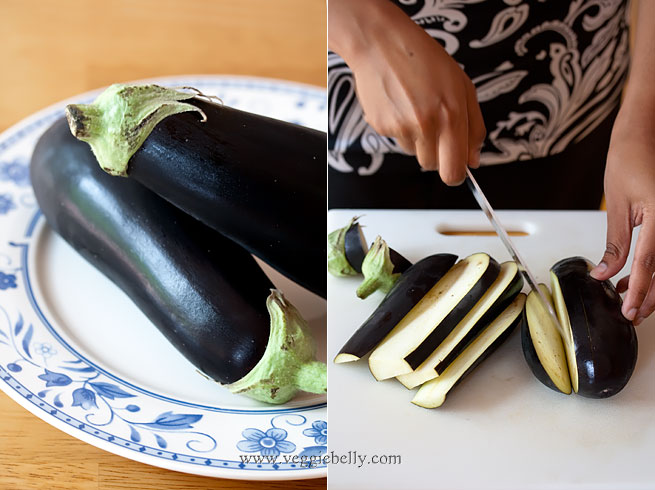
Take 2 medium eggplants. Cut off the stem end. Slice the eggplant lengthwise into 1/4th inch thick pieces. Discard the two end slices which have too much skin. Sprinkle salt and pepper on the slices

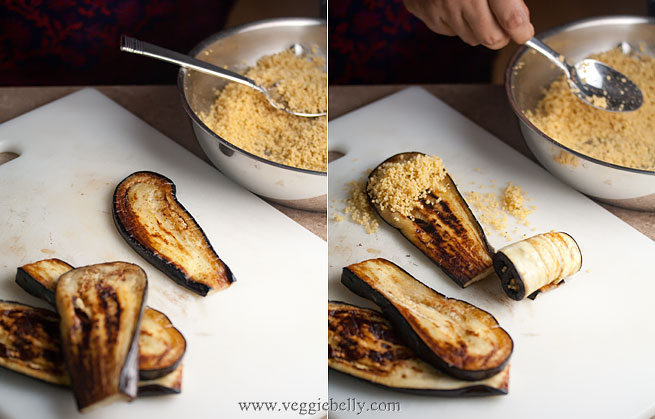
Pan fry the eggplant pieces in a skillet with a little olive oil, till they are golden (sorry, no photo!). Then place the slices on a work surface. Place a spoon of cooked pine nut couscous on one end of the eggplant.

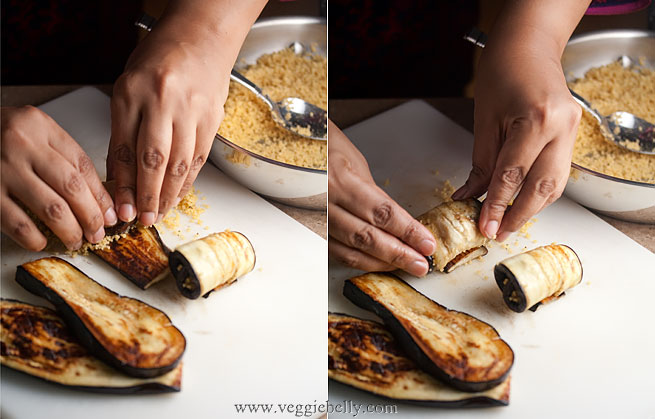
Roll. Repeat.

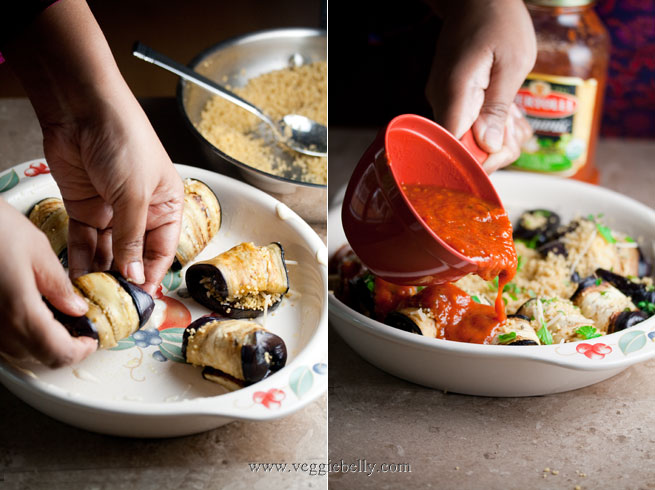
Place the stuffed and rolled eggplant onto a baking dish that has been spread with margarine or olive oil. Place any extra couscous in the center of the baking dish and inbetween the eggplant rolls. Sprinkle chopped parsley or basil.

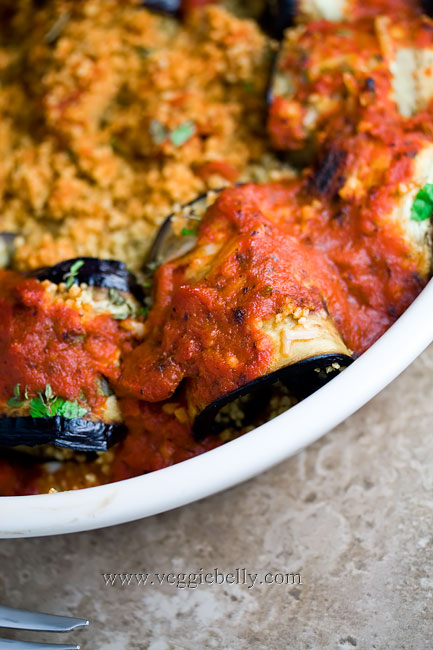
Pour a cup of marinara sauce over. Non vegans: sprinkle 3/4 cup of mozzarella cheese at this stage. Bake till bubbling.

Eggplant Rollatini stuffed with Couscous and Pine nuts Recipe

serves about 2

2 medium eggplants
salt and pepper
1/2 cup couscous, uncooked
4 tablespoons toasted pine nuts
2 tablespoons chopped basil or parsley
1 1/2 cups marinara sauce, use more if you like it saucy
2 tablespoons margarine or olive oil + more to cook eggplants

Pre heat oven to 375f.

Cut eggplant lengthwise into 1/4th inch thick strips. Sprinkle salt and pepper. Pan fry the strips on a little olive oil till both sides are golden.

Cook the couscous according to package instructions. Mix in the toasted pine nuts to the couscous.

Place a spoon of the the couscous on one end of an eggplant piece, and roll it. See pictures and instructions above. Repeat with all eggplant strips. Place the stuffed and rolled eggplants onto a baking dish that has been rubbed with a little margarine. Add any left over couscous to the baking dish. Sprinkle basil or parsley on top. Then pour marinara sauce over. Non vegans can add 3/4 cups of shredded mozzarella. Bake till the sauce is bubbly, about 15 minutes.

Note: If you dont want to bother with rolling the eggplants, layer the eggplant, couscous and marinara sauce to make vegan eggplant and couscous lasagna!

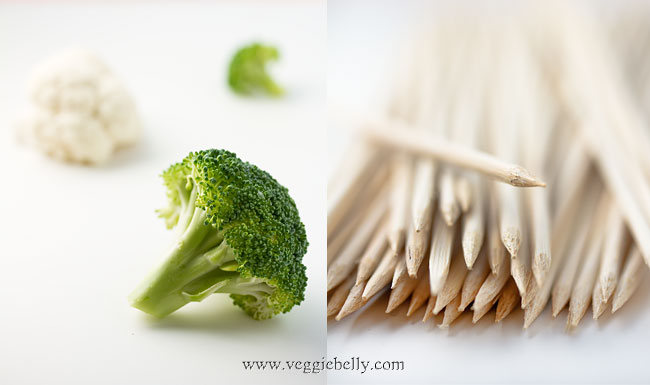
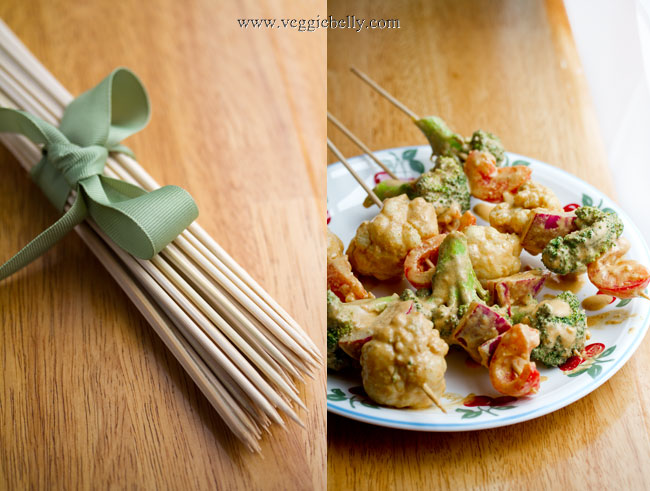
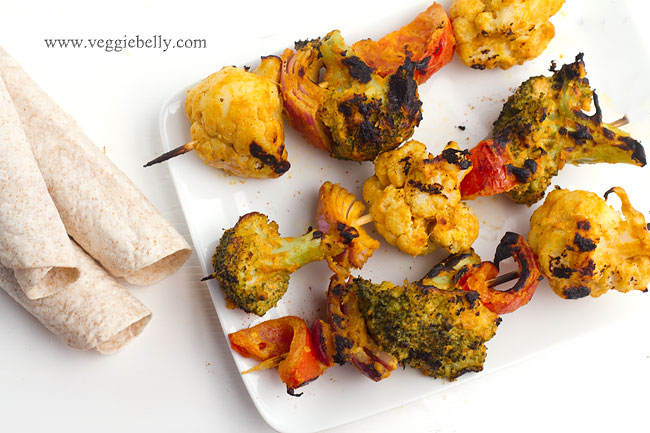
Tandoori Grilled Broccoli and Cauliflower Kebabs


A tandoor is an Indian clay oven. Marinated meat, cottage cheese (paneer) or vegetables are skewered and cooked in the oven. The result is smoky, charred skewers of tandoori yumminess.


Make sure you soak the skewers before grilling, otherwise they will burn on the grill. If you dont have a grill, you can place the skewers in the oven and broil them till brown and slightly charred. Then flip the skewers and broil the other side.

The tandoori marinade recipe I give you is very versatile, you can use it for paneer, tofu, potatoes, even seitan.

I like to blanch the broccoli and cauliflower before marinating. This reduces grilling time and also makes it easier to thread the skewer into the broccoli and cauliflower.

We usually eat these grilled kebabs with either brown rice, rotis or pita bread and some raita. Here are some recipes on Veggie Belly that will make great accompaniments to these kebabs:

Walnut raisin rice

My grandmother’s multicolored raita

Tamarind Jelly

Tandoori Grilled Broccoli and Cauliflower Kebabs Recipe

serves about 2 as an entree

4 bamboo skewers (about 10 inches long)

1 small head of broccoli
1/2 small head of cauliflower
1 small red onion, cut into 4 wedges
1 large tomato, cut into 4 wedges

for marinade
3 tablespoons chickpea or garbanzo flour (besan)
1/2 cup yogurt
2 tablespoons lemon juice
2 tablespoons vegetable or canola oil
1 tablespoon garlic paste
1 tablespoon ginger paste
1 teaspoon garam masala
1 teaspoon paprika
1/2 teaspoon turmeric powder
1 teaspoon coriander powder
Salt

Soak bamboo skewers in water for atleast 30 minutes, to prevent them from burning on the grill.

Cut the broccoli and cauliflower into large florets. You should have 6 florets (about 2 cups) each of broccoli and cauliflower.

Bring water to boil in a medium pot. Add plenty of salt. Add the broccoli and cauliflower florets. Bring back to a boil. Cook for 20 seconds. Then turn off heat and drain the broccoli and cauliflower. Rinse under very cold water to stop the cooking. If the tap water is not cold enough, dunk the broccoli and cauliflower in a bowl filled with water and ice cubes, then drain. Pat dry with a towel. Make sure the vegetables arent wet, if they are they will dilute the marinade.

Whisk all marinade ingredients together in a bowl. Add the broccoli, cauliflower, tomato and onion pieces to the marinade. Mix gently so the marinade coats all the vegetables. Cover and refridgerate for about 30 minutes.

Heat an out door grill to 400f. Skewer the broccoli, cauliflower, onion and tomato pieces. Place on grill and cook till one side of the vegetables is slightly charred, about 1 minute. Then using tongs, flip the skewers and cook the other side. If you dont have a grill, broil the skewers in the oven.

Thai-Burmese Curry Noodles (Khao Soi). Thailand part 3.

Before I tell you about this amazing noodle dish I learned to make in northern Thailand, here are more pictures from my recent trip. (And in case you missed my previous Thailand posts, they are here and here).

A Thai Market Outside Bangkok

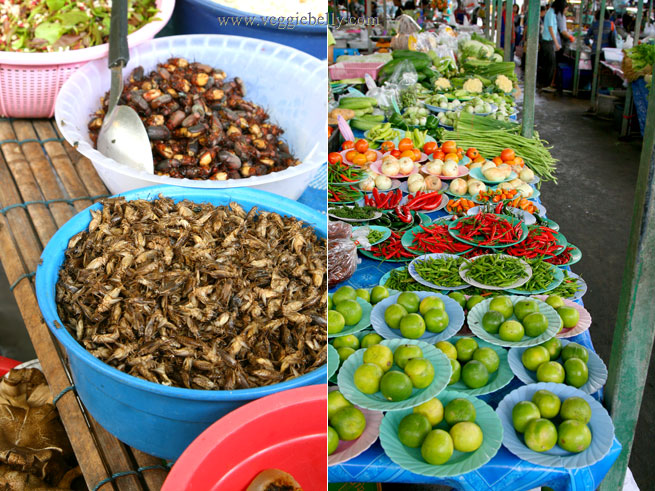
I visited several markets in Bangkok and Chiang Mai. The format seems to be pretty much the same everywhere – vegetable section, fruit section, then there are some bug vendors (yes, insects), rice vendors, fresh noodle vendors, dessert section and prepared foods section. Every single market I went to was extremely clean and organized.

This one was outside Bangkok, in the suburbs where I was staying with my uncle. So this market wasnt touristy, which is always a bonus.

Left: Sapodilla vendor. Right: My uncles wife Da, on her phone & buying guavas. Da showed me around here and so patiently explained everything and translated for me so I could communicate with the vendors 

Left: bugs and insects; I was feeling very Andrew Zimmern-ish.  Right: lime, red and green chillies


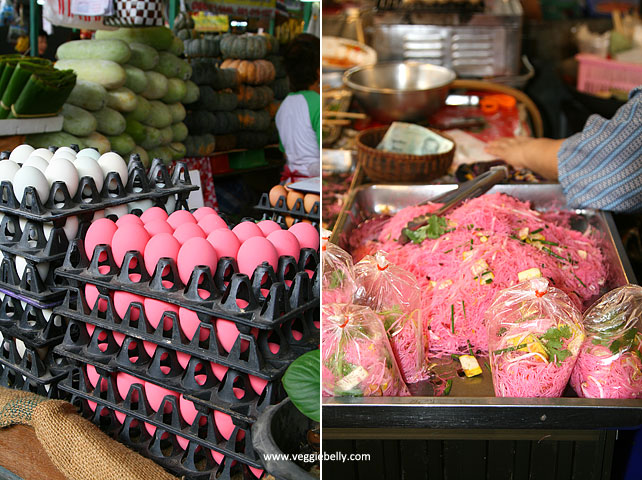
Pink preserved eggs (Chinese thousand year old eggs or century eggs) and pink noodles

Khao Soi Curry Noodles from Chiang Mai (Kow Swear or Khauk Swear in Burma)

Now lets travel up north to the cool mountains of Chiang Mai, Thailand. Chinese Muslim traders have greatly influenced this region’s cuisine. Their delicious, spicy noodle dish, influenced by Burmese cuisine, called Khao Soi was everywhere in this city. My favorite vegetarian Khao Soi is from Aum Vegetarian Restaurant. in Chiang Mai.

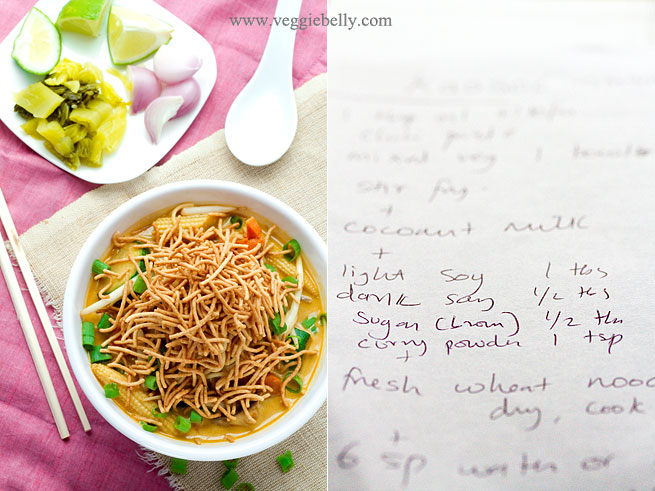
Left: Chiang Mai Aum restaurant’s Khao Soi topped with coconut cream. In the background, chilli paste, lemon iced tea, and British kid.    

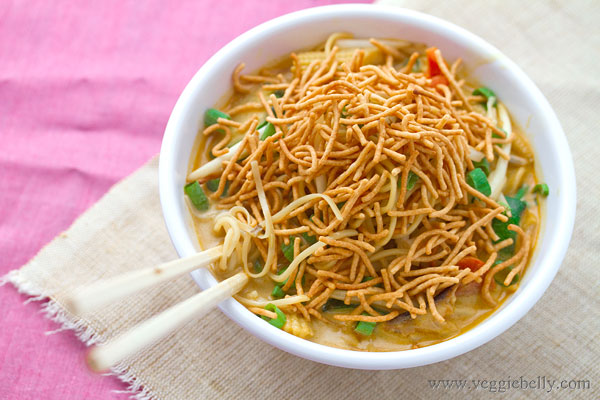
Right: My home made version

When I took a Thai Vegetarian cooking class at May Kaidee’s, Duan the owner and instructor was kind enough to show me how to make Khao Soi, even though it wasnt on the class schedule. See this post  for more on Duan and the cooking class.

Khao Soi, also spelled Khao Suey or Khao Soy, is also eaten in Myanmar or Burma and Laos. The Burmese version of Khao Soi is called Kow Swear or Khauk Swear. From what I understand, the Burmese curry noodles, are also in a coconut milk broth, but use more Indian influenced spices like coriander and do not have the crispy noodle topping. Since both the the Thai and Burmese versions are quite similar, I’m sending this post off to AWED Burma, hosted by Kitchen Swathi 

Other Khao Soi recipes:

Khao Soi by the amazing Chez Pim
A Khao Soi battle between an American guy in Bangkok and a Thai girl in Iowa
A Khao Soi recipe from Rosas Yummy Yums
And then there is this whole blog dedicated to the quest for the perfect Khao Soi in New York city!
A recipe for the Burmese version – Kow Swear on We Are Never Full blog

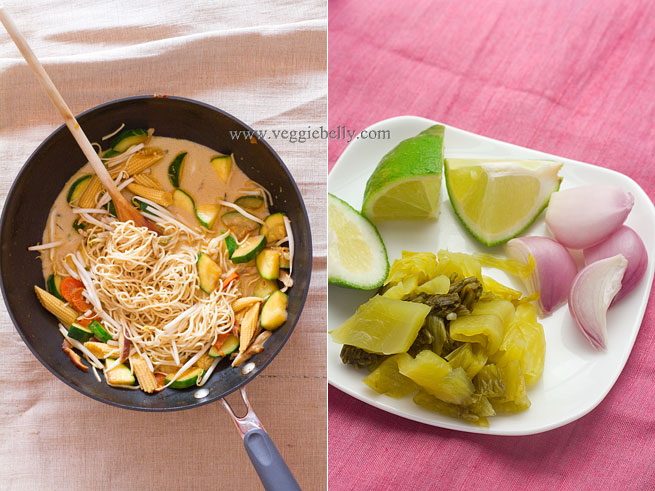
The version I learned to make at the cooking class had shredded chinese cabbage, cauliflower, and tofu. Ive used shiitake mushrooms, baby corn, carrot, zucchini and beansprouts. But I highly recommend adding some pan fried or deep fried firm tofu to this.

If there is an Asian store where you live, that is best place to buy the specialty ingredients for this recipe. But you may be able to find fresh chinese noodles (not the dry stuff) at the regular grocery store. For the pickled mustard greens, you may have to make a trip to the Asian store (if you want to make your own, here is a good recipe).

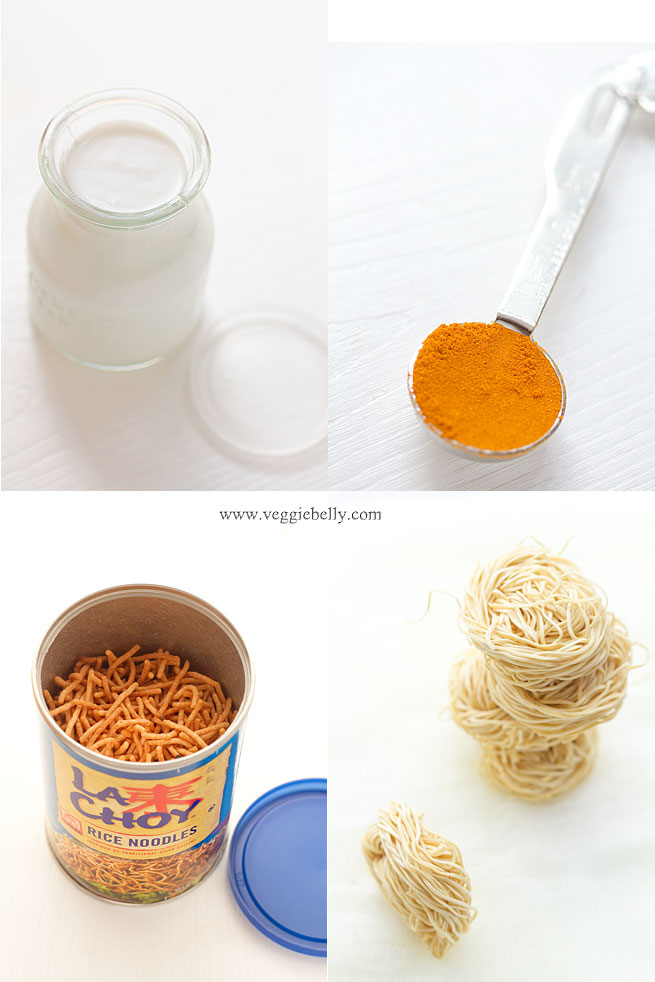
All the amazing Khao Sois I had in Chiangmai were topped with crispy fried noodles – the best part! I didnt feel like deep frying, so I used store bought La Choy brand crispy Asian noodles.

Curry Noodles in Coconut Milk Broth or Khao Soi or Khao Soy Recipe

serves 2-3

1 tablespoon oil
1 cup chopped shiitake mushroom
1 medium zucchini, chopped
1 small carrot, chopped
1/2 cup chopped baby corn
1 tablespoon red curry paste
1 teaspoon curry powder or according to taste
1 tablespoon light soy sauce
1 teaspoon dark soy sauce
1 teaspoon brown sugar
1 cup coconut milk
1 cup water
2 cups fresh Chinese wheat based noodles or about 3 oz dried thin wheat based noodles
1 cup bean sprouts

Toppings and garnishes
1 cup store bought crispy noodles (I used La Choy brand)
2 shallots, chopped
1/4 cup chopped pickled mustard greens (available at Asian stores)
3-4 lime wedges
Chopped cilantro
Chopped green onion

Heat a large wok with oil. Add shitake mushroom, zucchini, baby corn and carrot and cook on high for about 2 minutes. Then add curry paste and curry powder. Toss to coat the vegetables. Add light soy sauce and cook about 30 seconds so the vegetables absorb the liquid. Then add dark soy sauce, brown sugar, and coconut milk. Let the curry simmer for about 2 minutes.

Then pour in water and bring back to a simmer. Taste curry and adjust soy sauce, and sugar to taste. 

Bring a large pot full of water to boil noodles. If using dried noodles, cook in boiling water till noodles are very al dente. If using fresh noodles, boil for about 1 minute. No matter what noodles you use, make sure not to over cook them. Drain well.

Add cooked noodles and bean sprouts to the curry broth. 

Serve Khao Soi in individual bowls, topped with crispy noodles. If you dont have store bought crispy noodles, increase the fresh or dry wheat noodles quantity in this recipe by 1/2 cup. If using dried noodles — deep fry this extra half cup of boiled, drained noodles in oil, till golden. If using fresh noodles, deep fry them as is. Then top Khao Soi with the fried noodles.

Serve with chopped shallots, pickled mustard greens, lime wedges and cilantro on the side.

Chickpea Flour and Swiss Chard Savory Crepes with Mint Ginger Raita (Besan ka Cheela or Chilla)


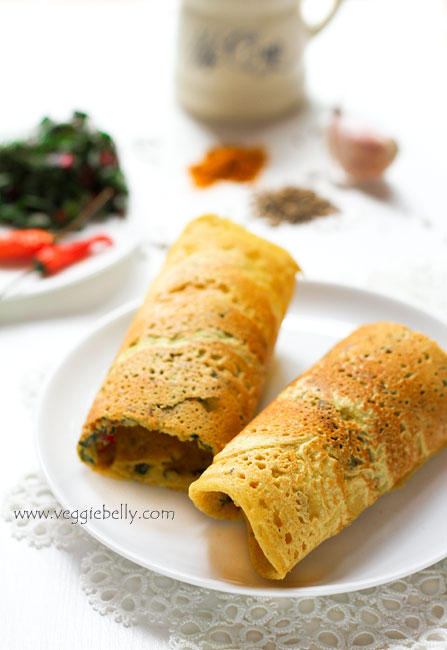
Chickpea or Garbanzo flour is a staple in Indian households, because its so quick to cook and versatile. Back home in India, when those unexpected visitors dropped in, chickpea flour always came to the rescue. We’d make a batter of the flour and water, dip some potatoes in it and deep fry them for quick, yummy bajjis or fritters for the unannounced guests. Or, we’d make a thinner batter with the chickpea flour, throw in some spices and make golden, crispy crepes. When cooked, chickpea flour (besan) has a beautiful creamy texture and a nutty flavor. Its chock full of protein too.  

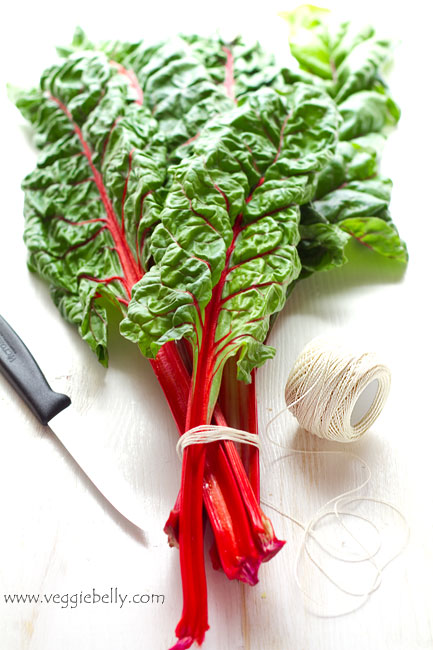
I added some shredded, wilted swiss chard to the crepe batter for extra nutrition. You could add any greens you like. The shredded chard in the batter does make it a wee bit difficult to spread around in the pan. But once youve made one crepe, you’ll get the hang of it. Just make sure you spread the batter as thin as you can.

For a simpler method, dont add the chard to the batter; instead, cook the crepes without swiss chard, then place the wilted chard (or any other filling) over cooked crepes, and roll them up.

As far as savory crepes go, this Indian style garbanzo flour crepe is one of my favorites. Its quick, filling, gluten free and vegan friendly (think of these as vegan omelettes!).  And you can customize this dish however you like. Change up the spices or fill the crepes with spiced potatoes, sauteed mushrooms or whatever left over vegetables you have on hand

I like to serve these crepes with an easy mint and ginger raita (recipe below). But you can serve it with pretty much any chutney you like. Mint chutney, coriander or cilantro chutney, coconut chutney, date-tamarind chutney will all be great. Or try this with store bought mango chutney.

Chickpea Flour and Swiss Chard Crepes with Mint Ginger Raita (Besan Ka Chilla or Cheela) Recipe

serves about 2

4 large leaves of swiss chard (1 1/2 cups when shredded)
1/2 teaspoon vegetable oil
1/2 teaspoon cumin or carom (ajwain) seeds

1 cup chickpea flour (also called garbanzo flour or gram flour or besan)
1 1/4 cup water
1/2 teaspoon ginger paste
1/2 teaspoon garlic paste
1/2 teaspoon turmeric powder
1/8 teaspoon asafoetida
1/8 teaspoon baking powder, optional
1 green or red chilli finely chopped
salt
Oil for cooking crepes

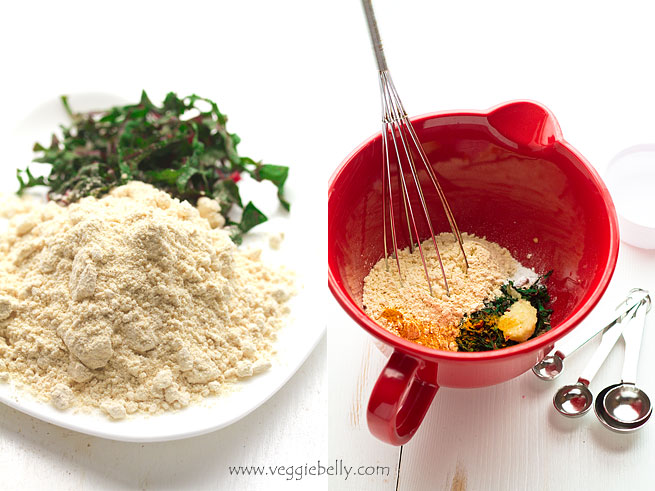
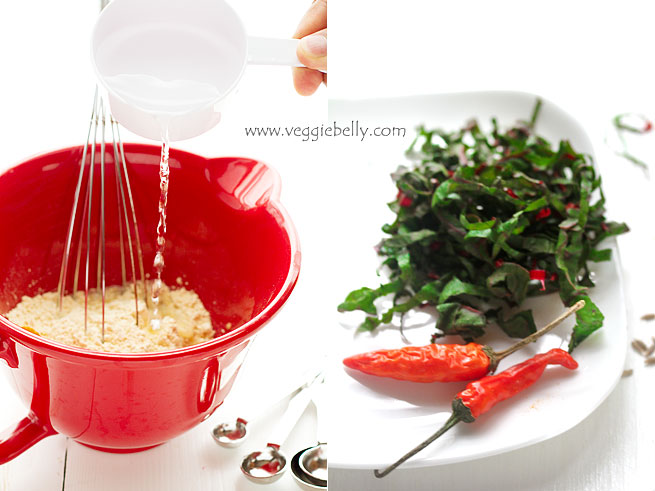
Removed and discard the stems from swiss chard leaves.  Stack the swiss chard leaves and roll them tightly. Chop the roll into fine shreds. You should have about 1 1/2 cups of shredded swiss chard.

Heat oil in a small non-stick pan, add cumin or carom seeds. When they start to sizzle, add shredded swiss card and 1/2 teaspoon water and toss on medium heat till the swiss chard has wilted to half its original volume. This will take about a minute. You should now have about 3/4 cups of wilted chard.

In a mixing bowl, add the wilted swiss chard, and all other remaining ingredients except oil. Whisk till everything is combined. The batter should be slightly thinner than pancake batter and should be easily pourable. If the batter is too thick, add more water.

Heat a non-stick pan. Pour a ladle of batter on the hot pan. Using the ladle or back of a spoon, spread the batter around to form a thin crepe. Drizzle about 1/2 teaspoon oil over the crepe. Cook on medium heat for about 1 minutes or till the bottom side is golden and sides start to crisp. Using a spatula, flip the crepe over and cook the other side till golden. Serve hot.

Ginger Mint Raita
makes 1 cup

1 cup yogurt (I recommend Greek yogurt)
1/2 tablespoon minced ginger
2 tablespoons mint leaves loosely packed
Chaat masala to taste or salt

Place all ingredients in a food processor. Blend till smooth. Serve chilled.

Lentil Drop Curry or Moong Wadi/Mangodi Curry


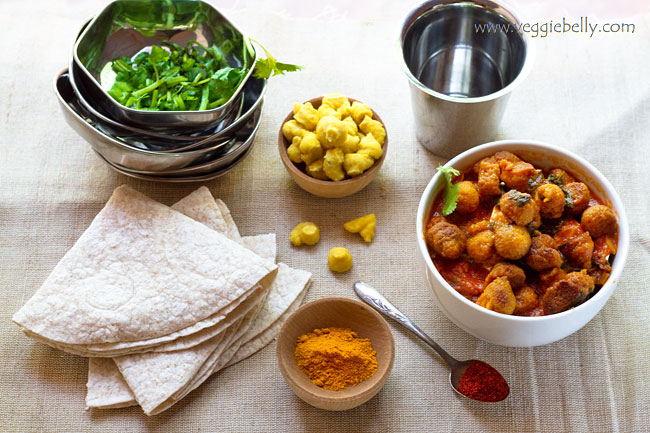
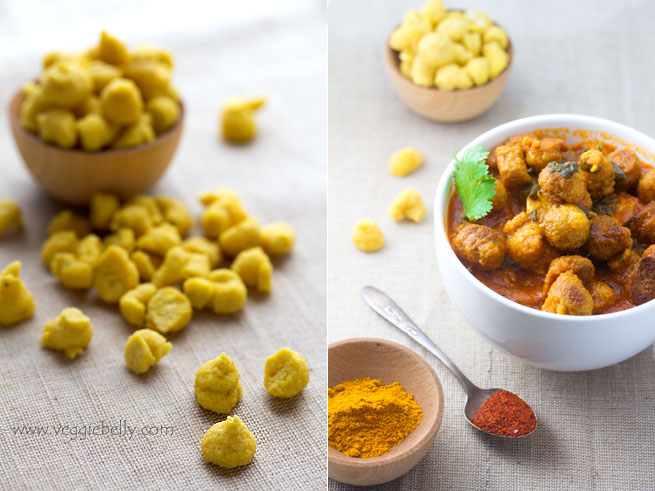
Whoever invented moong vadis is a genius. These little ‘drops’ or nuggets of dried lentils cooked in a curry, are filling and tasty. Also called Mangodi in parts of India, moong wadis are extremely versatile, you can use them in curries, soups or mashed up in chili. Because the lentils are ground up and dried, they have a great meaty texture when cooked. Moong wadis or mangodis are superb soy-free meat substitutes

How to use Moong Wadis

- Always shallow fry or deep fry wadis till golden before using
- Add to tomato based curries along with any vegetable you like (potato is traditional)
- Add fried moong wadis to yogurt based curries like kadhi or mor kulambu
- In the winter months I add extra water to this recipe and turn it into curried lentil drop soup. I serve the soup with a dollop of sour cream or greek yogurt
- Use fried moong wadis in vegetarian and vegan chili recipes instead of immitation soy based ‘meats’

How moong wadis are made: Moong dal and spices are soaked and ground into a paste. Little drops of this lentil dough are then piped onto a baking sheet or other surface and sun-dried for 2-3 days or untill hard. You can store these in an airtight container for several months. See this post for a recipe. I dont bother making moong wadis, I just buy them at the Indian store.

Lentil Drop Curry or Moong Wadi/Moong Vadi/Mangodi Recipe

serves about 6

4 tablespoons vegetable oil
2 cups moong wadi from the Indian store

1 tablespoon vegetable oil
1/2 teaspoon cumin seeds
1 red or green chilli chopped, optional
1/8 teaspoon asafoetida
1 small onion, finely chooped
1/2 tablespoon garlic paste
1/2 tablespoon ginger paste
1/4 cup tomato puree or 2 tablespoons tomato paste
1 teaspoon coriander powder
1/2 teaspoon turmeric
1/2 teaspoon red chilli powder, optional
Juice of 1/2 a lime or according to taste, optional

Heat 4 tbsp vegetable oil in a medium pot. Add the moong wadis to the oil. Fry on medium heat till the wadis are golden brown. Remove the wadis from the pot using a spoon and set aside. In the same pot, heat 1 tbsp oil.  Add cumin seeds and let them sizzle about 20 seconds or till fragrant. Then add chilli if using and cook another 15 seconds. Add asafoetida.

Immediately add chopped onion and cook till onions are soft, about 2-3 minutes. Then add garlic and ginger pastes. Cook, stirring for another 2 minutes. Pour in the tomato puree, add coriander powder, turmeric and red chilli powder if using. Let the gravy simmer for about 2 minutes. Then add the fried moong wadi along with 5 cups of water.

Bring the curry to a boil. Then lower heat, place a lid on the pot and let it simmer for about 20 minutes or till the moong wadis have plumped up and dont taste raw anymore. Taste the curry and add lime juice according to taste. If the gravy is too thick, add more water.

Serve hot with rice, bread, rotis or tortillas.

Chipotle Spiced Seitan Tacos

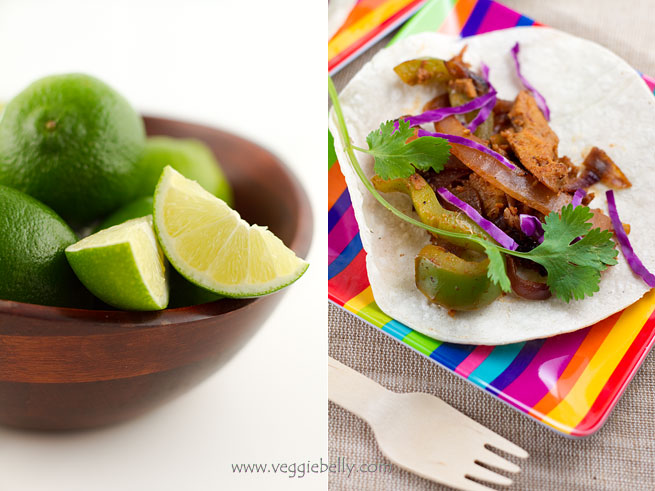
This recipe is a vegetarian and vegan version of a Food & Wine magazine recipe for chile spiced skirt steak tacos. I found the recipe on the Bitten Word site- my new favorite blog by fellow Washington DC bloggers!

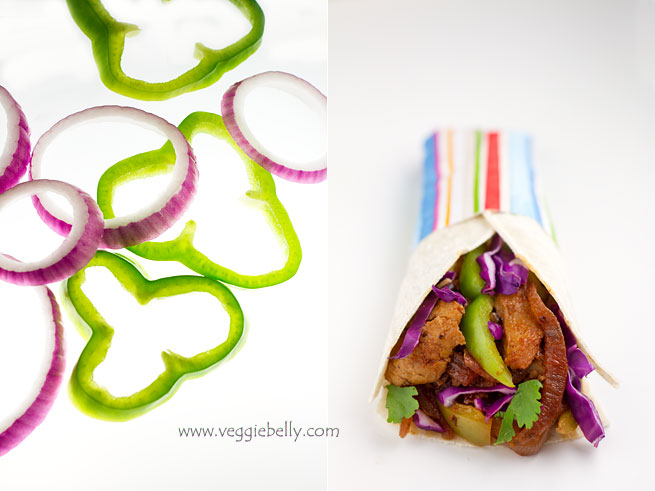
I used seitan (Westsoy brand)  instead of the meat and added some onions and green peppers to bulk it up.  I made some changes to the original taco seasoning recipe — I used more chipotle powder. I didnt use ancho chile powder because i didnt have any. I also cut out the black pepper because I didnt think it added much to the taco seasoning. The original recipe calls for onion powder, but because i was using a lot of fresh onions, I left out the onion powder. 

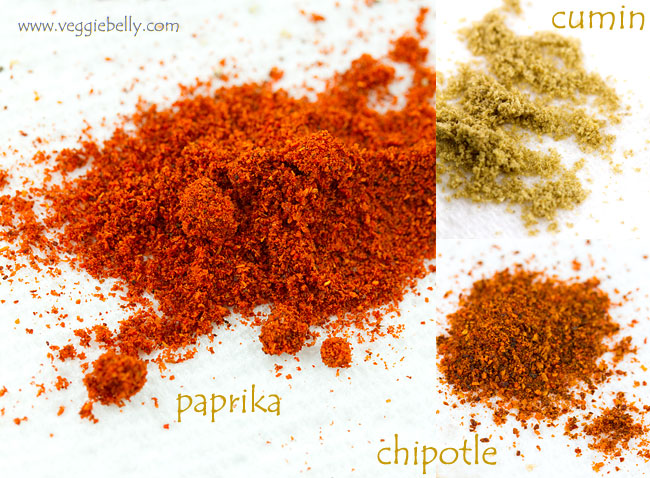
Non-vegans can serve this taco with shredded cheese and sour cream. But these tacos were so tasty thanks to all the paprika, chipotle, cumin and other spices that I didnt miss the cheese or sour cream. Enjoy with a good, cold mexican beer.

Chipotle Spiced Seitan Tacos Recipe

adapted from this Food & Wine magazine recipe found on The Bitten Word blog
makes about 8 tacos

for taco seasoning
1 teaspoon chipotle chile powder
2 teaspoons sweet paprika
1 teaspoon ancho chile powder (i left this out)
1 teaspoon garlic powder
1 teaspoon light brown sugar
1/4 teaspoon ground cumin
1/4 teaspoon ground coriander
3/4 teaspoon salt
1/4 cup fresh lime juice

for the filling
2 tablespoons oil
1 large red onion, cut into strips
1 large green pepper, cut into strips
8oz  seitan

8 corn tortillas, warmed
Pico de gallo, Guacamole, lime wedges, chopped cilantro and shredded red cabbage for serving

In a small bowl, whisk together all ingredients for the taco seasoning and set aside. In a wok, heat oil and add onions. Cook on medium heat till the onions are soft and caramelized, about 7 minutes. Then add green pepper strips, seitan, mixed taco seasoning and saute for about 2 minutes.

Serve with warm tortillas, pico de gallo, guacamole, and shredded red cabbage.

Fiddlehead Fern and Morel Mushroom Pasta


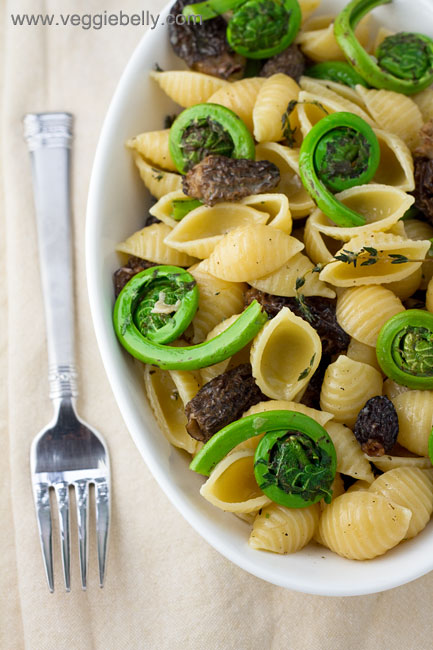
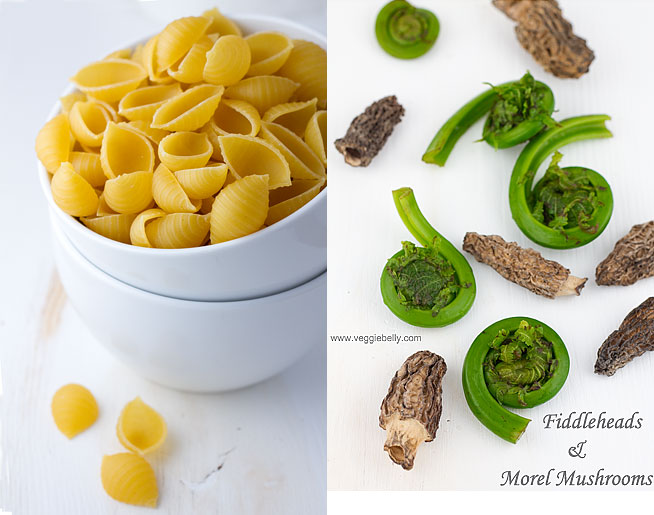
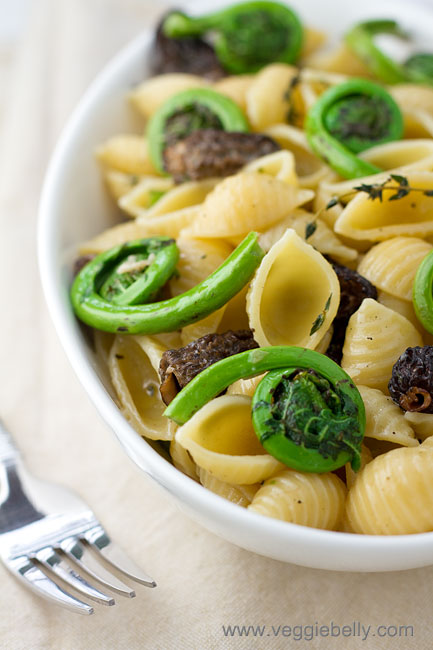
Fiddleheads are young, coiled fronds of the Ostrich Fern. They appear during a short window in the spring and are usually foraged. They have a very mild flavor and a pleasant crunch. To me, they taste somewhat like broccoli stems. Fiddleheads taste great with morel mushrooms. Both fiddleheads and morels come into season at the same time; so it makes sense to use them together. The bright delicate flavor of fiddleheads paired with the earthiness of morels is just exquisite.

Fiddleheads remind me of the beauty of natures creations. These are bright green coils of fern with the delicate flavors of spring tucked into their gorgeous spirals. Dont add too many herbs or spices to fiddlehead dishes; just let their flavor shine through.
How to cook and store fiddleheads

- Remove any brown stuff and dirt on the fiddleheads. Trim the ends

- Wash them throughly in cold water

- Fiddle heads taste best when blanched in salted waterfor 2-4 minutes or until they are tender but crisp. Use blanched fiddleheads in pasta or lightly saute them in butter

- Instead of boiling, fiddleheads can also be steamed till they are crisp-tender

- Blanched/steamed fiddleheads can be patted dry and frozen

- Don’t eat fiddleheads raw, they can make you sick!

- Consume fiddleheads immediately after your purchase or foraging trip. They don’t keep very well

- If you must store fiddleheads, wrap them loosely in a plastic bag and refrigerate them. Use within one day

Fiddlehead Fern and Morel Mushroom Pasta Recipe

serves about 3-4

1/2 oz dried morel mushrooms
3 oz fiddlehead ferns (about 18-20 pieces), washed well
1/2 pound pasta
3 tablespoons butter or olive oil
2 cloves of garlic, chopped
2 sprigs of thyme
1/4 cup heavy cream (recommended) or milk
salt and pepper

Boil water in a small pot, add dried morel mushrooms to boiling water. Immediately turn off heat. Cover and let the mushrooms soak for about 15 minutes. After 15 minutes, drain and squeeze excess liquid from the mushroom. Reserve about 1/4 cup of the mushroom soaking liquid.

In another pot, boil more water, add fiddlehead ferns and boil for about 2 minutes. Then remove from water and submerge in a bowl with cold water and ice cubes. This will stop the cooking process and keep the fiddleheads crisp and green.

Cook the pasta in plenty of salted water till pasta is al-dente. Don’t overcook pasta.

While pasta is cooking, heat a skillet and add butter or olive oil. Add chopped garlic, thyme, and drained morel mushrooms. Cook till morels are soft. Add drained fiddleheads, cream, and 2 tablespoons of mushroom soaking liquid. Cook on low heat for about 1 minute. Add salt and pepper. For a thinner sauce, add more mushroom soaking liquid. Add the boiled pasta and toss.

Related Posts with Thumbnails