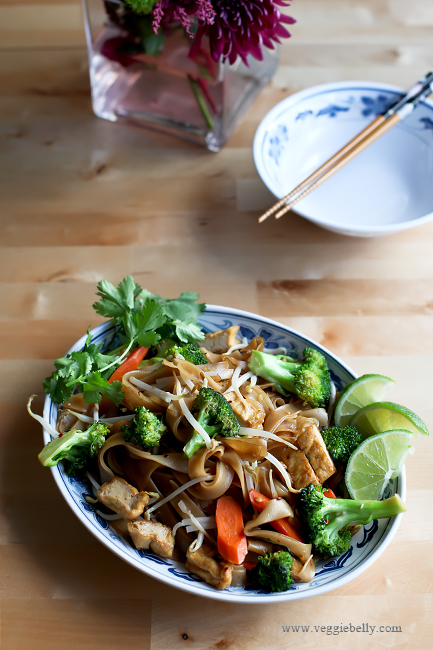
Easy Vegetable Pad Thai Recipe

I love Pad Thai and have been experimenting with a recipe that is easy, vegetarian and something you can make with just your pantry ingredients (no tamarind or palm sugar!). When I eat Pad Thai at restaurants I always have to ask for it vegetarian and without fish sauce, and even then sometimes they give it to me with the fish sauce! Probably because the pad thai sauce is pre-made.

My Pad Thai is totally vegan and vegetarian, and the Pad Thai sauce is very easy to make!

But before we get to this delicious home made Pad Thai recipe, here’s a story of how it happened..
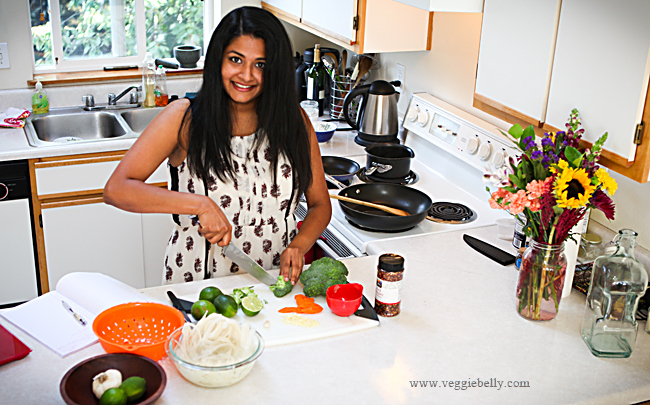
Emilee is a Veggie Belly fan and has been following the blog for a few years. She, her husband and new baby recently moved back home to Portland after living in Beirut, Lebanon.

As a special surprise for Emilee, her family arranged a cooking session for her with me! How sweet is that?! Emilee had no idea what she was in for until she arrived at my door! Imagine her surprise!

We made this Pad Thai together, and had so much fun chatting and cooking! We talked about food in Lebanon, adjusting to life with a new baby, how awesome Portland, OR is (it really is, trust me!)…all while chopping garlic, squeezing lemons and soaking noodles. My kind of evening!
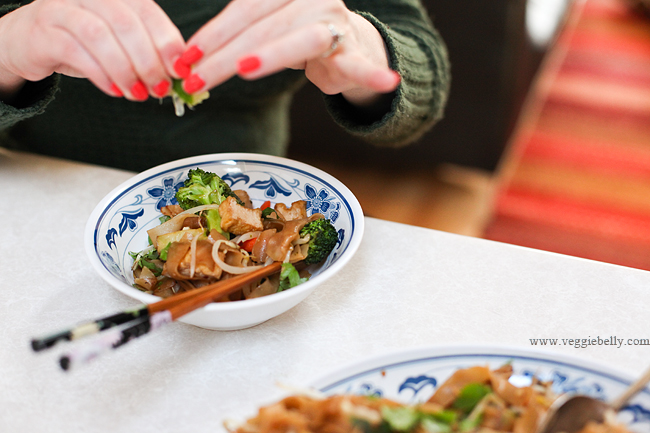
And the noodles turned out delicious! Below, Emilee squeezes a wedge of lime over her noodles because she likes it tangy.

Check out her nails, I love the color!
Thanks Emilee, for cooking with me!
I love hanging out with my readers!

Some tips for making veggie Pad Thai

- The Pad Thai sauce needs to have a balance of sweet, salty and sour. Everyone likes it a different way. Follow my sauce recipe to start with, and then feel free to adjust the sugar (for sweetness), soy sauce (for salt) and lime juice (for sourness)

- Pad Thai noodles are called Banh Pho. Look for the flat wide ones, sometimes labeled as size “XL”. The ingredients must only have rice or rice flour and water.

- Make sure you soak the noodles correctly (see package instructions). If they get too mushy, you’ve either soaked them too long or they’ve spent too much time in the wok. Or both. And if you don’t soak them long enough they will be crunchy.

- When you soak the noodles, they don’t have to soften all the way, but make sure they are soaked enough that they become pliable, and are no longer stiff.

- I like the boil the pad thai sauce. It gives it a deeper flavor, and caramelizes the sugar a bit. If you dont want to do this extra step, thats fine, simply whisk the sauce ingredients together and set aside.
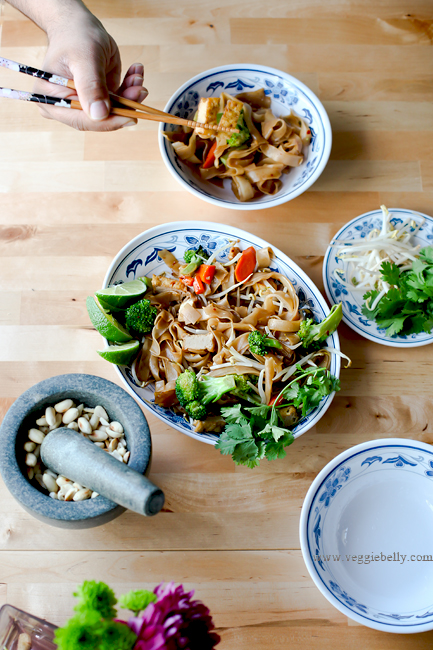
Easy Vegetable Pad Thai Recipe

serves 2-3
Ingredients

for the sauce
3-4 tablespoons light brown sugar
3 tablespoons fresh lime juice (about 2-3 limes)
4 tablespoons soy sauce
1/4 cup water

for the noodles
8 oz wide Pad Thai rice noodles, also called Banh Pho
2 tablespoons vegetable or peanut oil
crushed red pepper, as much as you like
4-6 cloves of garlic, minced
2 cups of broccoli florets
2 medium carrots, peeled and chopped into rounds
1 heaping cup of cubed fried tofu, available at Asian stores
a big hand full of bean sprouts
2 green onions, chopped
3 tablespoons roasted, chopped peanuts
3-4 cilantro sprigs, chopped
1/2 lime, cut into wedges

Method
1. Place all the sauce ingredients in a non stick sauce pan. Bring to a boil. Then reduce heat and simmer on low for about 2 minutes, or till the sauce has thickened just a little. Turn off heat and set aside.

2. Soak and drain the noodles according to package instructions. If the package does’nt have instructions, soak the noodles in warm water for about 15 minutes or till they become pliable. Then drain.

3. Heat the oil in a large wok. Add the crushed red pepper. As soon as they sizzle, add the garlic, broccoli and carrots. Toss on medium-high heat till the broccoli turns bright green and the garlic is fragrant, about 2 minutes.

4. Add the soaked noodles, tofu and the sauce. Toss on medium-high heat till everything is well combine and the noodles are cooked, but still a little chewy, and not mushy.

5. Turn off heat, and add the bean sprouts, and green onions and mix well.

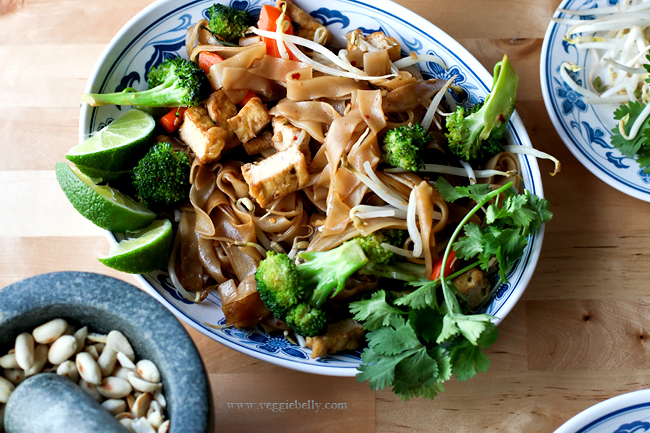
6. Garnish with cilantro and peanuts. Serve with lime wedges on the side.

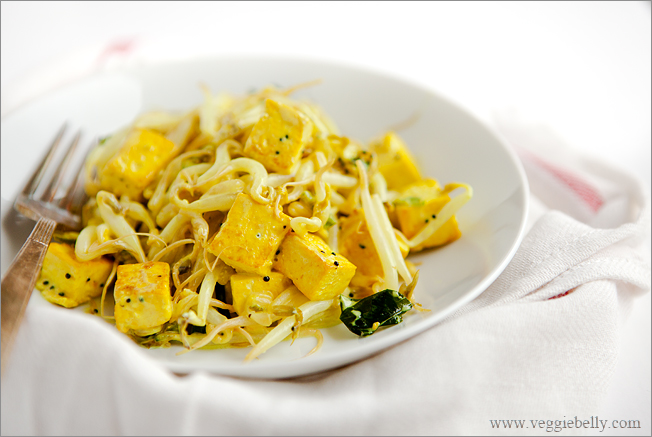
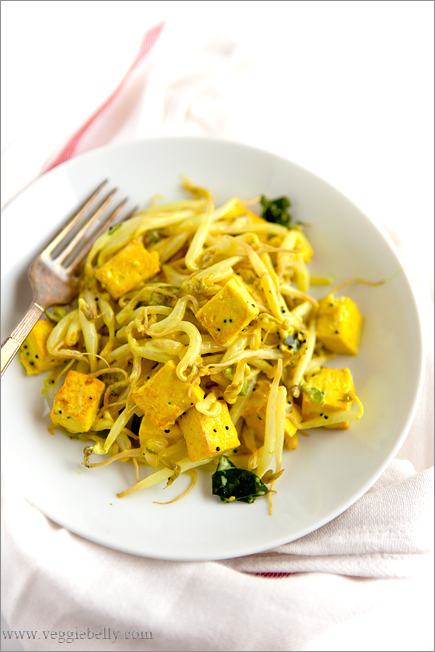
Simple Indian Style Tofu and Bean Sprout Braise Recipe


Even my tofu hating friends love this Indian style tofu with bean sprouts. I like to serve this dish with steamed brown rice and some wilted kale – a meal that makes me really happy! This is a simple dish, with simple flavoring. With a dish like this, I like to add some extra heat by using jalapenos or green chilies. Use them according to your taste and remember that green chilies are usually hotter than jalapeños. If you like it more liquidy, just add extra coconut milk at the end.

Make sure you use a wok or a large sauce pan. For two reasons – you don’t want to crowd the tofu, if you do, it wont brown properly. Also, the bean sprouts will get too watery if you use a small pan and everything is crowded.

Simple Indian Style Tofu and Bean Sprout Braise Recipe

Serves about 2 

Ingredients
8 oz firm tofu
1 tablespoon oil
1/4 teaspoon black mustard seeds. Substitute with cumin seeds.
6-8 curry leaves
A pinch of asafetida, optional
½ a Jalapeno or one green chili
¼ teaspoon Turmeric powder
4 Cups bean sprouts (about 8oz)
½ cup coconut milk

Method

1.Drain the tofu, and gently pat it dry with an absorbent towel. Cut the tofu into ½ inch cubes and set aside.
2. Heat oil in a wok or large sauce pan. Add the mustard seeds and let them pop over medium heat.
3. Once they pop, throw in the curry leaves, jalapeno or green chili and asafetida. Stir for about 30 seconds or till the jalapeño/chilies start to sizzle.
4. Sprinkle turmeric over the oil. Immediately add cubed tofu. Mix everything gently so the turmeric coats the tofu.
5. Cook the tofu on medium heat, flipping it around occasionally, till it is lightly browned on all sides. About 8 minutes.
6. Then add the bean sprouts, coconut milk and salt. If you want more liquid, add more coconut milk. Cook just till the bean sprouts wilt a little – about 2 minutes.
7. Serve hot with brown rice or quinoa and some wilted greens.

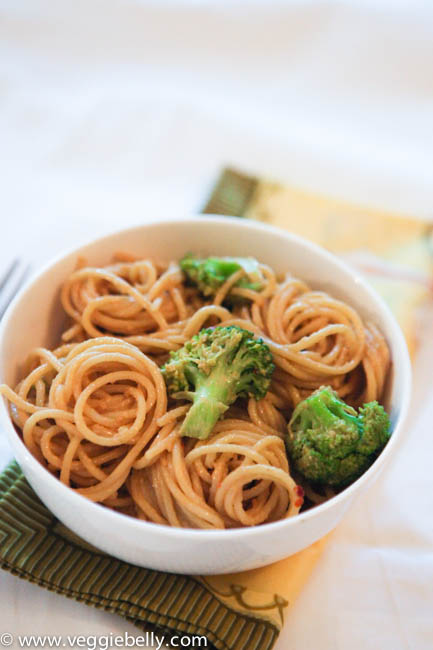
Stupidly Easy Peanut Noodles

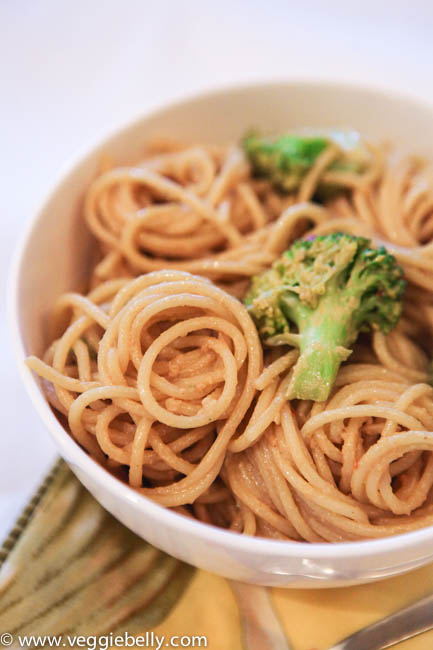
Can you cook pasta? Do you know how to chop garlic? Yes? Then you’re in business! This peanut noodles recipe is easy and fool proof! You can make it ahead of time and it will keep well in the fridge for up to two days. Plus, it tastes great warm or cold. This easy peanut noodles recipe is perfect for a quick dinner, packed lunch or picnic.

Broccoli is easy to chop, and cooks very quickly, so its perfect in this easy, fuss free recipe. But If you want to add other vegetables to this noodle dish, here are some suggestions. Just make sure the total amount of vegetables is about 3 cups.

- Shredded raw cabbage
- Shredded carrots
- Chopped cucumber
- Red peppers cut into strips
- Bean sprouts
- Wilted kale
- Baby corn
- Fried tofu cubes

Easy Peanut Noodles Recipe

serves about 3

Ingredients
2 cups broccoli florets
8 oz linguine or spaghetti

for the sauce
3 tablespoons peanut butter
2 tablespoons soy sauce
3/4 tablespoon lime juice
1 tablespoon sesame oil. Substitute with canola oil.
1-2 garlic cloves, minced
Crushed red chili flakes, as much as you like

2 tablespoons chopped green onion or cilantro or parsley for garnish

Method
1. In a large pot, bring plenty of salted water to a boil.

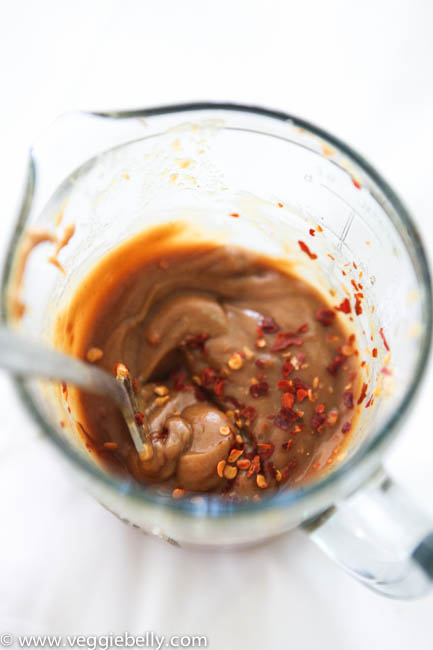
2. While water is coming to a boil, work on the sauce. Place all sauce ingredients (peanut butter through red chili flakes) in a bowl. Add 3 tablespoons of water, and whisk everything together till a sauce forms. Set aside.

3. When the water boils, add the broccoli florets and continue boiling till the broccoli is bright green and crisp-tender, about 1 minute. Using a slotted spoon, remove the broccoli from the water and place in a wok.

4. Bring the same water back to a boil. Then add pasta to the water and cook according to package instructions. Make sure you dont over cook the pasta. Drain well.

5. Add the drained pasta to the wok with broccoli.

6. Pour the peanut sauce all over the pasta and toss well. Taste the pasta, if it needs more salt, add soy sauce half a tablespoon at a time, tossing and tasting as you go.

7. Garnish with chopped green onions, cilantro or parsley. Serve warm or cold.

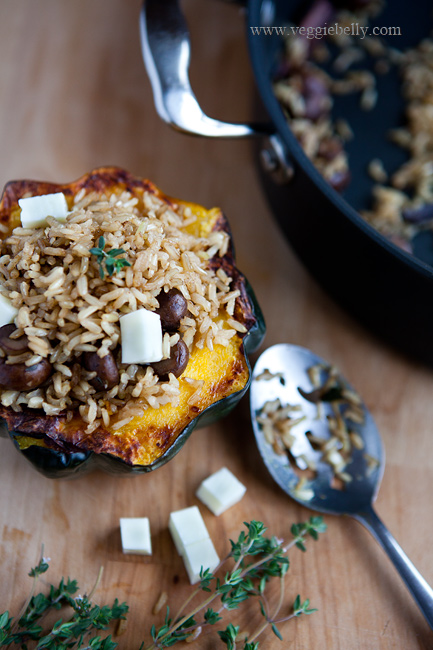
Acorn Squash Stuffed with Brown Rice Mushroom Pilaf

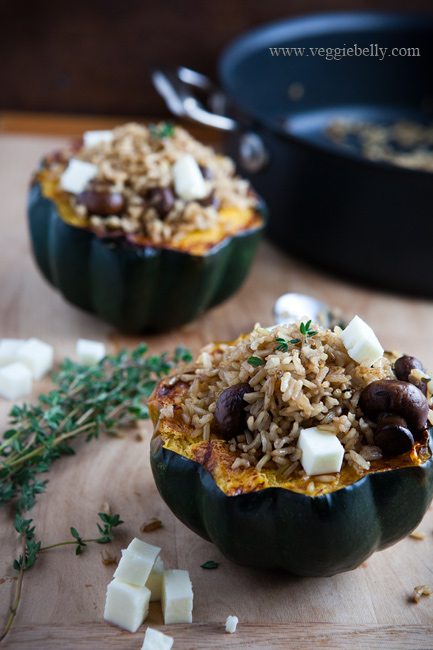
Here is a vegetarian recipe for thanksgiving that is both easy to make AND a show stopper! With this baked acorn squash stuffed with brown rice mushroom pilaf, you won’t even miss the turkey. And you can easily make this dish the day before and just warm it in the microwave – so it’s a stress free thanksgiving main dish!

If you are making this dish ahead of time. Keep the baked squash and the pilaf separate. Heat them separately in the microwave and then spoon the pilaf into the squash just before serving.

Keep in mind that different brown rices need different amounts of water. And they may also have different cooking times. The 1 cup water and 50 minute cooking time I’ve given you is a guideline. So check the package instructions on your brown rice.

Mushrooms will let out water, so its important to cook them on high heat. I find that crimins dont let out as much water and recommend you use criminis if you can.

I love halloumi cheese and will find an excuse to put it in anything! But this recipe is stellar even without it, so leave out the halloumi if you wish. But if you do use the halloumi, keep in mind it’s a salty cheese – so add less salt to the rice to compensate.

Acorn Squash Stuffed with Brown Rice Mushroom Pilaf

serves 2

Ingredients
For the squash
1 acorn squash
For the Pilaf
1 1/2 tablespoons butter
½ a cinnamon stick
2 cloves, optional
5  oz (about 2 cups) chopped mushrooms – either white button, crimini or portobello.
2 cloves of garlic, minced
1 sprig of thyme
1/2 cup brown basmati or long grain brown rice
Salt
¼ scant cup cubed halloumi cheese, optional
1 tablespoon dried cranberries or raisin, optional

Method
Pre heat oven to 400f

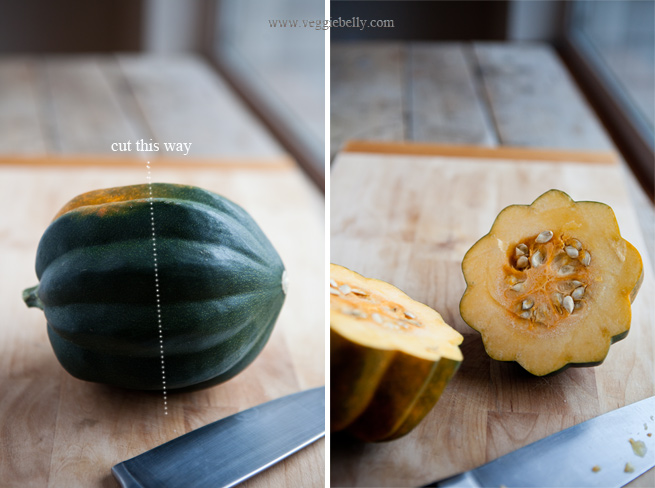
  1. Cut the squash in half. Using a spoon, scrape out the membrane and seeds. Bake on a parchment lined baking sheet, cut side down, for about 30 minutes or till the squash is fork tender.
  2. When the squash is done, cut off the tips to that the squash sits up steadily.
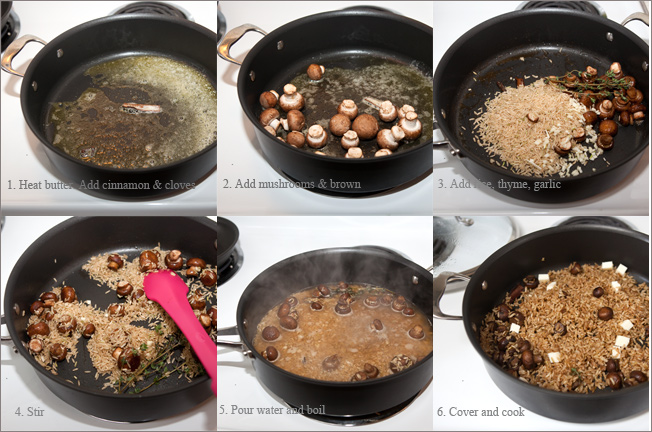
  3. While squash is baking, work on the mushroom pilaf – heat butter in a large, deep skillet. Add cinnamon and cloves and let sizzle for 30 seconds.
  4. Toss in the mushrooms and cook undisturbed on medium-high heat, till the mushrooms brown.
  5. Then reduce heat to medium, add garlic, thyme, rice and salt. Stir for about 2 minutes.
  6. Pour 1 cups water and bring to a boil. Then reduce heat to low, cover the pan and simmer till the rice is done, about 50 minutes.
  7. When the rice is cooked (but shouldn’t be mushy), turn off the heat and let it sit covered for 10 minutes. Then fluff with a fork. Fish out and discard the cinnamon stick and cloves.
  8. Stir in halloumi cubes if using.
  9. Spoon the pilaf into the squash cavities.
  10. Sprinkle with dried cranberries or raisins, if using.

Pumpkin and Spinach Curry Recipe

If you read my previous post on my homemade curry powder recipe, you are already anticipating this post! This is a pumpkin and spinach curry recipe using my home made curry powder. The curry powder takes just 12 minutes to make and there is nothing like freshly roasted and ground spices in your curry!

The curry powder is a really simple recipe using just coriander, cumin, fennel seeds, dried chili and turmeric. But heres a great trick to get two layers of flavor from this simple curry powder – add most the curry powder to the pumpkin and cook it till the pumpkin is done – this will give the spices a mellow, rounded flavor. Then, add a little more curry powder right at the end of cooking; this will add another layer of fresh spice taste.

Any yellow flesh winter squash will work with this recipe. Today I’ve used pie pumpkin. But I often make this recipe with butternut squash, which my husband and I both love.  You can also use potato or sweet potato, or mixed vegetables.

Making this easy vegan curry during the holidays? Sprinkle some dried cranberries over the curry when its done for added sweetness and a festive look.

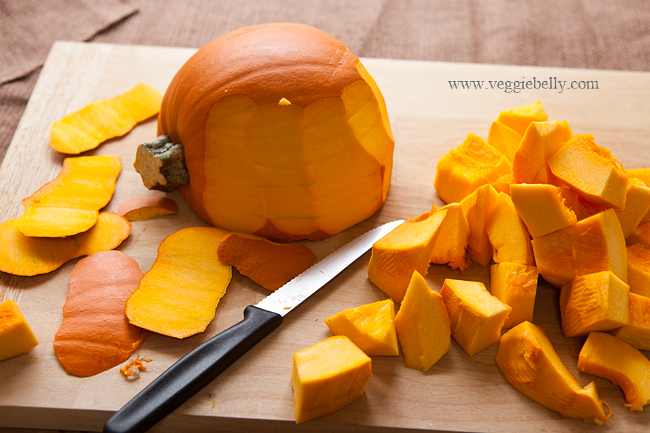
How to to peel a winter squash like butternut, kabocha or a pumpkin

  1. Using a sharp chef’s knife, cut the squash or pumpkin in half.
  2. Then using a spoon, scoop out the seeds and thready bits from the cavity.
  3. Lay the squash or pumpkin cut side down. Using one hand to hold it down and stabilize it, take a sharp, preferably serrated knife, and carefully slice off the skin.
  4. Then cube the squash.

Pumpkin  and Spinach Curry Recipe

Serves about 4

Ingredients
2 tablespoons vegetable or canola oil
¼ teaspoon black mustard seeds, optional
¼ teaspoon Cumin seeds
6 Curry leaves, optional
1 medium onion, diced
4 cloves garlic, minced
1 recipe homemade curry powder (5 tablespoons), see this post for recipe
4 cups peeled and cubed (1 ½ inch cubes) pie pumpkin or butternut squash or kabocha squash. See post above on how to peel squash.
2 cups water
1 cup coconut milk (about half a 14oz can)
3 cups tightly packed baby spinach

Method

  1. Heat oil in a large saucepan and add mustard seeds if using. When they start to pop, add the cumin seeds and curry leaves and stir till fragrant, about 30 seconds.
  2. Add onions and cook till they are light brown
  3. Then throw in the garlic and cook for 30 seconds or till fragrant.
  4. Sprinkle 4 tablespoons of curry powder, stir, then add the peeled, cubed squash or pumpkin and salt.
  5. Pour in 2 cups of water and bring to a boil. Then reduce heat to a lively simmer, cover the pot and let the squash or pumpkin cook till it is fork tender, about 20 minutes.  If the water is drying up before the pumpkin is done, add more water, half cup at a time. If there is too much water in the pot, boil it uncovered, till there is only about 3/4 cup water remaining.
  6. When the squash/pumpkin is cooked, add the coconut milk and remaining 1 tablespoon of curry powder. Stir and bring back to a boil.
  7. When the curry boils, add the spinach and cook just till the spinach wilts, about 1 minute.
  8. Optional – for added sweetness, garnish the curry with some dried cranberries, or stir in up to one teaspoon of sugar.
  9. Serve hot with rice, roti, bread or quinoa.


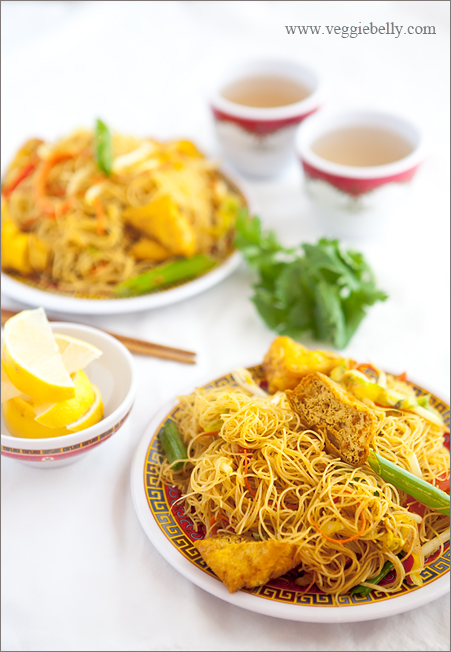
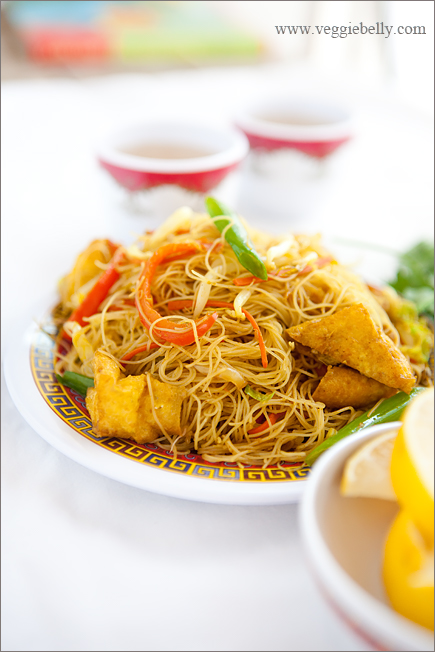
Singapore Rice Noodles Recipe

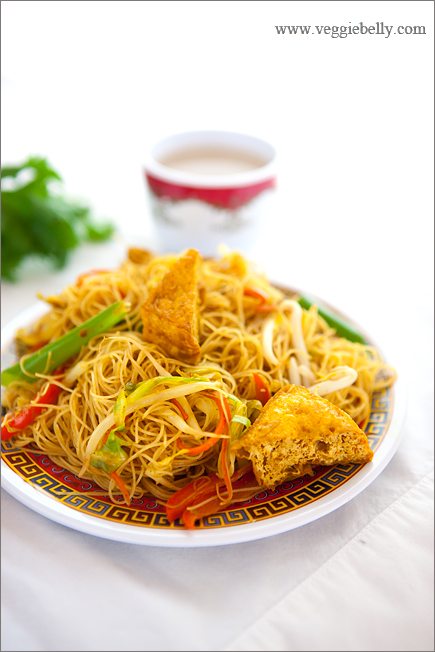
I love Singapore rice noodles – pan fried thin rice vermicelli with curry powder and turmeric. But most the ones you get at restaurants have fish sauce and or meat. So I make my own vegetarian Singapore rice noodles. Funnily, this dish is not Singaporean –  you won’t find it in Singapore. It is most likely an invention of Hong Kong chefs. Irrespective of its origins, this is a great vegetarian noodle dish!

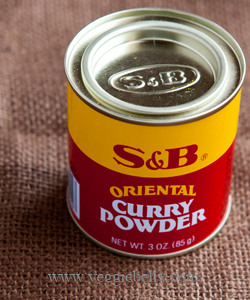
I use S&B Oriental Curry powder for this recipe. For more about curry powders, read this post.

And the mushroom flavored soy sauce I use is Healthy Boy brand. If you cant find it, substitute with regular soy sauce.

Tips for perfect Singapore rice noodles

  • Don’t over soak the noodles. Read package instructions and make sure the noodles aren’t sitting in water longer than needed. Drain the noodles well. If you land up over-soaking the noodles, try to rescue them by spreading the drained noodles on a large platter and placing them under a fan, this should dry them out a bit.
  • Don’t over cook the vegetables, they will get soggy.
  • Use medium-high heat, this will ensure that the vegetables and noodles don’t get soggy.
  • Work quickly. Have all the ingredients prepped before hand, and then work quickly. Don’t let the vegetables or the noodles sit in the wok for too long. When you add the noodles and sauce to the wok, if you feel you are taking too long (over 2 minutes) to mix everything well, take the wok off the heat, and mix the noodles. You can then re-heat the noodles before serving.
  • Remember that every curry powder is different. Some are spicier/hotter than others. You may have to use more or less depending on the curry powder you use. Taste the noodles at the end, and add more curry powder and soy sauce if needed, then re-heat.
  • The taste of Singapore rice noodles develops over time (because of the curry powder), so it tastes even better the next day!

Singapore Rice Noodles Recipe

serves about 4


Ingredients
6 oz rice sticks, also called rice vermicelli or rice noodles
For the sauce
2 teaspoons curry powder, I recommend S&B Oriental curry powder
½ teaspoon turmeric
Crushed dry red pepper, to taste
3 tablespoons soy sauce
1 teaspoon brown sugar, optional
½ teaspoon vinegar, optional
1 tablespoon mushroom flavored soy sauce (available in Asian markets), substitute with soy sauce

For the noodles
1 tablespoon vegetable oil
1 heaping teaspoon garlic paste (use a mortar and pestle or grate in a microplane)
1 heaping teaspoon ginger paste (use a mortar and pestle or grate in a microplane), optional
1 medium carrot, peeled and cut into matchsticks
1 red pepper, cut into thin strips
1 1/2 cups shredded cabbage
1 cup cubed fried tofu, available in Asian markets
1 tablespoon sesame oil
1 heaping cup beansprouts
3 scallions, chopped
4 lemon or lime wedges
Chopped cilantro for garnish

Method:

  1. Soak the rice noodles according to package instructions. (This usually involves soaking them in warm or cold water for 2-5 minutes).Drain well and set aside in the colander.
  2. Whisk together all ingredients for sauce, along with 3 tablespoons of water. Set aside.
  3. Heat oil in a large wok, that is atleast 12 inches wide. Add the ginger and garlic and let them sizzle on medium heat, till fragrant and lightly browned.
  4. Pour in half of the sauce. Work quickly, and mix everything together, breaking up any lumps with a wooden spoon. Cook till the sauce starts to bubble, about 20 seconds.
  5. Throw in red peppers, carrot, cabbage, and tofu.
  6. Crank up the heat to medium-high and sauté till the vegetables just start to wilt, about 2 minutes. Don’t over cook the vegetables.
  7. Add the soaked, drained rice stick noodles to the vegetables. Also add the remaining sauce. Working quickly, and using two spoons or tongs, toss and combine everything till the noodles are well coated in the sauce.
  8. Turn off heat and add sesame oil, bean sprouts and scallions. Toss well.
  9. Serve immediately garnished with chopped cilantro and lemon or lime wedges on the side to squeeze over the noodles.

Taste Test – The Best Curry Powders

If you’ve ever wondered what’s the best curry powder brand, look no further! I’ve taste tested a bunch of curry powders and present to you my favorites and how to use each one of them. This also kicks off my curry series – a month of easy curry recipe posts using, of course, curry powders! I will post one recipe a week for a curry from around the world, and also post a recipe for how to make your own curry powder.

But first, let me make something clear. There is no such thing as curry powder. Not in India at least. The first time I ever heard of a curry powder was outside India! In my own language, Tamil, the word “Kari” simply means either vegetables (“kai kari”) or meat.

Every Indian dish that requires powdered spices uses a blend that is unique to that dish. So there is no standard curry powder in India. (Just like how there is no standard curry in India). An Indian cook will roast and powder whole spices for each dish, specifically for that dish. A cook in India may also use a combination of different already ground spices.

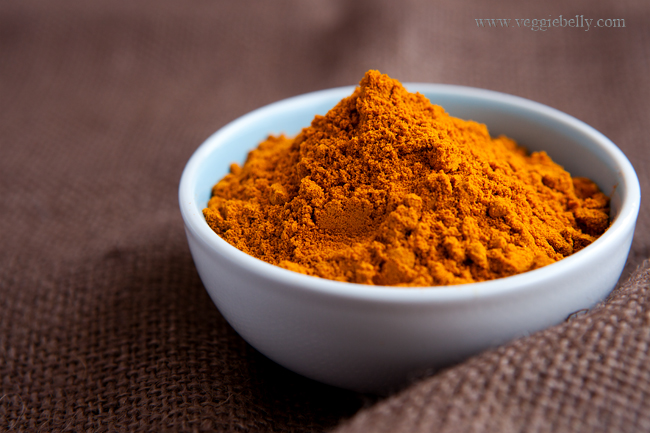
So what exactly is curry powder? It’s a western, British invention. It is a blend of different powdered spices like turmeric, chili, coriander, cumin, fennel, cinnamon etc.  Instead of the various spice powders used in Indian cooking, you can use an already blended curry powder.

As inauthentic as curry powder is, I like its convenience. There are some great blends out there, and are usually the only ‘spice’ you need when making a dish. So curry powders are an easy shortcut and I like using them. They are especially handy for making quick dishes with great curry flavor. 

The Best Curry Powders

(in my opinion)

Note: This curry powder taste test is by no means exhaustive. I know there are many brands in the market that I haven’t tried. And I haven’t even addressed Thai and other curry powders/pastes/blends etc. I will reserve them for a future post.

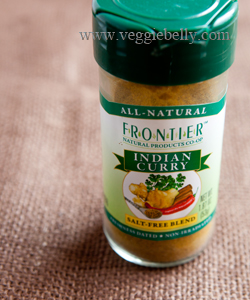
Frontier Indian Curry Powder

Predominant flavors are roasted cumin and lemon peel. Light, and fresh tasting.
Available in some grocery stores and online
Use in
-          Light curries
-          Summer vegetables
-          Salad dressing

Recipes – Zucchini cauliflower curry , Curried tofu salad with Jicama

S&B Oriental Curry Powder

A mild, well balanced, well rounded blend.

Predominant flavors are turmeric, coriander, garlic.
Available in most grocery stores, Asian markets and online
Use in
-          Japanese curries
-          Tofu dishes
-          Recipes involving fruit and or a little sweetness

Recipes- Tofu and broccoli curry, Khao soi curry noodles

Penzey’s Hot Curry Powder

Spicy, with predominant chili and coriander flavor
Available at Penzey’s stores and online
Use in
-          Coconut milk based curries
-          Lentils, beans
-          Paneer or tofu

Recipes- Curried kale and white bean patties, Chickpea bunny chow


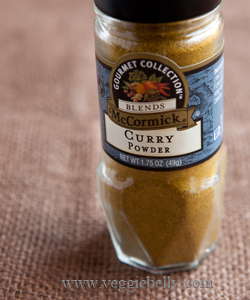
McCormick Gourmet Collection Curry Powder

Savory taste, with predominating onion flavor.
Available in grocery stores and online
Use in
-          Roasted vegetables
-          Pasta dishes
-          Root vegetable dishes

Recipes- Potato curry

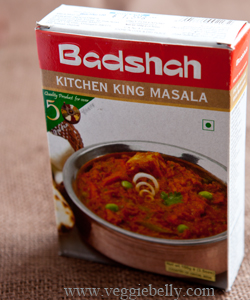
Kitchen King by Badshah

Spicy, intense and complex. This blend is also made by MDH and Everest brands.
Available in Indian grocery stores and online
Use in
-          Rich sauces and gravies
-          Nut and cream based curries
-          Lentils

Recipes- Masala stuffed okra (use instead of the masala in the recipe)

Easy Zucchini and Cauliflower Curry Recipe. Only 8 ingredients!

My husband loves this easy zucchini and cauliflower curry and requests it at least once a week. I will vary the vegetables depending on what’s available and what we are in the mood for. I’ve made this curry with eggplant, green beans and potatoes. I’ve made it with pumpkin and kale. I’ve also made it with cubed paneer,  green peppers and baby corn. This recipe is versatile!

A make ahead tip: Because I make this curry so often (did I mention we love it?!), I’ve started making the curry sauce in bulk and freezing it. It’s easy. Once you are done with step 5 in the recipe below, just spoon the curry sauce into ice cube trays and freeze it. When solid, put the frozen curry cubes in freezer bags and return to the freezer.

You now have a delicious vegetarian, vegan curry base sitting in your freezer to pull out anytime and heat up along with vegetables of your choice!

I prefer the taste and convenience of canned tomatoes for this recipe. If you want to use fresh tomatoes, core them, and puree them in a blender. You will need 3 cups freshly pureed tomatoes + about 1 cup water. If the fresh tomatoes make a tart curry, you will want to add a little sugar at the end of cooking.

My favorite tomatoes to use for this curry:
-          Muir Glen fire roasted diced tomatoes
-          San Marzano crushed tomatoes
-          Del Monte diced tomates with basil, garlic and oregano

And the curry powder I used is Frontier Indian curry powder from Whole Foods, which is mild, very fragrant, tasty and has a hint of lemon peel. If you use a stronger curry powder, you may want to use less.

Easy Zucchini and Cauliflower Curry Recipe

serves 3-4

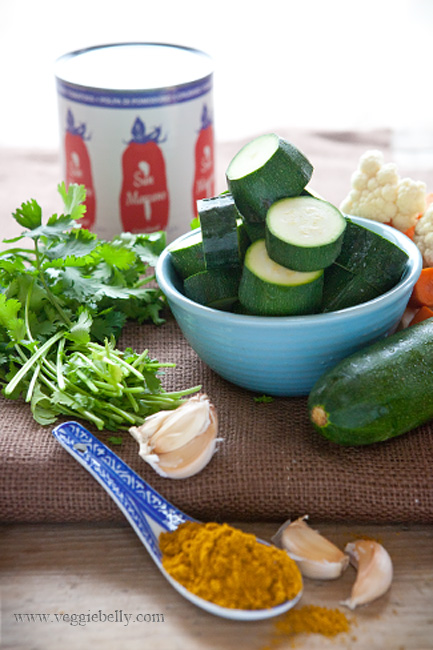
Ingredients
1 ½ tablespoons Oil
½ teaspoon Cumin seeds, optional
A pinch of asafetida, optional
½ large red onion, diced
2 garlic cloves, minced
2 teaspoons curry powder
One 14 oz can of diced or crushed tomatoes. I like San Marzano or Muir Glen.
2 zucchinis, about 12 oz
6 cauliflower florets (about 1 heaping cup of florets)
1 carrot
¼ cup coconut milk
Chopped cilantro or mint for garnish

Method
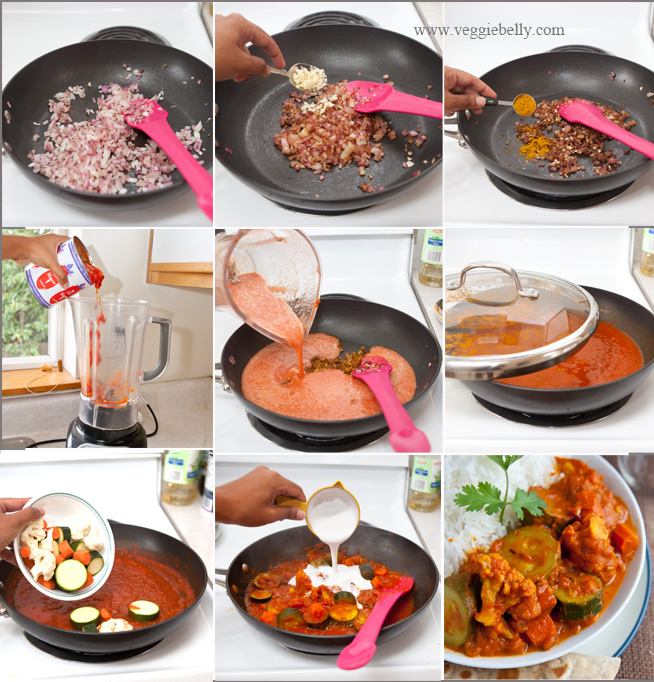
1.Heat oil in large sauté pan. Add cumin seeds if using. When they sizzle, add the asafetida if using.

2. Immediately add chopped onions. Cook on medium heat till the onions are lightly browned.

3. While the onions are cooking, puree the tomatoes. Place the canned tomatoes in a blender. Fill the empty tomato can with water, pour this into the blender as well. Puree well. You should have about 30 oz of puree now. Set aside.

4. When the onions are browned, add minced garlic and stir for 30 seconds.

5. Add curry powder and stir another 10 seconds. Then pour in pureed tomatoes and salt and bring to a boil. Reduce heat to medium-high, partially cover the pan with a lid and let the sauce simmer for about 15 minutes or till the sauce thickens a little. Careful, the sauce will bubble and splatter.

6. While the sauce is cooking, prepare the vegetables. Cut the zucchini into 3/4th inch rounds. Peel and cut the carrot into ½ inch pieces. Break up the cauliflower into florets.

7. Toss the vegetables in the curry sauce, cover and cook till the zucchini is soft, about 10 minutes.

Turn off heat and stir in the coconut milk. For an extra creamy curry, add 1/2 cup coconut milk instead of the 1/4 stated in this recipe.

Garnish with chopped cilantro or mint. Serve hot with brown rice or roti or pita bread. My grandmothers multi colored raita goes well with this dish.

Related Posts with Thumbnails