Baked Pear Parcels with Lemon Chamomile Sauce


baked pear

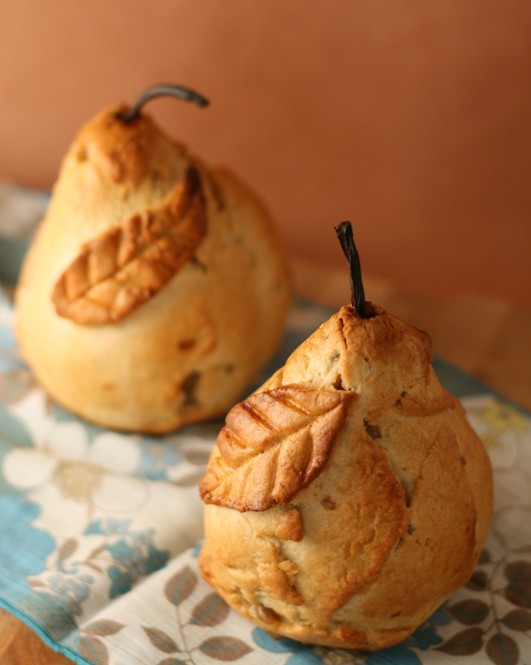
The MLK weekend and the Presidential Inauguration tomorrow have put me in a festive mood. Despite the freezing temperatures, I’m feeling celebratory. So much so that I took the trouble to make the crust from scratch for this dish. The crust is actually easy to make, it just takes time. Its worth the effort though. The pears wrapped and baked in the dough look gorgeous. I got the idea from this recipe on the BBC Good Food website. This tastes like a pear pie but looks infinitely better!

Baked Pear Parcels
makes 2 generous servings

Bosch Pears -2 (ripe but firm)
Walnuts – 3 tbsp
Brown sugar – 2 tbsp
Flour – 1 tbsp

For the crust
All purpose flour – 4 oz
Butter – 4 oz (I used Land O’ Lakes light butter)
Sugar – 1/4 cup
Salt – a pinch
Vanilla extract – 1/8 tsp

Preheat oven to 375F.

To make the crust, combine all ingredients (flour through vanilla) in a bowl. Using your finger tips, rub the butter into the flour. Do not knead. Rub the flour and butter till it forms a crumbly mixture. Press the crumbs into a ball. Cover the dough ball in plastic wrap and refrigerate for 30 minutes.

While the dough is in the fridge, work on the pears. Peel the pears. Make a thin slice on the bottom of the pears so that they can sit stably. Core the pears and remove the seeds. I used the tip of a potato peeler to do this.

Crush the walnuts lightly. Combine them with the brown sugar and flour. Fill the cored inside of the pear with the walnut-sugar mixture. Pack the mixture into the pear cavity.

When the dough is chilled, take it out of the fridge and divide it into two. Roll out each portion into a rough round. Place a pear in the middle of one dough round. Lift the sides of the dough up and press together over the pear to form a parcel. This doesn’t have to be perfect. Pinch off any excess dough. Patch up any empty spots (dip you finger tips in water to seal edges).

Brush the pear parcels with milk or egg wash. Bake in the over for 50-60 minutes or until the pear parcels are golden. Cool 10-15 minutes before serving.

Serve with lemon chamomile sauce (recipe below), ice cream or whipped cream.

Lemon Chamomile Sauce

Water – 1 1/2 cups
Chamomile tea bags – 2
Lemon juice – 1 1/2 tbsp
Malbec Jam - 3 tbsp (click here to win a bottle of Malbec Jam!). Alternatively, use 3 tbsp of honey and 1 tbsp of red wine.
Brown sugar – 1 tbsp, you can use regular sugar instead. Use more sugar for a sweeter sauce.
Lemon zest – 1/8 tsp

Boil the water in a sauce pan. When the water comes to a boil, add the chamomile tea bags. Boil for 30 seconds. Turn off heat and let the tea steep for about 7 minutes. Remove tea bags.

Turn the heat back on and add all the remaining ingredients to the tea. Simmer till the sauce has reduced to about 60% of its original volume.

Serve with baked pear parcels.

Exotic, Warming Teas – Kashmiri Kahwa and Moroccan Mint Tea


lashmiri kkawa and moroccan mint tea

Any south Indian family will know how to make and enjoy a good cup of coffee. The day always starts with a stainless steel tumbler full of strong, sweet, frothy coffee. But not in my family. Most my family are tea drinkers. Serious tea drinkers at that. Tea time at my grandmother’s house in India is an elaborate affair reminiscent of the British era. Every morning and evening, tea is carefully brewed and poured into a bone china tea pot with pink roses on it. A matching creamer with full fat milk, tea cups with saucers, little teaspoons and sugar are all placed on a tray. The tray is then ceremoniously placed on a teapoy before my grandmother. The tea is mixed, Marie biscuits are dunked and the slurping starts.

One day my grandmother offered a sip of tea to my 13 year old cousin, T. He loved it and wanted more. Then there was a great discussion whether a 13 year old boy should be drinking tea or not. But T had his way. And from that day on, my cousin had his daily tea, with his own little teapot, tray and teapoy. He is 35 now and still takes his tea with the same pomp and ritual.

Me…I’m not into 19th century teapoys or pretty British teapots. But I do have cute mugs and some great tea recipes that will be just perfect for a cold winter’s day.


Kashmiri Kahwa (makes 2 cups)

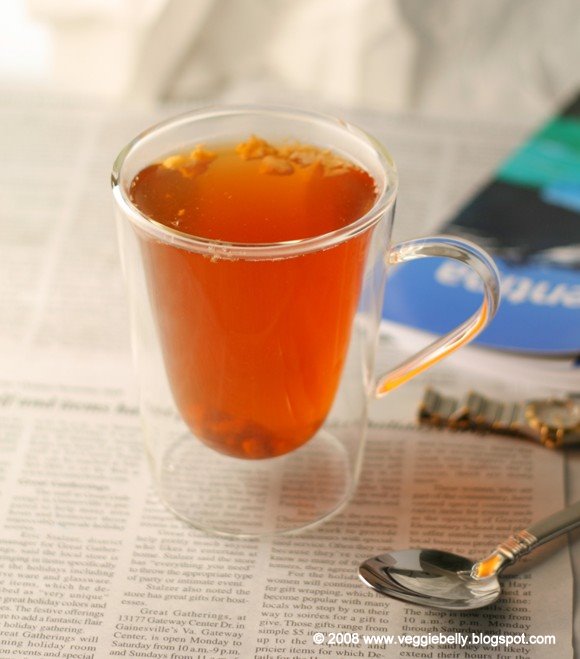
We use to live 3 doors away from a Kashmiri family. Every time we visited them they would offer us Kahwa (or Kehwa) – Kashmiri green tea spiced with cinnamon, cardamom, saffron and walnuts. The saffron gives the tea a beautiful golden, honey color. The walnuts impart a delightful buttery flavor.

Green Tea – 1 tsp (I used Chinese gunpowder tea)
Cloves – 2
Cardamom – 3
Cinnamon – 1/2 tsp powdered or 1 stick
Walnuts – 4
Saffron – a pinch
Sugar to taste
Water – 2 1/2 cups

Coarsely chop the walnuts. Using the back of a wooden spoon, lightly crush the cardamom, cloves and cinnamon stick, if using.

Place the water, crushed cardamom, cloves and cinnamon in a pot and bring to a boil. Reduce heat and gently boil the water for about 5 minutes. Then add the green tea. Immediately turn off the heat. Let the tea steep in the water for about 2 minutes. Stir in sugar. Strain the tea.

To serve, divide the walnuts and saffron and place in tea cups or mugs. Pour tea over the saffron and walnut pieces.

Moroccan Mint Tea
(makes 2 cups)

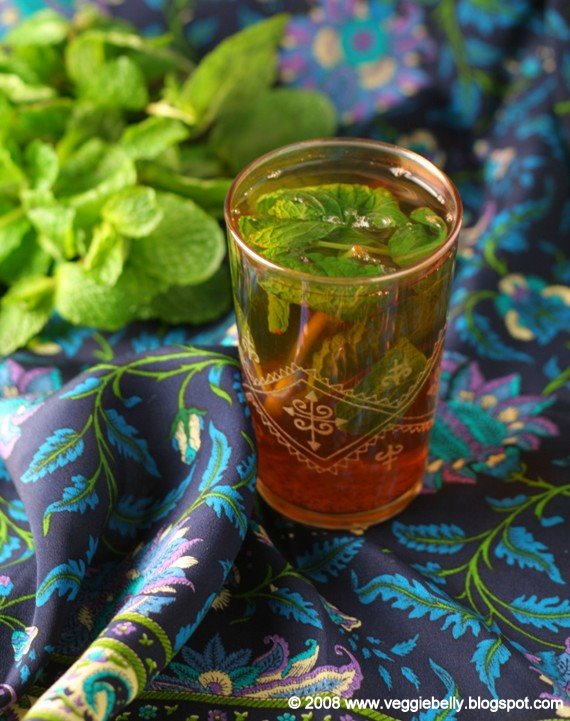
We first had this refreshing mint tea when we went to Morocco. The tea was ubiquitous – every home and every shop always served a glass. We were even offered mint tea in the middle of the sahara dessert!

Green Tea – 1 tsp (I used Chinese gunpowder tea)
Mint – about 5 sprigs
Sugar to taste
Water – 2 cups

Bring the water to a boil in a pot. Turn off heat and add the green tea. Let tea steep about 2 minutes. Add sugar and mix well. Strain the tea.

Place the mint sprigs in tea cups or mugs. You’ll need to use about 2 full sprigs of mint per medium sized cup/mug. This might seem like a lot of mint, but that’s what imparts flavor to the tea.

Pour hot tea over the mint and serve immediately.

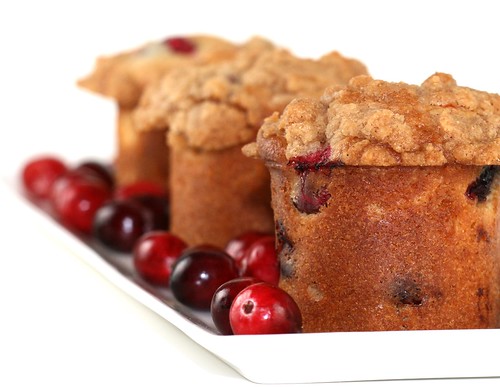
Cranberry Crumb Cake Minis

Living in Virginia, I really enjoy the four seasons. They are so much more than just changing weather. The seasons signify mother earth’s cycles of renewal and replenishment. And cooking seasonally is a way of celebrating that. It is so easy to pick up the same old potatoes, carrots and tomatoes every time you go grocery shopping. But if you are thinking about cooking whats in season, you’ll discover all sorts of fruits and vegetables – rutabaga, dandelion greens, kohlrabi and so much more. Now, I’m not someone that cooks with seasonal produce all the time. I have no problem buying that unseasonal pineapple that traveled here all the way from Hawaii.

I picked up a beautiful packet of fresh cranberries at the market. Why consume cranberries that were canned or dried and packaged months ago when I can try them fresh and unprocessed?

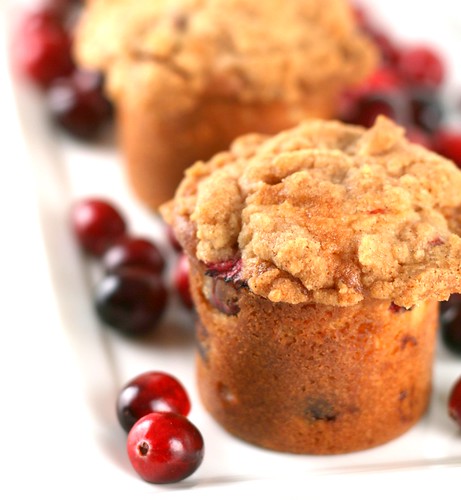
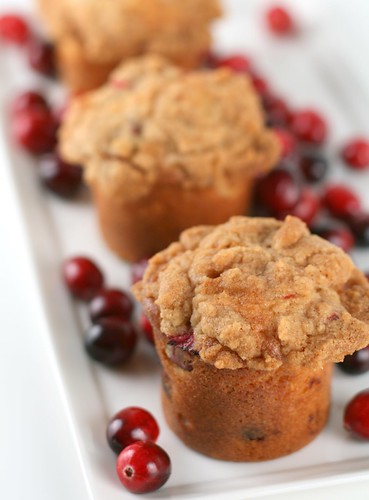
I’ve never tried fresh cranberries before, but I wanted to use them in Ina Garten’s Blueberry Crumb cake recipe instead of the blueberries. It turned out perfectly. The cranberries were ruby red and had just the right amount of tartness. The crumb topping with butter and brown sugar was just magical.

I made a few changes to Ina’s recipe:
I cut the sugar in half – Ina’s recipes are fabulous, but always a bit too sweet for me
Used 1/2 cup cranberries instead of the 1 cup blueberries the recipe calls for
Used orange zest instead of lemon zest
If you use mini cheese cake pans or muffin pans, the cakes will cook in about 20 minutes (Ina’s recipe calls for 50 minutes baking time in a cake pan).

Ina’s original recipe is here.

I also decided to make the crumb cakes into crumb cake minis. I was itching to use the new Norpro Mini cheesecake pan that I won. Yes, I won it! The wonderful Mari, at Once upon a Plate Blog had a random drawing and I was one of three winners! Mari is a passionate cook and her blog is full of beautiful food. She sent me the mini cheesecake pan a few days ago and I decided to make the crumb cake in it. It turned out perfectly.

Thanks Mari!

Orange Mulled Wine

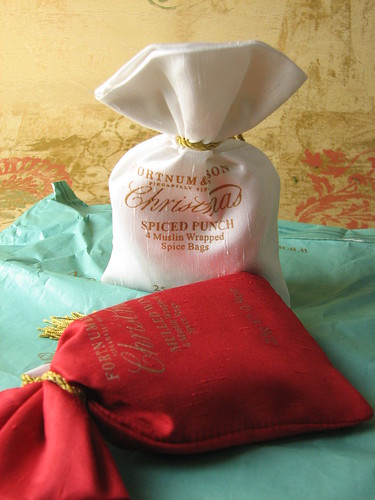
My sister gave me two gorgeous pouches of mulling spices from England. They’ve been sitting in my pantry all year waiting to be used. I thought serving mulled wine at thanksgiving would be warm and festive.

Ingredients

Red wine – 1 bottle, I used Merlot
Orange juice – 2 cups
Orange zest – 1 tbsp
Water – 1 cup
Mulling spice – 1 bundle, scroll down for recipe
Sugar – 1/2 cup

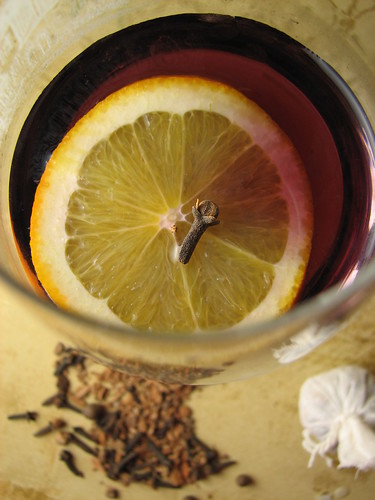
Heat a large pot on the stove. Pour in all the ingredients except the wine. Bring to a light boil. Then reduce heat and simmer 10 minutes. Pour in the wine. Heat on low for another 4 minutes. Don’t let the wine boil. Serve with some orange slices.

Make your own mulling spice

Cinnamon – 2 sticks
Cloves – 10
Nutmeg – 2 pinches
Allspice – 4 berries, optional

Slightly crush the cinnamon using a rolling pin. Mix in the other ingredients. Tie this into a bundle using muslin or cheese cloth. Alternatively, just add the spices to the wine and strain before serving. This will make enough mulling spice to use with 1 bottle of wine.

Pumpkin Pie

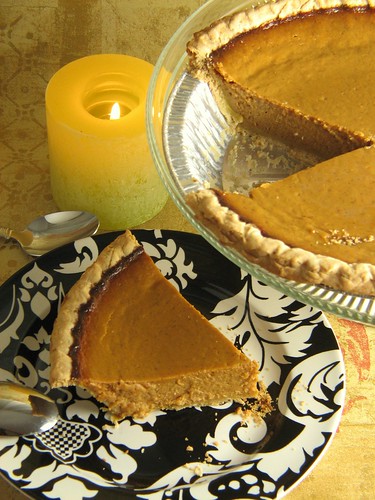
I used this recipe by Martha Stewart and the pumpkin pie turned out great. I made a few changes to Martha’s pumpkin pie recipe – I used store bought frozen pie crust instead of making my own, and I used all spice instead of ground ginger.The pie was soft, cinnamon scented, with just the right amount of sweetness.

I’m having trouble holding on to the pie till thanksgiving; my husband has already eaten a slice and is asking for more!

Sweet Sticky Rice Sushi

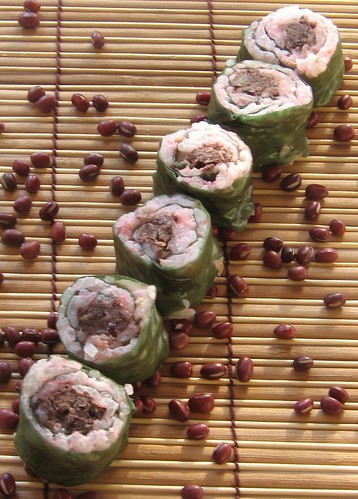
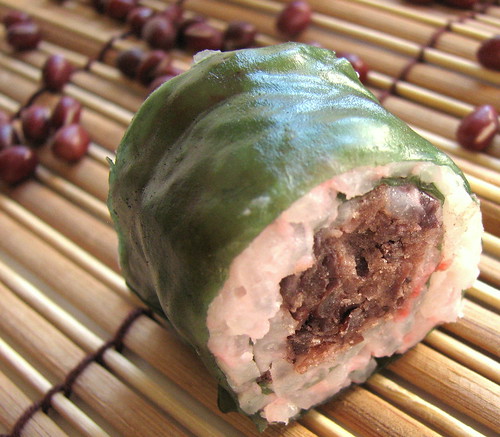
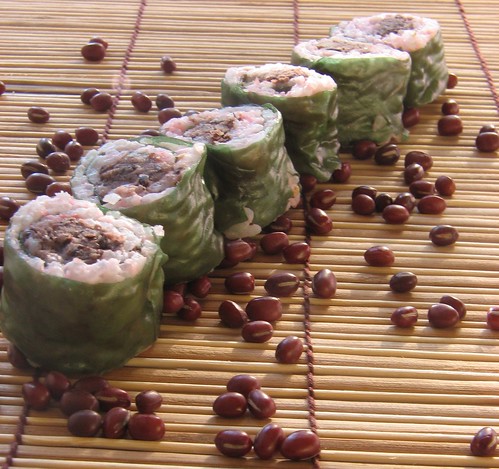
When we go out to eat sushi we always sit at the sushi bar. Mainly because S likes being perched on high bar stools. Sitting at the sushi bar gives me an advantage too. I can watch the sushi chef to make sure he washes his fishy hands before making my veggie sushi (usually oshinko). Making sushi at home however is problem free. For one, its cheaper, and I dont have to police fishy hands. No worrying about a lone fish roe clinging to my sushi roll! The best part is, I can play around and experiment with sushi ideas. Like sweet sticky rice sushi. I like rice paper wraps, I like sticky rice and I like adzuki beans. So I put them all together to make a dessert sushi. The rice paper does the job of the seaweed in a traditional sushi roll. The rice is cooked in coconut milk and rolled with a sweet adzuki bean filling. Its fun to experiment with the food coloring in this recipe. I love sakura mochi, so I tried to recreate the cherry blossom color by adding two drops of red coloring to the rice. The rice paper is colored to look like seaweed, exact food coloring proportions are below. I feel a little like Sandra Lee with all the food coloring!

Ingredients

Adzuki beans – 1/2 cup
Sugar – 7 tbsp (3+4). This will yield a mildly sweet sushi. Add more sugar if you like.
Sushi Rice – 1 1/4 cup
Coconut milk – 1 1/4 cup
Sesame seeds – 1/2 tbsp, toasted
Rice paper wraps – 6
Food coloring – red, blue, green
Salt – 1/4 tsp

To make the Adzuki beans: place the beans in a large pot with a lid. Add plenty of water and 1/4 tsp salt. Bring to a boil. Reduce to a simmer, put the lid on and let it cook. The beans should be done in about 1 1/2 hours. If you have excess water, drain it. Return the beans to the stove and let the moisture evaporate. Then add 3 tbsp sugar. Mix well and keep aside.

To make rice: While the beans are cooking, place the sushi rice, 1 cup water and 1 1/4 cup coconut milk in a pan. Bring to a boil. Then reduce heat, put a lid on and let the rice cook, about 25 minutes. The rice should have absorbed all the liquid. Turn off heat, add 4 tbsp sugar, the toasted sesame seeds, and 2-4 drops red food coloring and mix well. This will give you pink colored rice. Change up the colors as you like.

To make sushi rolls: Place a rice paper wrap on your work surface. In a small bowl, mix 2 tbsp water and 1 tsp sugar. To make a seaweed color, add food coloring to the sugar water in the following proportions: 10 drops green+4 drops blue+3 drops red. Using a basting brush, brush this colored water all over the rice paper wrap. Turn it over and brush the other side as well. In about 30 seconds the rice paper wrap will be soft and pliable. If your rice paper is still stiff, use warmer water or just use more water to brush on and let it soak another 30 seconds.

Now spread the rice evenly all over the rice paper; using your fingers is the easiest way to do it. Arrange the beans on top of the rice, but only on the end closest to you. Now, roll the rice paper away from you forming a sushi roll. Cut into pieces with a sharp knife.

Some Tasty Variations

Instead of adzuki beans, use fruits in the center of the roll. Mangoes or pineapple will work well.

To recreate fish roe, color some sesame seeds with orange food coloring and sprinkle on top of the cut sushi.

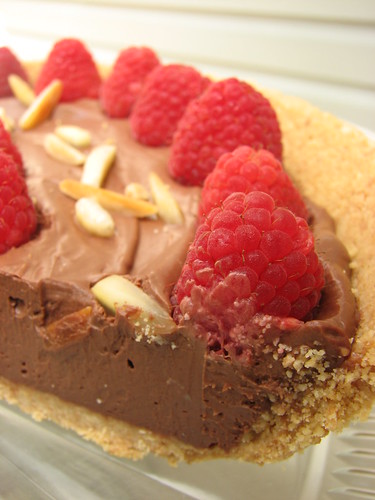
Light Chocolate Raspberry Pie. On a related note – Alton Brown, Marry Me!!

The main ingredient in this pie is tofu.
Yes, tofu.
Take a moment to be shocked.
Now read on for a luscious, easy, and decadent recipe.

I’ve seen recipes on TV where people use tofu in dessert. I saw someone make a fruit smoothie with tofu. And my reaction was “Yuck”. And I’m someone that loves tofu. If you’ve been reading my blog, you probably know that by now! But tofu in dessert?! I wouldn’t have ever ventured in that direction if I hadn’t come across Alton Brown’s Moo-Less Chocolate Pie recipe. Now, Alton Brown can make wax taste good. I trust AB. So I tried this recipe; happily combining unlikely ingredients.

The result – a luscious mousse like chocolate filling and you’ll never ever know there is tofu in there! And the best part is, once you learn the basic method (which is super easy) you can create endless different flavors and variations. The original recipe is in the link above; below is my slightly modified version.


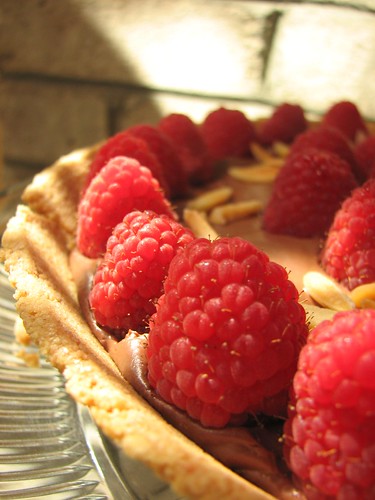
The above photo is my entry to the CLICK photo event hosted by Jugalbandi blog. This month’s theme is Crusts.

Pre-made store bought pie crust 9″- 1, I used a graham cracker crust.
Silken Tofu – 1 block
Semi Sweet Chocolate Chips – 1 cup scant, I used Ghirardelli.
Dark Chocolate Chips – 1 cup
Coffee Liquor – 1/3 cup, I used Kahlua.
Vanilla essence – 1 tsp
Honey – 1 tbsp
Raspberries – 1 cup
Almonds slivered – 1 hand full
Salt – pinch

Put both the chocolate chips in a microwave safe bowl and microwave on high for about 2 minutes or until just melted. Every 30 seconds, stir the chocolate chips. Keep an eye on the chocolate, it will burn easily. If you want to melt the chips the traditional way, melt them in a double broiler.

Put the tofu, melted chocolate, vanilla, honey, coffee liquor and salt in a blender and blend till smooth. Stir the mixture well so everything is well combined

Pour the chocolate mixture into the pie shell. Decorate the top with raspberries and almonds. Or you could chop up the berries and add them to the chocolate mixture instead.

Refrigerate atleast 2 hours before serving. If you don’t have pie crust, simply serve as a mousse.

The chocolate filling tastes its best on the 3rd day and beyond. So definitely make this atleast 2 days ahead to get the best flavor!

Alton Brown, MARRY ME!!!


Some Tasty Variations

The structure of this recipe is Tofu + Flavour + Liquor + Sweetener + Vanilla/other Extract. By changing the flavor ingredient and the liquor, you can make hundreds of different fillings. Here are some ideas to start you off.

Mint Chocolate – mint liquor, chocolate chips and vanilla
Orange Chocolate – orange zest, triple sec, chocolate chips and almond extract
Strawberry Mousse – frozen strawberries, strawberry jam, sugar syrup, vanilla
Pumpkin Mousse – can pumpkin, sugar syrup, nutmeg, clove, cinnamon, vanilla
Mango Mousse – mango pulp, sugar syrup, rum
Peanut Butter – peanut butter, chocolate chips and vanilla
Pina Colada – pineapple, coconut milk/dessicated coconut, sugar syrup and rum
Key Lime – key lime juice, sugar syrup and vanilla
Tiramisu – brewed espresso, chocolate, coffee liquor and vanilla
Irish Coffee – Irish cream, coffee, chocolate and vanilla
Banana Split – chopped bananas, sugar syrup, banana liquor and vanilla. Layer with banana filling, strawberry mousse filling and chocolate filling. Top with cherries.

If you dont want to use sugar syrup, try maple syrup, agave nectar or extra honey instead.

I haven’t tried any of the variations, so I cant give you exact measurements. If you try any of the variations, write in and let me know how it turned out!

Related Posts with Thumbnails