Sweet Potato Samosa Pops

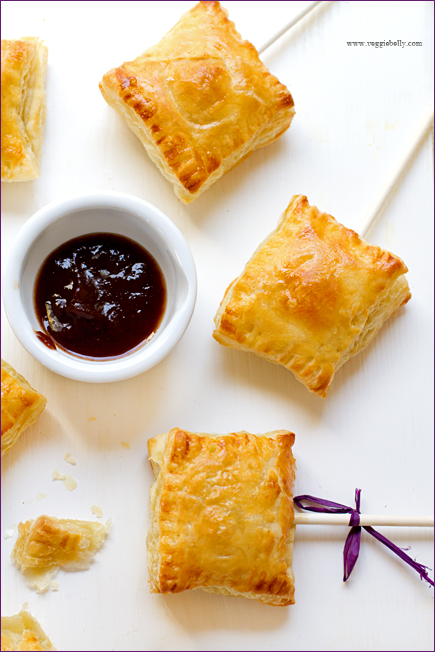
It seems like pops (food on sticks) are every where. Starbucks recently came out with cake pops. And the amazingly talented Bakerella has made cake pops into an art form . I’m jumping on the pop band wagon with this savory sweet potato samosa pops recipe! Yay! for samosa on a stick!

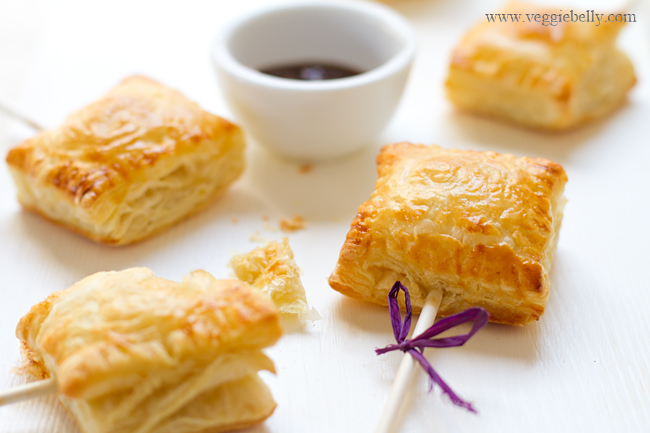
Im modernizing the Indian samosa by using sweet potato, making it mini sized, and putting on a lollipop stick.

You could also use this recipe for making regular potato samosas, green pea samosa, or pumpkin samosa. Whatever samosa filling you use, make sure you dont over stuff the puff pastry. Also make sure your lollipop sticks are oven-safe before baking! 

I use puff pastry because it’s so delicious and easy (and its vegan). You could ofcourse use your favorite samosa shell recipe if you have one.

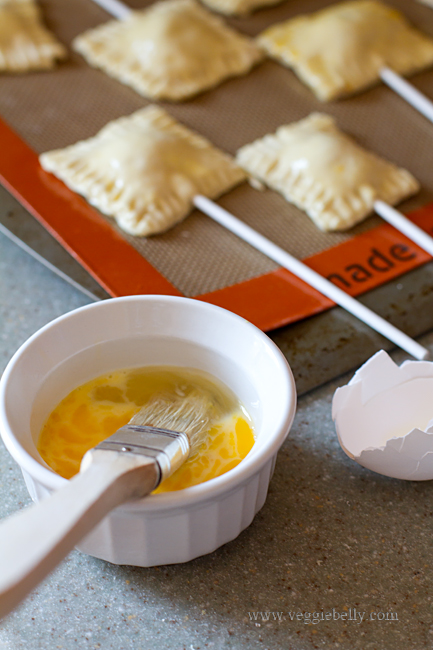
An egg wash will make the surface of the samosa pops beautifully golden. Vegans can leave out this step and still get great tasting samosas.

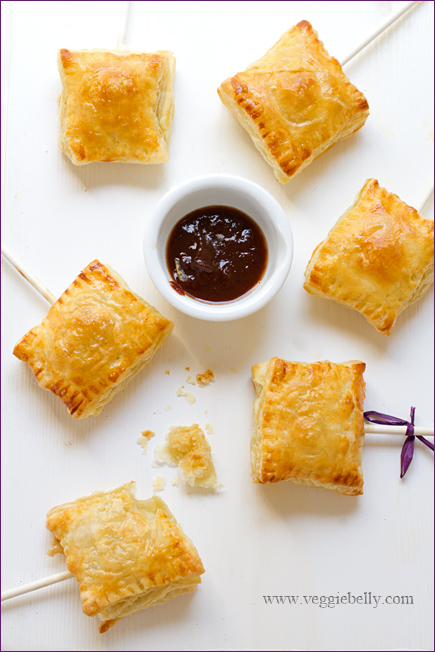
I serve samosa pops with the same sauces one would use for regular samosas – tamarind chutney and mint chutney. This recipe goes to the Chez Cayenne’s House Favorites: Vegan event.

Sweet Potato Samosa Pops Recipe

Makes 20 pops

1 large Sweet potato (substitute with regular potato or ¾ cup peeled, cooked butternut squash or pumpkin)
1 tablespoon vegetable oil
¼ teaspoon cumin seeds
1 small onion, finely chopped
1/2 tablespoon minced garlic
½ tablespoon minced ginger
¼ teaspoon turmeric powder
¼ teaspoon, or to taste red chile powder
¼ teaspoon coriander powder
¼ teaspoon garam masala
1/8 teaspoon aam choor or mango powder (substitute with 1/2 teaspoon lime juice)
1 tablespoon chopped cilantro
Salt
2 sheets of puff pastry, thawed for about 30 minutes.
1 egg (vegans leave this out)
1 tablespoon milk (vegans leave this out)

20 six inch lollipop sticks (I used ‘Candymaker’ brand; it is oven-safe)

Pre heat oven to 400f

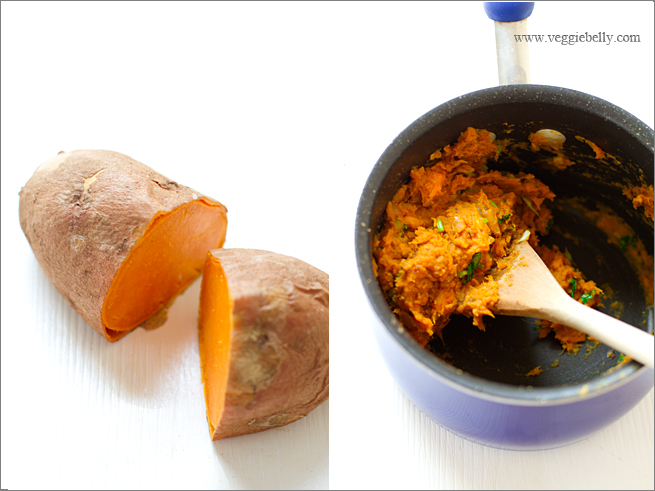
Wrap the sweet potato in a paper towel and microwave on high for about 4 minutes or till the sweet potato is cooked through. When it is cool enough to handle, peel the skin and lightly mash.This is the easiest way to cook and prepare a sweet potato for this recipe. Alternatively, you could peel, cube, and boil the sweet potato in water till tender. You need about 3/4th cup of cooked and peeled sweet potato.

While the sweet potato is cooking, heat the oil in a medium sauce pan. Add cumin seeds. When they start to sizzle, add the chooped onion and cook on medium heat till onions are lightly browned. Then add the ginger and garlic and cook for about a minute. Add turmeric, chilli, coriander powders, garam masala, and aam choor. Stir for about 30 seconds, taking care not to burn the spice powders. Turn off heat. Add the mashed sweet potato, cilantro and salt. Mix well. Taste and adjust salt and seasonings.

Lay out the thawed puff pastry on a clean work top. Measure out 2 inch squares. Using a sharp knife, cut the puff pastry sheets into 2 inch squares. You should have about 40 squares.

(If you have any odd sized bits of puff pastry left over after cutting, simply bake the scraps without filling, along with the rest of the samosas. You can snack on these!)

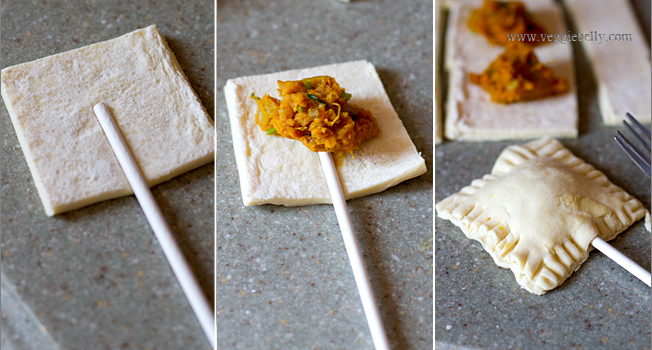
Press a lollipop stick onto the center of 20 of the squares. Mound 1 teaspoon of the sweet potato filling on top of the squares with the lollipop sticks. Don’t over fill.

Cover these with the other 20 squares of puff pastry. Gently stretch them a little so they fit over the filling mound. Using the tines of a small fork, press down and seal all the edges. Make sure they are sealed well. (Look at photos above).

(If you wish to freeze the samosa pops, you can do so at this point. Lay out the samosa pops on a single layer and place in the freezer. Once they are frozen hard, remove the samosa pops and put them in a zip lock bag, and return to the freezer for future use.)

Lay the samosa pops on a baking sheet lined with parchment paper or a silicone baking mat. Whisk together the egg and milk in a small bowl. Brush this egg wash over the samosas.

Bake in a 400f oven, for 15 minutes or till puff pastry is golden.

Serve with store bought tamarind chutney.

The Perfect Dosa Recipe (Rice and Lentil Crepes)


Perfecting my dosa recipe and method hasn’t been easy. It took a lot of experimentation, but finally I have the best dosa batter recipe and method for you. Read on to learn hot to make the perfect dosa-idli batter recipe, a dosa grinder giveaway, and your questions about dosa and idli batter answered by the experts!
Dosa, Idli Dos and Don’ts

Do use a hot griddle for dosas
Do use your hands to mix the ground batter
Do use whole urad dal (urad gota)
Do use a wet grinder or other similar heavy duty grinder/blender for the batter
Do place the batter in 80-90 degrees F for fermentation
Do experiment with various types of rice and urad dal to find what suits you best
Don’t pour dosas using cold batter
Don’t make dosas on an unseasoned pan (see recipe below for the onion trick)
Don’t use poor quality rice and dal
Don’t use an air tight lid when batter is fermenting
 

Your Dosa and Idli Batter Questions Answered by the Experts

Ive talked to several people about the art and science that is dosa-idli making.  For this post, we have two of the most knowledgeable people on this topic to answer your idli, dosa questions.

Chef KN Vinod, is an award winning restaurateur who runs three of Washington DC’s favorite Indian restaurants Indique, Indique Heights and Bombay Bistro. At his restaurants, Chef Vinod regularly hosts celebrities and politicians including (KR Narayan and Hillary Clinton!). Chef Vinod blogs at http://chefvinod.typepad.com/. You can also find him on twitter and facebook. For today’s Q&A, Chef Vinod has elicited the help of his friend, and food scientist Dr. Danny Chawan.

Ms. Andal Balu is the owner of Atlanta based Inno Concepts, a company which sells kitchen appliance for Indian cooking.  Mrs Balu is a successful business woman, gourmand, and America’s expert on dosa/idli making. Inno Concepts is the generous sponsor of today’s grinder giveaway.

My idli and dosa batter doesn’t fermentation properly. I let the batter sit in the oven with the light on overnight and it is completely unchanged even 10 hours later. Ive tried everything. Help!

 Andal Balu: Use the soaking water to grind the rice and dal for proper fermentation. You have to mix the batter with your hand. If you mix it with ladle, it may not ferment right (body heat from your hands helps kickstart fermentation). Also cover the batter with a lid that fits loosely - do not use an airtight lid.

 Chef Vinod: Fermentation is always a problem in colder places. Our modern living with air filters etc. also inhibits the capture of wild yeast from the air. Sometimes indoor air, particularly in winter with all the doors and windows shut will be low in air borne yeast cells. When all else fails, I would recommend using some yeast. Use half teaspoon in half cup water and a teaspoon of sugar to kick start yeast growth. Add to a gallon of batter.

 Sala’s note: If you’ve tried everything, you might want to change your brand of rice and dal and see if that does the trick. Poor quality ingredients = poor quality fermentation.
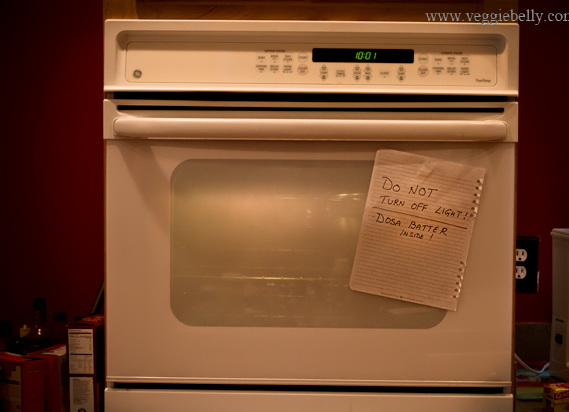
In cold climates, place batter in an oven with the light on for warmth. Leave a note so no one turns off the oven!

What proportion of rice and ural dal do you personally use?

Andal Balu: I use the same proportion for idlis and dosas. 5 cups parboiled (idli) rice, and 1 cup whole urad dal (gotta). I make idlis with this batter the first day, dosa on the second, and uthappams on the third day.  

Chef Vinod: At the restaurant we use 4 cups long grain rice, 1 cup parboiled (idli) rice, 1 cup urad dal, and a little methi seeds

Sala’s note: Everyones recipe will be different because quality of rice and dal used, quantity of batter made, and temperature all affect the ratio. Use these proportions as a guideline and then experiment.

Should I grind the rice and dal separately or together?

Andal Balu: Separately. Grinding dal separately will make it fluffy, resulting in excellent fermentation. It will also volumize the batter when fermenting which is important for fluffy, soft idlis.

What consistency and texture should my ground dosa and idli batter be?

Andal Balu: Grind dal till it is very soft and foamy. Also grind the rice till smooth. Add enough water to the batter so that it is thick, but when you scoop it in your hands, the batter falls through your fingers. This is what I do for both idli and dosa.
Does is matter if I use tap water or filter water for soaking and grinding? 

Chef Vinod: If your tap water is highly chlorinated, it could inhibit fermentation. In this case, use filtered water.

Why do we use fenugreek or methi seeds in dosa-idli batter making?

Chef Vinod: Methi seeds contain compounds high in beta-glucans.  They help hold carbon dioxide, which makes idlis fluffy and soft. Methi seeds also give viscosity to the batter.

If I rinse the dal, will it take away the necessary properties to ferment?  

Chef Vinod: Washing is done to remove any dust, and impurities from the dal and rice. Althought some old time cooks soak the dal and rice without rinsing and wash just before grinding.

How much salt should I add to my dosa and idli batter?

Andal Balu: About 1/2 teaspoon for one cup of dry ingredients (rice + dal) plus more according to taste. Adding enough salt is important for proper fermentation.

How can I get good textured idlis at high altitude? What are the adjustments for altitude?

Andal Balu: The rice needs to be ground finer so it can cook faster at higher altitudes. If the rice is coarse, it will take longer to cook and will feel gritty in the mouth. Make sure a warm temperature is maintained when batter is fermenting.

Chef Vinod: I turned to Dr. Chawan for this. He says changing the proportion of dal and rice for higher altitudes isnt necessary. Fermentation is done by yeast, and yeast grows in high altitudes as well, and produces carbon dioxide which is the key component of making fluffy, soft idlis. Pay attention to the fermentation temperature; make sure your batter is in a warm place. A little glucose or corn syrup will also make your batter rise better.

My dosas always turn out dry and brittle, what am I doing wrong?

Andal Balu: Check the consistency of the batter – is it too thick? Check the temperature of the batter – make sure it is at room temperature, and not straight out of the fridge. Make sure that the pan is hot enough when you pour the batter. Check it by splashing couple of droplets of water on the pan and it should sizzle.

Chef Vinod: Two scientific reasons. 1. Not enough dal in your batter. Protein in dal is responsible for the softness. Try increasing your dal proportion. 2. Amylopectin in rice. According to Dr. Chawan, there are two kinds of starches present in rice and grains – Amylopectin and Amylose. If the rice is low in Amylopectin and high in Amylose it can cause the dosa to be dry and brittle. Sala’s note: Try experimenting with different brands of rice.

Ok, but there is no way I can determine the chemical composition of a bag of rice at the store. Is there a quick fix for dry and brittle dosas?

Chef Vinod:  As a quick fix, if you have some tapioca flour handy, Dr. Chawan recommends trying to incorporate some into the batter as it is very high in Amylopectin. I have not personally  tried it.
My idlis are pale yellow. How do I get white idlis?

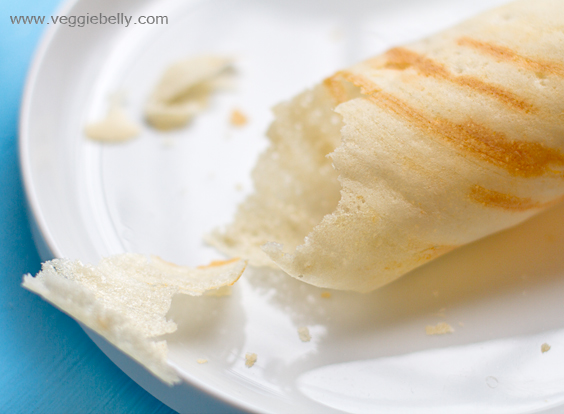
Andal Balu: If the ground batter does not ferment properly, the idlis will be yellowish (see the question and answer on fermentation). Also make sure the consistency of the batter is right – once the urad and rice batters are mixed, take the batter in your hand, it must fall freely back into the vessel.

Chef Vinod: If your batch of urad dal has been contaminated with immature urad beans or partially germinated beans, this will produce some enzymes which will cause idlis to become yellowish or pinkish. Sala’s note: Try a different brand of dal.

I would love some tips on how to make paper thin, crispy dosas

Andal Balu: Grind the rice fine. Don’t use extremely thick batter. Use an iron skillet for best results. Bring refigerated batter to room temperature before making dosas. You can take it out of the fridge ahead of time. Or you can heat some water in the microwave and add to the thick batter to make it thin and to bring it to the room temperature. Between dosas, grease the tawa or skillet lightly with oil and then pour the batter. Add extra oil after the batter is poured on the skillet.

Sala’s note: I add chana dal (soak 3 tablespoons of channa dal with every cup of urad) for super crispy, golden, restaurant style dosas.

How do you get the nice golden color you seen in restaurant dosas?

Chef Vinod: Add a little besan (gram flour) in very less quantities that you cannot make out that besan has been added. OR, add a little sooji (cream of wheat) to make the dosa really golden and crisp. This again is done in very less quantities that you cannot make out.

Andal Balu: You will get nice golden brown dosas if you bring the batter to room temperature. If you use the cold batter, the dosas will stay white.

Sala’s note: I add channa dal (soak 3 tablespoon for every cup of urad dal) for golden colored dosas.
Why are my idlis hard and rubbery? How do I make soft and fluffy idlis?

Andal Balu: Keep four thing in mind for soft, fluffy idlis.
1. proper fermentation (see earlier questions)
2.proper rice:dal proportion
3.don’t overcook idlis, this will make them hard. Steam idlis for about 12 minutes if using a conventional idli steamer, and 15 minutes for an electric one.
4.never pressure cook idlis

What is the proper way to eat a dosa, what are the accompaniments, what do you dip it with? Is there a dosa etiquette?

Andal Balu: There is no dosa etiquette. Enjoy it however you want. Side dishes recommended – idli chilly powder, coconut chutney, tomato chutney, coriander or cilantro chutney, yogurt, Chinese garlic pickle, potato masala, sambar…possibilities are endless! 

Chef Vinod: Dosa is made and served differently from region to region in India – so I would  not  say that a particular way is right or wrong. Most places in south India serve dosas with sambar and coconut chutney.

Sala’s note: Serve yourself a dosa on your plate. Pour sambar into cups, if they are available. Serve chutney, dosa or idli podi (also called gun powder) and potato masala on the plate. Tear off a piece of dosa and dip it into any combination of the sambar, chutney, podi and or potato. Lick your fingers, and enjoy :)


The Perfect Dosa Recipe

Serves about 8

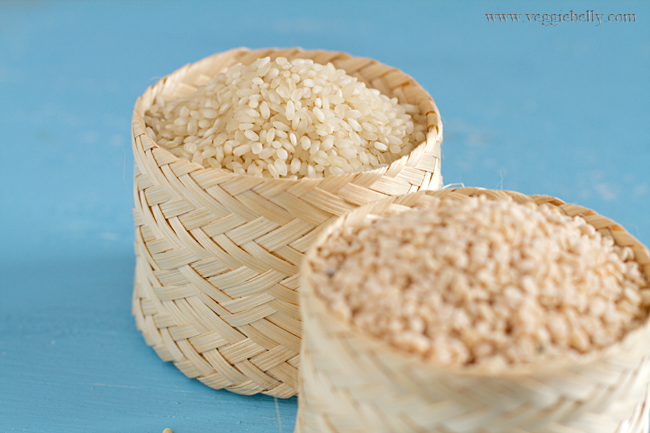
1 cup sona masuri rice (or similar medium grained rice)
1 cup idli rice (parboiled rice)
½ cup whole urad dal (skinned black gram)
½ teaspoon methi seeds (fenugreek seeds)
Salt 1 teaspoon

Special equipemt: a wet grinder. This is a heavy duty grinder that is perfect for dosa and idli batter. You could use a blender instead, but the results wont be the same.

Place the rice in a large bowl. Place the dal and fenugreek seeds in another large bowl. Wash the rice with room temperature water. Drain out the water, and fill the bowl with more water, so that the water is about 2 inches above the rice.

Do the same with the dal and fenugreek – wash, rinse, and fill with water. Let rice and dal soak for about 6 hours.

The dal should now be swollen, and the rice will be easy to break with your fingers.

Pour about 2 tablespoons of the dal soaking liquid into a wet grinder. Turn the grinder on. Then, using your hands, scoop the soaked dal, allowing excess water to drain back into the bowl. Add dal to the grinder, hand fulls at a time. Grind till the dal is fluffy and silky smooth – about 15 minutes (grinding time will vary depending on the grinder and quantity of dal). You should have fluffy clouds of ground dal – think liquid marshmallows.

Sprinkle a little soaking water into the grinder as and when needed, to move the batter along. Turn off grinder, and scoop the ground dal using your hands and put it into a large (4 quart) bowl.

Now grind the rice (no need to wash the grinder). Add 1 cup of the rice soaking liquid into the grinder and turn it on. Add the rice to the grinder. The rice should be ground to a smooth, but ever so slightly gritty batter – about 20 minutes (will vary depending on the grinder and rice). Sprinkle water in the grinder as and when needed.

Using your hands, scoop the rice batter into the bowl with the dal. Add salt, and stir gently using your hands. You should now have approximately 2 quarts of batter.

Cover the bowl loosely, either with a large tea towel, or a lid. The lid should not be air tight.

If you live in a warm climate leave the batter over night in a warm place (about 8 hours) to ferment. Ideal dosa idli batter fermentation temperature is around 90f or 32c.

If you live in a cold climate, turn on the pilot light of your oven. (do not turn on your oven!). Place the batter bowl on the lowest rack, farthest away from the light. The light will give the batter enough warmth to ferment. Leave the bowl in the oven for about 10 hours for dosa batter to ferment. Sometimes, the batter may take up to 18 hours to ferment in colder climates.

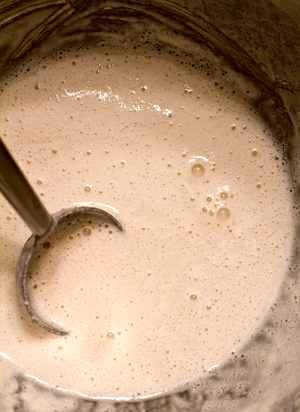
The fermented batter should be frothy, and almost doubled in volume. For this recipe, you should land up with at least 3 quarts of fermented batter.

If the fermented batter is too thick, add a little water. For dosas, the batter must be of pouring consistency, but not runny.

Heat a 9 inch nonstick skillet on high heat. Sprinkle a few drops of water on the skillet. The water should sizzle and evaporate away on the count of 4. This means the pan is hot enough to make dosas.
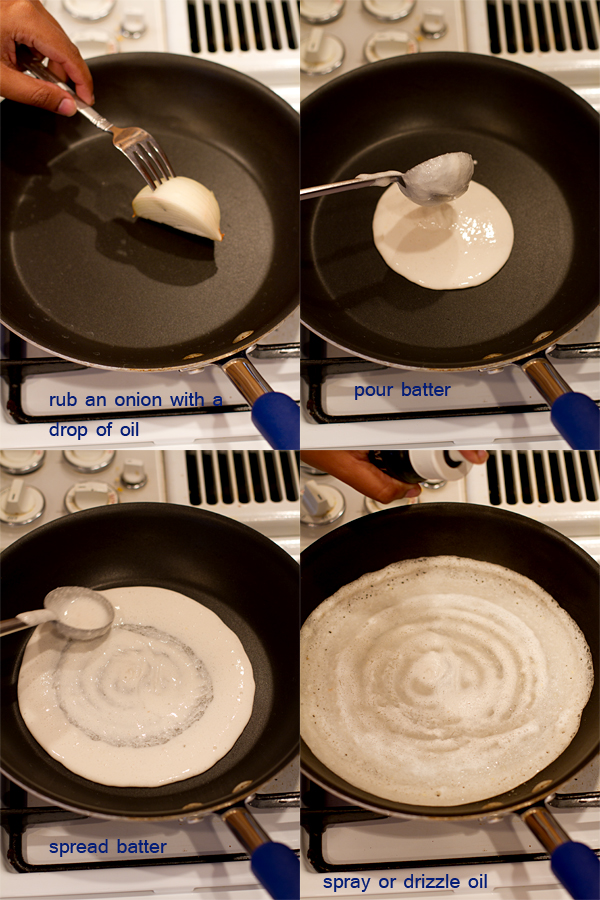
Cut a small wedge from an onion. Stick a fork into the onion (See photos above). Add a drop of vegetable oil to the hot pan, and spread the oil around, using the onion. (Just a drop of oil will do for a non-stick pan.)

Now pour a ladle (1/4 cup) of batter onto the hot pan. Using very little pressure, swirl the ladle in concentric circles, to spread out the batter (see photos).

When the batter is fully spread, spray or drizzle a few drops of vegetable oil all over the dosa.

Cook on medium-high heat till the bottom side of the dosa becomes lightly brown.

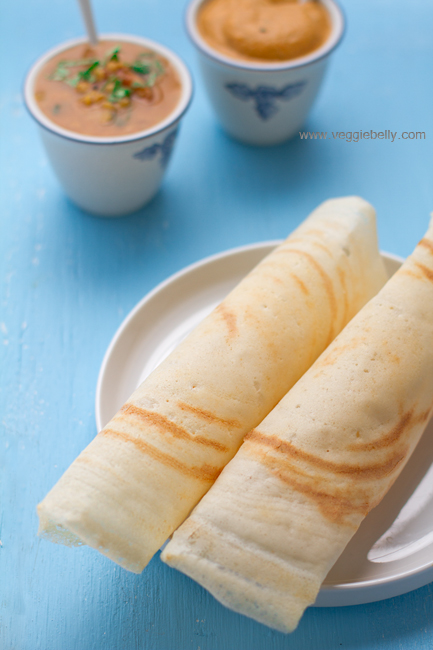
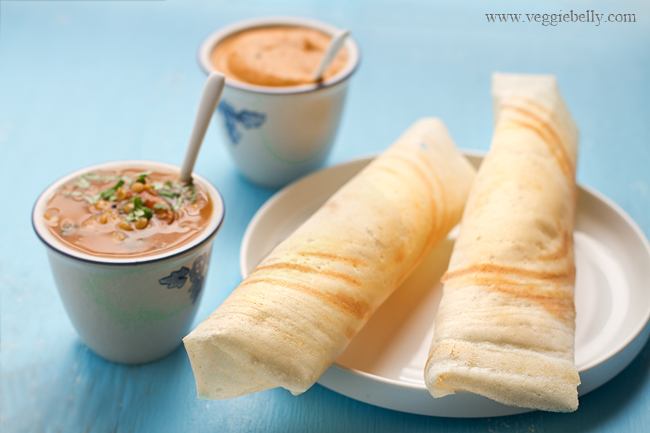
At this point, you can fold the dosa over in half, or roll it into rolls like ive done, and serve. (For extra crispy dosas, flip the dosa over, and lightly brown the other side).

Taste your first dosa, and adjust salt in the batter if needed.

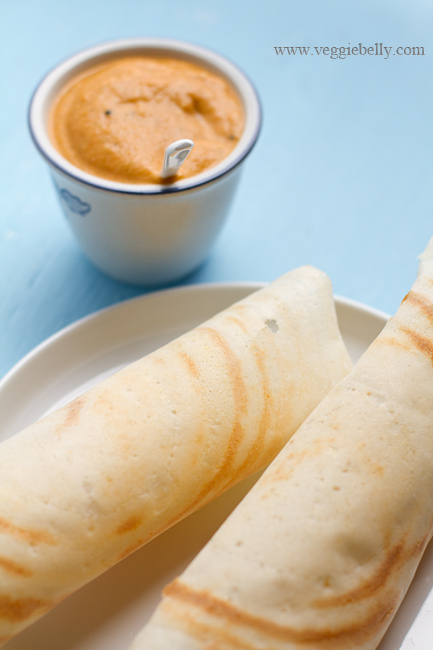
Serve with sambar and tomato chutney.

———————————————————————————————————————–

This giveaway had ended. We have a winner!

Please contact me to claim your prize! veggiebelly@gmail.com


Win an Ultra Pride Plus Wet Grinder!

1.25l capacity
Voltage 110V AC 60Hz
Sleek design, easy to clean
Kneader attatchment for dough
Perfect for grinding dosa, idli, vada batters
More features here

Ive had mine for 6 years and love it :)

** When you entered the giveaway if you checked the ‘send me a coupon’ option, iNNo Concepts Inc will send you a coupon for $10 off Ultra Pride Plus grinder plus a free gift worth $20 or $20 off all other larger sized Ultra grinders plus a free gift worth $20. You can use this coupon between April 9th and April 15th. US & Canada shipping only. No cash redemption.

Indian Spiced Potato Chip Sticks. Baked, not Fried!

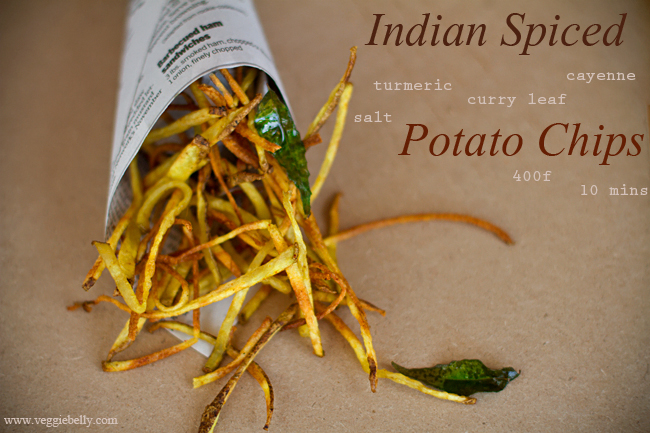
I love how simple this oven/microwave baked potato chips recipe is. All you do is cut a russet potato into think sticks, toss it in oil, salt, cayenne or chilli powder, and turmeric. Add a fer curry leaves for aroma. Bake or microwave. Yes, I said microwave! So much easier and healthier than deep fried potato chips!

You could spice up the potato chip sticks in many ways; I love the turmeric, chilli powder or cayenne powder, curry leaf combination. The curry leaves get crispy and so fragrant
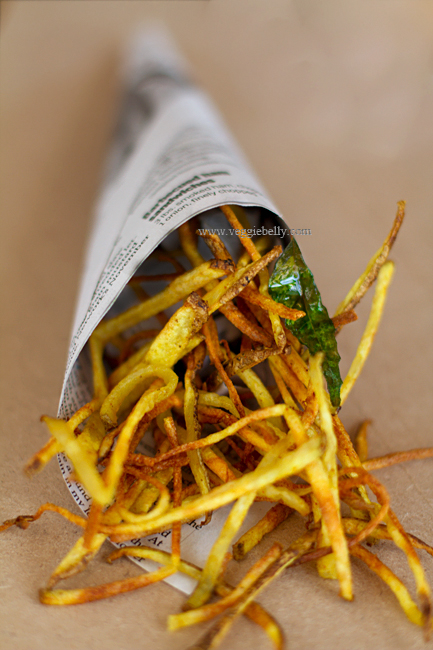
Serve Indian spiced potato chips as a side or a snack, in a newspaper cone. They go well with my brown rice and black bean  burgers.

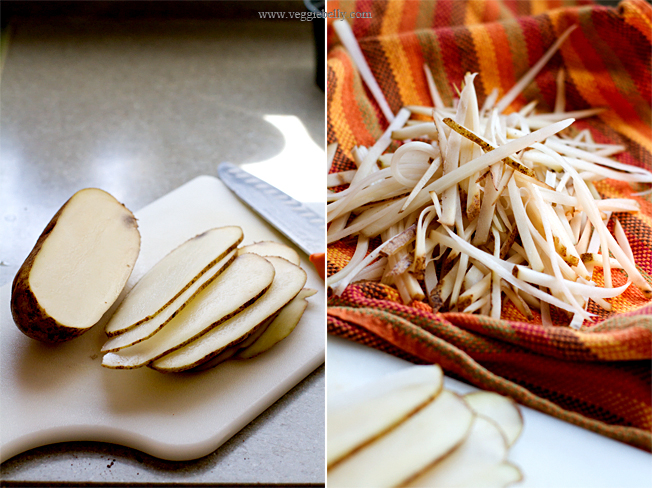
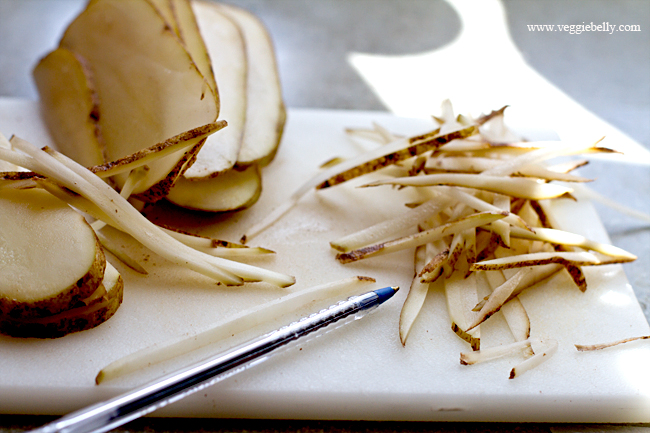
Cut the potato sticks really thin, this way they bake very quickly in the oven. Use either a mandoline or a large sharp chef’s knife to cut the potatoes into 1/8th inch slices. Stack up the slices and cut them into thin sticks. The sticks should be thinner than a pen or french fry.
More oven baked or microwaved potato chip recipes
Martha Stewart’s baked potato chips recipe
Oven fried potato chips recipe  on Simply Recipes
Spicy baked potato chips recipe on Chow vegan
5-spice potato chips recipe on the Hungry Mouse
Uncle Bill’s microwave potato chip recipe  on Food.com
Microwave potato chips recipe  on Eating well
Homemade microwave potato chips recipe  on Sweet Savory Life

Indian Spiced Baked Potato Chip Sticks Recipe

serves about 2

1 large russet potato (about 10 oz)
1 tablespoon vegetable oil or ghee
¼ teaspoon ground turmeric
¼ teaspoon or to taste chili powder pr cayenne powder
10 curry leaves
1/2 teaspoon salt

Wash and dry the potato. Peel the potato if you like. I leave the skin on because I like the texture of potato skin in my chips.

Slice the potato into 1/8th inch thick slices lengthwise using a mandoline or a large, sharp knife. Stack up the slices, and cut them lengthwise to form thin sticks, about 1/4th the thickness of a French fry.

Place the potato sticks on a kitchen towel, and gently pat dry.

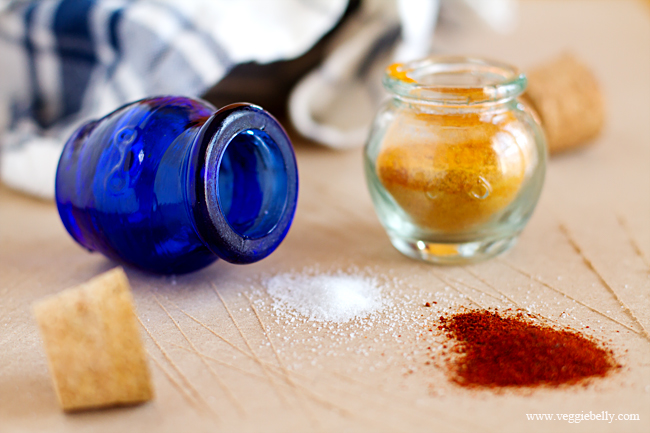
In a bowl, whisk together the ghee or melted butter or oil, turmeric, chili powder, curry leaves and salt. Add the potato sticks to the bowl and toss well. Now follow one of the below methods.

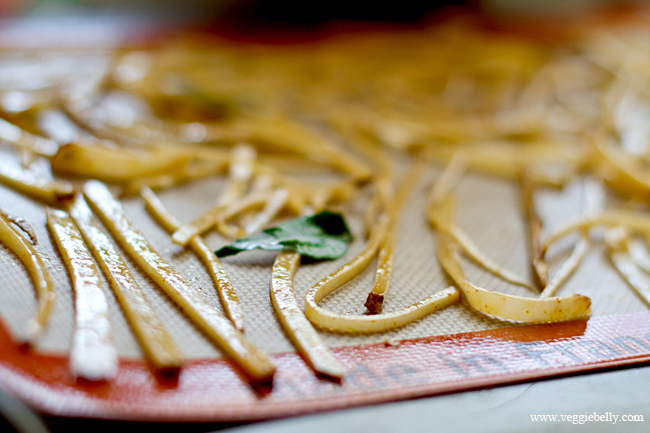
Oven method – pre-heat oven to 400f. Place the seasoned potato sticks on a non-stick baking sheet or a regular baking sheet lined with parchment paper or silicone non-stick mat. Spread the potato sticks so that they are in a single layer and don’t overlap. You may need to do this in batches. Make sure they are in a single layer, this is what makes them crisp! Bake for 10 minutes or till the chips are golden and crisp. Halfway through baking, check on the chips, and remove any pieces that are already crispy and golden. Rotate the baking sheet and continue baking.

Microwave method – take a microwaveable plate and coat with a few drops of oil. Place the potato chips that have been coated in the turmeric chili ghee/oil. Spead them out into a single layer. You may need to do this in batches. Microwave on high for 2-4 minutes or until the chips are golden and crisp. Cooking time will vary depending on the microwave, so check on the chips periodically.

******************

Are you a fan of Chef Sanjeev Kapoor?

Join me at his book signing event in Washington DC!

Tickets and details are here – http://sanjeevkapoor-indiqueheights.eventbrite.com/

*******************

Afghan Sweet and Savory Pumpkin or Butternut Squash (Borani Kadoo) & A Giveaway!

This giveaway is closed. Random.org  has picked a random winner!

Winner is comment #98 Shriya!

Please email me your mailing address! veggiebelly@gmail.com

*****************


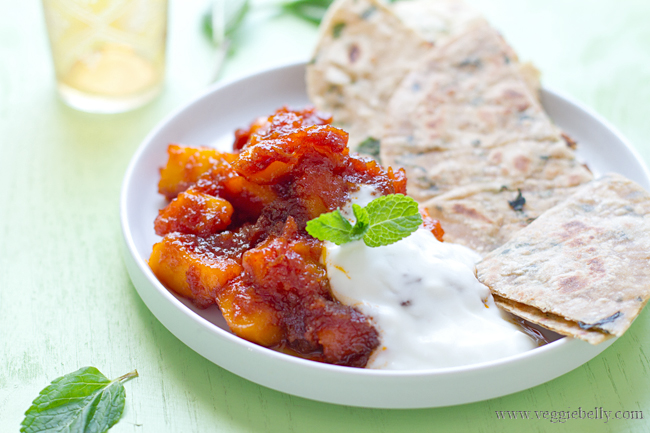
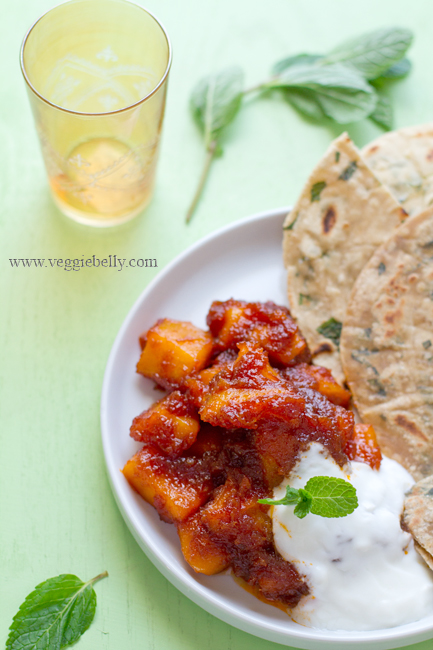
The wonderful ladies behind the amazing Afghan food blog, www.afghancooking.net, say this dish is “America’s favorite Afghan dish”. And Mousa Amiri of Bamiyan Restaurant says this is “one of the most requested” dishes at his restaurant. I can see why. This sweet and spicy pumpkin or butternut squash dish is simple to make, and the flavors are incredible.

This wonderful sweet and savory braised pumpkin or butternut squash recipe is spelled many ways – borani kadoo, borani kadu, brony kadoo, brony kadu, bouranee kadu, bouranee kado, or halwaiy kadu. Whatever you call it, this vegan, vegetarian recipe served with naan makes a great fall or winter time main dish.

Kadu or Kadoo means pumpkin. But because pumpkin is so seasonal, you can use butternut squash instead, which is what I did today.

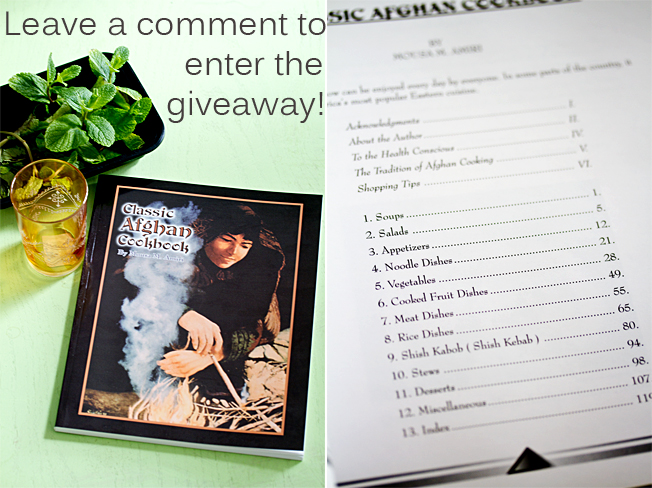
And now for a giveaway I know you are going to love. You can win Mousa Amiri’s Classic Afghan Cookbook! See details below..

Win a Copy of Mousa Amiri’s Classic Afghan Cookbook!

Mousa Amiri of Bamiyan Afghan restaurant is giving away a copy of  his book  ’Classic Afghan Cookbook’ to one lucky Veggie Belly reader! The recipes in this book are easy, simple, and just yummy!

- To enter the giveaway, just leave a comment below (make sure you enter your email address so I can contact you if you win)

- Last day to enter is March 1st 2011

- A random winner will be picked and announced on March 2nd 2011

- The book will ship to anywhere in the world. Thankyou, Mousa!

*********

Afghan Sweet and Savory Braised Pumpkin (Bouranee Kadu or Borani Kadoo) Recipe

adapted from Katie Sullivan Morford’s Borani Kadoo recipe in the San Francisco Chronicle
serves 2-3
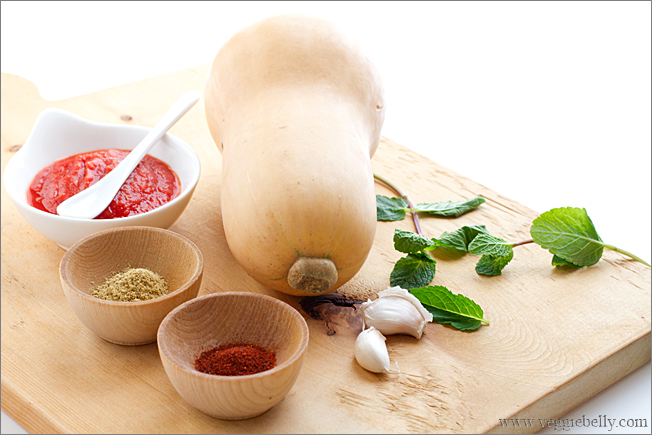
One 1 pound butternut squash or pie pumpkin
1 medium yellow onion
4 tablespoons vegetable oil
1/2 tablespoon minced garlic
1/2 tablespoon minced ginger
1/2 teaspoon turmeric powder
1 teaspoon coriander powder
1/2 teaspoon chili powder or according to taste
1/2 tablespoon tomato paste or 1/2 cup tomato puree
1 cup water
3 tablespoons sugar
salt
Dried or fresh mint for garnish
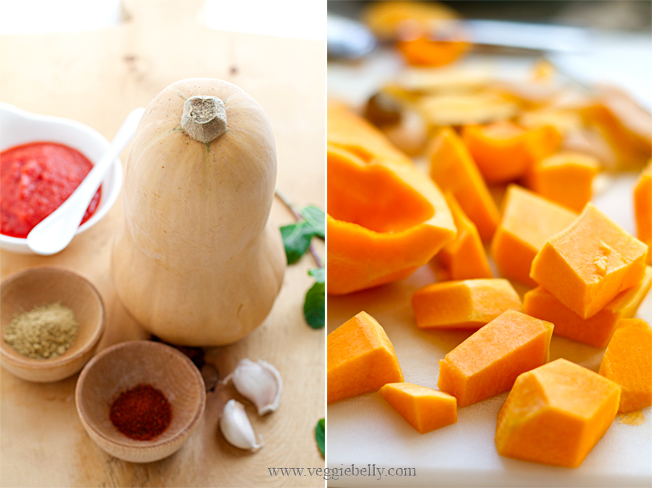
Peel the squash or pumpkin. Using a spoon, scoop out the inner membrane and seeds. Cut into 1 inch cubes and set aside.

Peel and place the onion in a food processor and puree.

Heat oil in a medium heavy bottom pan or wok. Carefully add the onion puree and cook on medium-low heat untill it is golden, about 10 minutes. Then add ginger, garlic, turmeric, coriander powder, and chili powder and stir for 1 minute or untill fragrant.

Now add tomato paste or puree, water, sugar and salt, bring to a boil, while stirring.

Add the chopped butternut squash or pumpkin pieces. Reduce heat and simmer uncovered till the squash is cooked, but still holding its shape, about 20 minutes. Add more water while cooking, if needed.

Garnish with mint and serve with garlic yogurt (vegans can use cashew cream instead) and naan.

Garlic Yogurt

1/2 cup plain yogurt
1 clove galic minced
Salt

Whisk everything together.

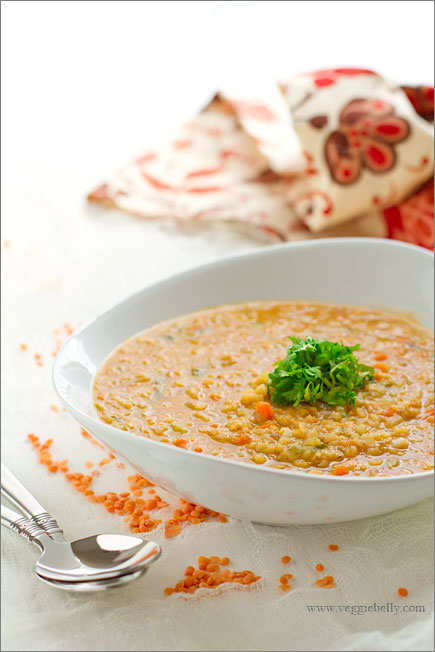
Easy Cream of Red Lentil Soup

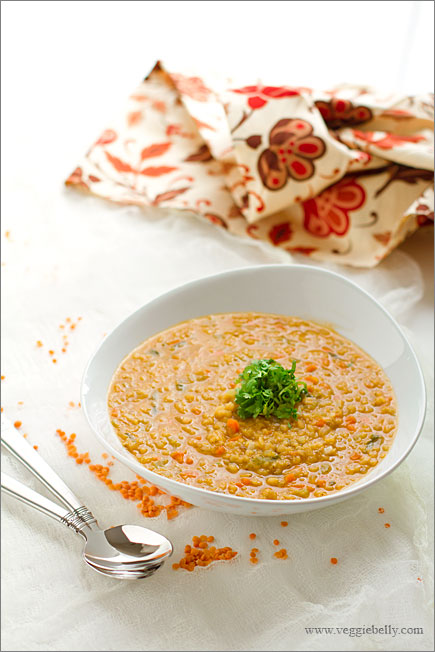
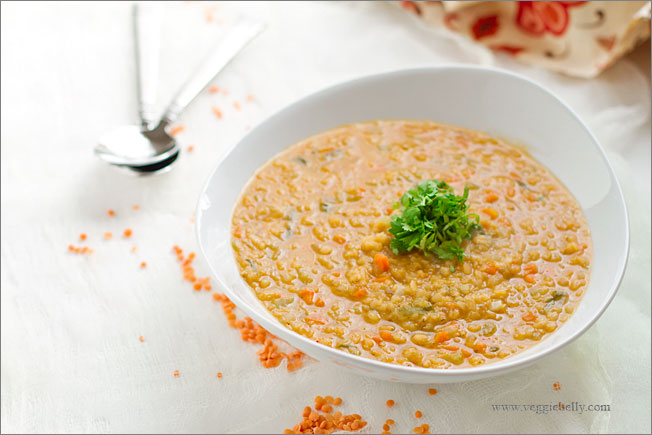
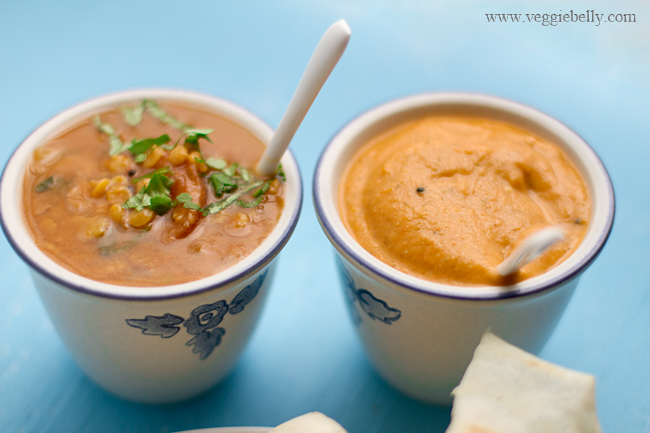
This easy red lentil soup recipe comes together in 15 minutes. Add a touch of cream, greek yogurt or coconut milk (for vegan red lentil soup) and you have a satisfying, easy soup in no time. Serve with crusty bread or over brown rice.

We’ve all had gloopy lentil soup before and hate it! So make sure you dont over cook the lentils. They should be cooked through, but still holding their shape. Their texture and taste is so much better when you dont over cook lentils and make them mushy.

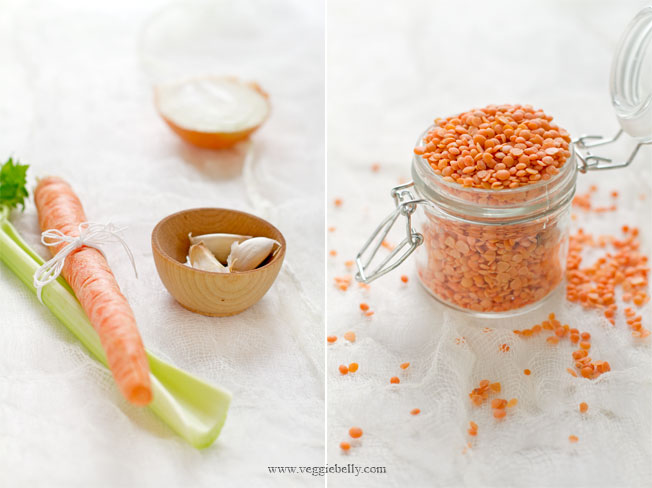
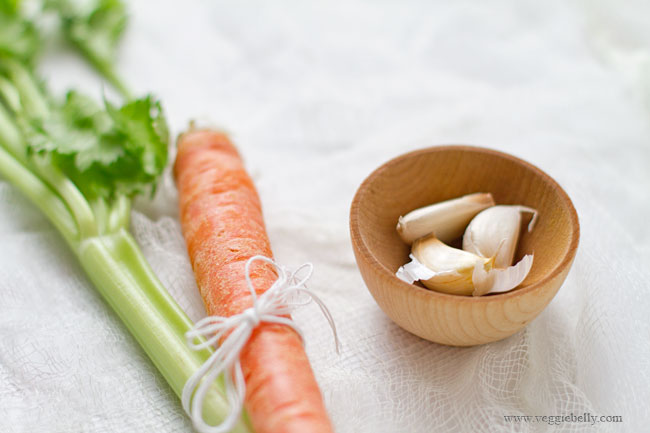
The ingredients are simple for this fuss free soup – carrot, celery, garlic, onion, and red lentils. Then you add a pinch of paprika for heat, if you like, and a little drizzle of cream, greek yogurt or coconutmilk for creaminess. Thats it!

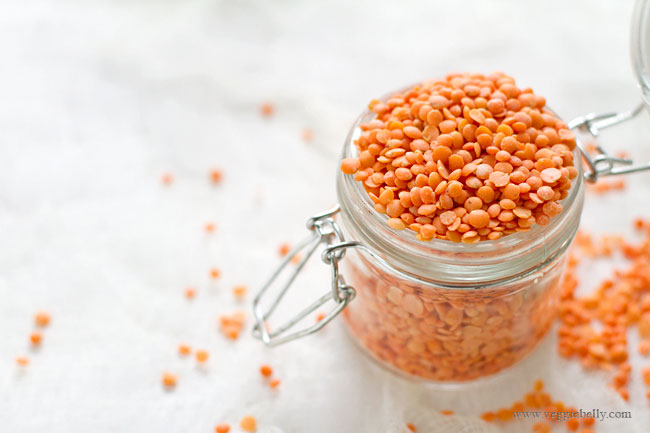
I used masoor dal from the Indian store, which is usually cheaper than other local brands of split red lentils. If you dont have an Indian store near you, Bob’s Red Mill brand red lentils are great.

More lentil soup recipes

Alton Brown’s Lentil Soup recipe with cumin

Giada De Laurentiis Lentil Soup recipe with pasta

Lentil soup recipe from 101 cook books using beluga lentils

Lentil soup recipe  with Cajun flavors on Food Mayhem

Red lentil soup recipe with curry on New York Times

Red lentil soup recipe by Aarti Sequeira

Red lentil soup recipe with sumac on eCurry

Cream of red lentil soup Recipe

serves 2 as a main dish

1 tablespoon olive oil
1 carrot, peeled and chopped finely (about 1/2 cup)
1 celery rib, chopped finely (about 1/2 cup)
1 small onion, chopped finely (about 1/2 cup)
2 cloves garlic, peeled and minced
1 cup dry split red lentils (either Bob’s red mill red lentils or masoor dal from Indian store)
1/2 teaspoon paprika or to taste, optional
salt
2 tablespoons heavy cream or greek yogurt or coconut milk for vegans
For garnish – chopped cilantro or parsley or dill

Heat olive oil in a pan. Add the carrot, celery, onion and garlic. Stir on low heat for about 3 minutes, or till the vegetables are soft. Dont let them brown.

Add the red lentils to the vegetables, and stir for about 1 minutes. Add paprika, salt and 3 cups water. Bring to a boil. Then reduce heat to low, place a lid on the pan, and simmer for 10 minutes or till the lentils are cooked but still holding their shape. Dont let the lentils get mushy. Add more water during cooking, if needed.

When the soup is done, stir in your choice of heavy cream or greek yogurt or coconut milk and turn off heat.

Serve hot, garnished with chopped cilantro, or parsley or dill. Drizzle more cream or yogurt or coconut milk – whichever you are using - over the soup if desired.

Gado Gado – Indonesian Vegetable Salad with Peanut Sauce


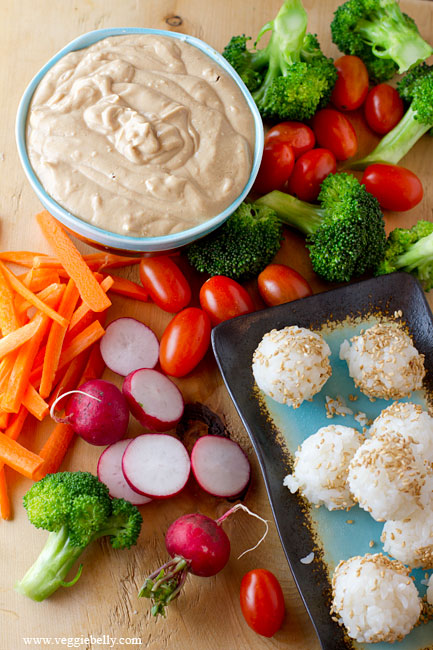
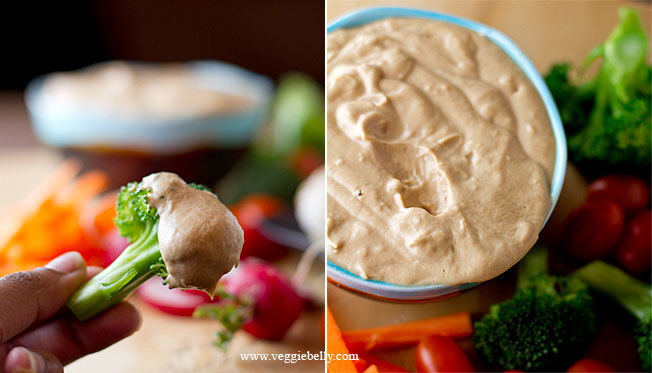
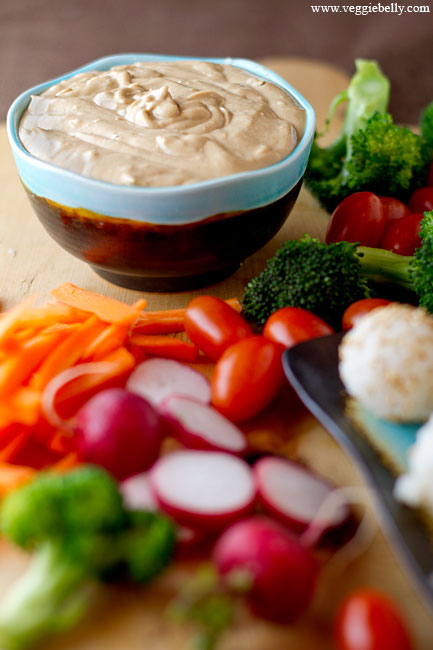
I fell in love with the flavors of gado gado when I first tasted it in Indonesia. It is a quick, easy, healthy salad that you can serve as an appetizer, as a salad course, or pack for office lunch. Typically, the vegetables and peanut dressing are tossed together, or the peanut sauce is poured over the vegetables. Here, I serve it deconstructed on a platter, with the peanut sauce or sambal kacang on the side for dipping.

In Indonesia, the peanut dipping sauce is prepared by pounding together roasted peanuts, garlic, palm sugar, chillies, and shrimp paste. I left out the shrimp paste to make the gado gado vegan. I used peanut butter instead of roasted peanuts – a great shortcut!

The gado gado I had in Indonesia was served with tomato wedges, beansprouts, tofu and boiled eggs. You can use absolutely any vegetable you like. For this recipe, I served the gado gado peanut sauce with steamed broccoli, cherry tomatoes, carrot sticks, baby radish and rice balls.

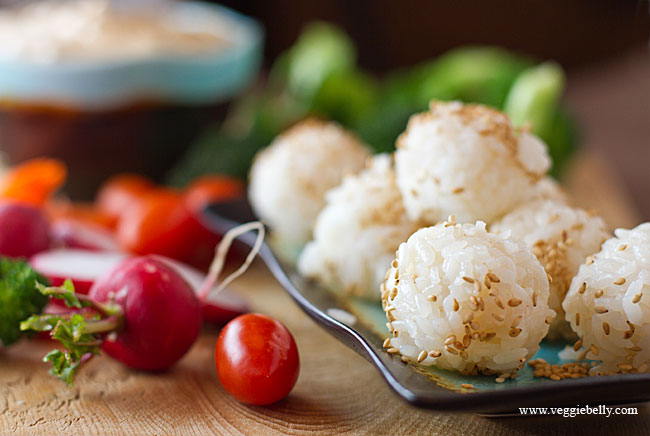
Lontong inspired rice balls

These rice balls are inspired by Indonesian lontong (or Ketupatin some parts of Asia). Lontong is cubes of compressed, cooked rice, that is sometimes served with gado gado. Traditional lontong is made by half cooking rice, packing it into a banana leaf lined mould, steaming the rice in the mould, and then cutting it into cubes or discs.

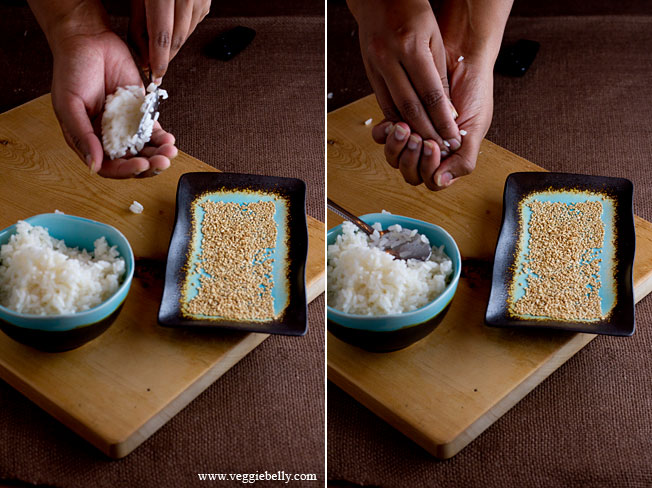
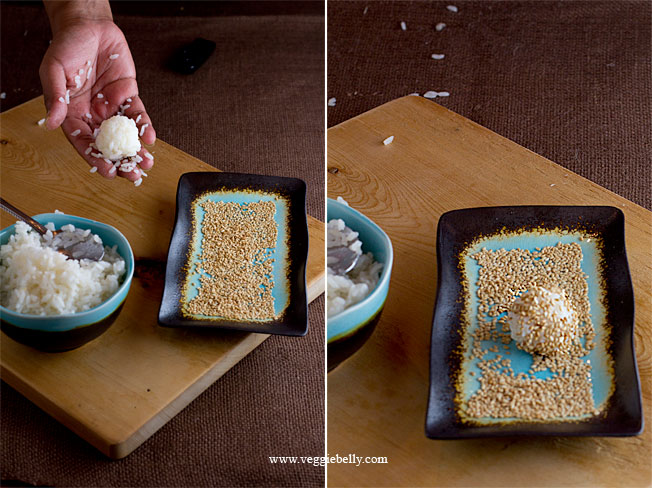
I love the taste of lontong, but wanted to make something quicker but similar for the gado gado. So I simple rolled cooked sushi rice into balls, and coated the rice balls in sesame seeds. Simple, and delicious!

Oil your hands, and scoop a tablespoon of cooked sushi or sticky rice. Using your palm and fingers, gently squeeze the rice into a ball.

Roll the rice ball into a nice round shape. Roll ther ice ball in toasted sesame seeds.

More Gado Gado recipes

Indonesian Sambal Kacang recipe (peanut sauce for gado gado) from the book Indonesian regional cooking

Agado gado recipe from Rasa Malaysia

Gado gado surabaya style on Indonesia eats

Street sidegado gado making in central Java, Indonesia

Gado Gado with Peanut Sauce Recipe

serves about 6

for Peanut Dipping Sauce (Sambal Kacang)
3-4 cloves garlic, peeled
1 fresh green chili chopped, (use 1/2 for milder sauce, or leave it out)
Salt
1 cup peanut butter
1 teaspoon jaggery or palm sugar or regular white sugar
2 tablespoon lime juice
2 cups hot water

Place the garlic cloves, green chili and salt in a mortar and pestle and pound into a paste.

In a small bowl, add the garlic paste, peanut butter, sugar and lime juice. Pour in hot water a little at a time, while whisking the peanut butter. Stop pouring the hot water when the peanut butter forms a smooth, dippable sauce. You may not need to use all of the hot water.

Taste the peanut sauce and adjust salt, sugar and lime juice if needed. Serve with vegetable crudites.

for Rice Balls with Sesame Seeds

makes about 6 balls

1/2 cup sushi rice (or other similar glutinous, sticky rice)
1 cup water
salt
1/2 cup toasted sesame seeds
1 teaspoon sesame oil

Place rice, water and salt in a pan. Bring to a boil. Then reduce heat to simmer, place a lid on the pan, and cook till rice is done, about 15 minutes. Let the rice cool a little.

Spread sesame seeds on a plate.

Rub a little sesame oil on your hands (so rice doesnt stick). Scoop about 1 tablespoon of cooked rice, and using your palms, form the rice into tight balls. Roll the rice balls in sesame seeds. Rub your palms with more sesame oil if needed. Repeat till you use up all the rice.

Serve rice balls with peanut dipping sauce.

the vegetables
Choose 5 items from this list, and serve about 1 cup each on a platter, along with peanut dipping sauce (recipe above)

Cubed, fried tofu
Pan fried Tempeh pieces
Tomato wedges or cherry tomatoes
Cucumber slices
Green and red pepper strips
Bean sprouts
Baby radish
Carrot sticks
Celery sticks
Boiled potato
Blanched green beans
Lightly steamed broccoli
Rice balls (recipe above)
Boiled egg
Tortilla chips
Pretzel sticks

Chocolate Beet Cake – a Ross Burden Recipe

This is the ONLY chocolate cake I ever make. After the first time I made this cake, I threw out every other chocolate cake recipe I had. This easy, moist beet and chocolate cake recipe comes from Chef Ross Burden.

The cooked beets (beetroot) in this recipe keep the cake incredibly moist. And if you didnt tell your guests there are beets in this cake, they will never guess! My favorite trick is to serve this cake, and after everyone has eaten it, ask “guess whats in it”?!

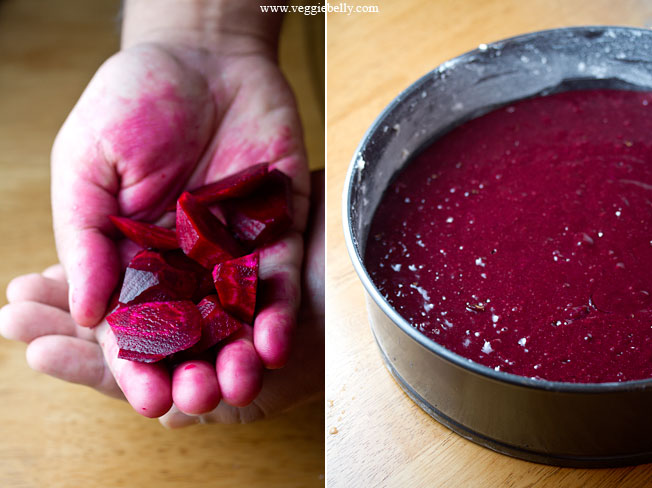
To cook the beets, peel about 3-4 large beets. Chop them into chunks. Place in a pan with just enough water to cover them. Put a lid on the pan, and simmer till the beets are fork tender. Add more water while cooking if needed. But make sure you cook away all the water, you dont want the cooked beets to be watery. Then place the cooked beetroot in a blender and puree. Weigh the amount of beets needed, and proceed with the recipe below.

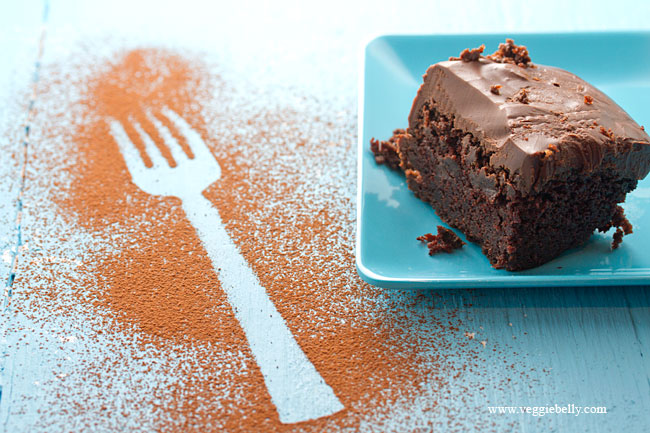
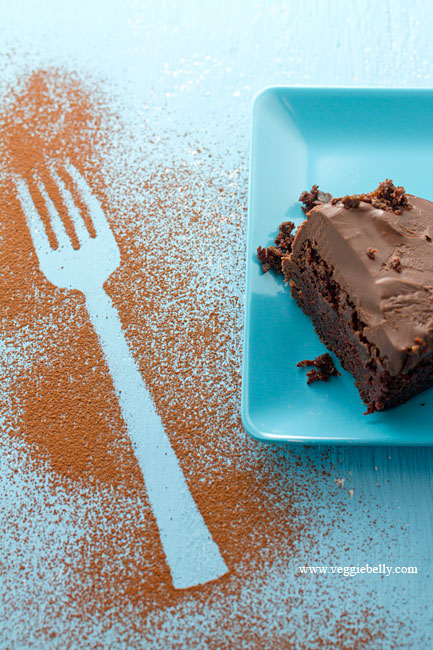
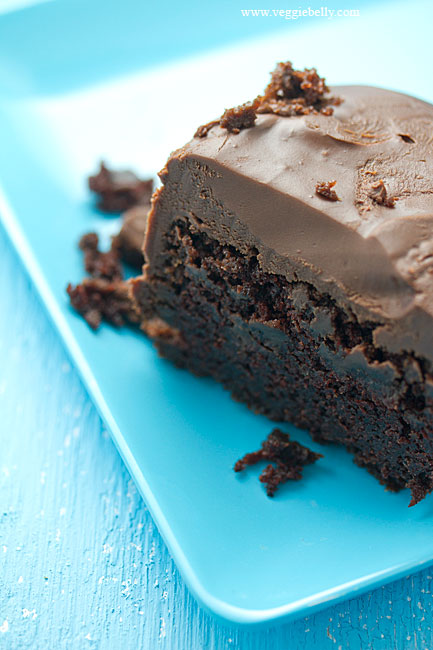
You wont find a picture of the whole chocolate beet cake here because it was all eaten up, and I struggled to even save this one piece so I could photograph it!

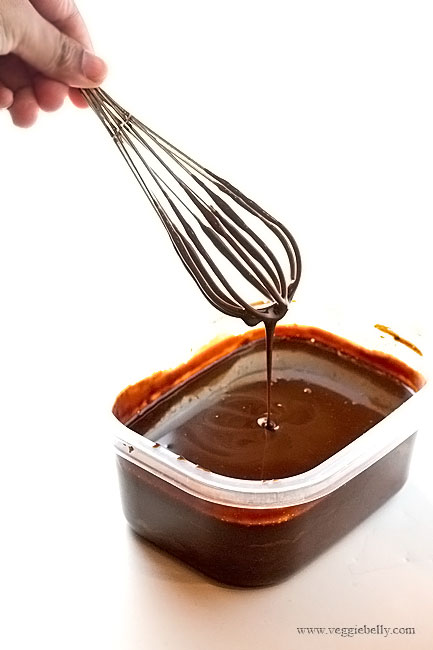
Ross Burden’s Chocolate frosting recipe is so easy and decadent. Make sure to use the best quality chocolate you can afford!

The only change I made to Ross’ original recipe is to add a little vanilla extract and a pinch of salt. If you wish, you could also add a couple of tablespoons of brewed espresso to the batter, for depth.

Make sure you use a kitchen weighing scale and measure the ingredients in the recipe by weight.

Ross Burden’s Beet (Beetroot) Chocolate Cake Recipe

original recipe is here

serves about 8

for the cake
85 grams dark chocolate
3 medium eggs
300 grams sugar
240 ml sunflower or vegetable oil
300 grams cooked beets (see post above for how to cook the beets)
1 teaspoon vanilla extract
30 grams cocoa powder
200 grams flour
1 1/2 teaspoon baking soda
1/4 teaspoon salt

for the chocolate ganache
250 grams dark chocolate, broken into pieces
250 ml heavy cream

Pre heat oven to 350 f.

Melt the chocolate (for the cake) over a double boiler. In a separate bowl, whisk together the eggs, sugar and oil. Slowly add the cooked beet puree , the melted chocolate and vanilla into the egg mixture. Beat just untill combined.

Sift the cocoa, flour, baking soda and salt. Add this to the beet batter. Fold just untill everything is combined. Dont over work or over mix the batter.

Spread a teaspoon of butter or oil over the surface of a 10 inch cake pan. Sprinkle some flour all over, and tap out the excess. Pour the cake batter into the prepared cake tin. Bake for about 30 minutes, or till a tooth pick or skewer inserted in the middle of the cake comes out clean. Baking time may vary depending on the pan and oven you are using.

While the cake is baking, work on the ganache frosting. Place the chocolate in a bowl. Heat the cream in a sauce pan, just till it starts to barely boil. Pour the hot cream over the chocolate and whisk till it forms a smooth sauce.

When the cake is done, cool it on a wire rack. Then pour the chocolate ganache over while the ganache is still warm. Let the ganache topping cool and set a little before serving.

Serve with Ross Burden’s burnt caramel icecream. Yum!

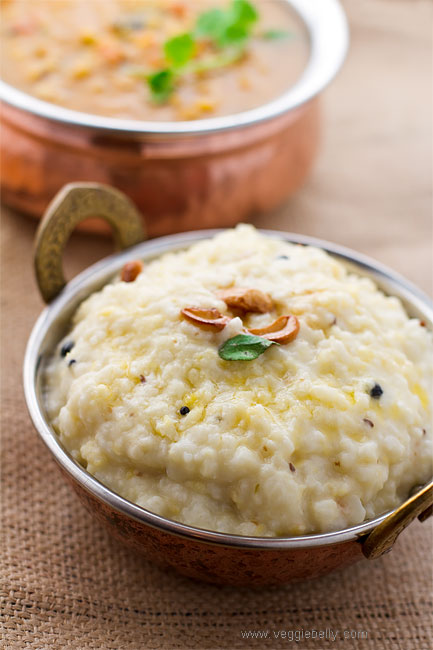
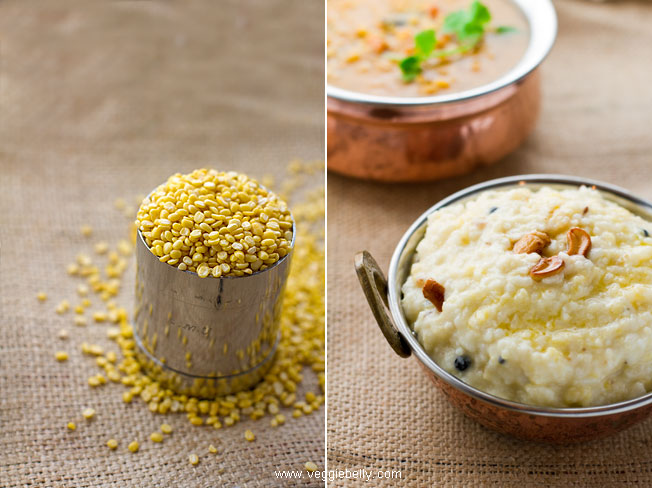
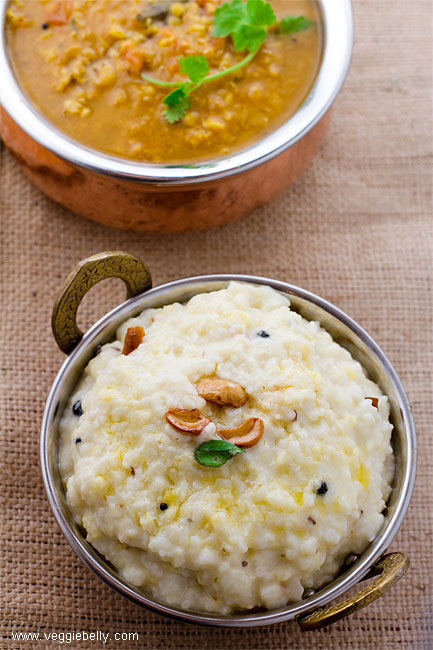
Creamy Ven Pongal (Rice and Lentil ‘Risotto’)

Tamil people of South India celebrate Pongal in January. During this harvest festival we combine two of south India’s staples, rice and lentils, into a luscious, comforting and creamy risotto like dish. The day of Pongal is one of worship and thanksgiving  where we make offerings to the Sun god and thank him for the year’s harvest. The day after pongal is maattu pongal, literally ‘cow pongal’, honoring cows and other working animals.

A Pongal Tradition

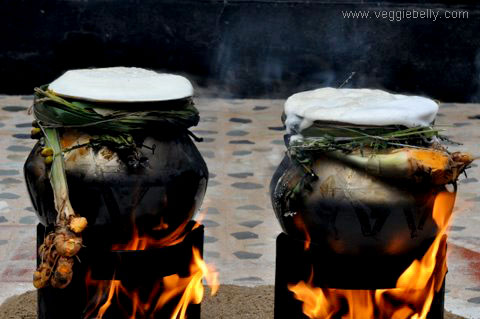
When I was a child, pongal was always a much anticipated festival day. We woke early, dressed up and headed downstairs to a smokey open wood fire. Two decorated brass pots of pongal would already be bubbling away – one sweet (with coconut, cardamom and jaggery), and one savory (recipe below).  My grandmother the matriarch, was in charge of making the pongal. My father would always scold her for using too much ghee in pongal, and the second he turned away, shed add another dollop!

Pongal in India – sweet and savory pongals in brass pots on an open fire in my grandmother’s house

The trick to a creamy pongal is to cook it in whole milk, rather than water. If you’d rather keep the dish light, substitute the milk with water. Remember that the amount of water you’ll need in this recipe will vary depending on the rice you are using.


More pongal recipes..

Chef in you’s pressure cooker pongal recipe

Ven pongal recipe by Archanas kitchen

Another ven pongal recipe on a life time of cooking blog

Kara pongal or khara pongal recipe using chillies and coconut on Aayi’s recipes

Creamy Ven Pongal Recipe

serves about 4

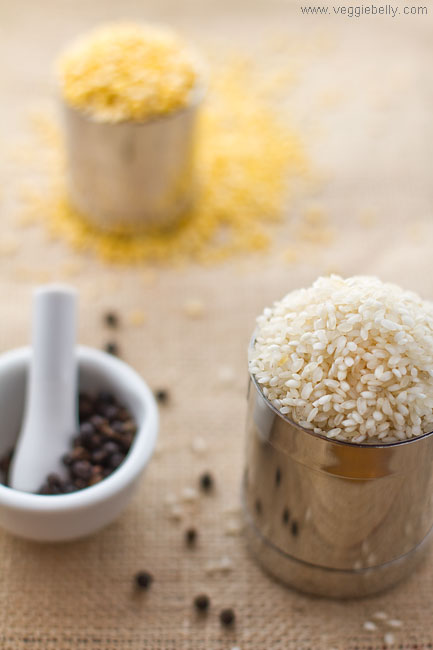
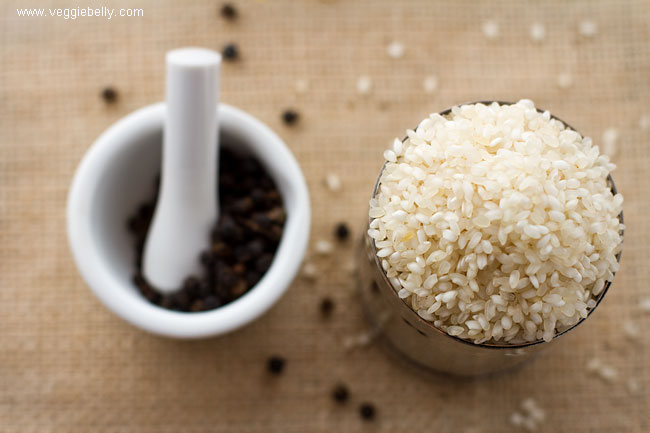
1 cup short grain rice (substitute with basmati)
½ cup split moong dal (mung beans)
½ teaspoon oil
4 tablespoons ghee (clarified butter) or butter
½ teaspoon black mustard seeds
½ teaspoon cumin seeds
1 teaspoon peppercorns
6oz fresh ginger, peeled
1/8 teaspoon asafoetida
4 curry leaves
3 cups whole milk
2 cups water
Salt
2 tablespoons cashewnuts, lightly roasted in a few drops of oil or ghee

Rinse and drain the rice and dal and set aside.

You will need to use a large, deep pot or saucepan for this recipe. If you use a small pot, the milk will boil over and make a mess.

Heat oil and ghee in the pot . Add mustard seeds to oil & ghee. When they splutter, add cumin and peppercorns, and stir 30 seconds. Cut the peeled ginger into 2 or 3 chunks. Add ginger chunks, asafetida, and curry leaves to the oil and stir about 30 seconds or till the ginger and curry leaves are fragrant.

Add the rinsed rice and dal, and stir well. Pour in the milk, water and salt and bring to a boil. If the milk begins to froth and boil over, stir it till it settles down.

Once the milk boils, reduce heat to low, cover the pot with a lid and simmer for about 30 minutes. Stir occasionally so that the milk doesn’t boil over and make a mess.

Pongal is done when the rice is very soft and creamy. Depending on the rice you are using, cooking times may vary. You may also need to use more water, depending the rice you are using.

If most the liquid gets absorbed, but the rice still isn’t cooked, just add more water and continue cooking till rice is soft.

Serve hot, topped with roasted cashews and sambar on the side.

Happy Pongal!

Related Posts with Thumbnails